The office was the last remaining room without a floor. The room had been locked up and forgotten about for nearly a year. Now that we have stairs, it made sense to finish the floor up there.
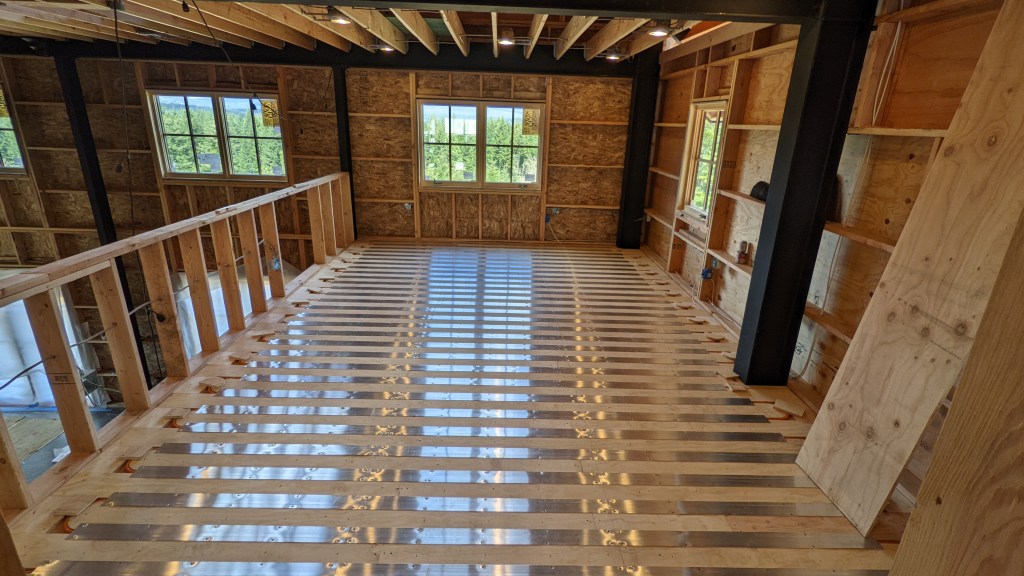
We had completed the plywood subfloor back when we framed the whole building (which was in January 2022 according to this photo).
Shortly after that, Terry installed the radiant heat tubes. He laid strips of plywood over the subfloor for the tubes to nest in.
Aluminum plates were installed over the tubing to distribute the heat evenly and to protect the tubes from stray nails.

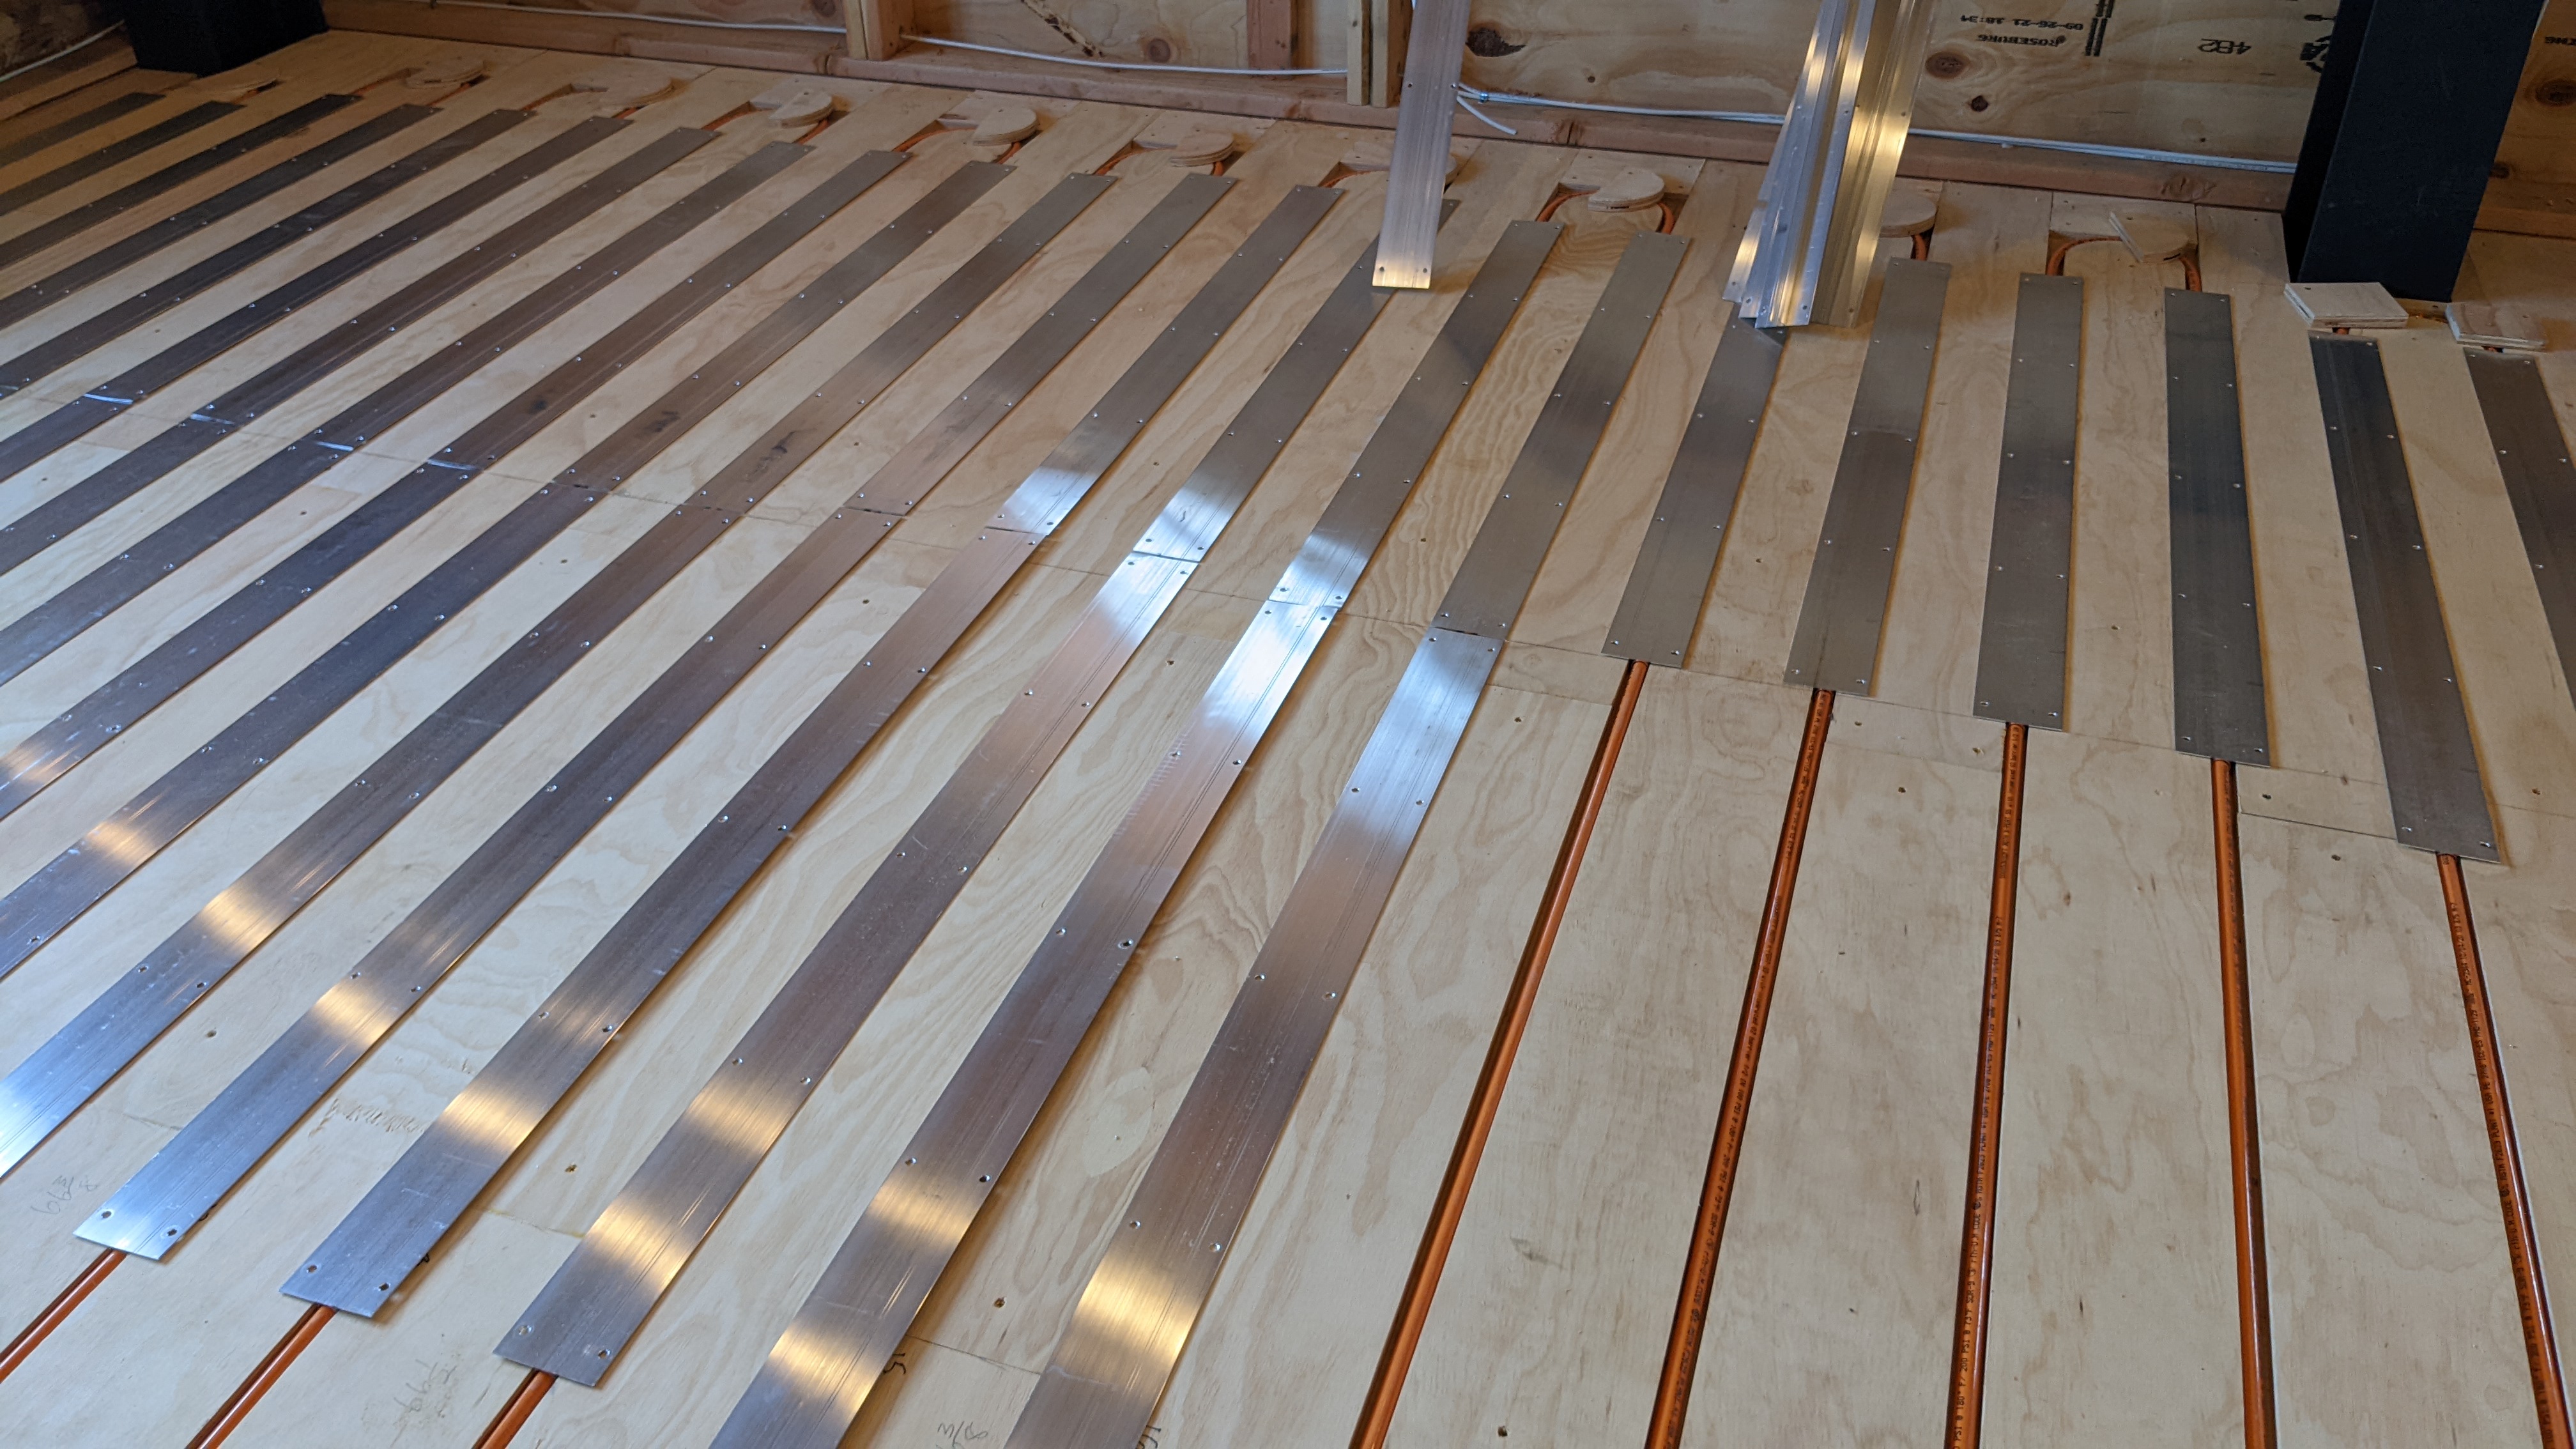
The plates look cool, but they created a bumpy surface which was less than ideal for installing wood flooring on top of.
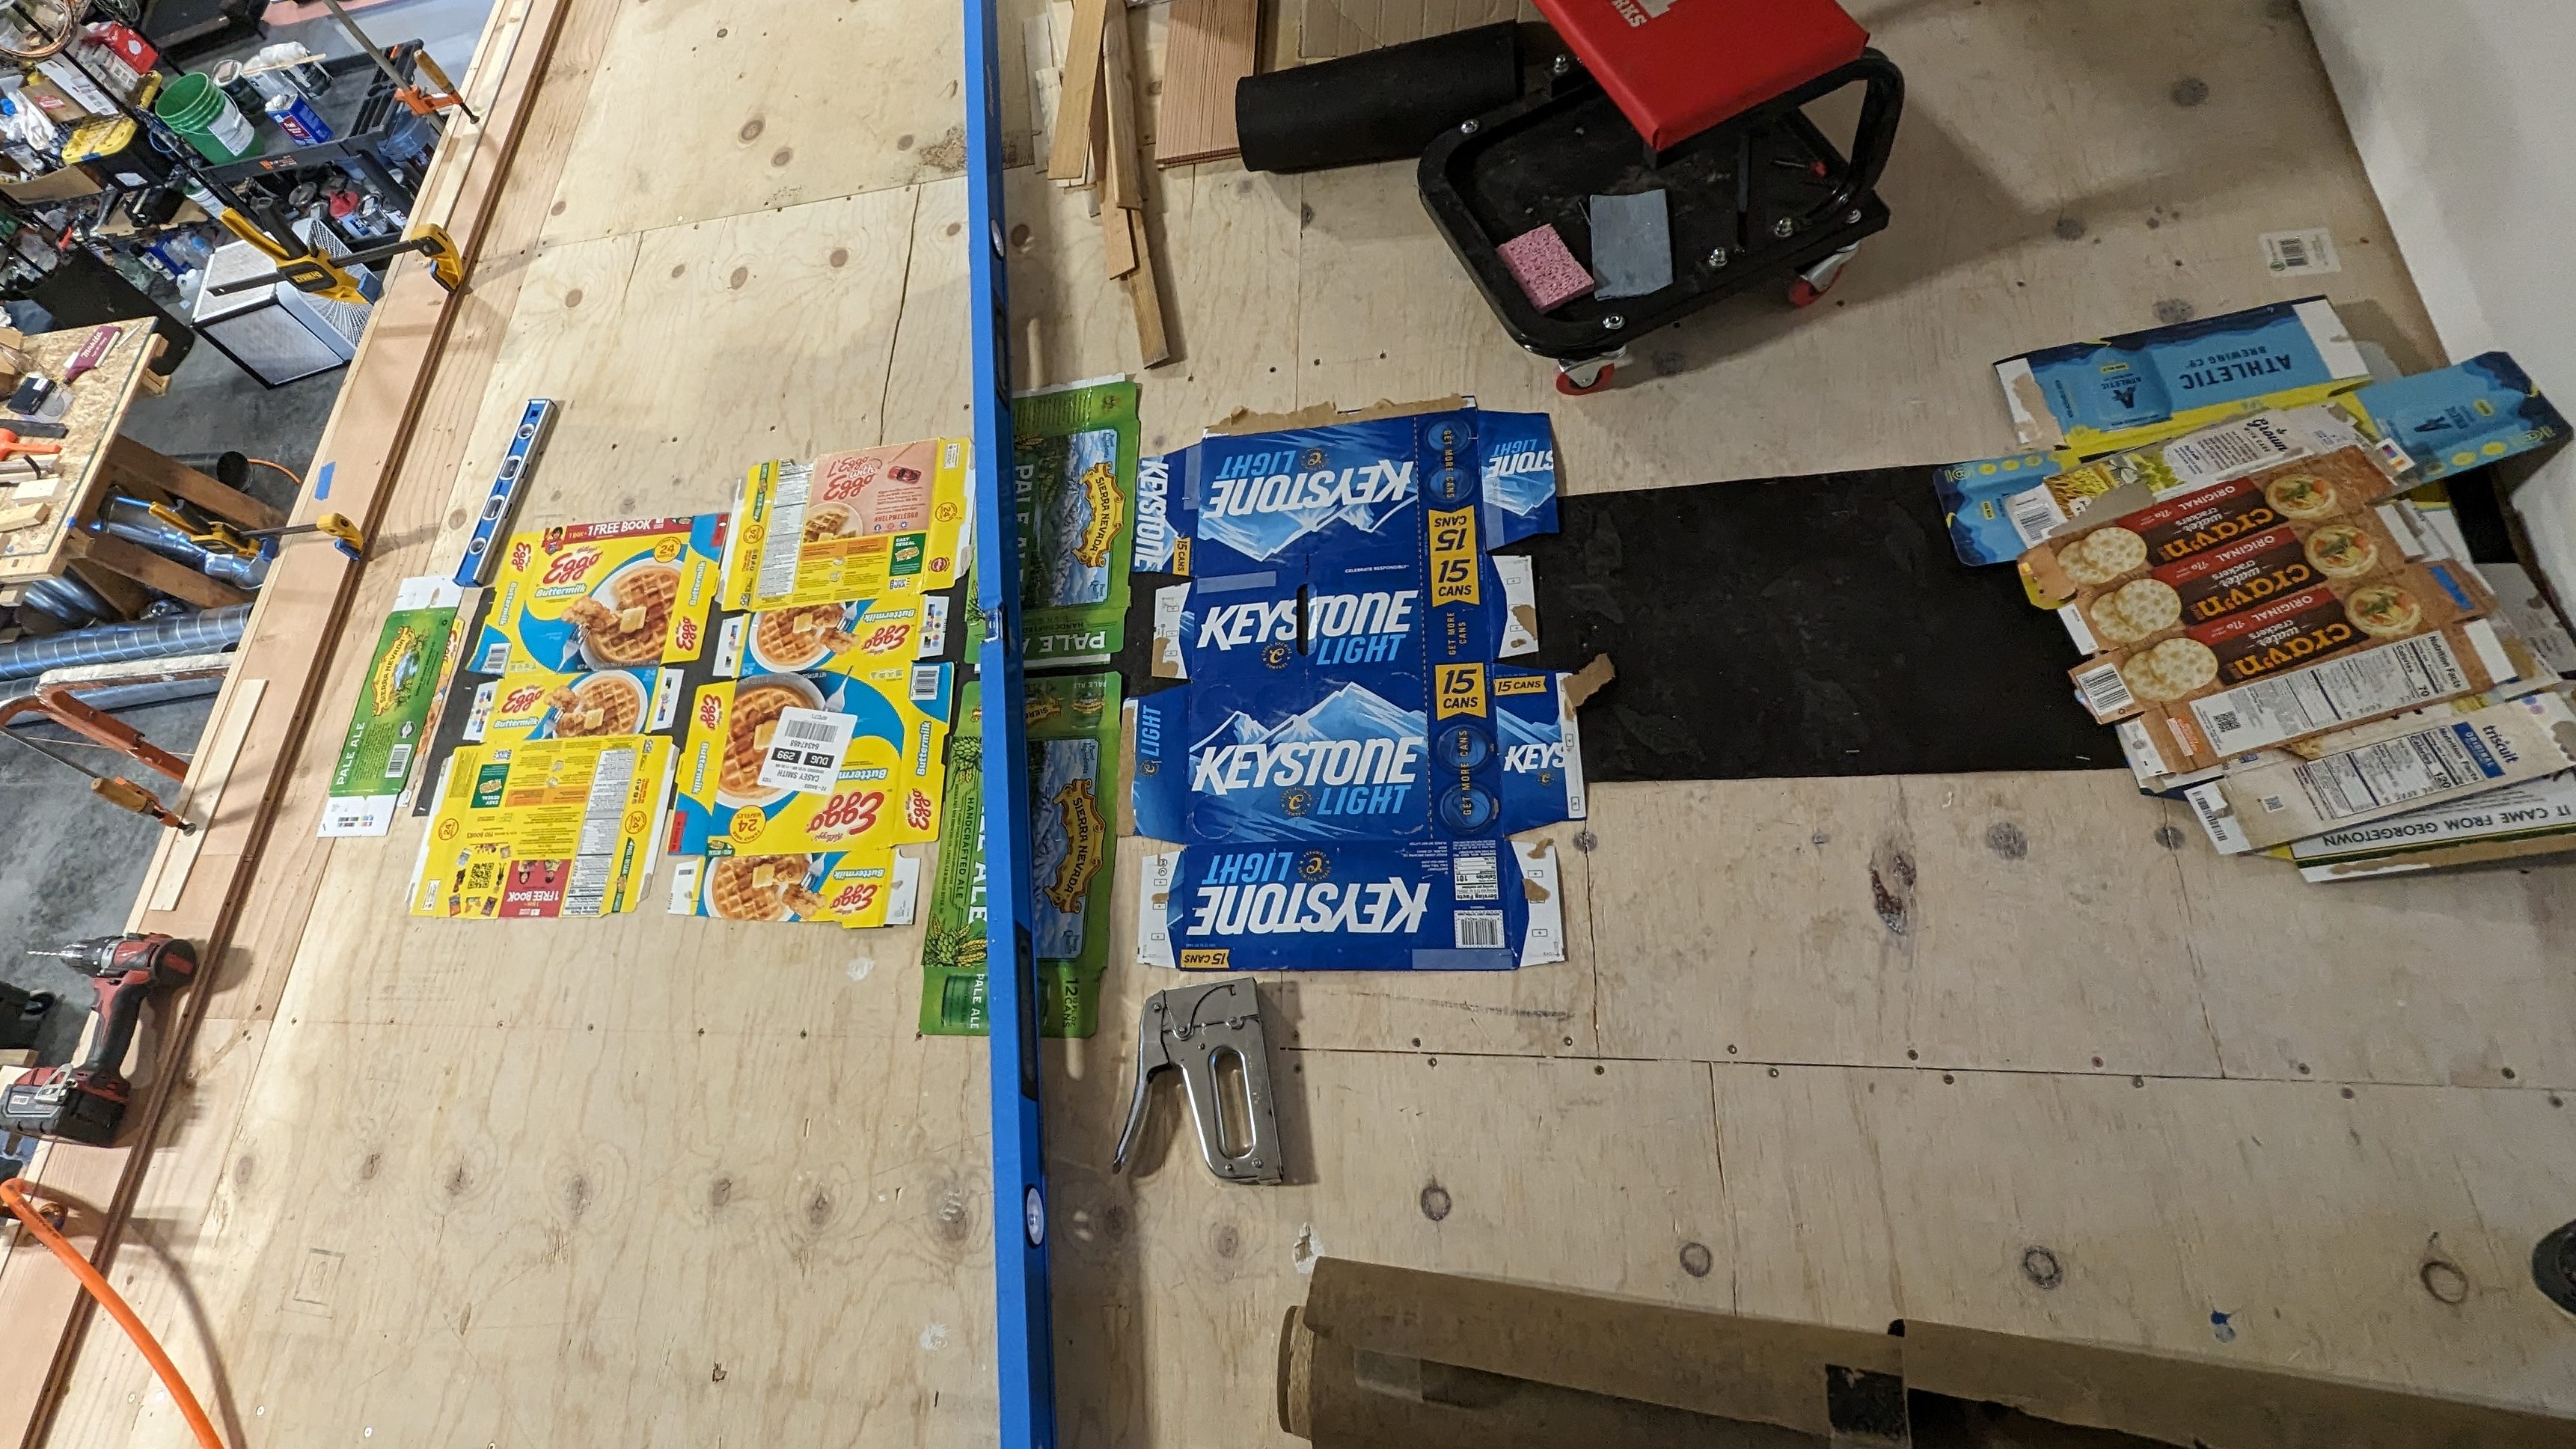
We didn’t know what to do when we discovered you can’t nail through most of the liquid shims and self-leveling products. Luckily, we found some leftover roofing felt that was just the right thickness. We cut felt strips to place between the aluminum plates, creating a level surface across the room.

The landing outside of the office isn’t heated; however, it had it’s own issues. There was a large low spot in the middle of the area. What kind of amateurs installed the subfloor? The roofing felt wasn’t thick enough, but we found a good assortment of shims in our recycling bin.
Time to start laying the floor boards. Just kidding! First we had to make the floor boards. I mean, why buy flooring when you can make your own? Call us crazy, but we thought it would be special and cost effective to make our own fir flooring. In hindsight, it was a LOT more work and more expensive than had we purchased hardwood flooring like normal people.
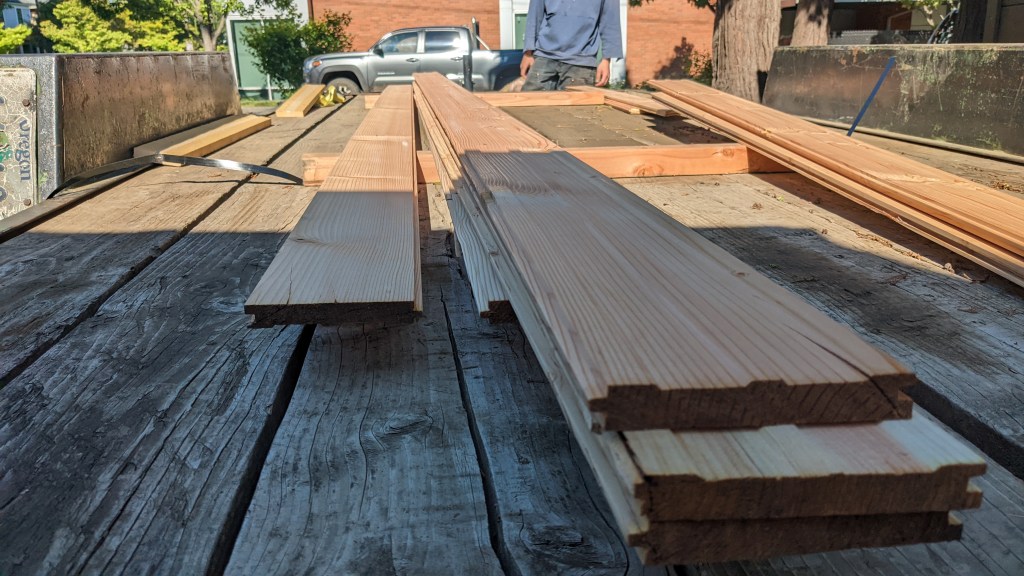
The flooring material came from the centers of all the Douglas firs logs that were used to make our roof purlins. Heartwood (center of a log) tends to split and warp more than sapwood, so Fred advised us not to use the heartwood for the purlins. He set all that wood aside and we later decided to use it for the office floor. Like the purlins, the heartwood slabs were about 2″x12″ and ranged from 16 to 20 feet in length. We let them dry out for over a year, and then we brought the slabs to Creative Woodworking in Portland. Creative turned our slabs into 5″ wide tongue and groove boards. They even put the wavy profile on the bottom face of the boards.
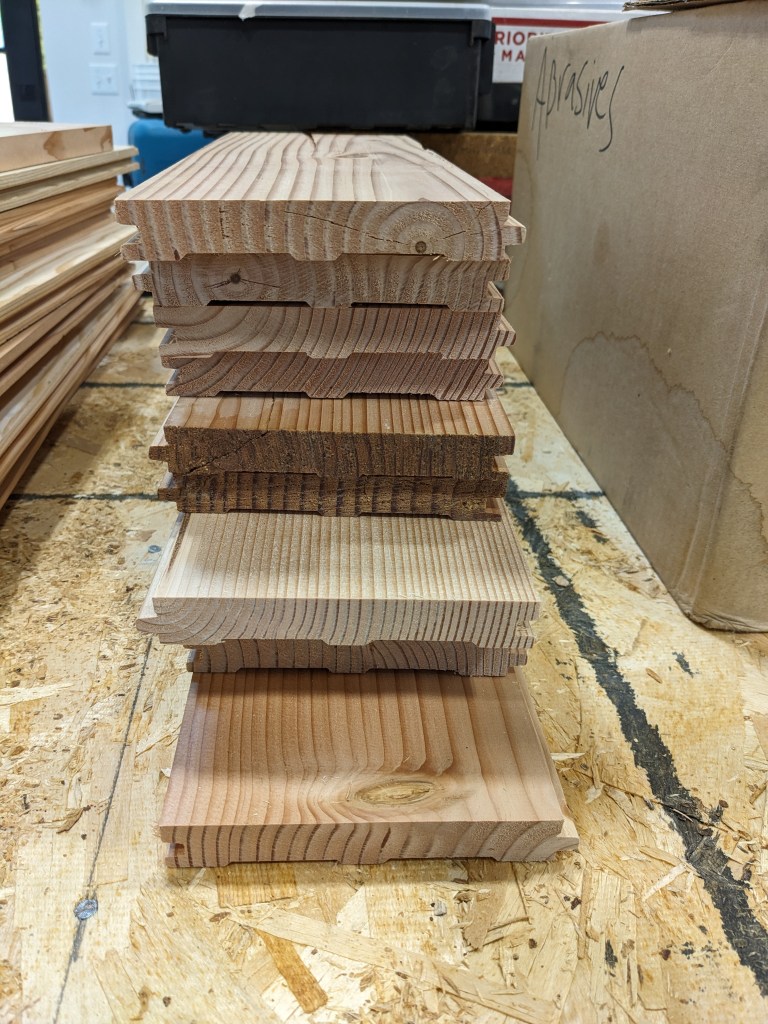
There were still a few more steps before these were usable. First we had trim the split ends and cut the knots and defects out of each board. There were a lot of defects! On average, a single 18 foot long board yielded about 5 short pieces of flooring and 6 short pieces of scrap. Some boards were such bananas that they had to be cut into many smaller sections. The scrap pile was growing at a high rate, causing enough concern for us to measure and tally every usable piece of flooring (another time-consuming task). We were barely going to have enough!
At this point, the short ends of the boards had squared off edges.
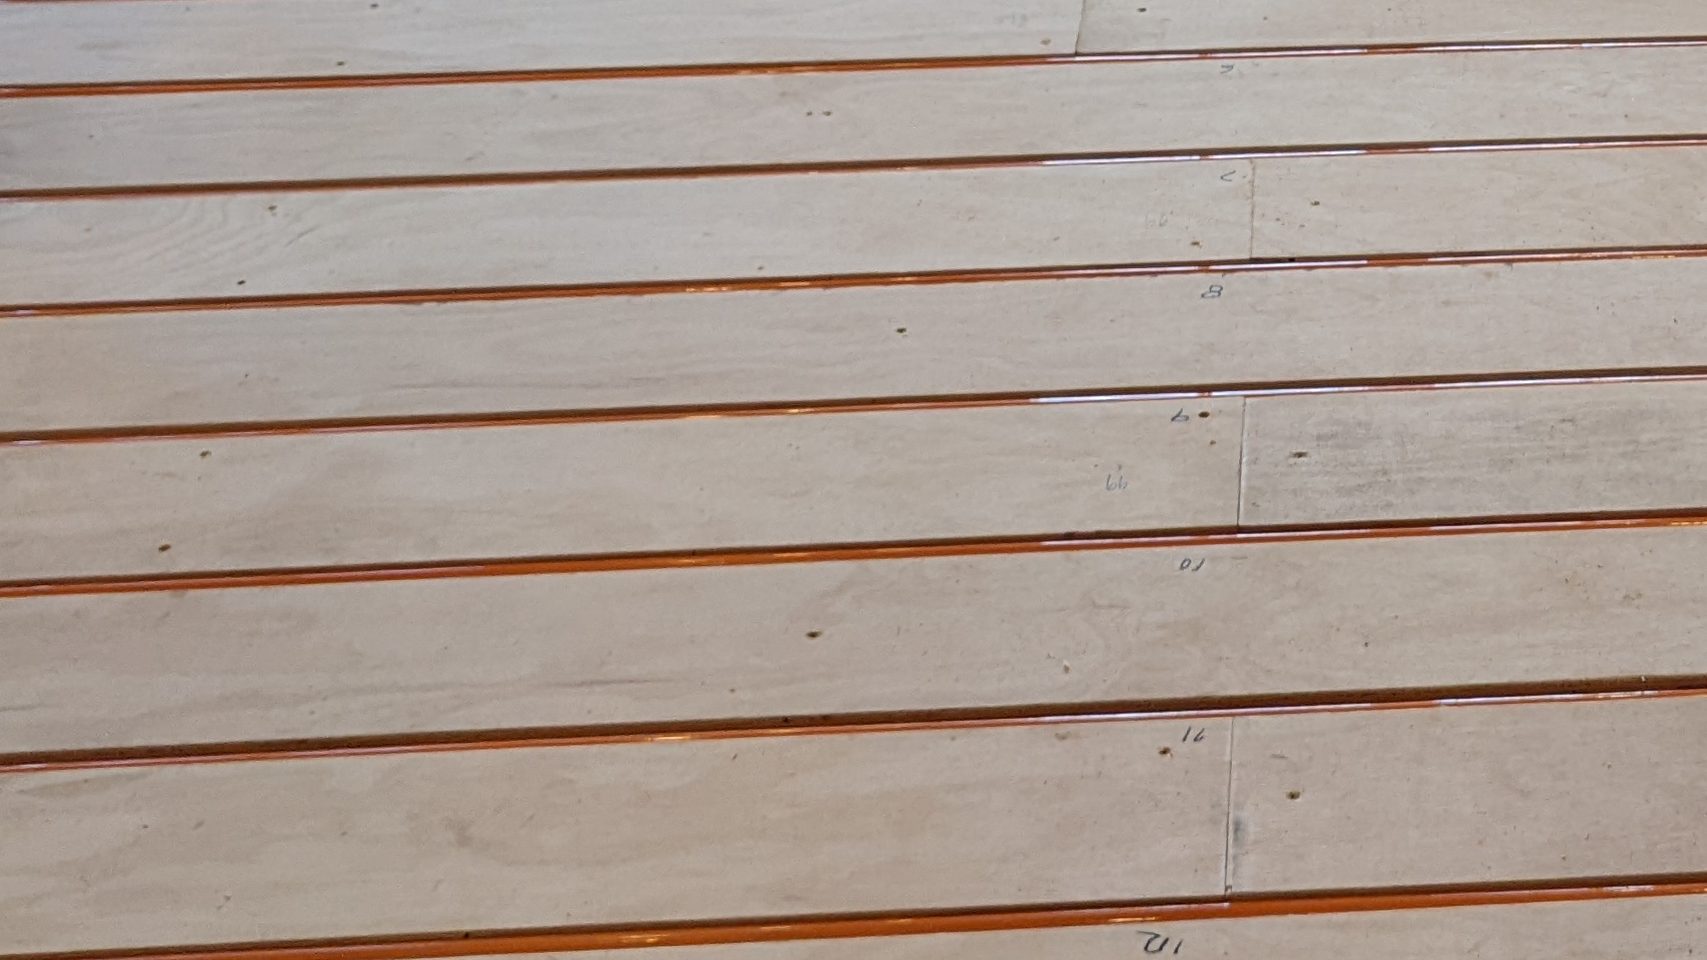
We had to end-match every board. End-matching keeps the ends of the boards aligned.
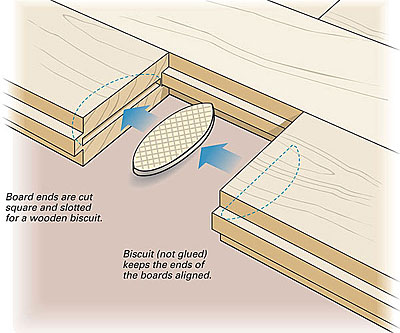
We notched the short ends of each board, so a spline could be glued between the ends of two boards during installation.


We used the shaper for this. In order to notch a straight groove, Sam built a jig to hold the board at a slight downward angle. It took a lot of force to clamp the boards down. It took even more force to push the boards through the shaper, especially the longer ones. Sam and I did not have the strength to process the giant stack of material. So of course, Sam devised a plan to improve efficiency. I had no idea what he was up to when a handful of mysterious pneumatic parts showed up in the mail. After a few hours of tinkering, he presented me with this…
One lever clamps the board in place with a finger-flattening force. Another lever pushes the board through the cutter. Sam’s extravagant project didn’t seem so silly after all. I was able to notch all the boards by myself with little effort. (It still took a long time though.)
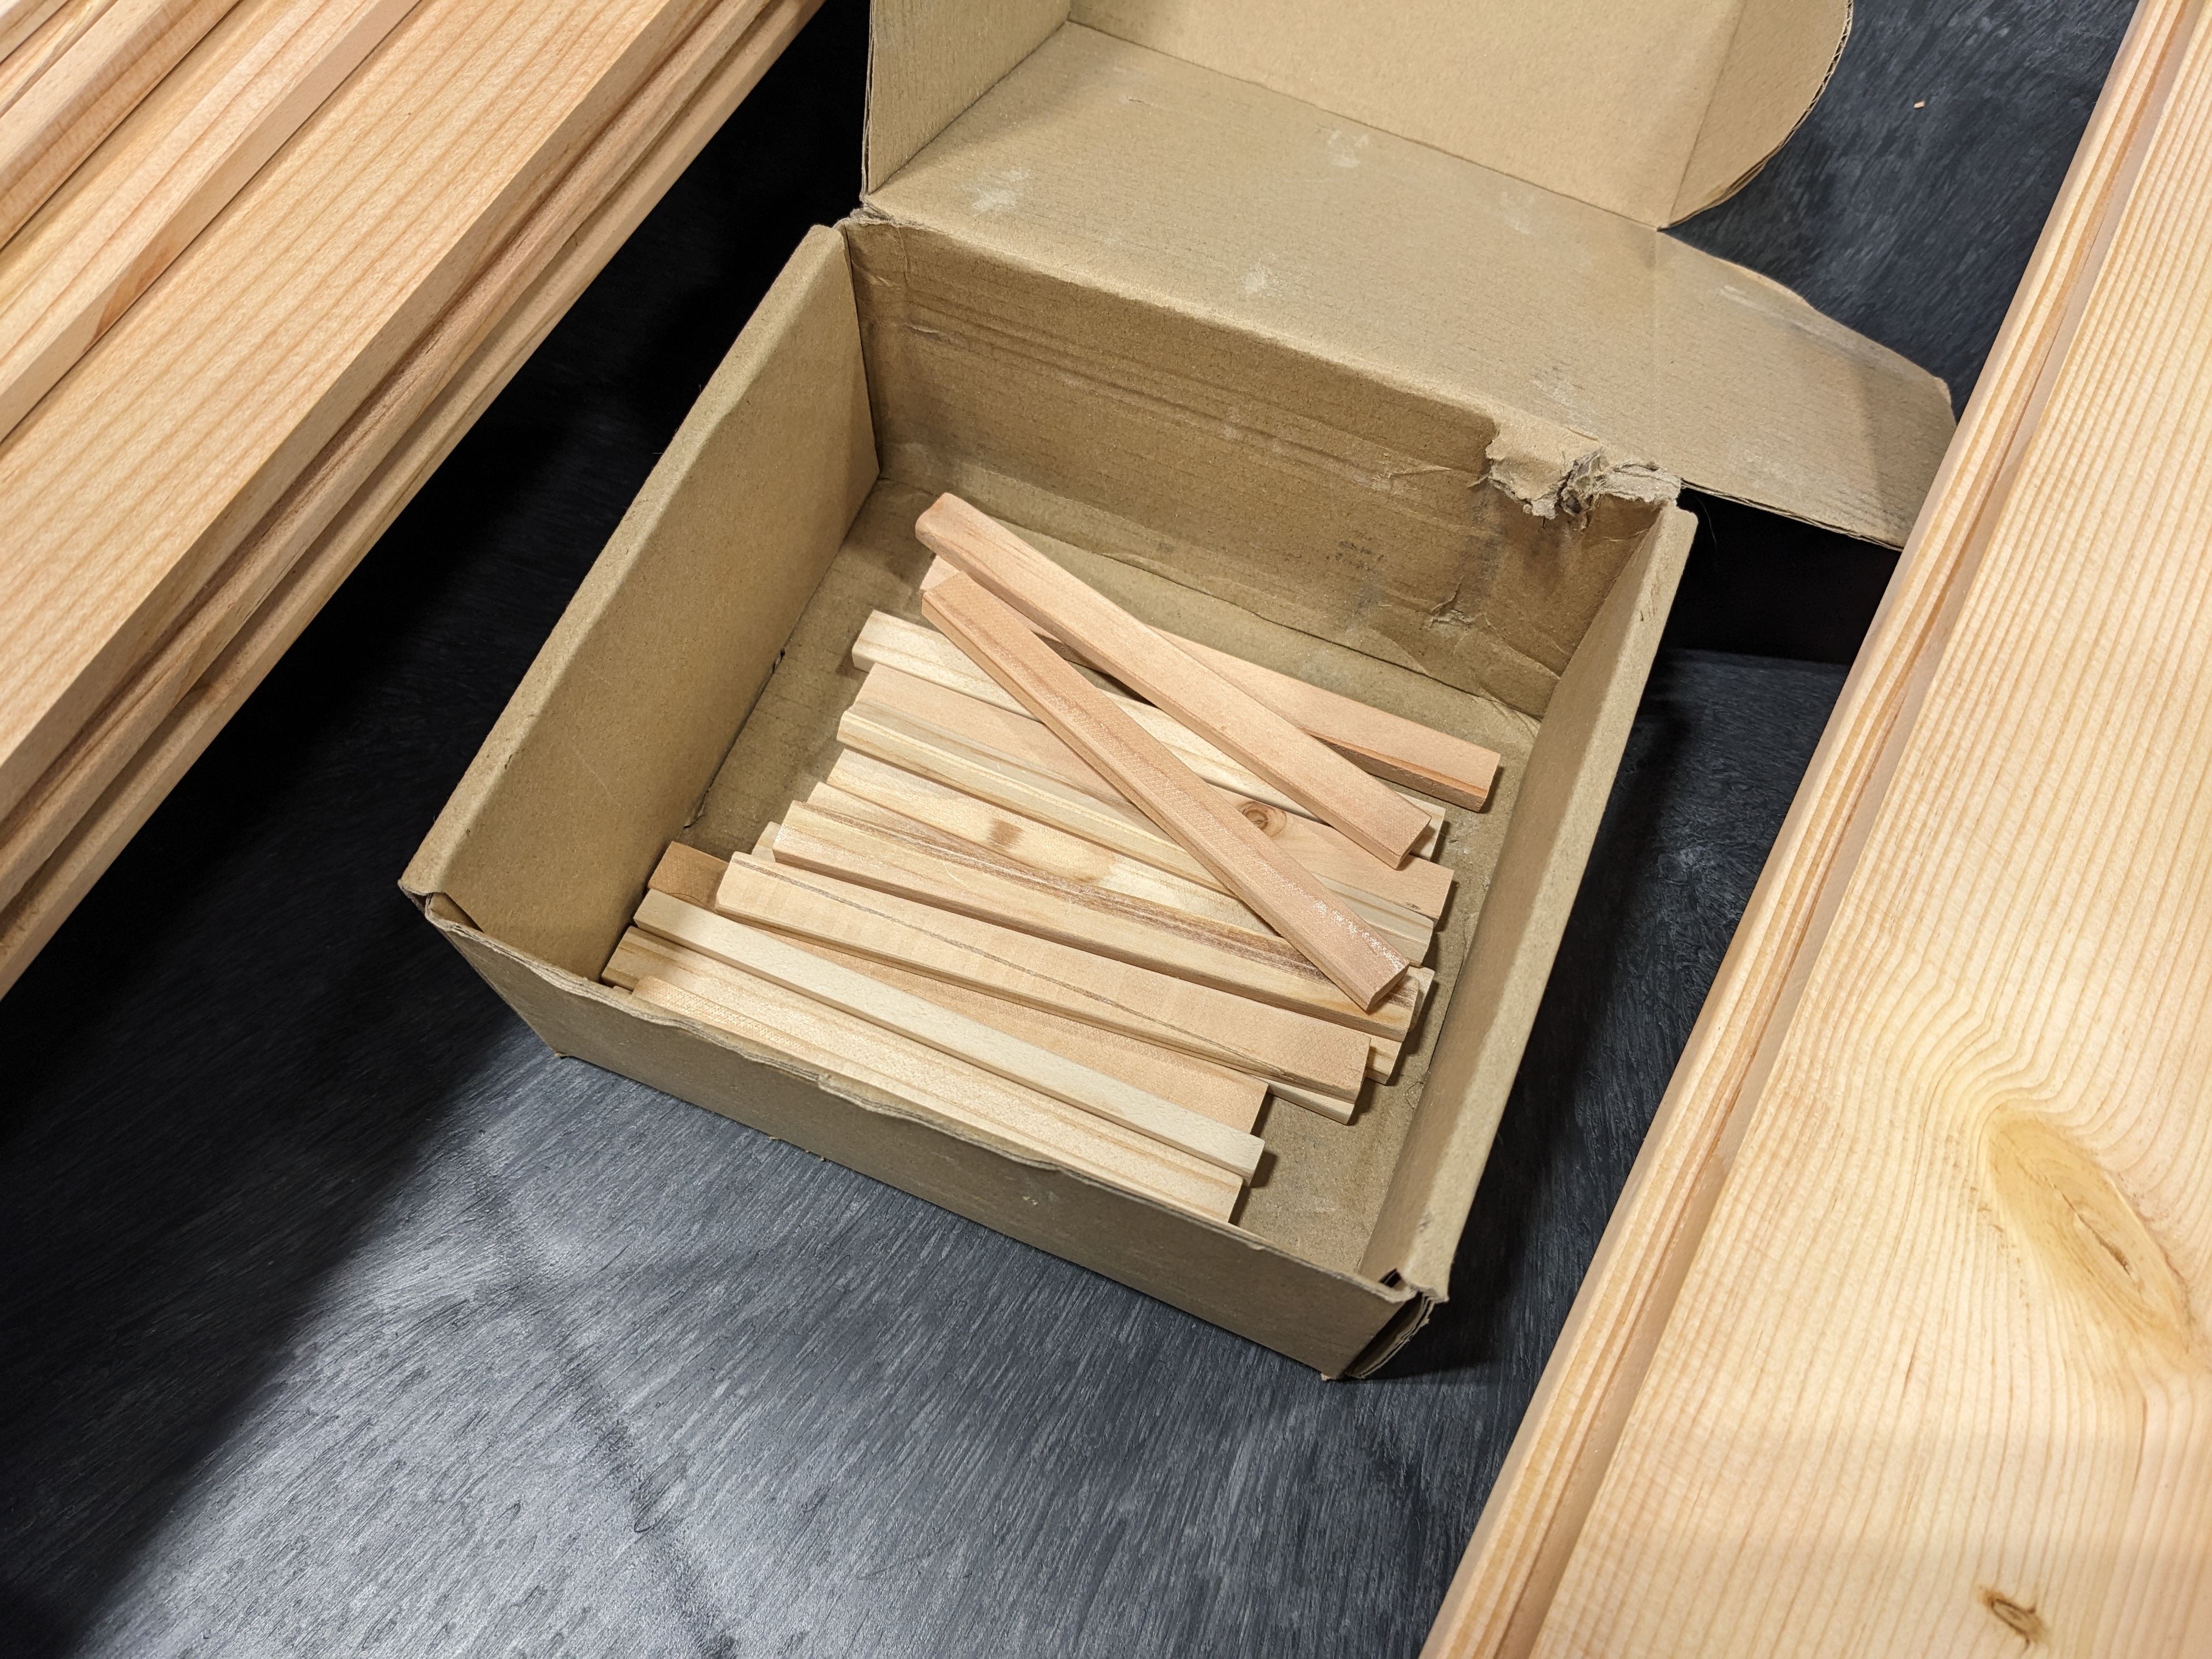
Then we spent a few hours making the little splines. We even sanded the edges so they could slide into the grooves with ease.

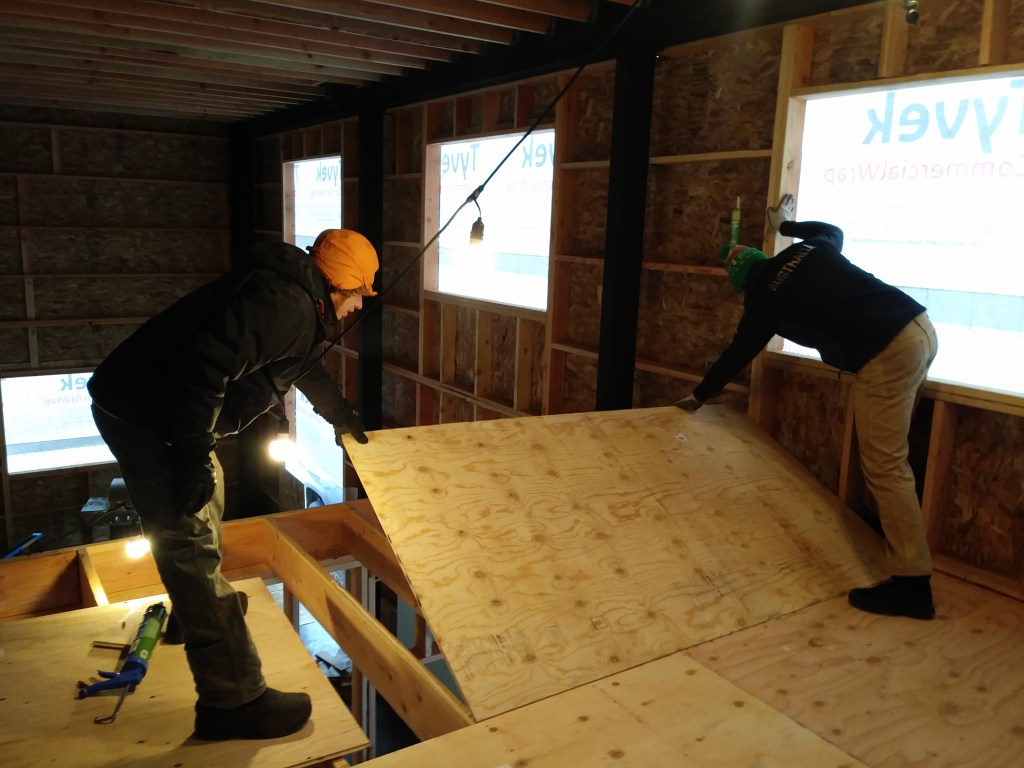
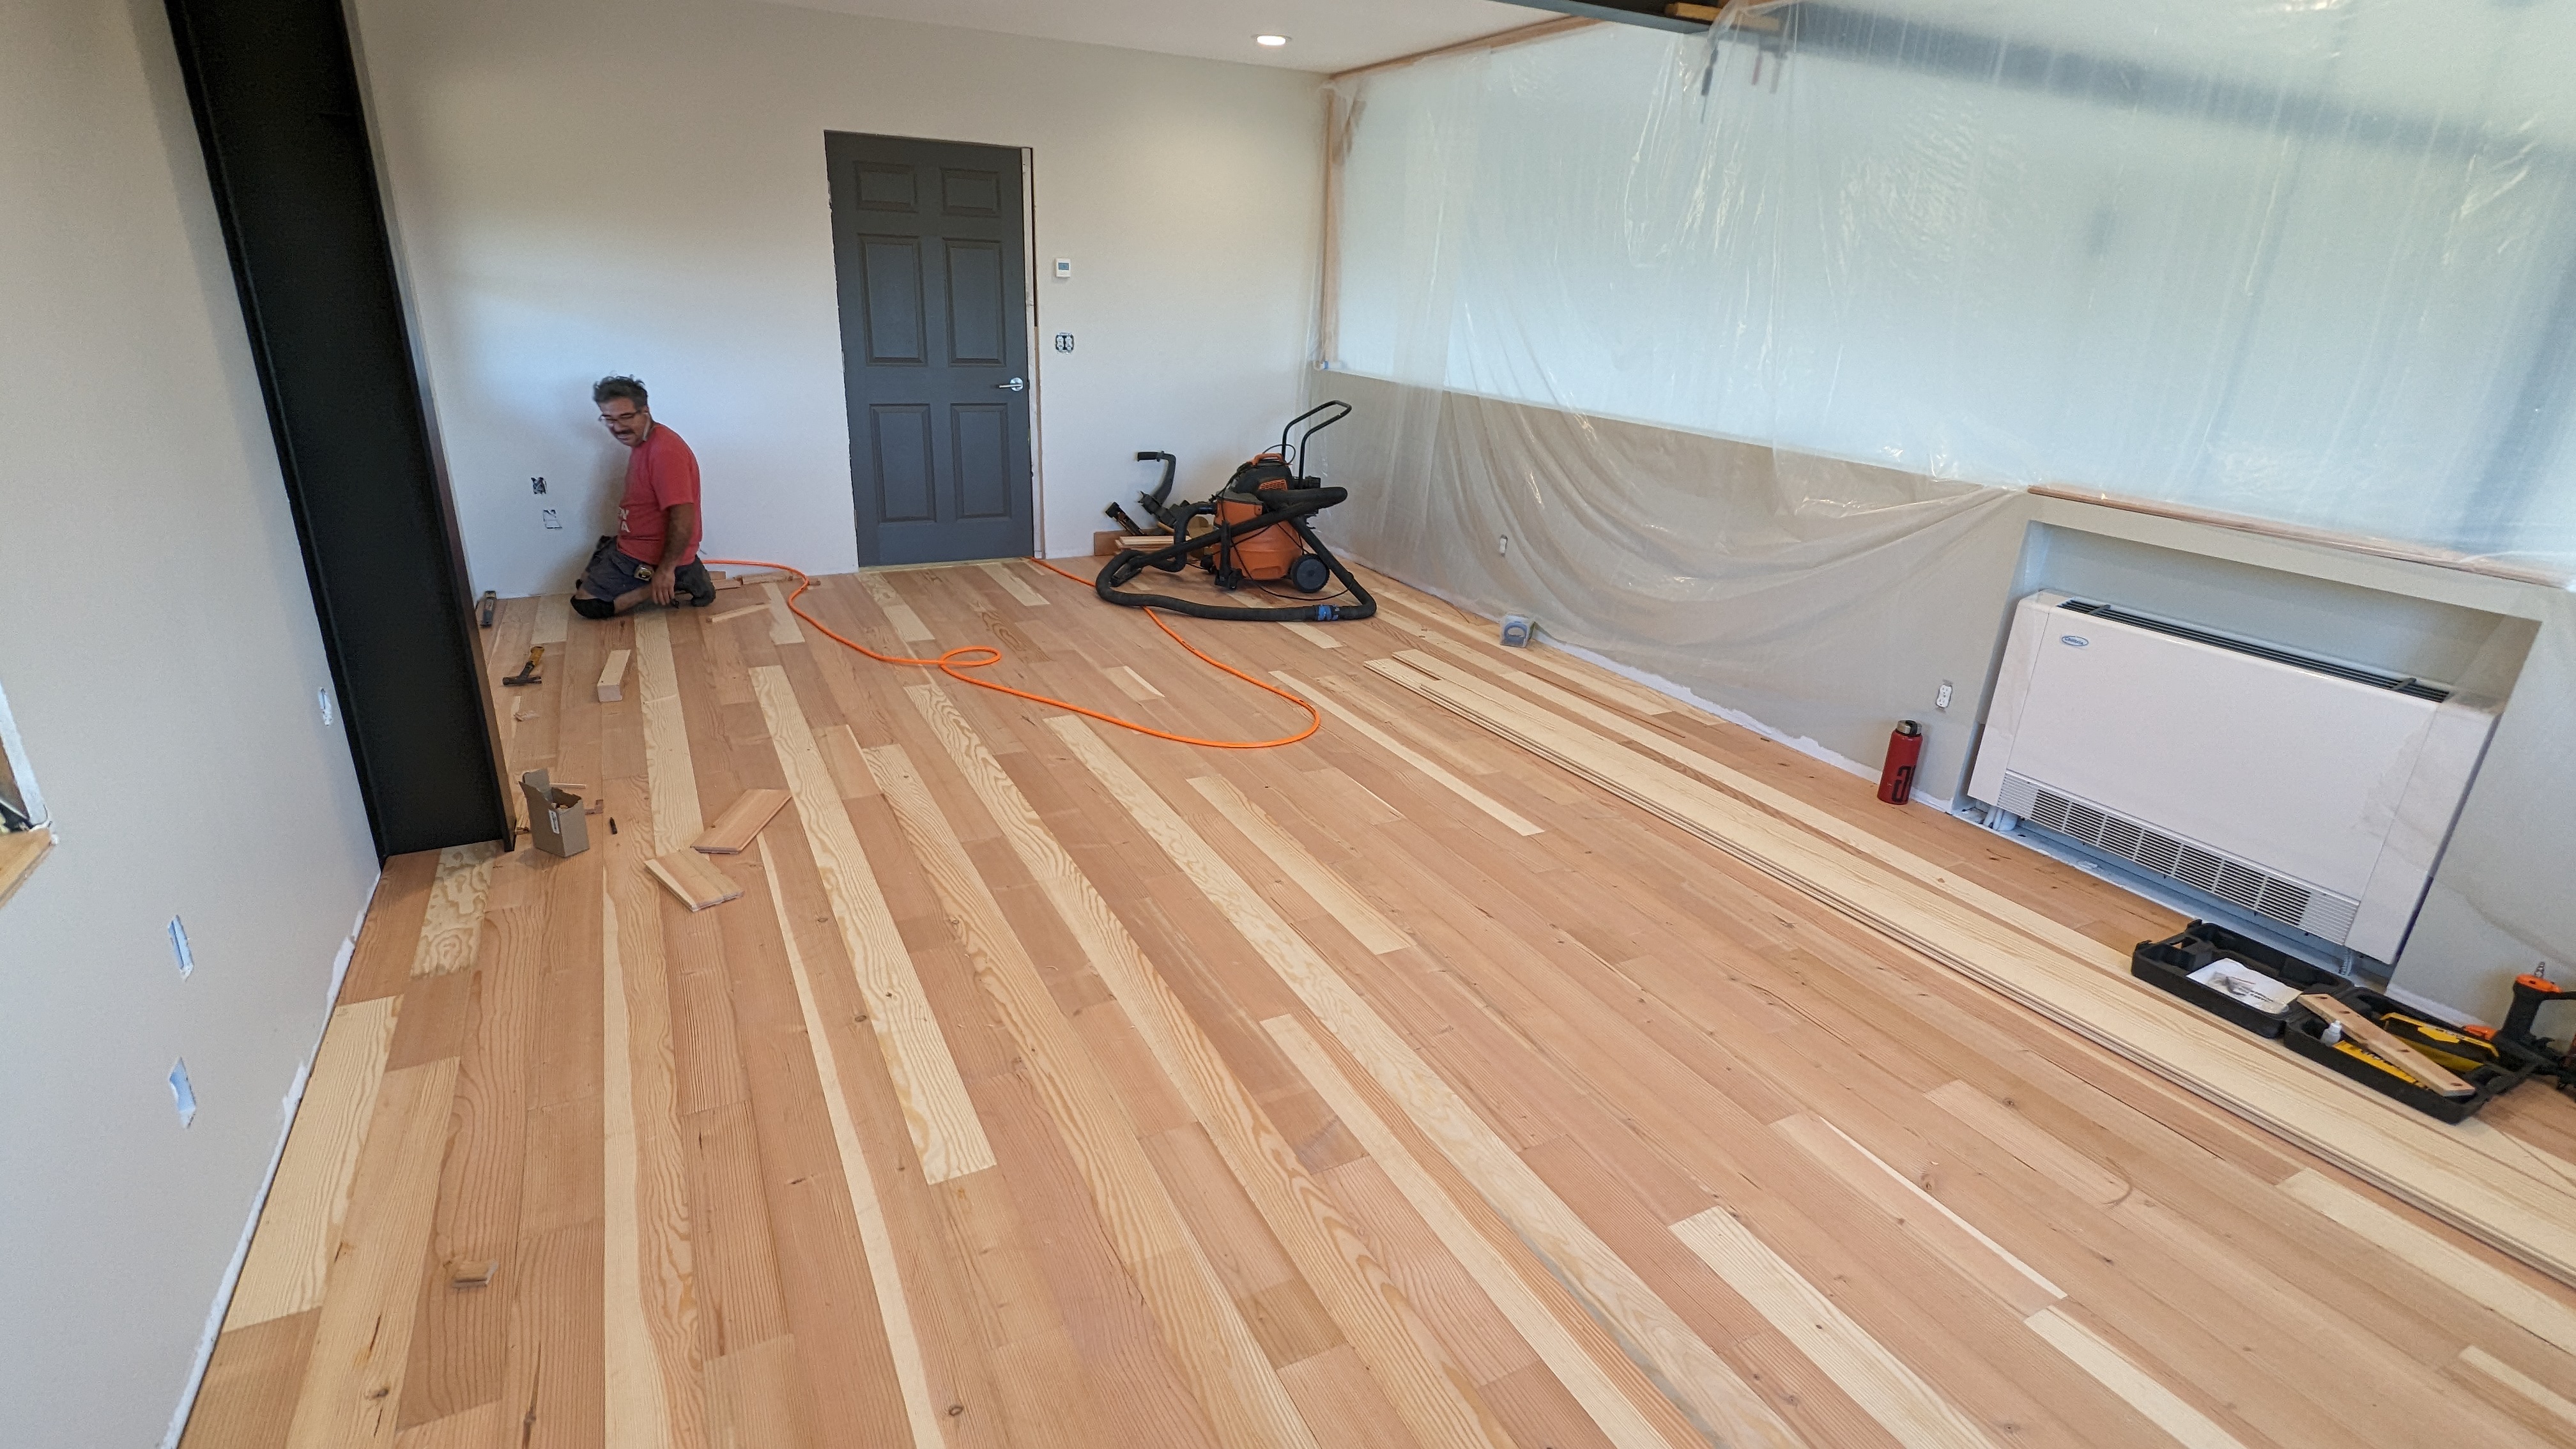
All the prep work wore us out, so we hired Carlos, our tile guy, to do the installation. He nailed everything down and was done with the office in just a few days.

Meanwhile, Sam was preparing the landing by making a “cap” along the edge. This took a lot of patience and a lot of clamps. It was quite the custom job and fit perfectly.


Then we covered the landing in subfloor paper, and Carlos got to nailing.

Once the final piece of flooring was installed, we sanded everything and applied a sealer.
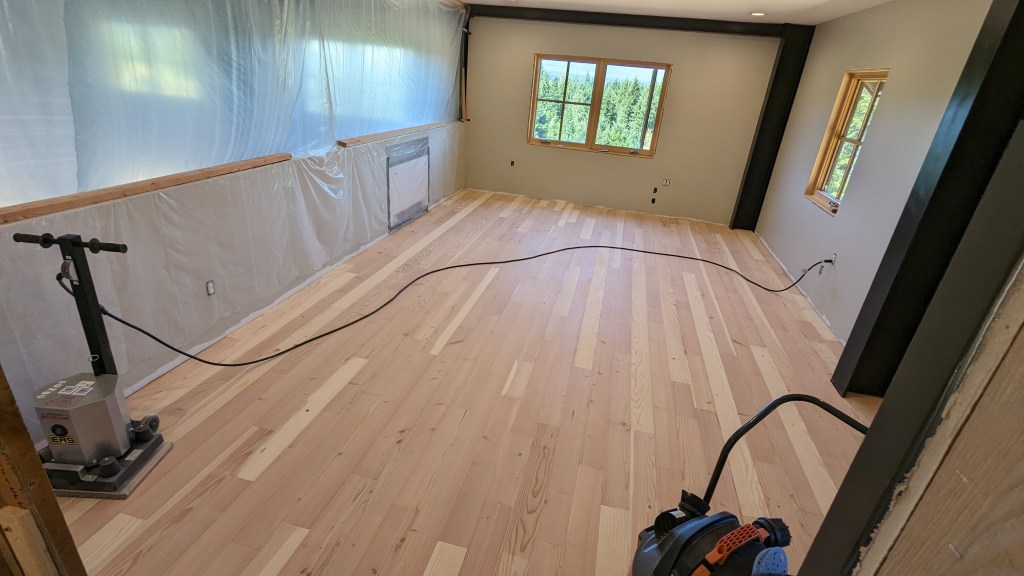
Carlos sanded it again after the sealer dried. The floor was so smooth that I looked like a baby deer on ice while vacuuming in my socks.
Next, Carlos applied two coats of a clear floor finisher (Vermont Natural Coatings PolyWhey Floor Finish). It dries quickly, making it difficult to work with. Instead of rolling it on, he poured it out and squeegeed it to achieve an even coat.
There were some streaks and drip marks that really caught the light. Sam and I thought there was room for improvement, so we hand sanded some spots and applied one more coat. We got slightly better results and concluded the finishing coat is a bear to work with.


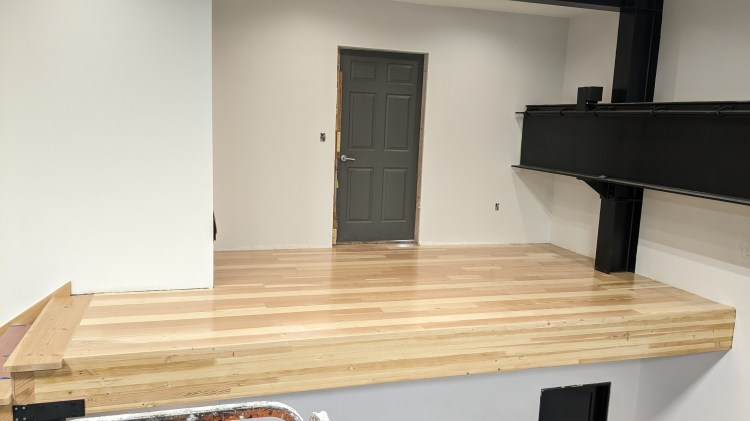
The office floor is all done!


So is the landing! We are really pleased with how it turned out and don’t regret making our own flooring.