Although we finished the stairs to the office over a year ago, we never installed the railing. Sam and I designed the railing and went as far as ordering the balusters and newel posts during an online New Year’s sale. The parts sat, unopened, in their original packaging all this time. It wasn’t until this summer that the railing made it onto the priority list. This was prompted when we watched two movers struggle to keep their footing on the paper stair covering while awkwardly carrying our very heavy couch up to the office.
We picked up the last piece of the puzzle – the handrail itself – from a woodworking shop in Portland. Sam and I were excited to find they had a 20 ft long Doug fir option (not common) to match our stairs. Unfortunately the handrails were unfinished. We sprayed them with a clear coat after some light sanding.

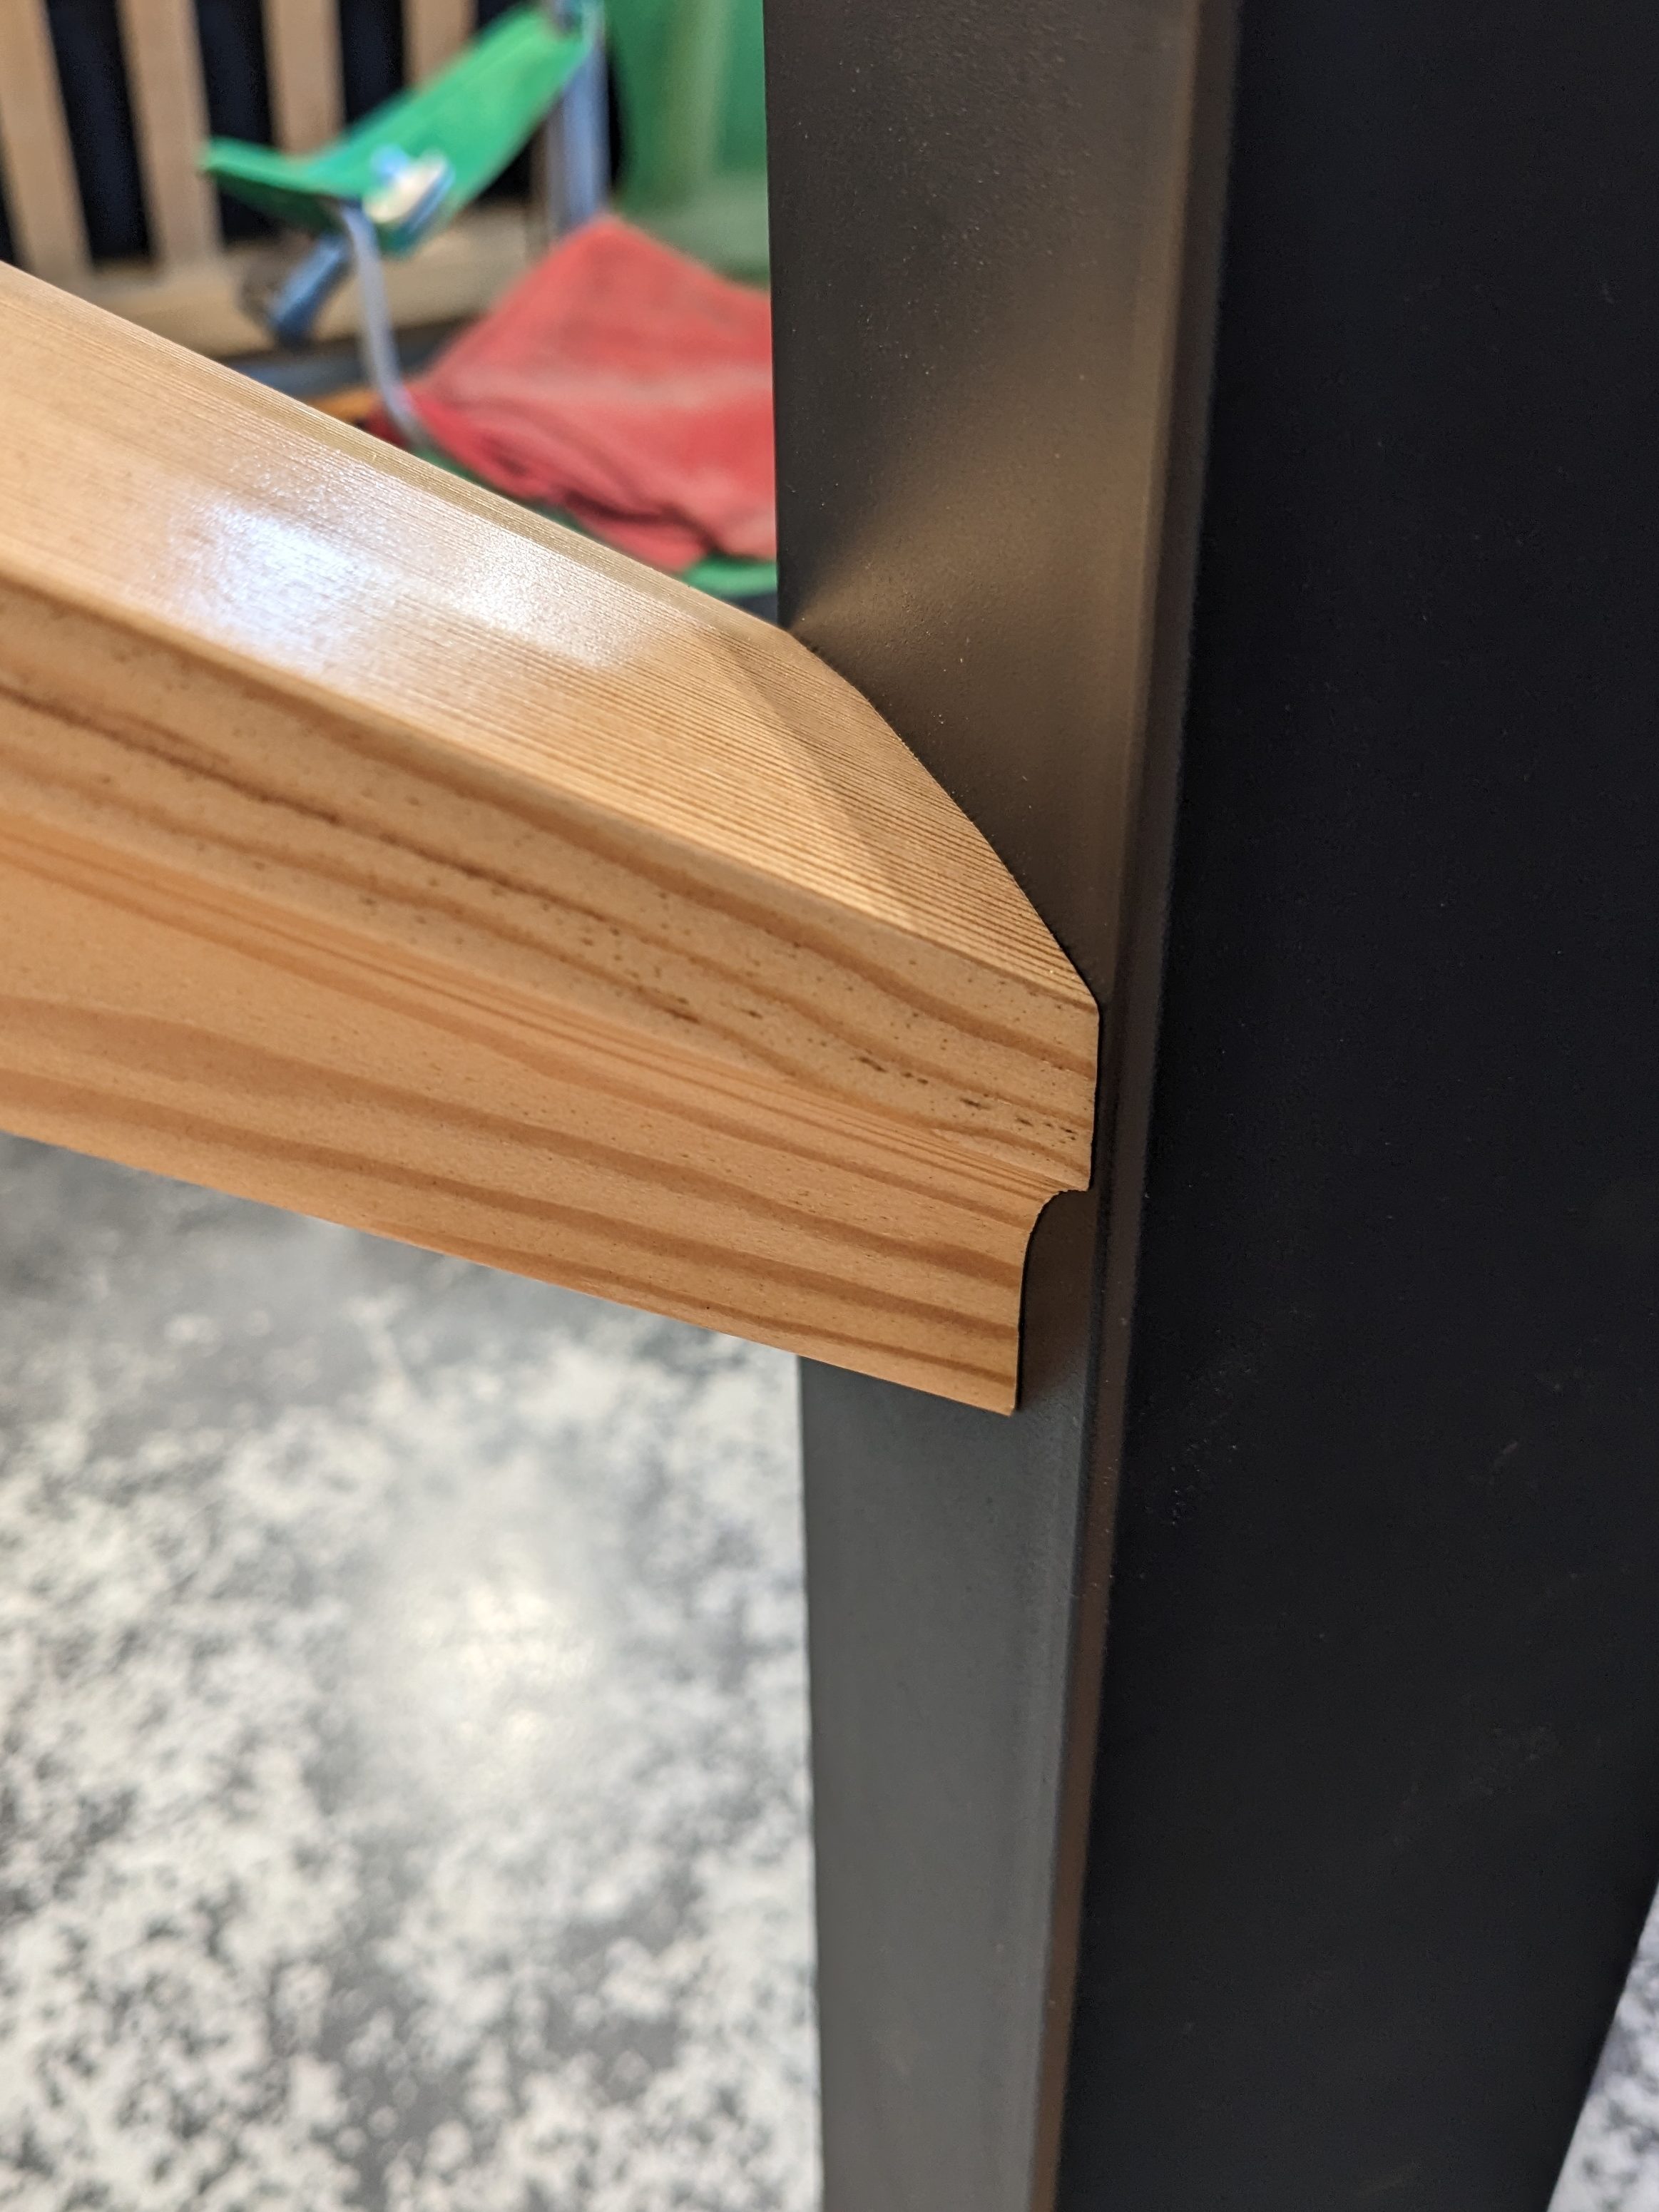
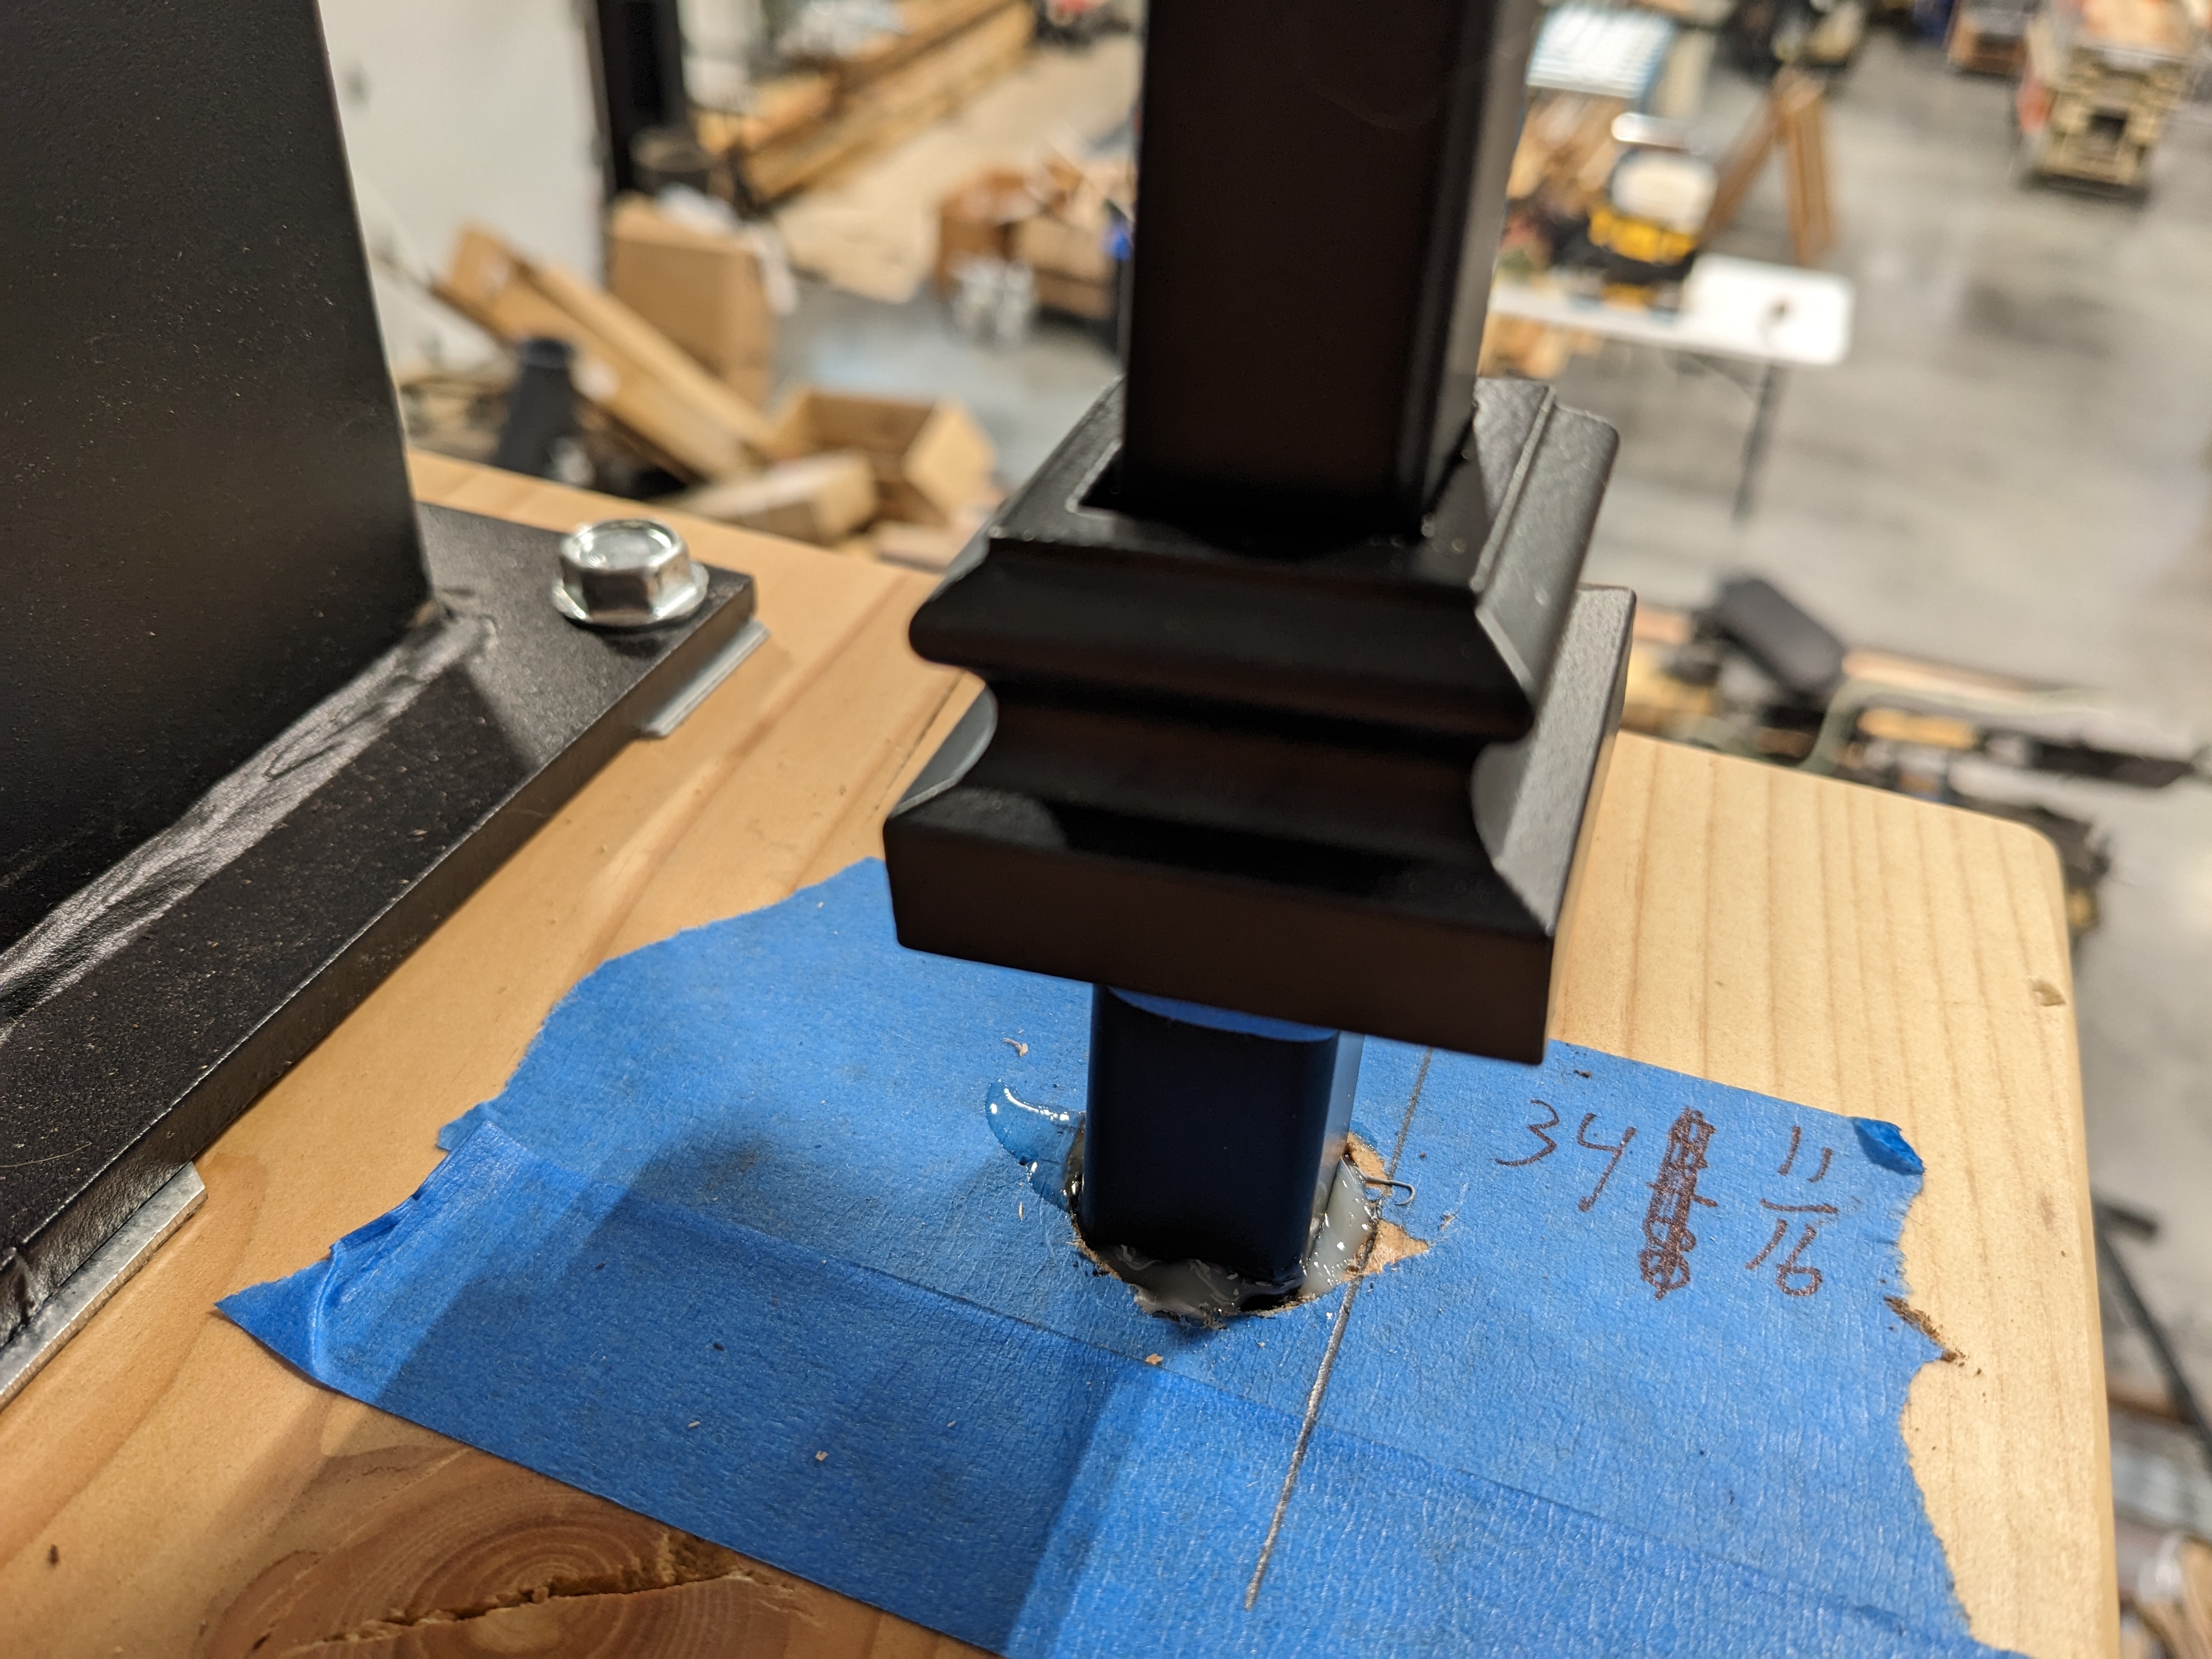
Once all the components were ready, we began the assembly. The first step was installing the two newel posts. The base post required drilling into the concrete.

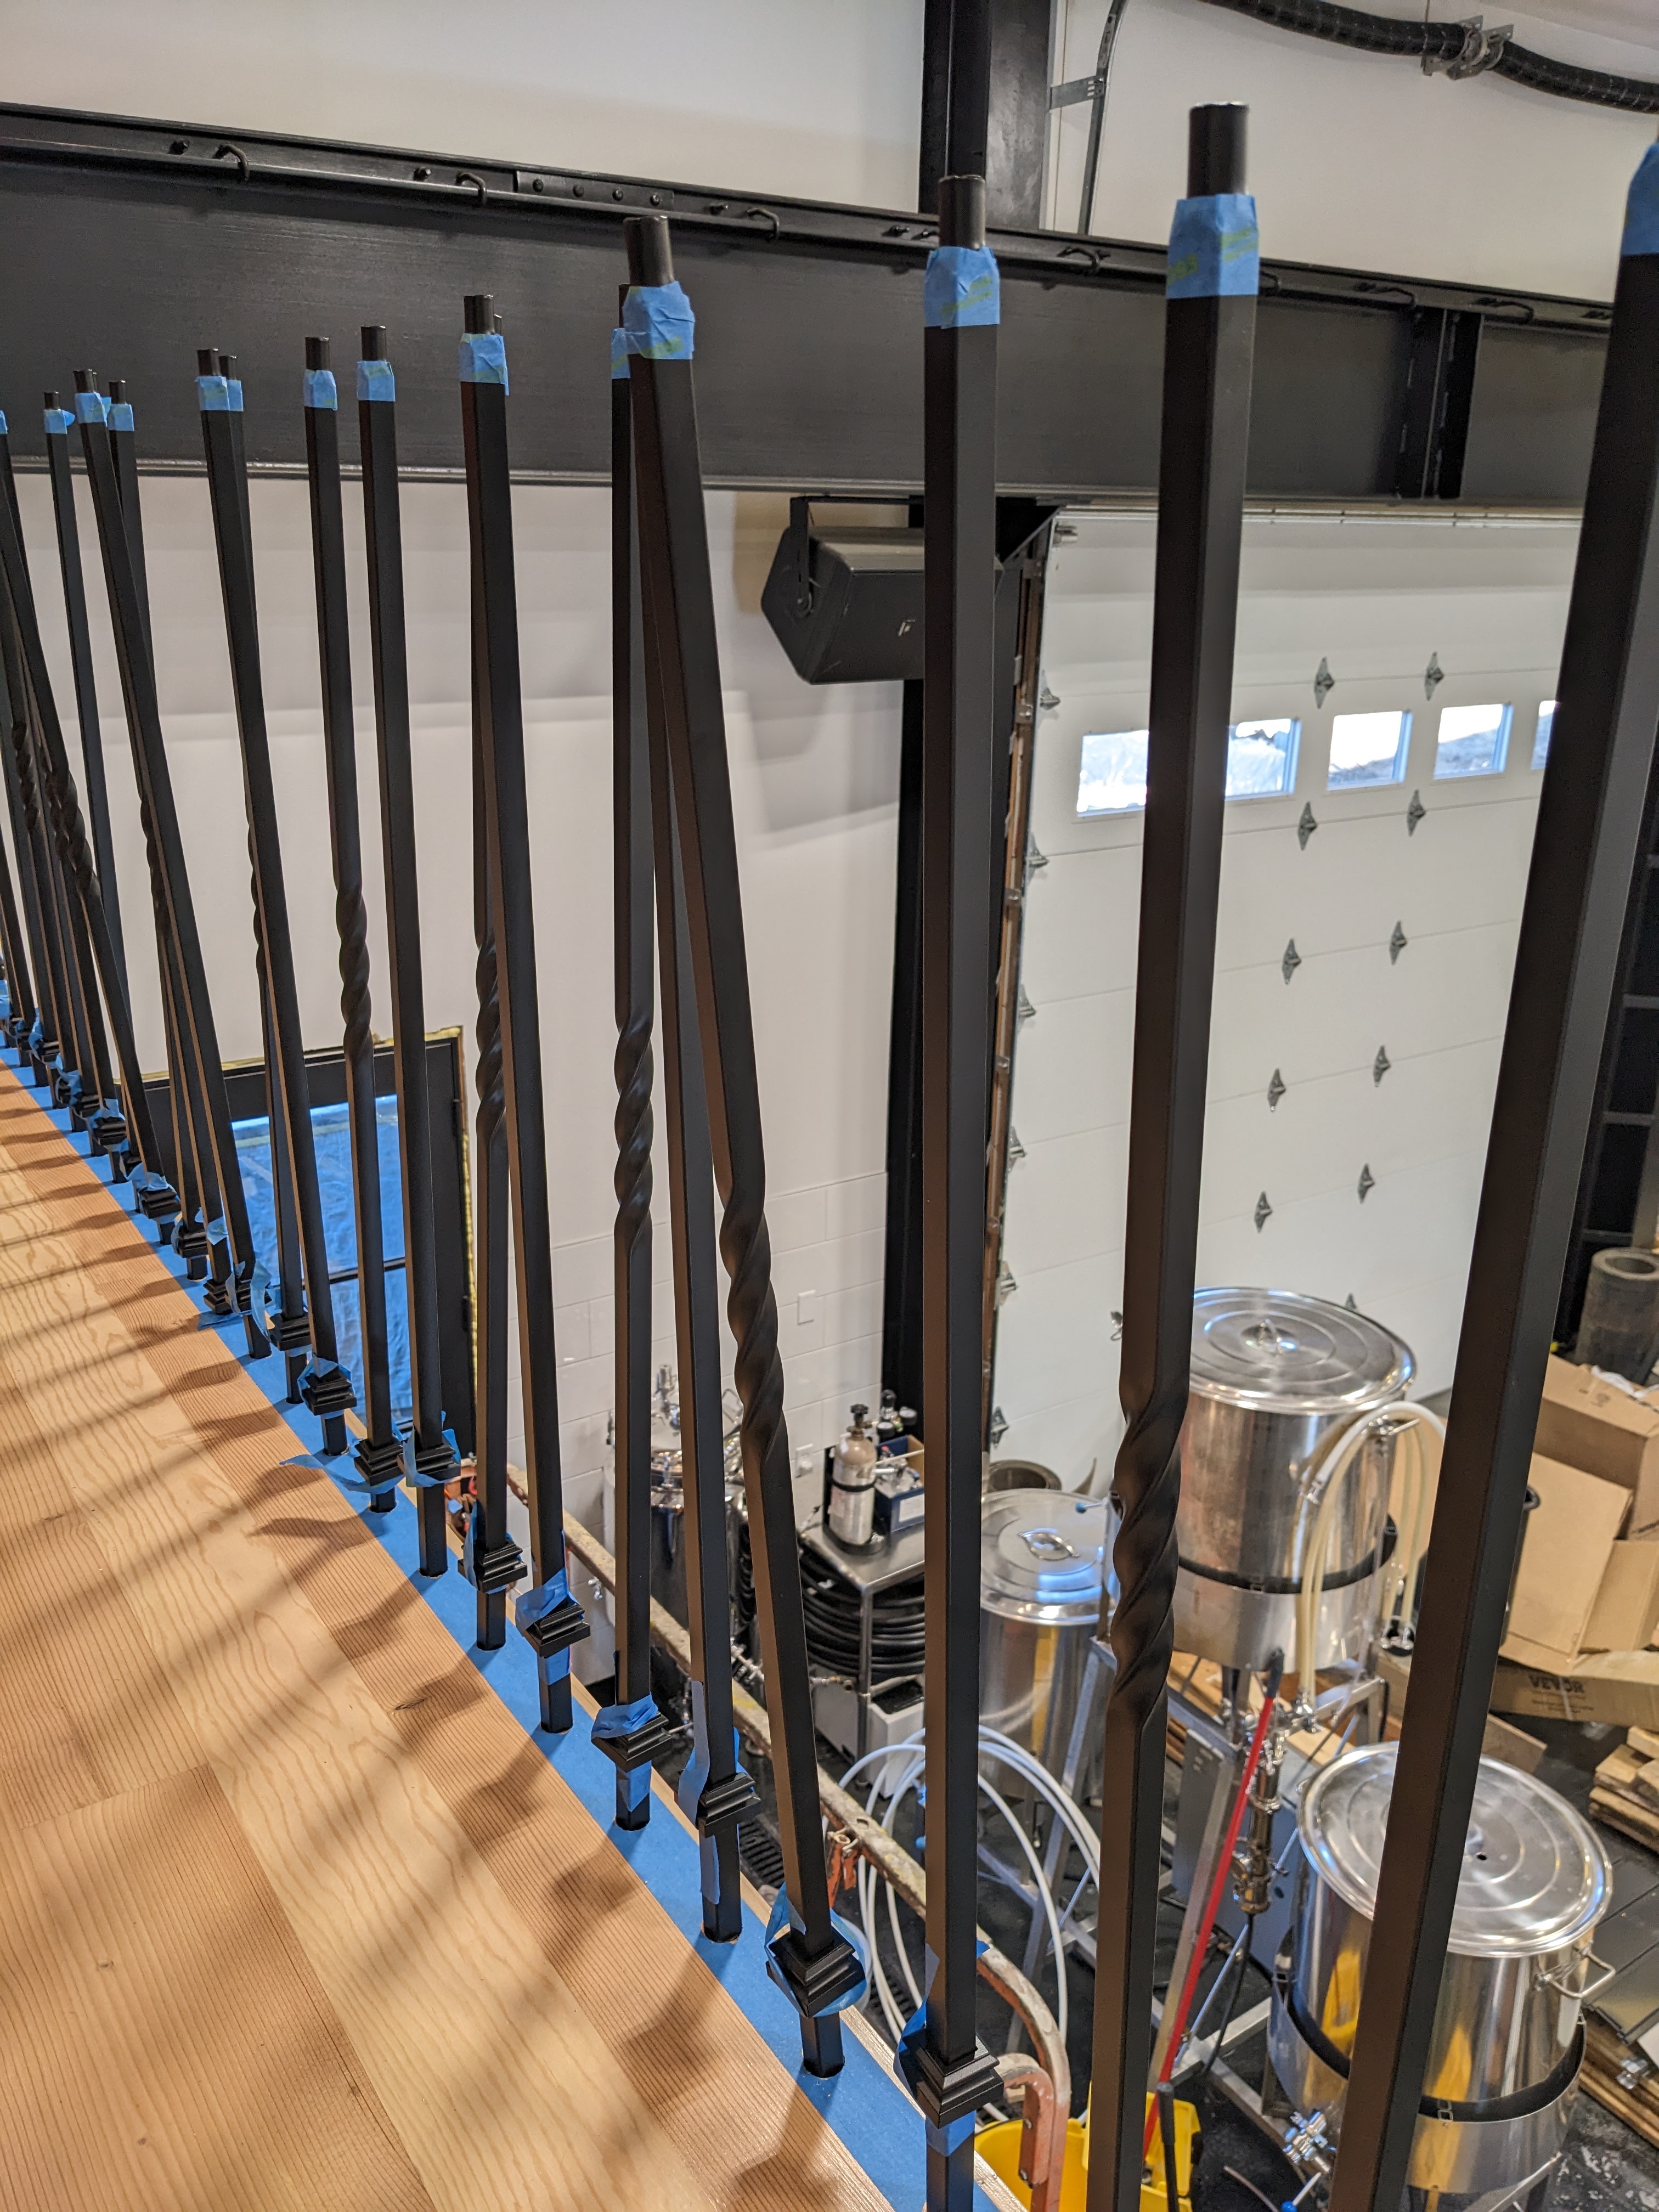
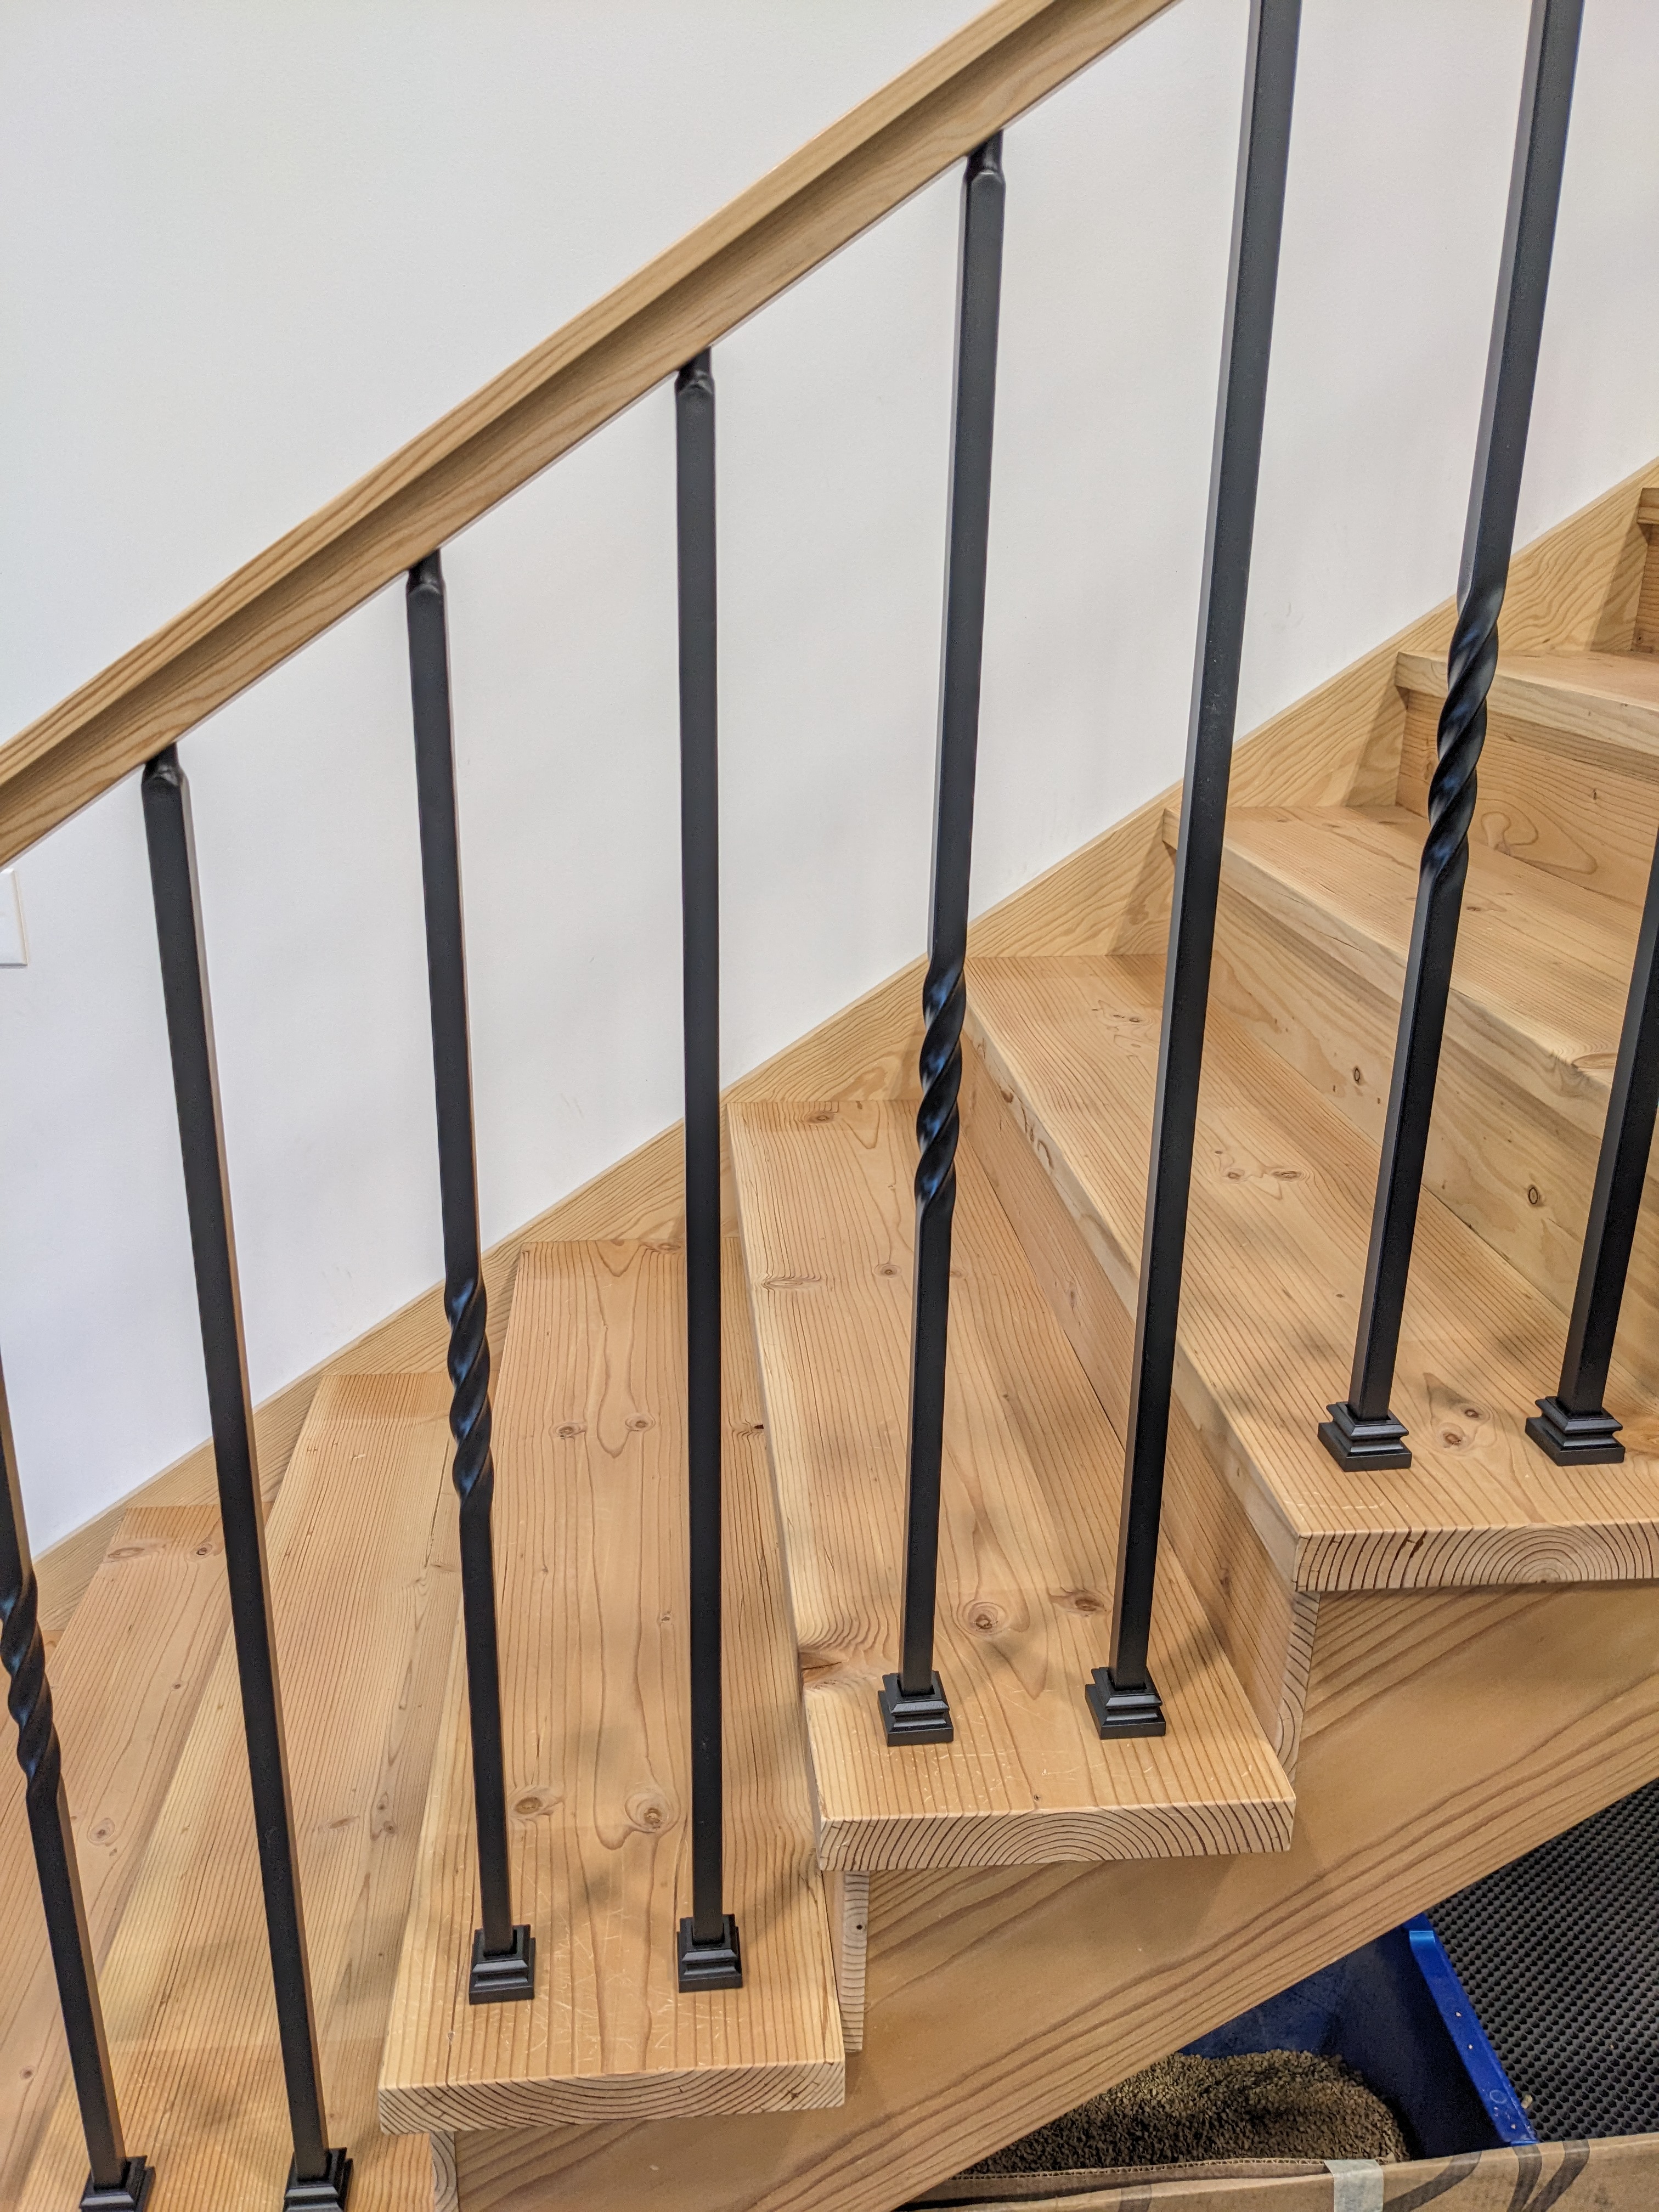
Next, we figured out the baluster layout. The spacing was governed by the minimum gap per the building code. From that number as well as an aesthetic perspective, we determined where to place them on the stair treads. We added the layout to our CAD model to confirm we were on the right track. There are two balusters per stair, with an alternating pattern of plain and twisted ones.

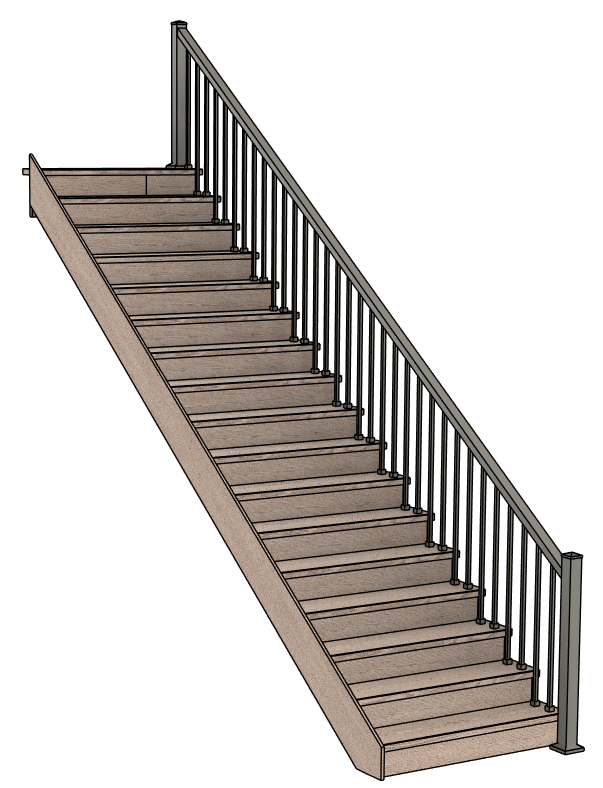
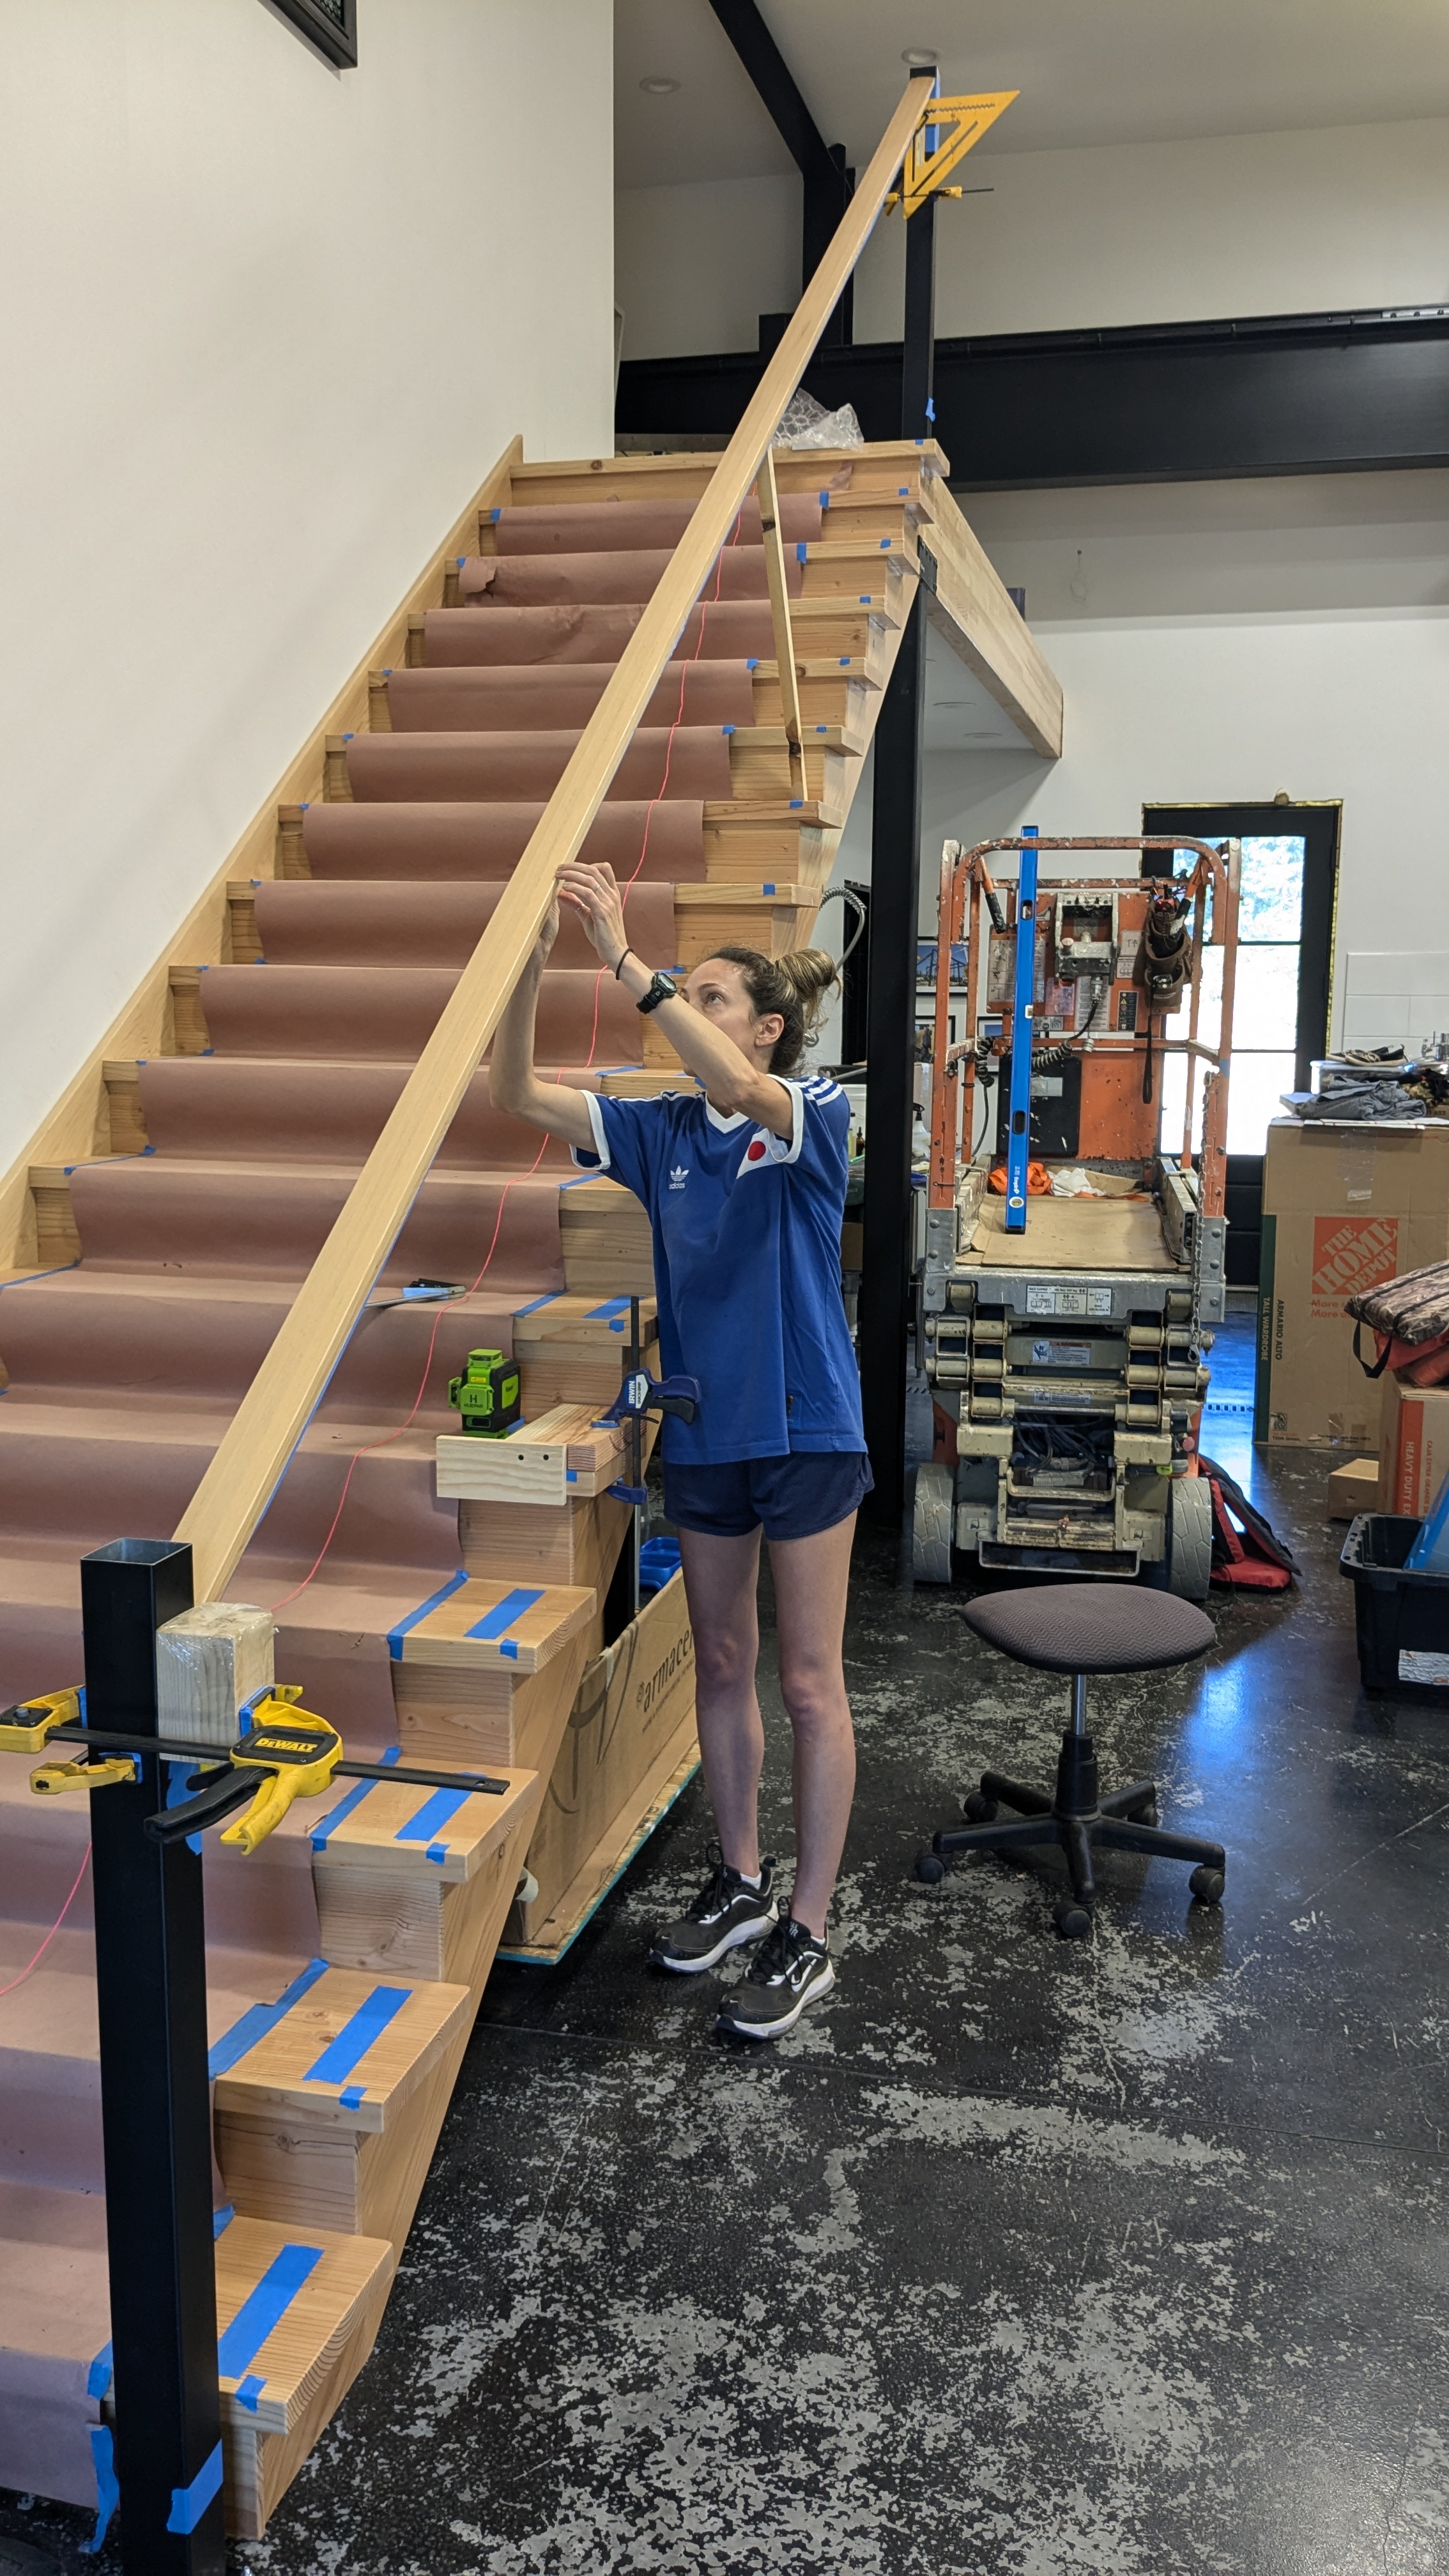
Unfortunately the real stairs weren’t nearly as precise or square as the model. The width and depth of the treads varied from stair to stair, so we couldn’t measure off the outside edges. Sam and I agreed that the most important thing was for everything to follow a straight line up the stairs, so we set up the laser and stringline to mark a centerline for the parts. Sam made a jig to locate the baluster positions along the line.


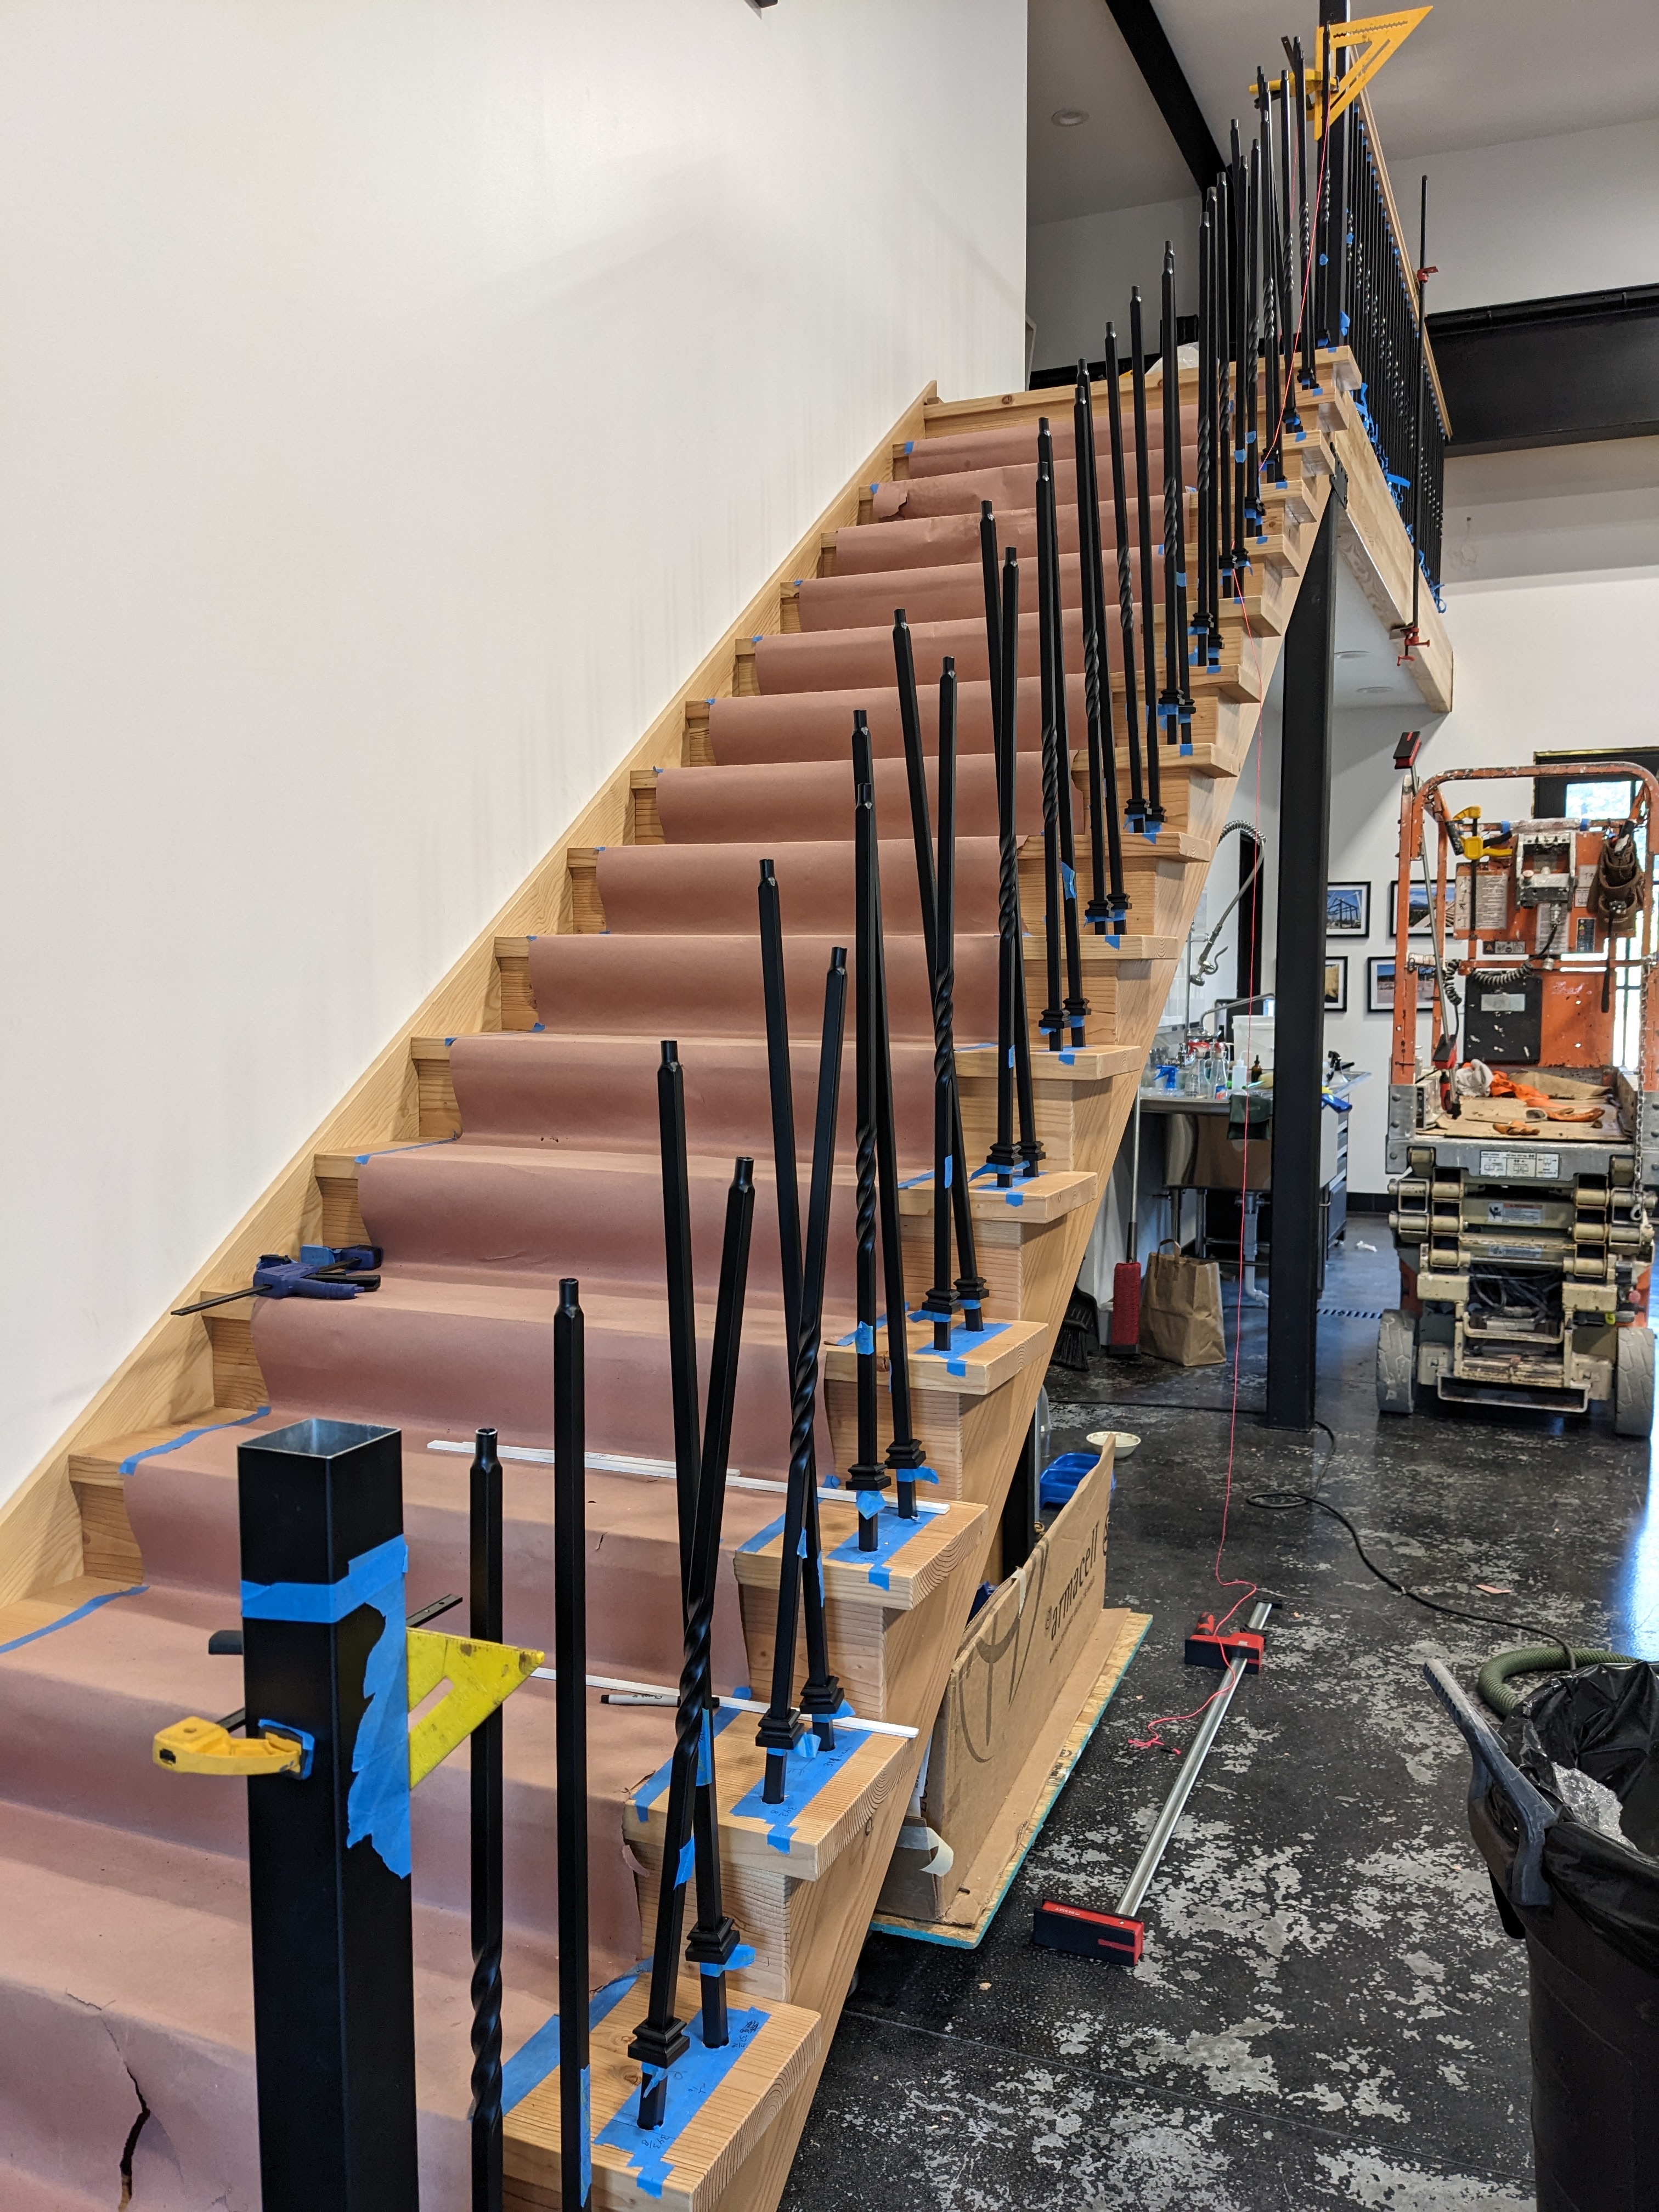
We had to mark the same locations along the handrail. We carefully cut the handrail to length, angles included.
The railing sagged a lot in the middle, so we propped it up.

Then we projected the points on the treads straight up onto the handrail.


The layout for the landing was much easier. We simply marked everything with a tape measure.
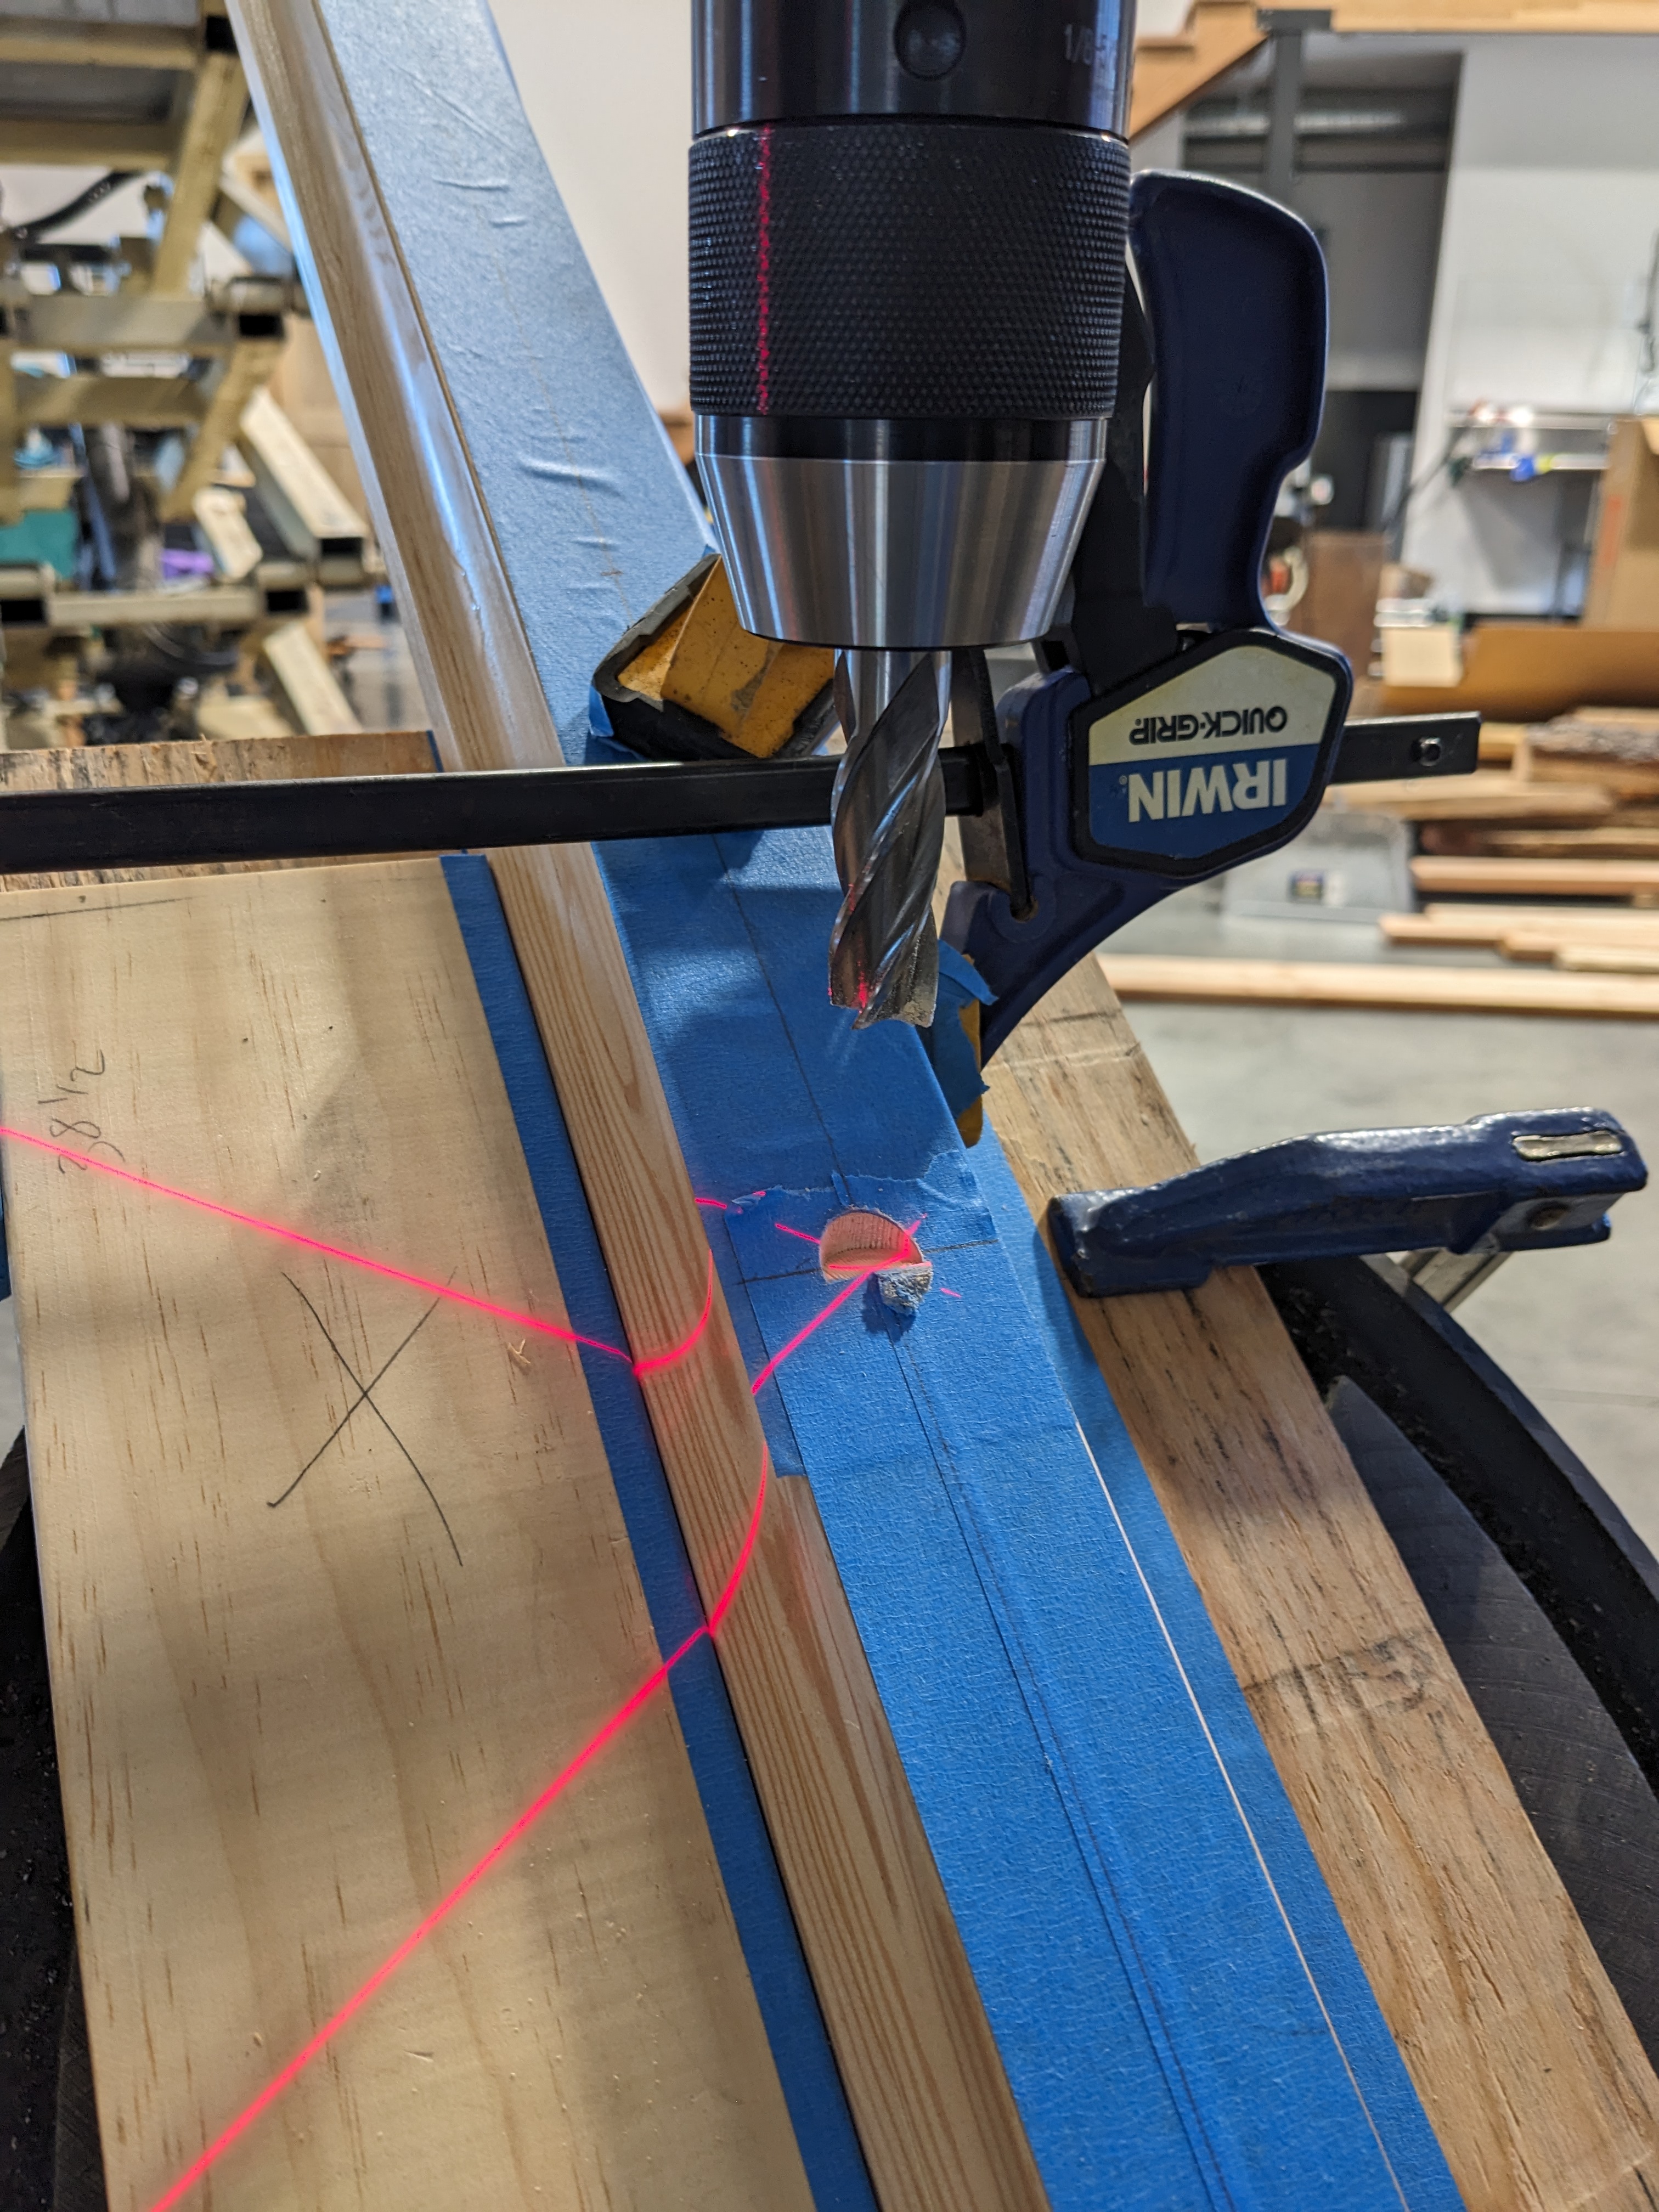
Now it was time to drill! The handrail for the landing was a piece of cake. The sloped section of rail, however, presented some challenges. First, we set the handrail on the drill press at an angle.

Sam drilled a test piece first. He used an end mill to spot face the railing before drilling the holes.

After 2 of 3 successful test holes, Sam was ready. I wanted to see at least one more successful hole, but Sam didn’t want to dull the bits.

The drilling went well, but the handrail quickly ran out of travel.
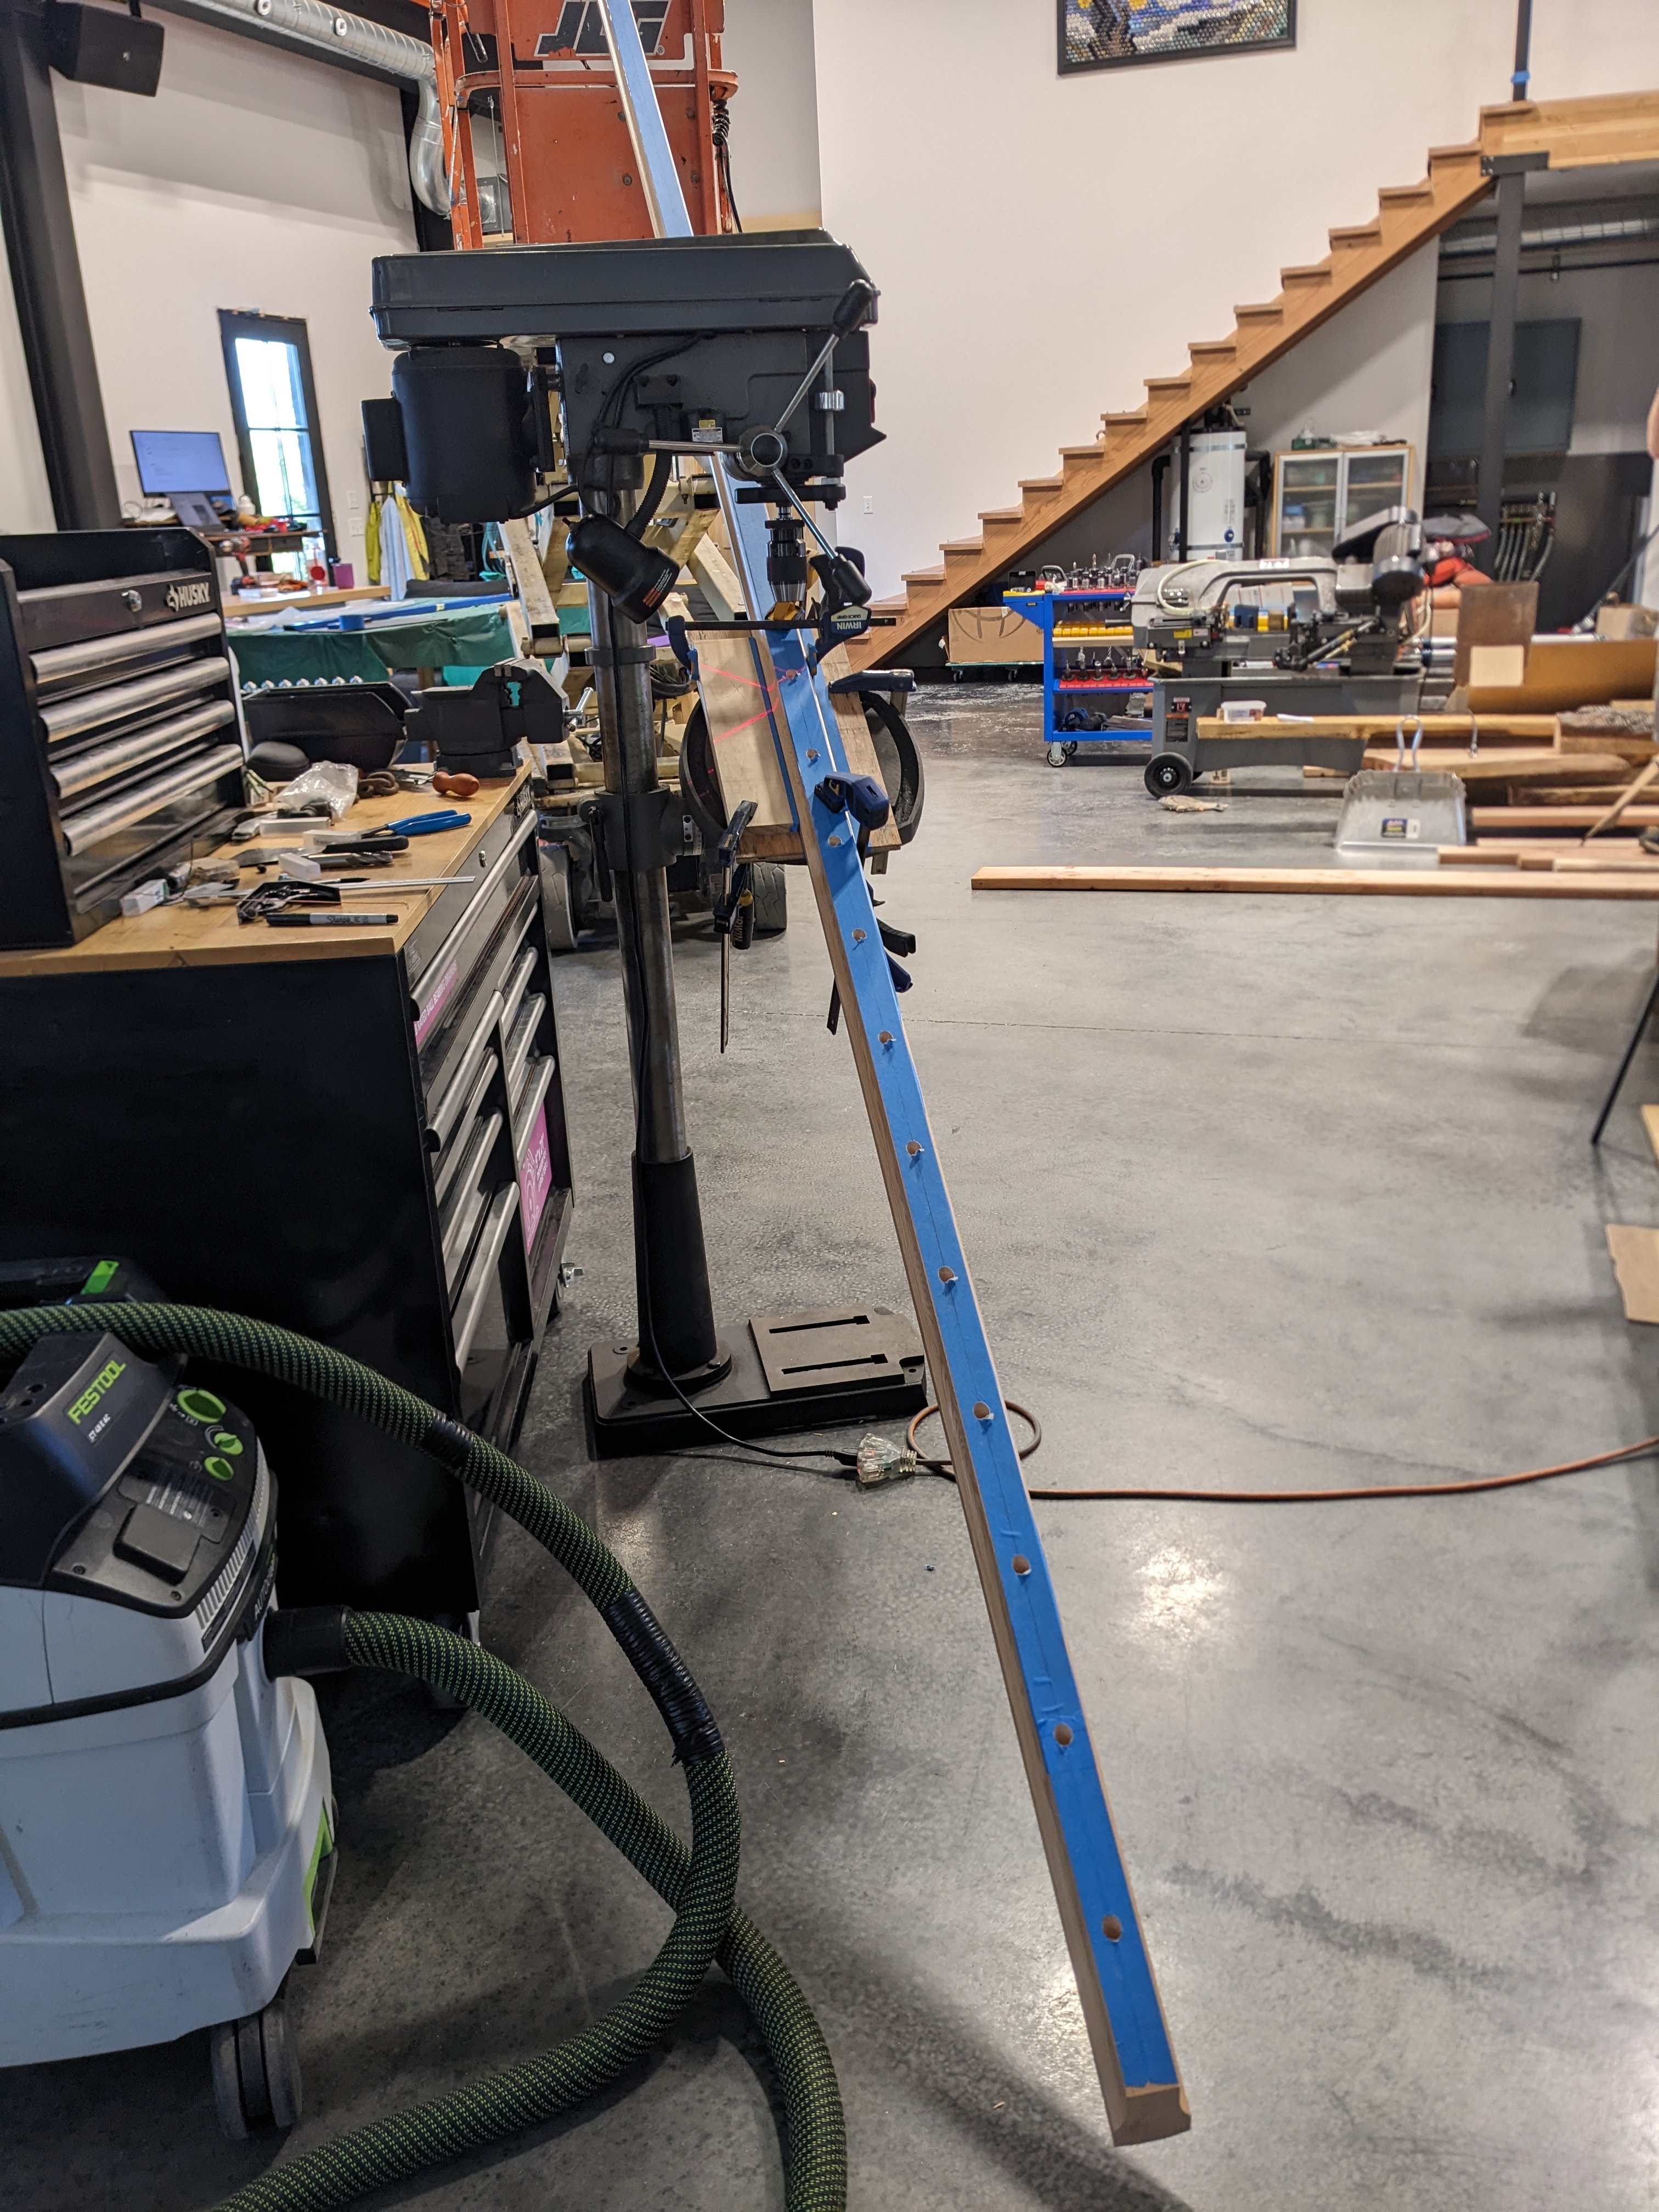
Sam and I got more creative and used the crane to tilt the drill press.

This worked surprisingly well. After many hours we were done. And with no slip-ups!


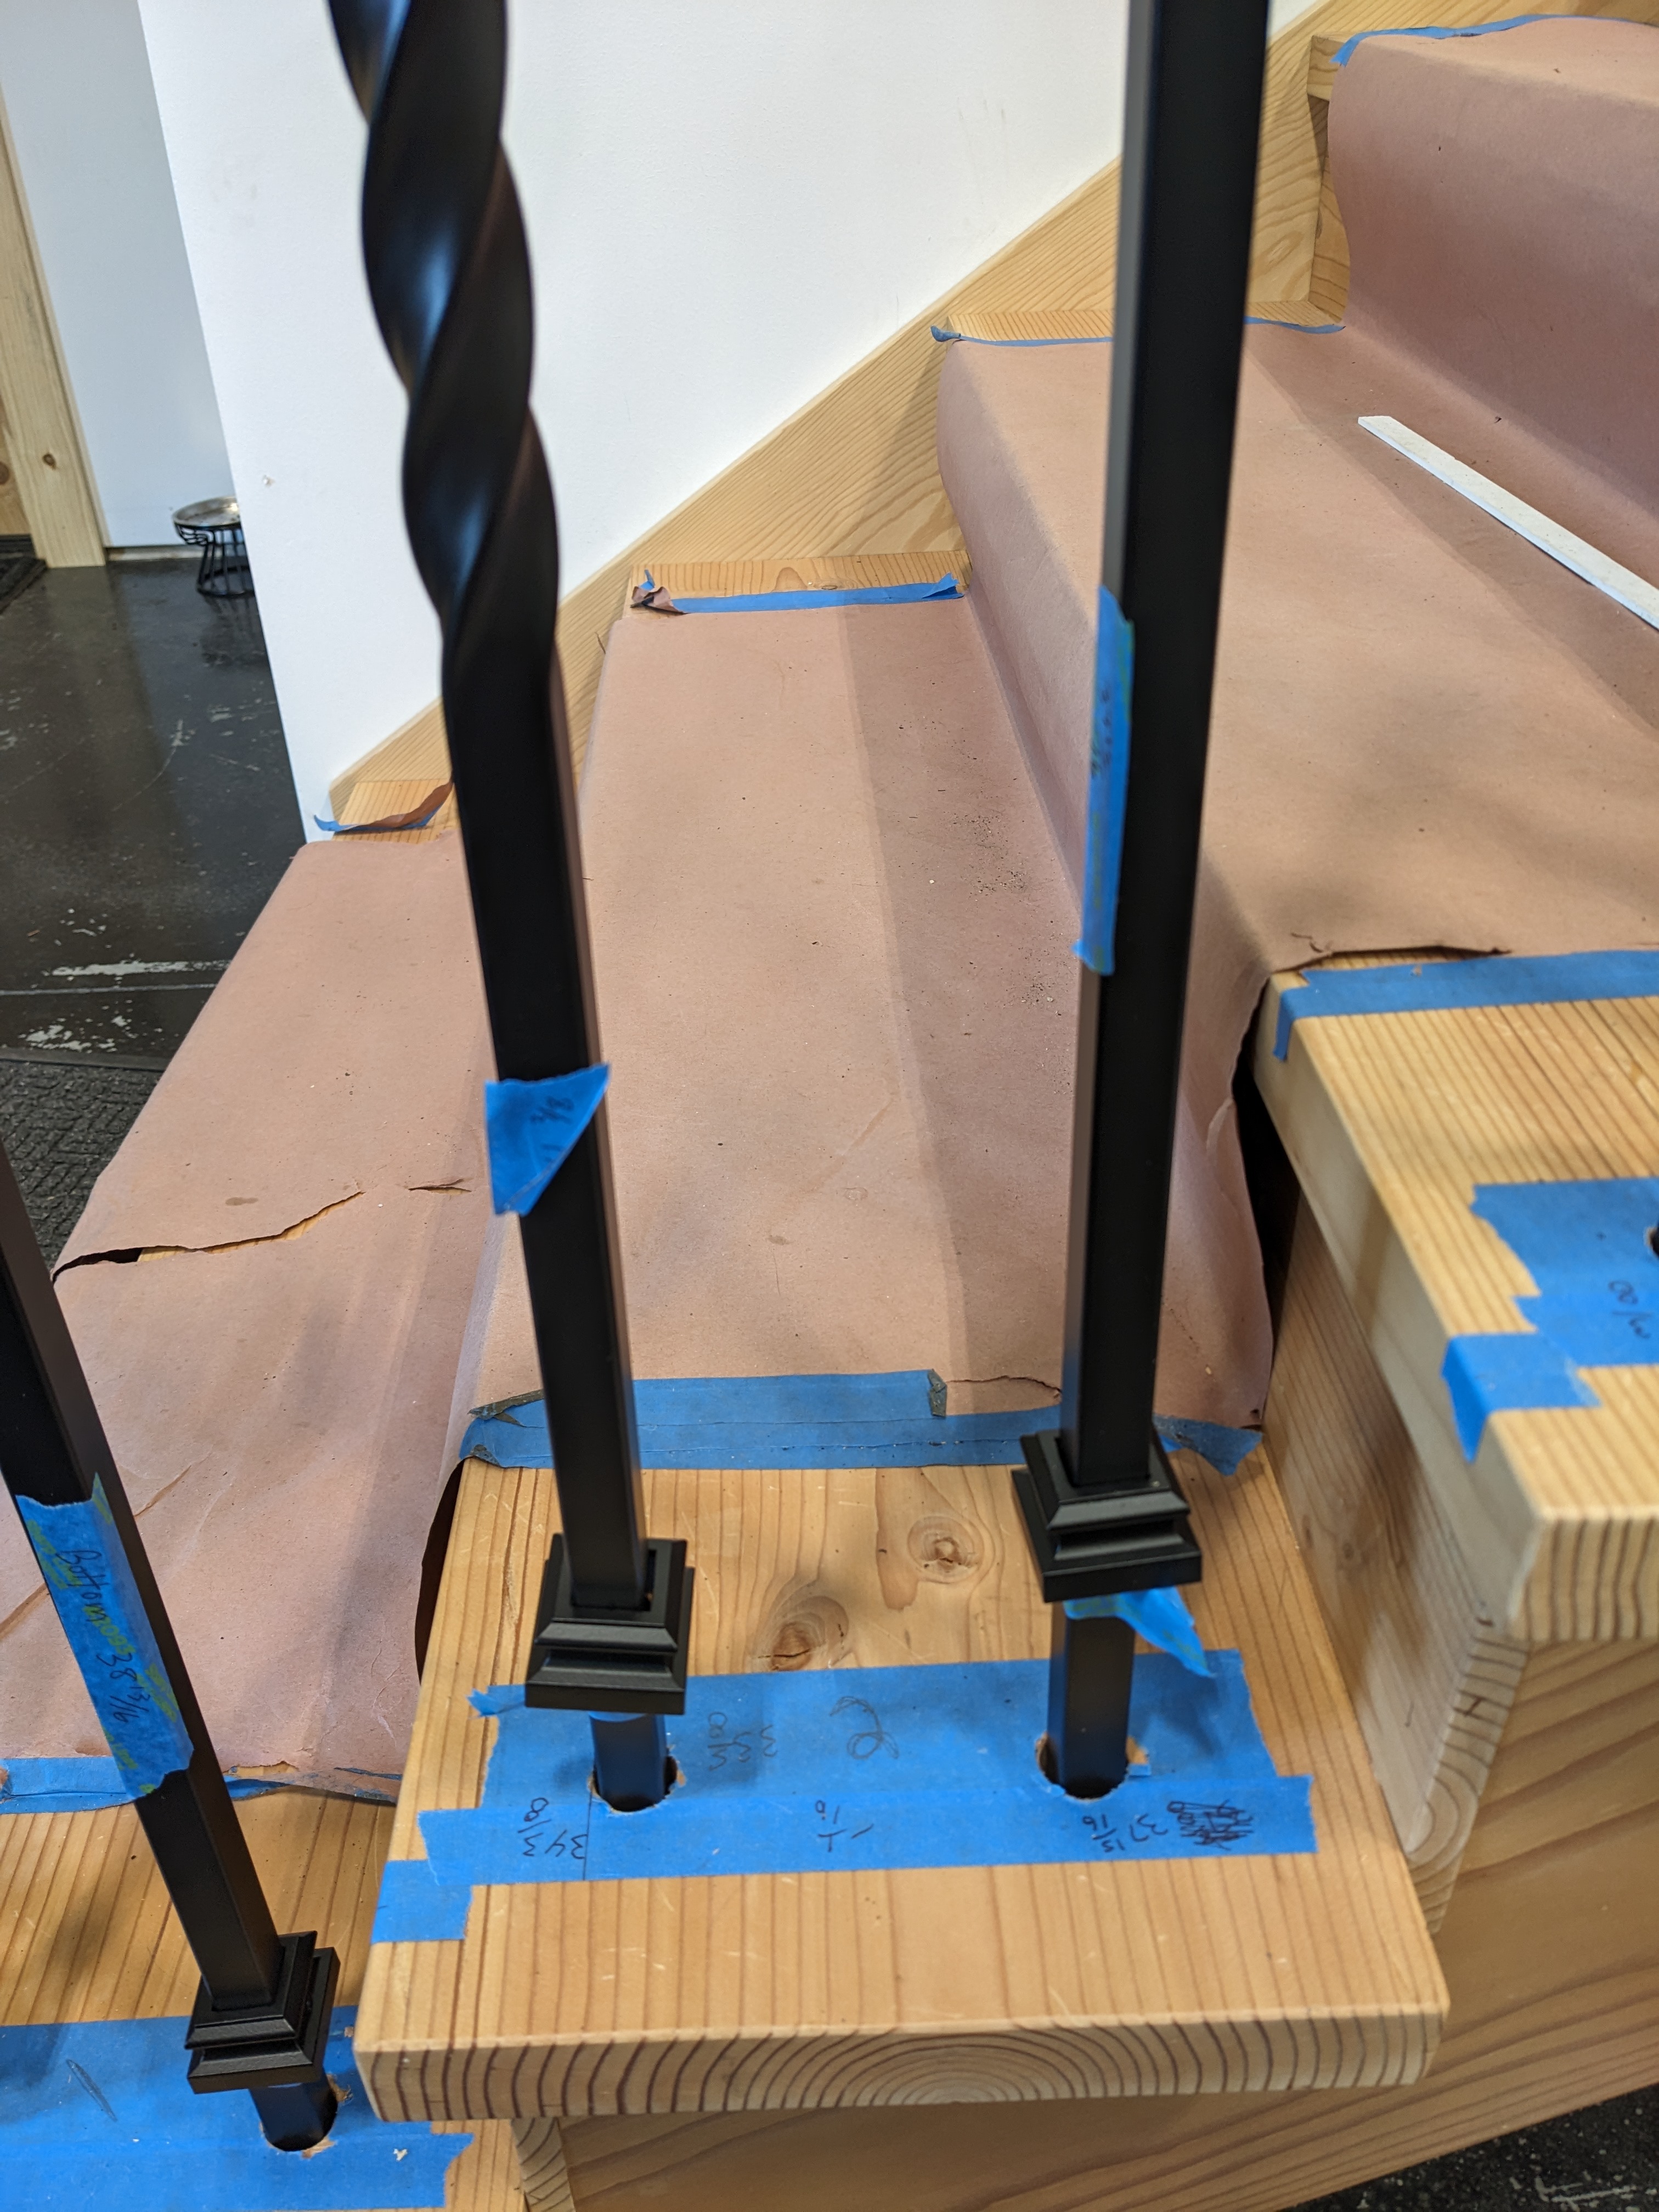
Well, we were done with the handrails. We still had to drill the treads, which we were more apprehensive about. We began on the landing. Nothing bad happened, but when we test fit the balusters, we discovered that only half of them fit! Although they were all advertised to be 3/4″, the twisted ones were slightly larger. We couldn’t drill new holes, so Sam had to grind down the tips of the balusters!

This extra step wasted a lot of time, so Sam ordered a larger forstner bit before drilling the lower section of stairs.

At this point, we called up Douglas to help us. We wrongfully assumed he had worked on a stair railing before, but his help was still valuable.

We needed to cut the balusters to the correct length. We set up the handrails again to measure from the bottom of the stair holes to the bottom of the handrail holes. Douglas concocted a special measuring stick for this.

Many of the balusters were a unique length. After marking (and labeling them), we cut each one on the bandsaw.

Finally, after watching another Youtube video, we were ready for the big installation! Again, we started with the landing since it was easier. We got all parts in place before gluing the ends of the balusters.


As if enough of these steps weren’t stressful, the label on the epoxy warned us of a 15 minute cure time! Luckily Douglas was there. I’m not sure how the carpenters on Youtube do this part by themselves. We definitely needed 6 hands.


We graduated from the landing and moved on the to stairs…

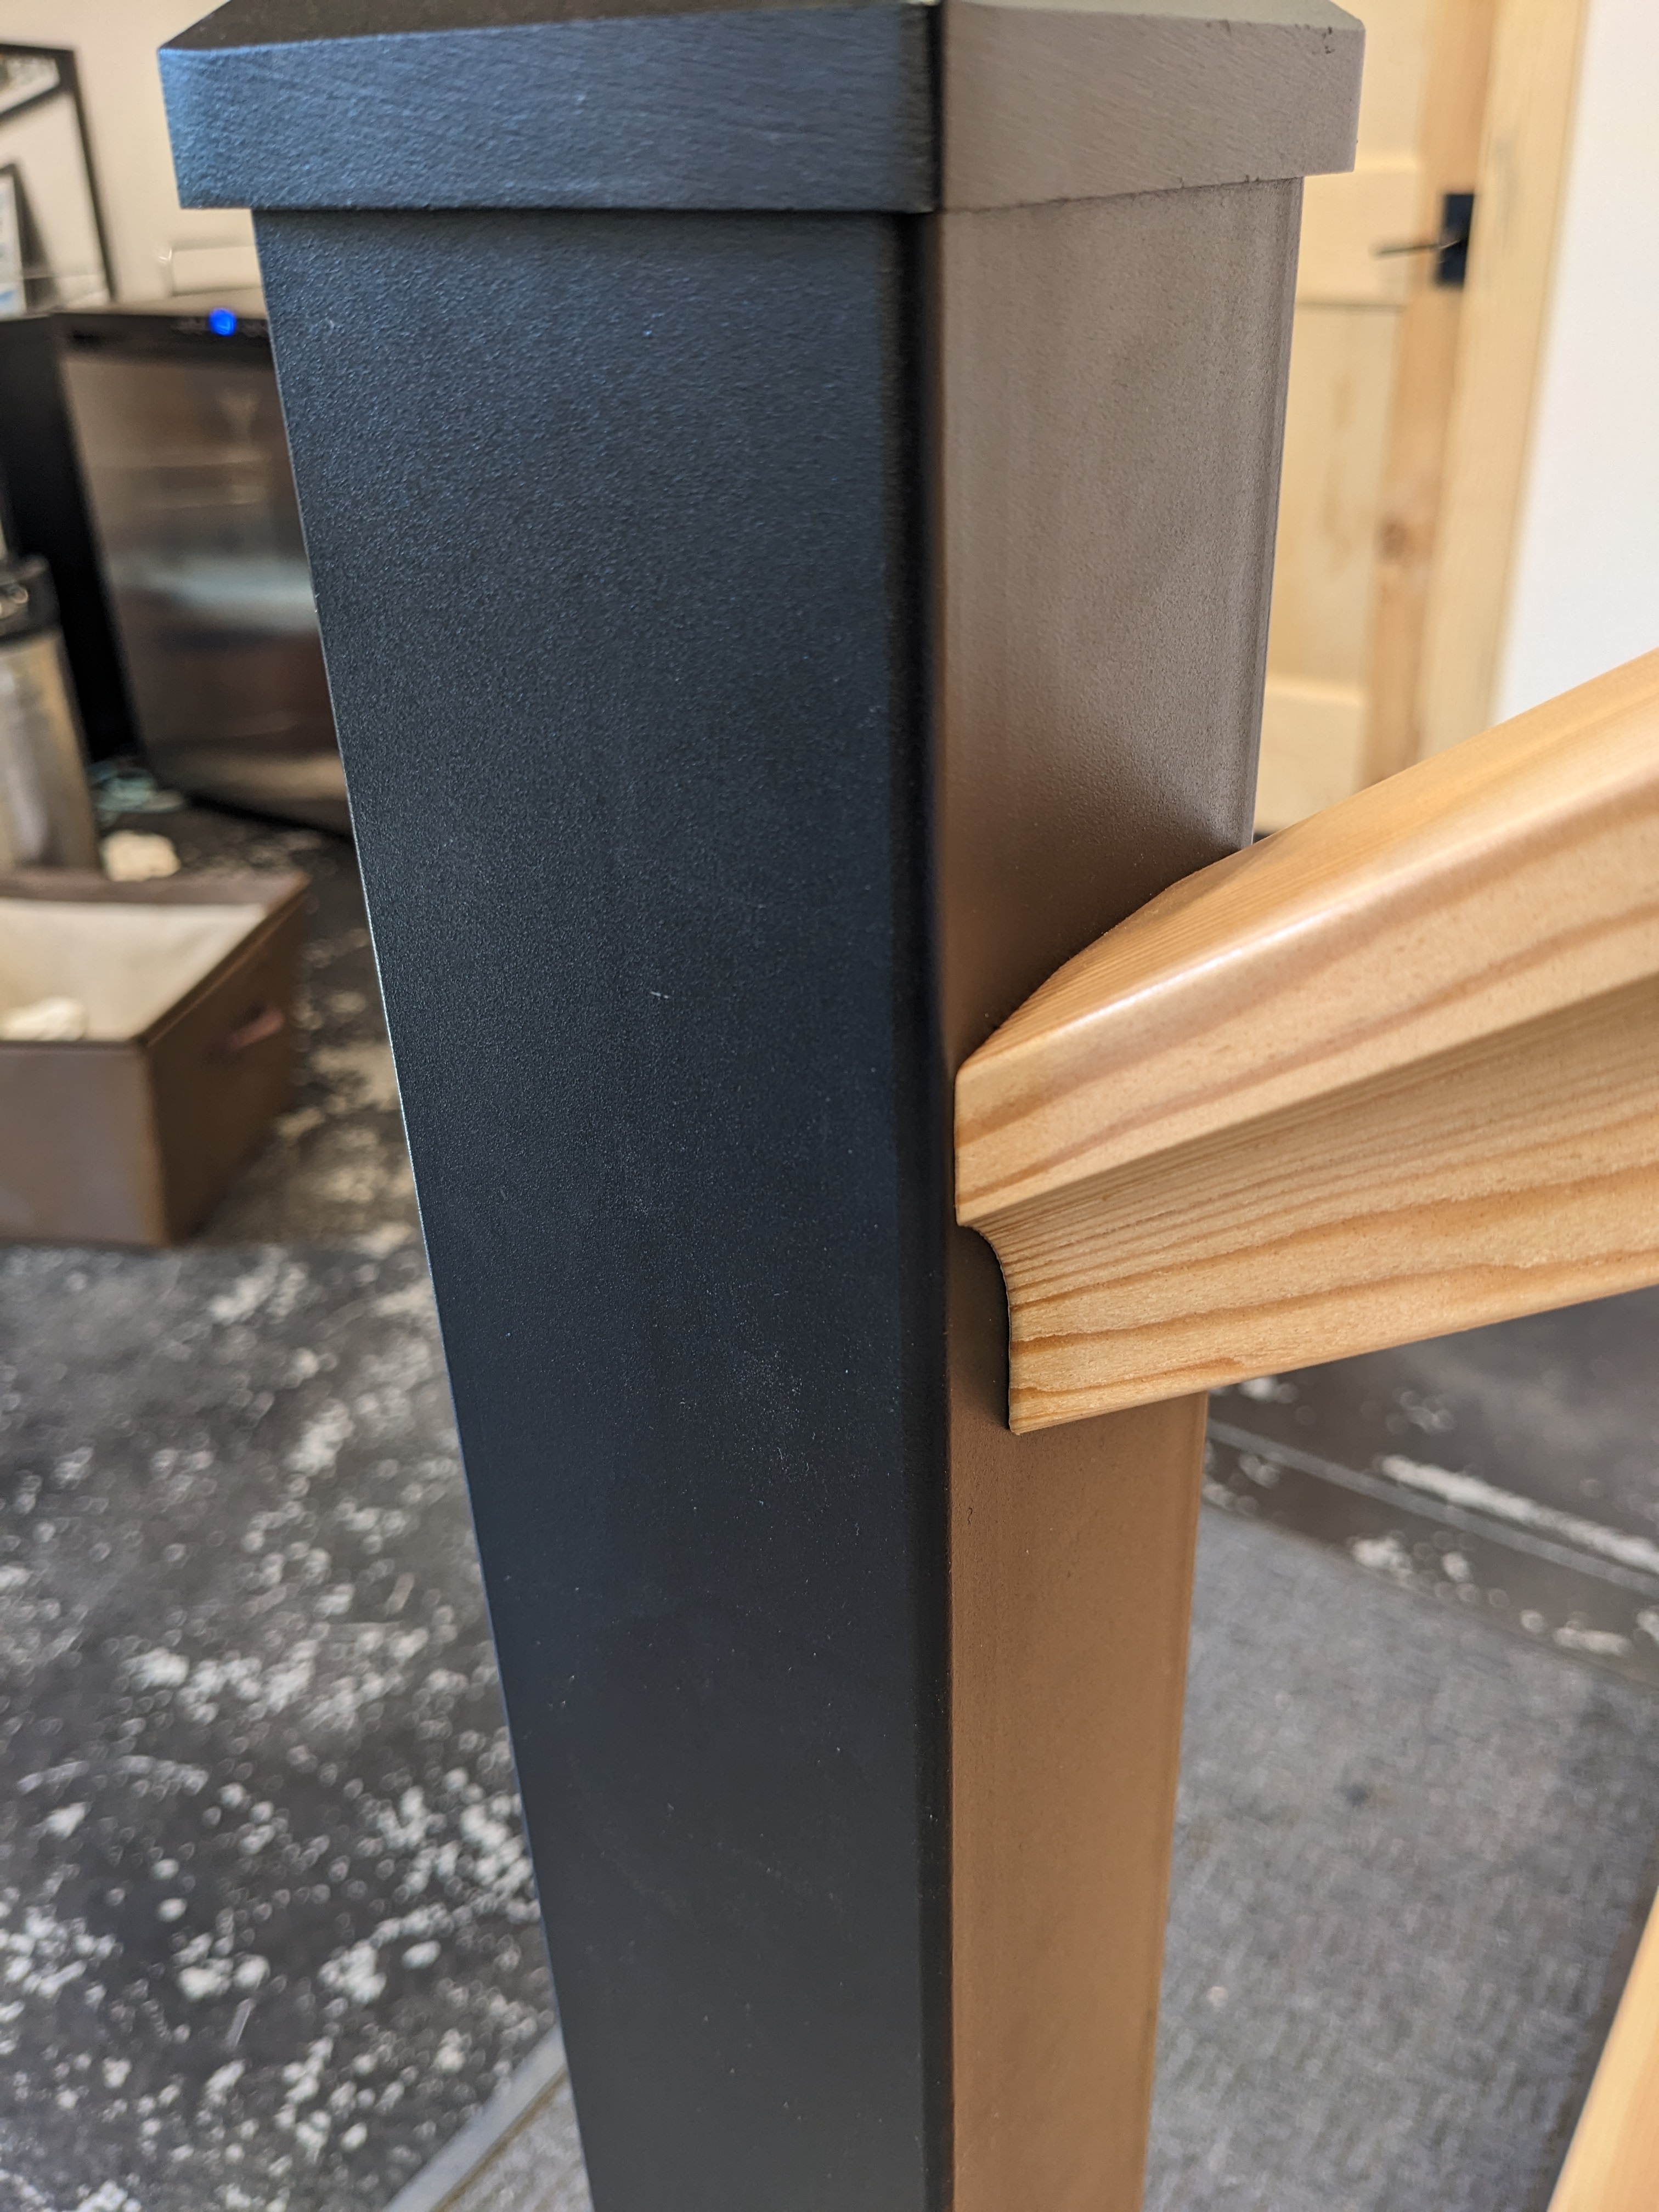
Sam screwed the handrails into the newel posts. Prior to the final installation, he marked the posts with some special tooling and drilled holes in the posts.

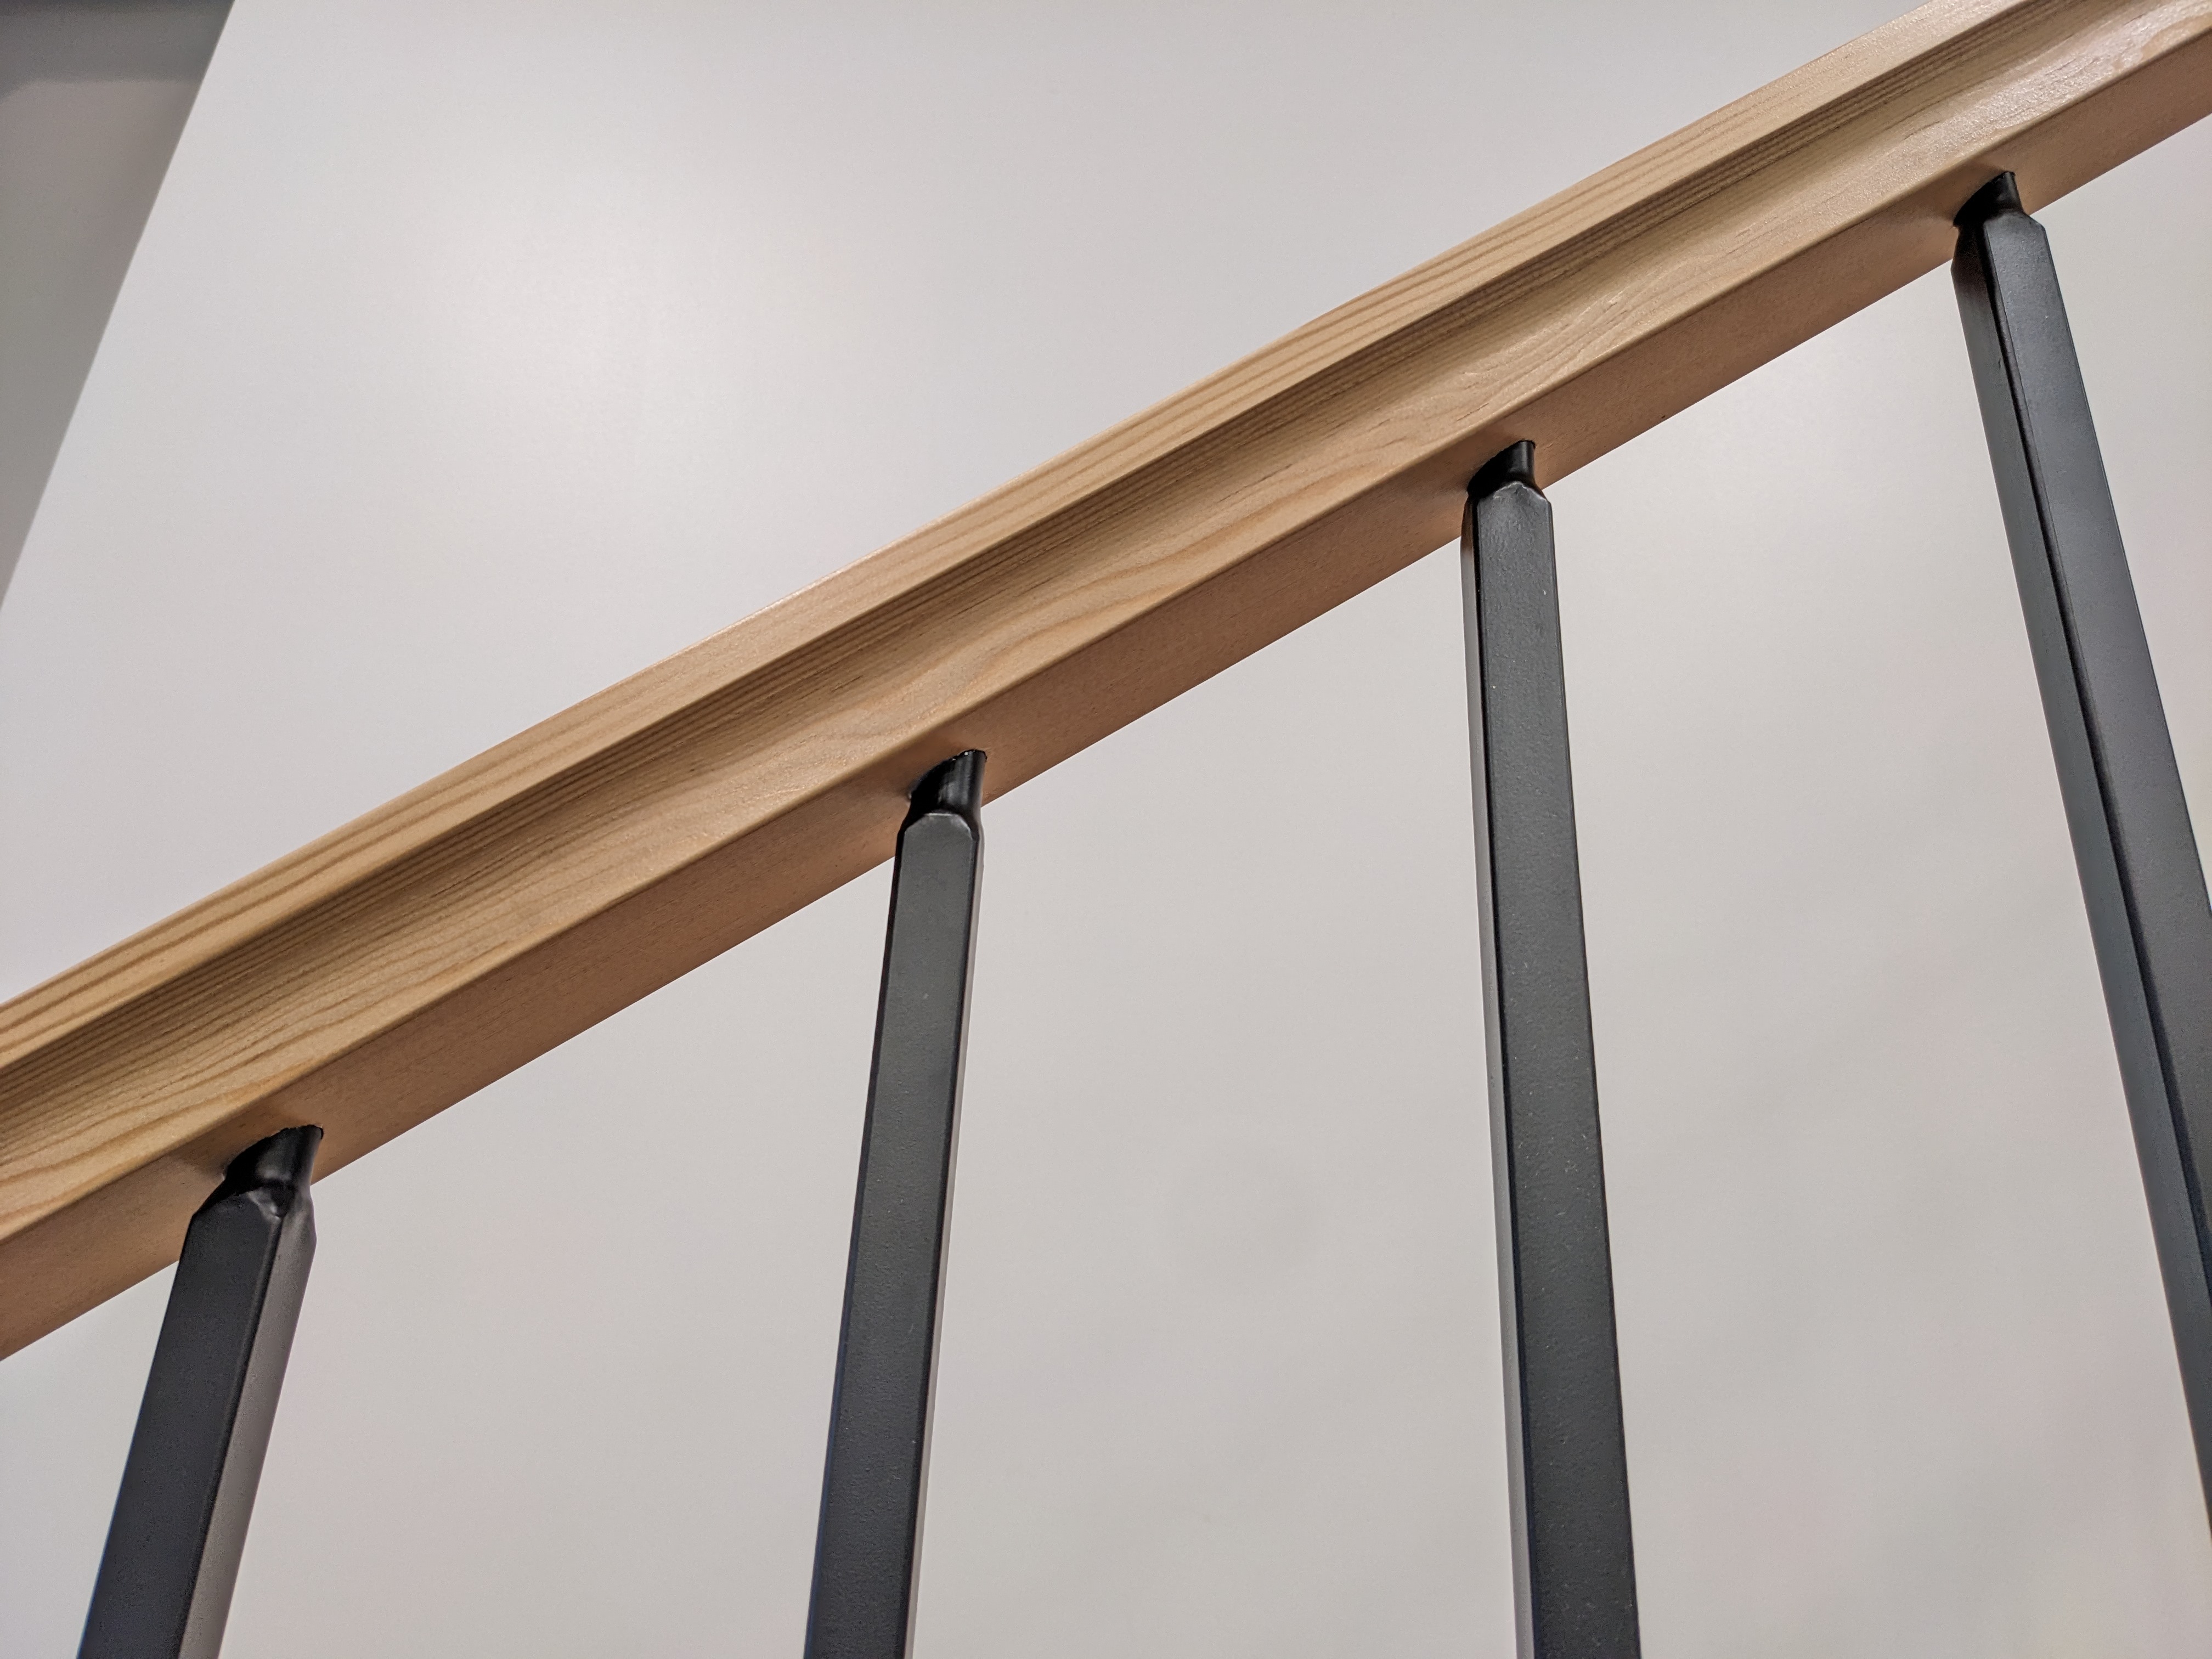
The glue dried quickly, as promised. We stripped the masking and secured the shoes in place. The shoes hide a lot of imperfections. I have a new appreciation of metal balusters that fit snug without shoes.

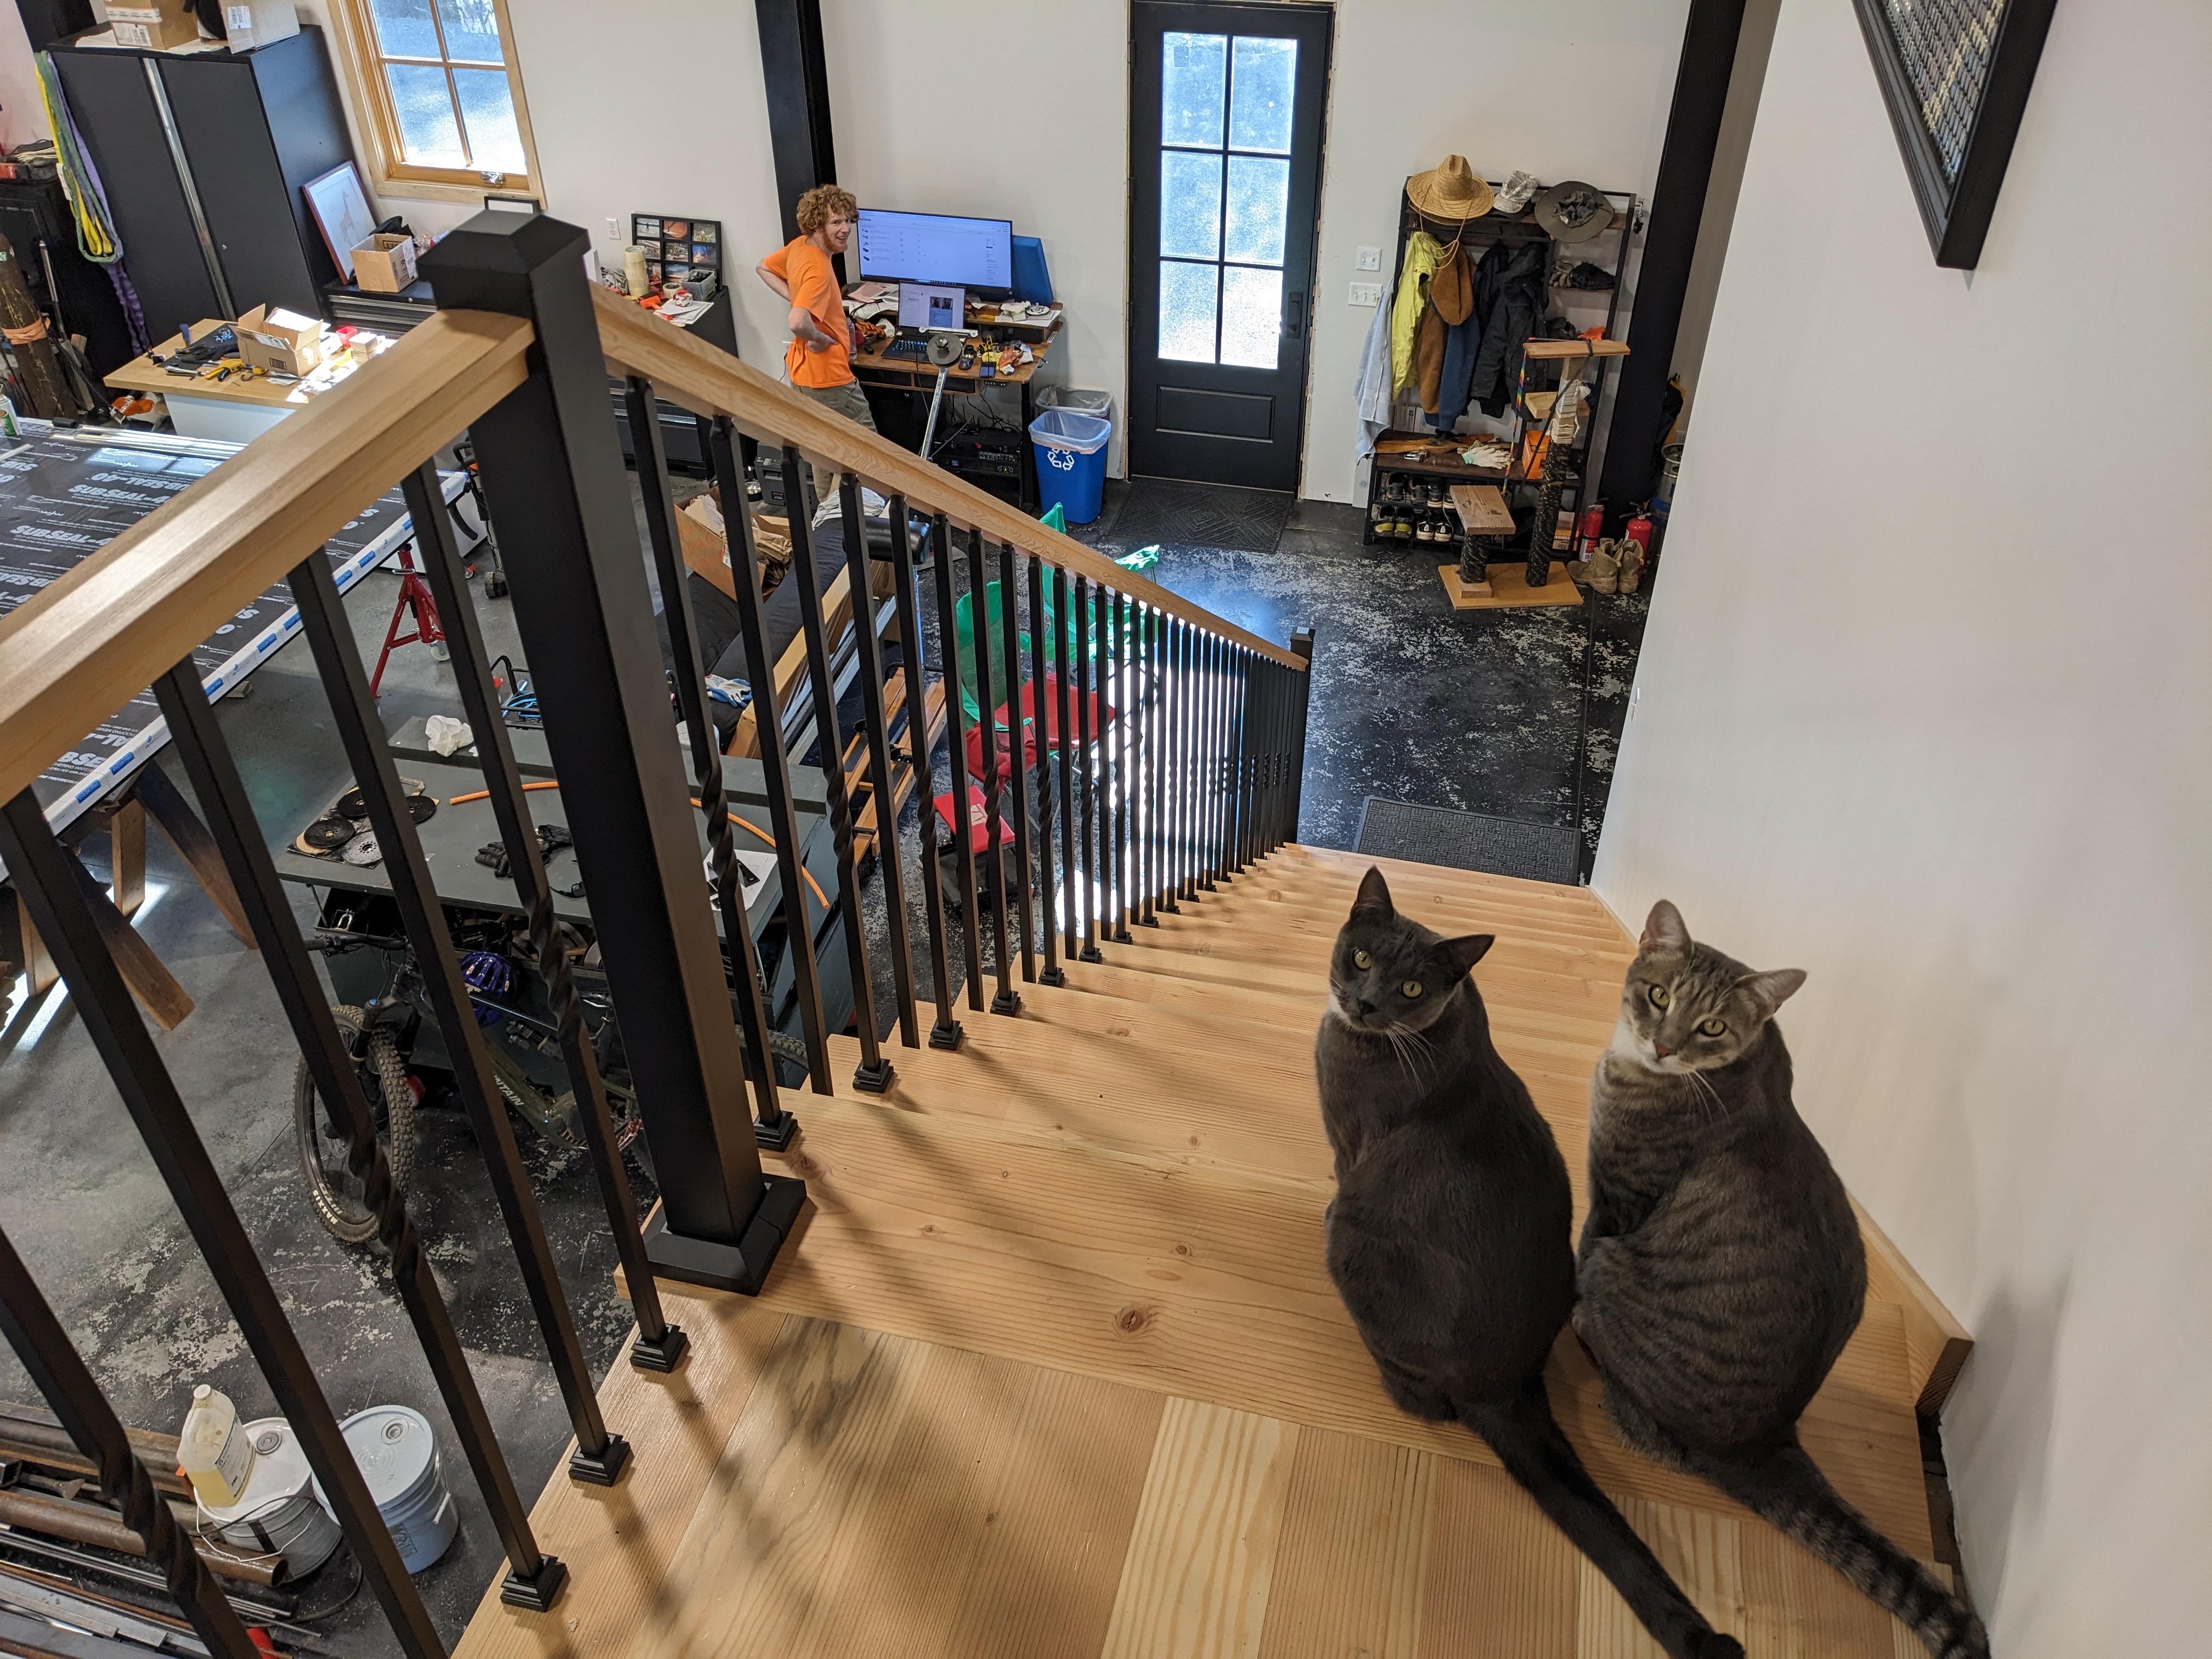
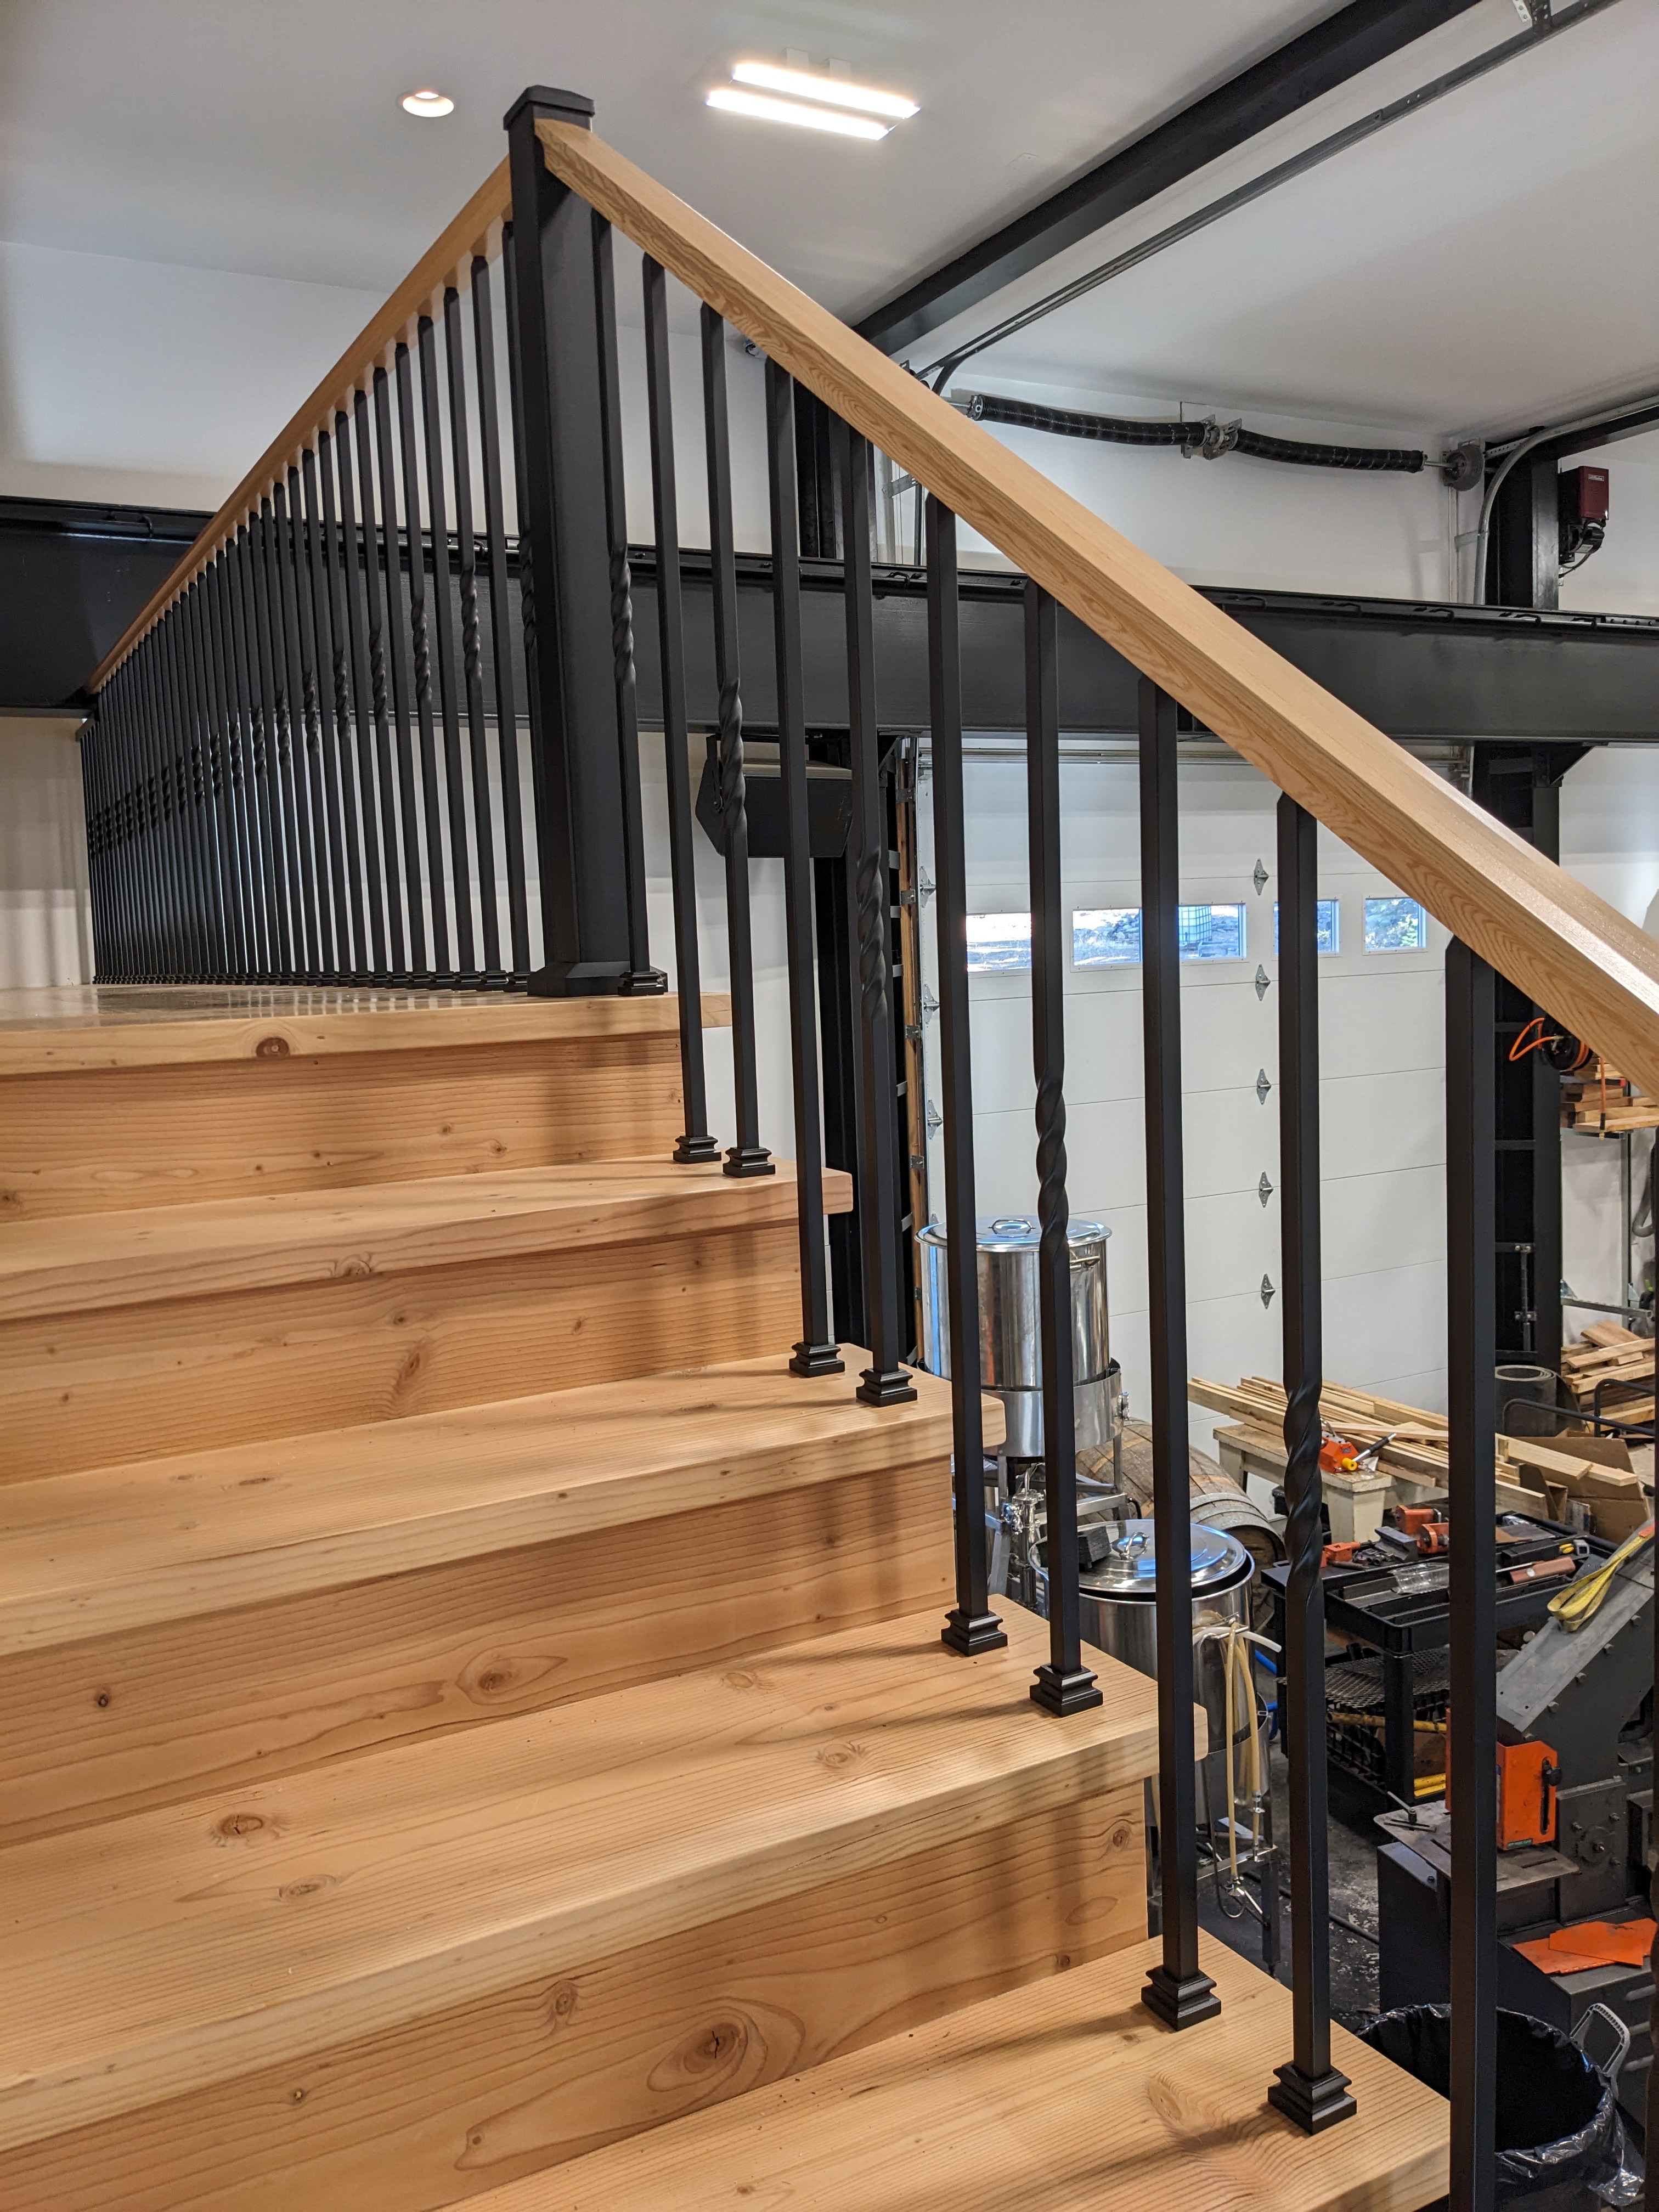
The railing looks great! Everything is straight and sturdy!

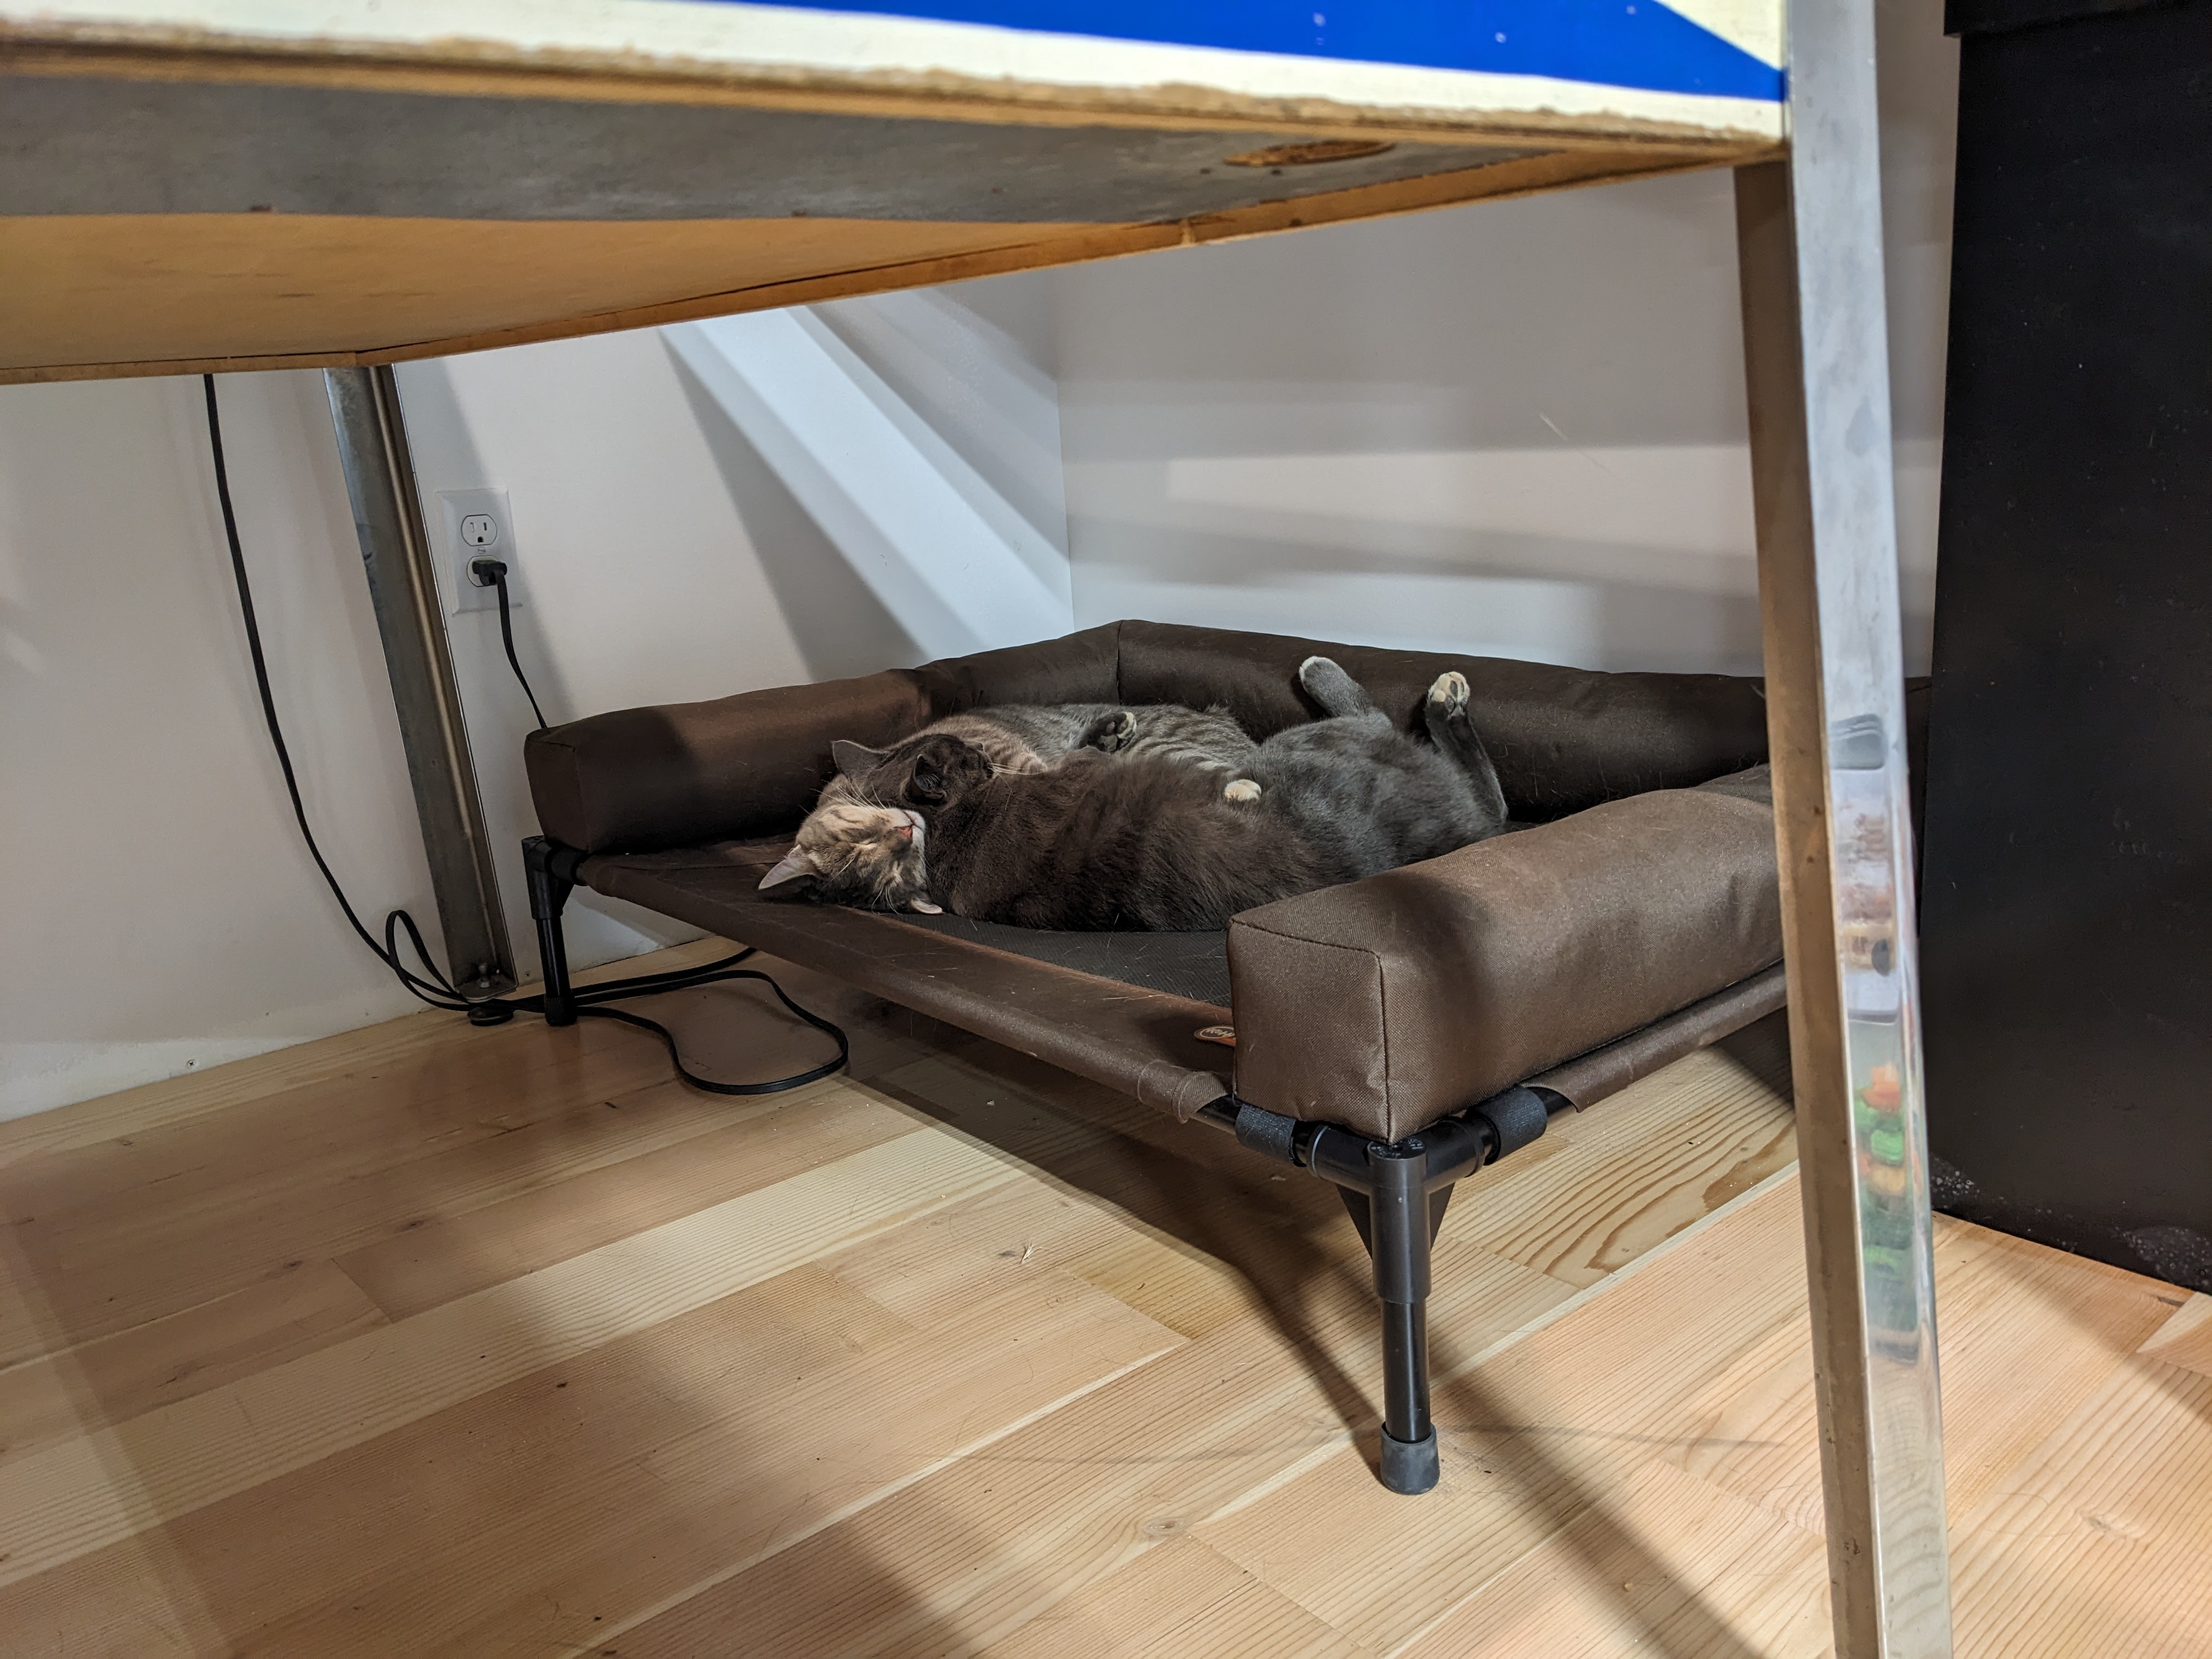
The cats love the railing too. They immediately started using their neglected bed upstairs. Buster is ecstatic that the protective paper is finally gone- he no longer has to tiptoe down the edge that the paper didn’t cover. Smokey, being afraid of heights, feels much safer with the railing.