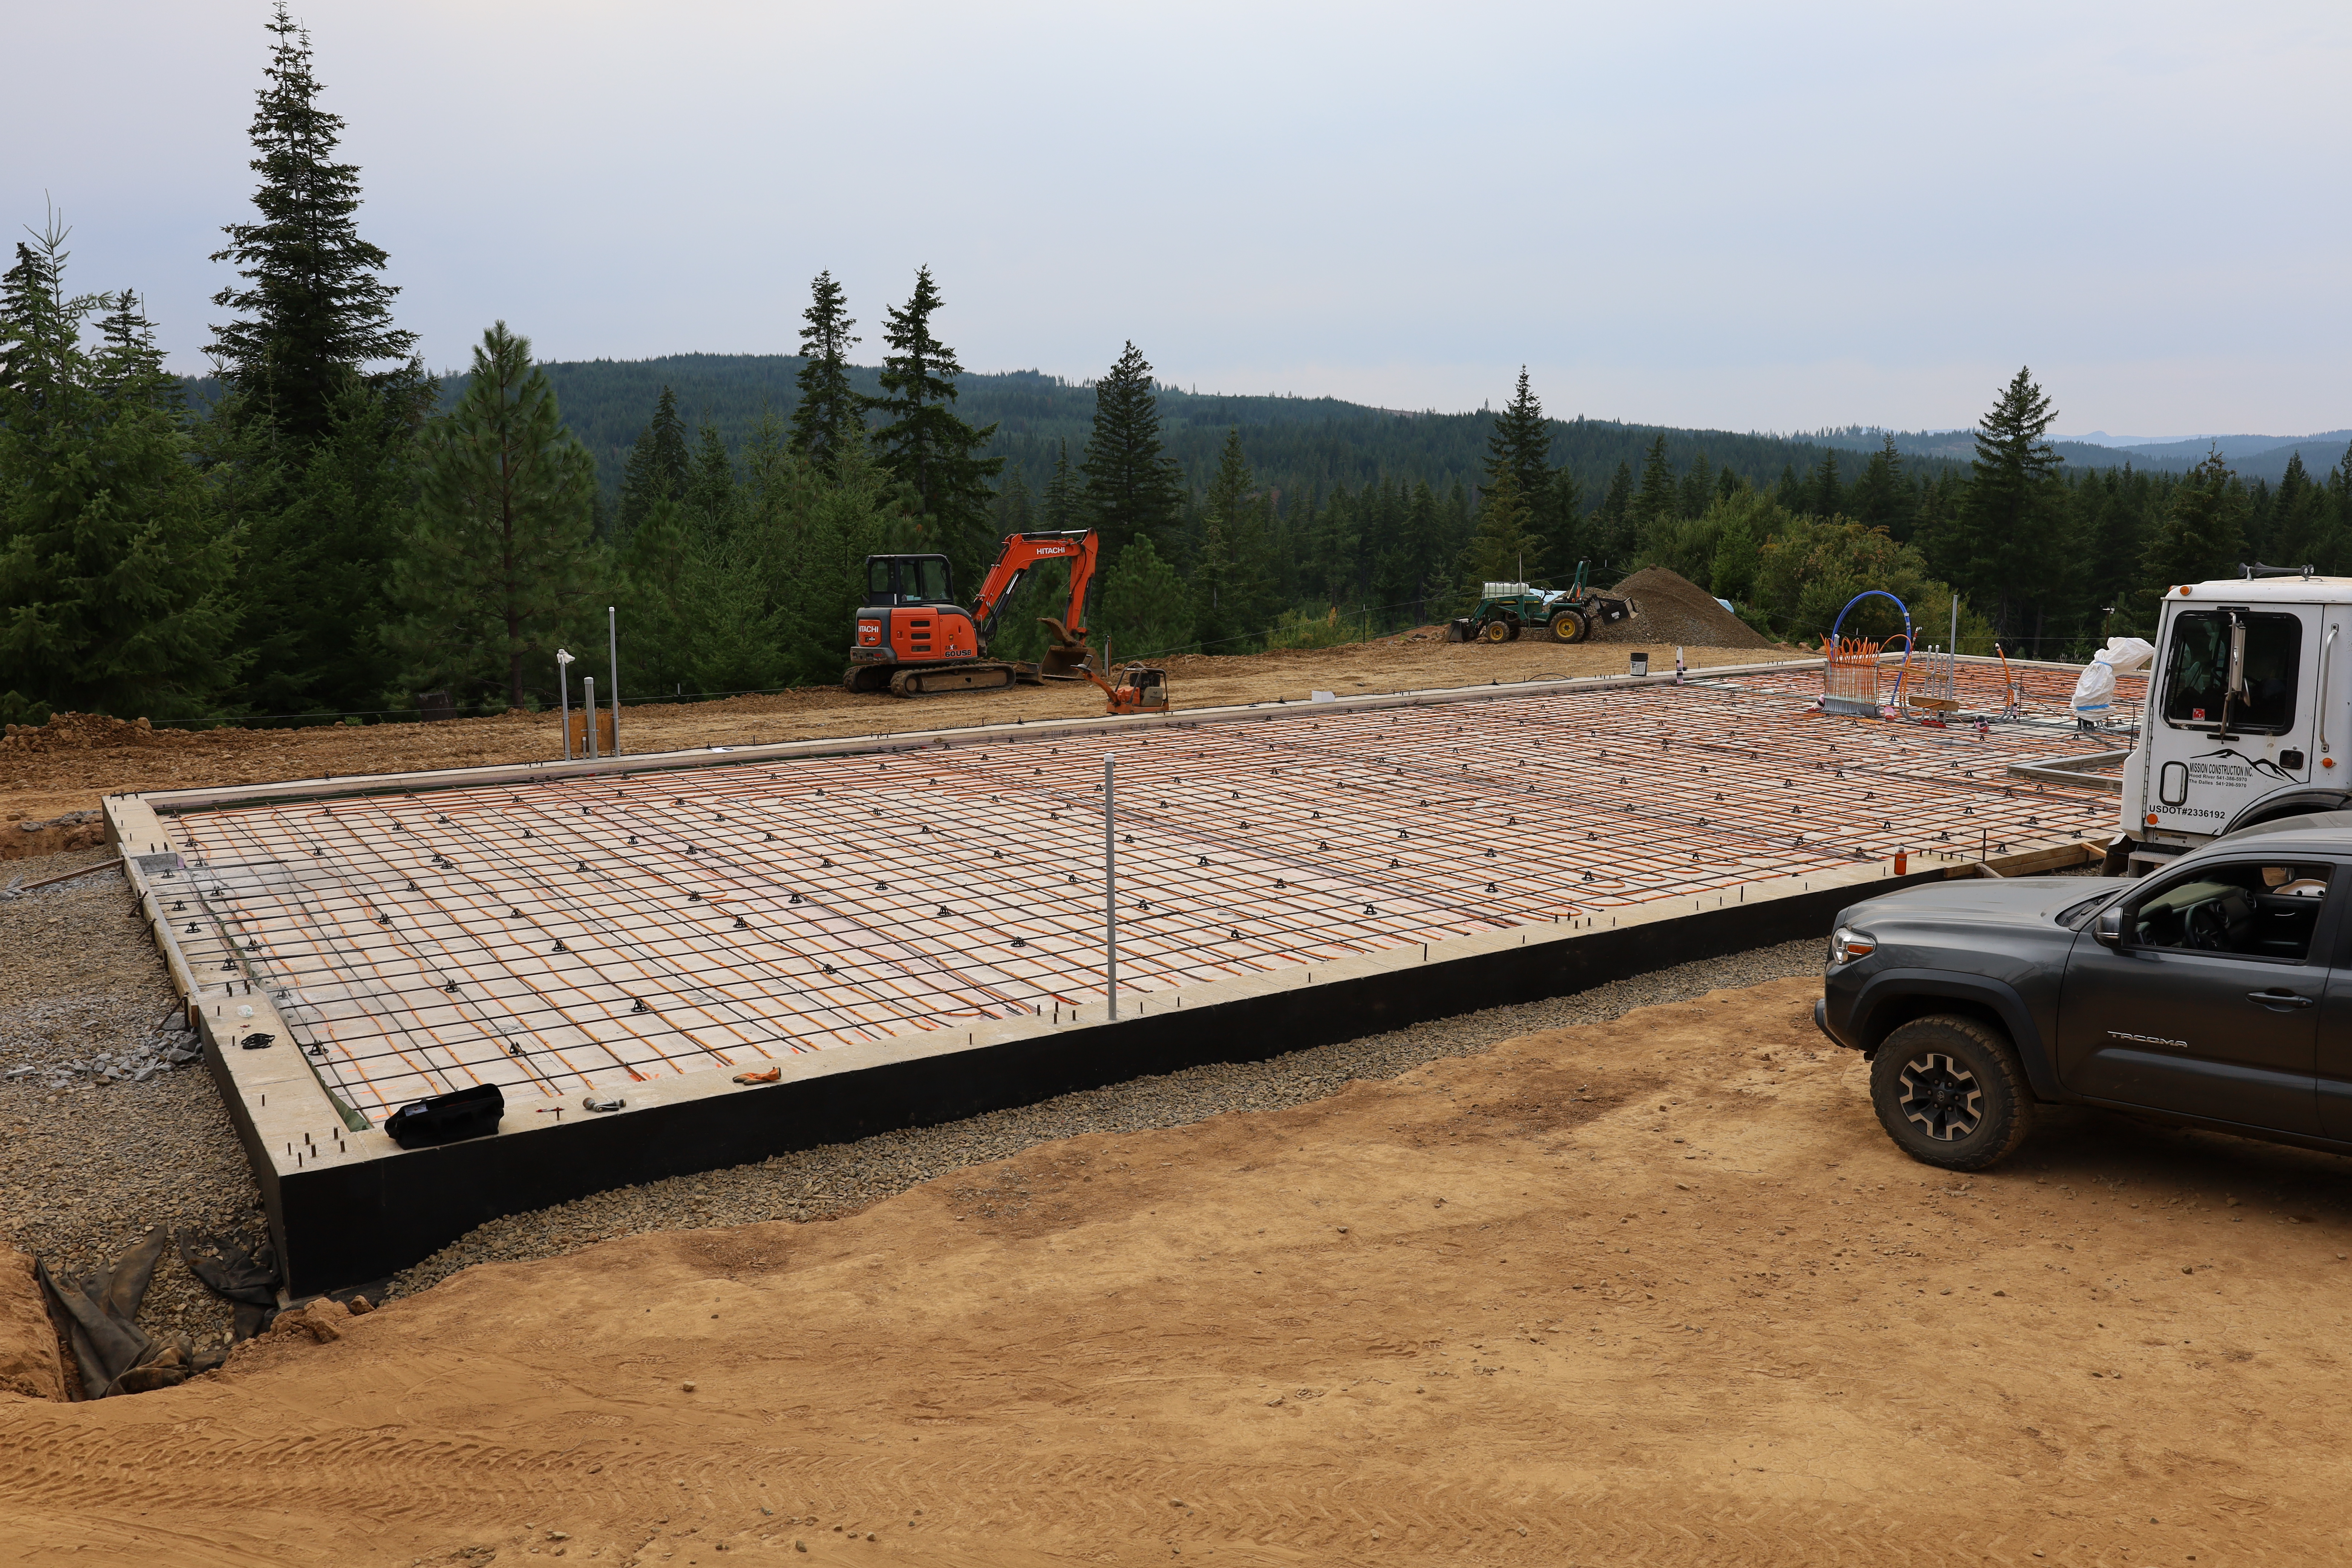
We reached another big milestone- pouring the slab! Since we have radiant heat and most of the building is a workshop, we decided to leave all of the floors as exposed concrete. Cracking, texture, sheen, color, and the general appearance were all concerns, especially in the living area. Luckily, Matt and his crew were up to the challenge of pouring us a big beautiful slab!
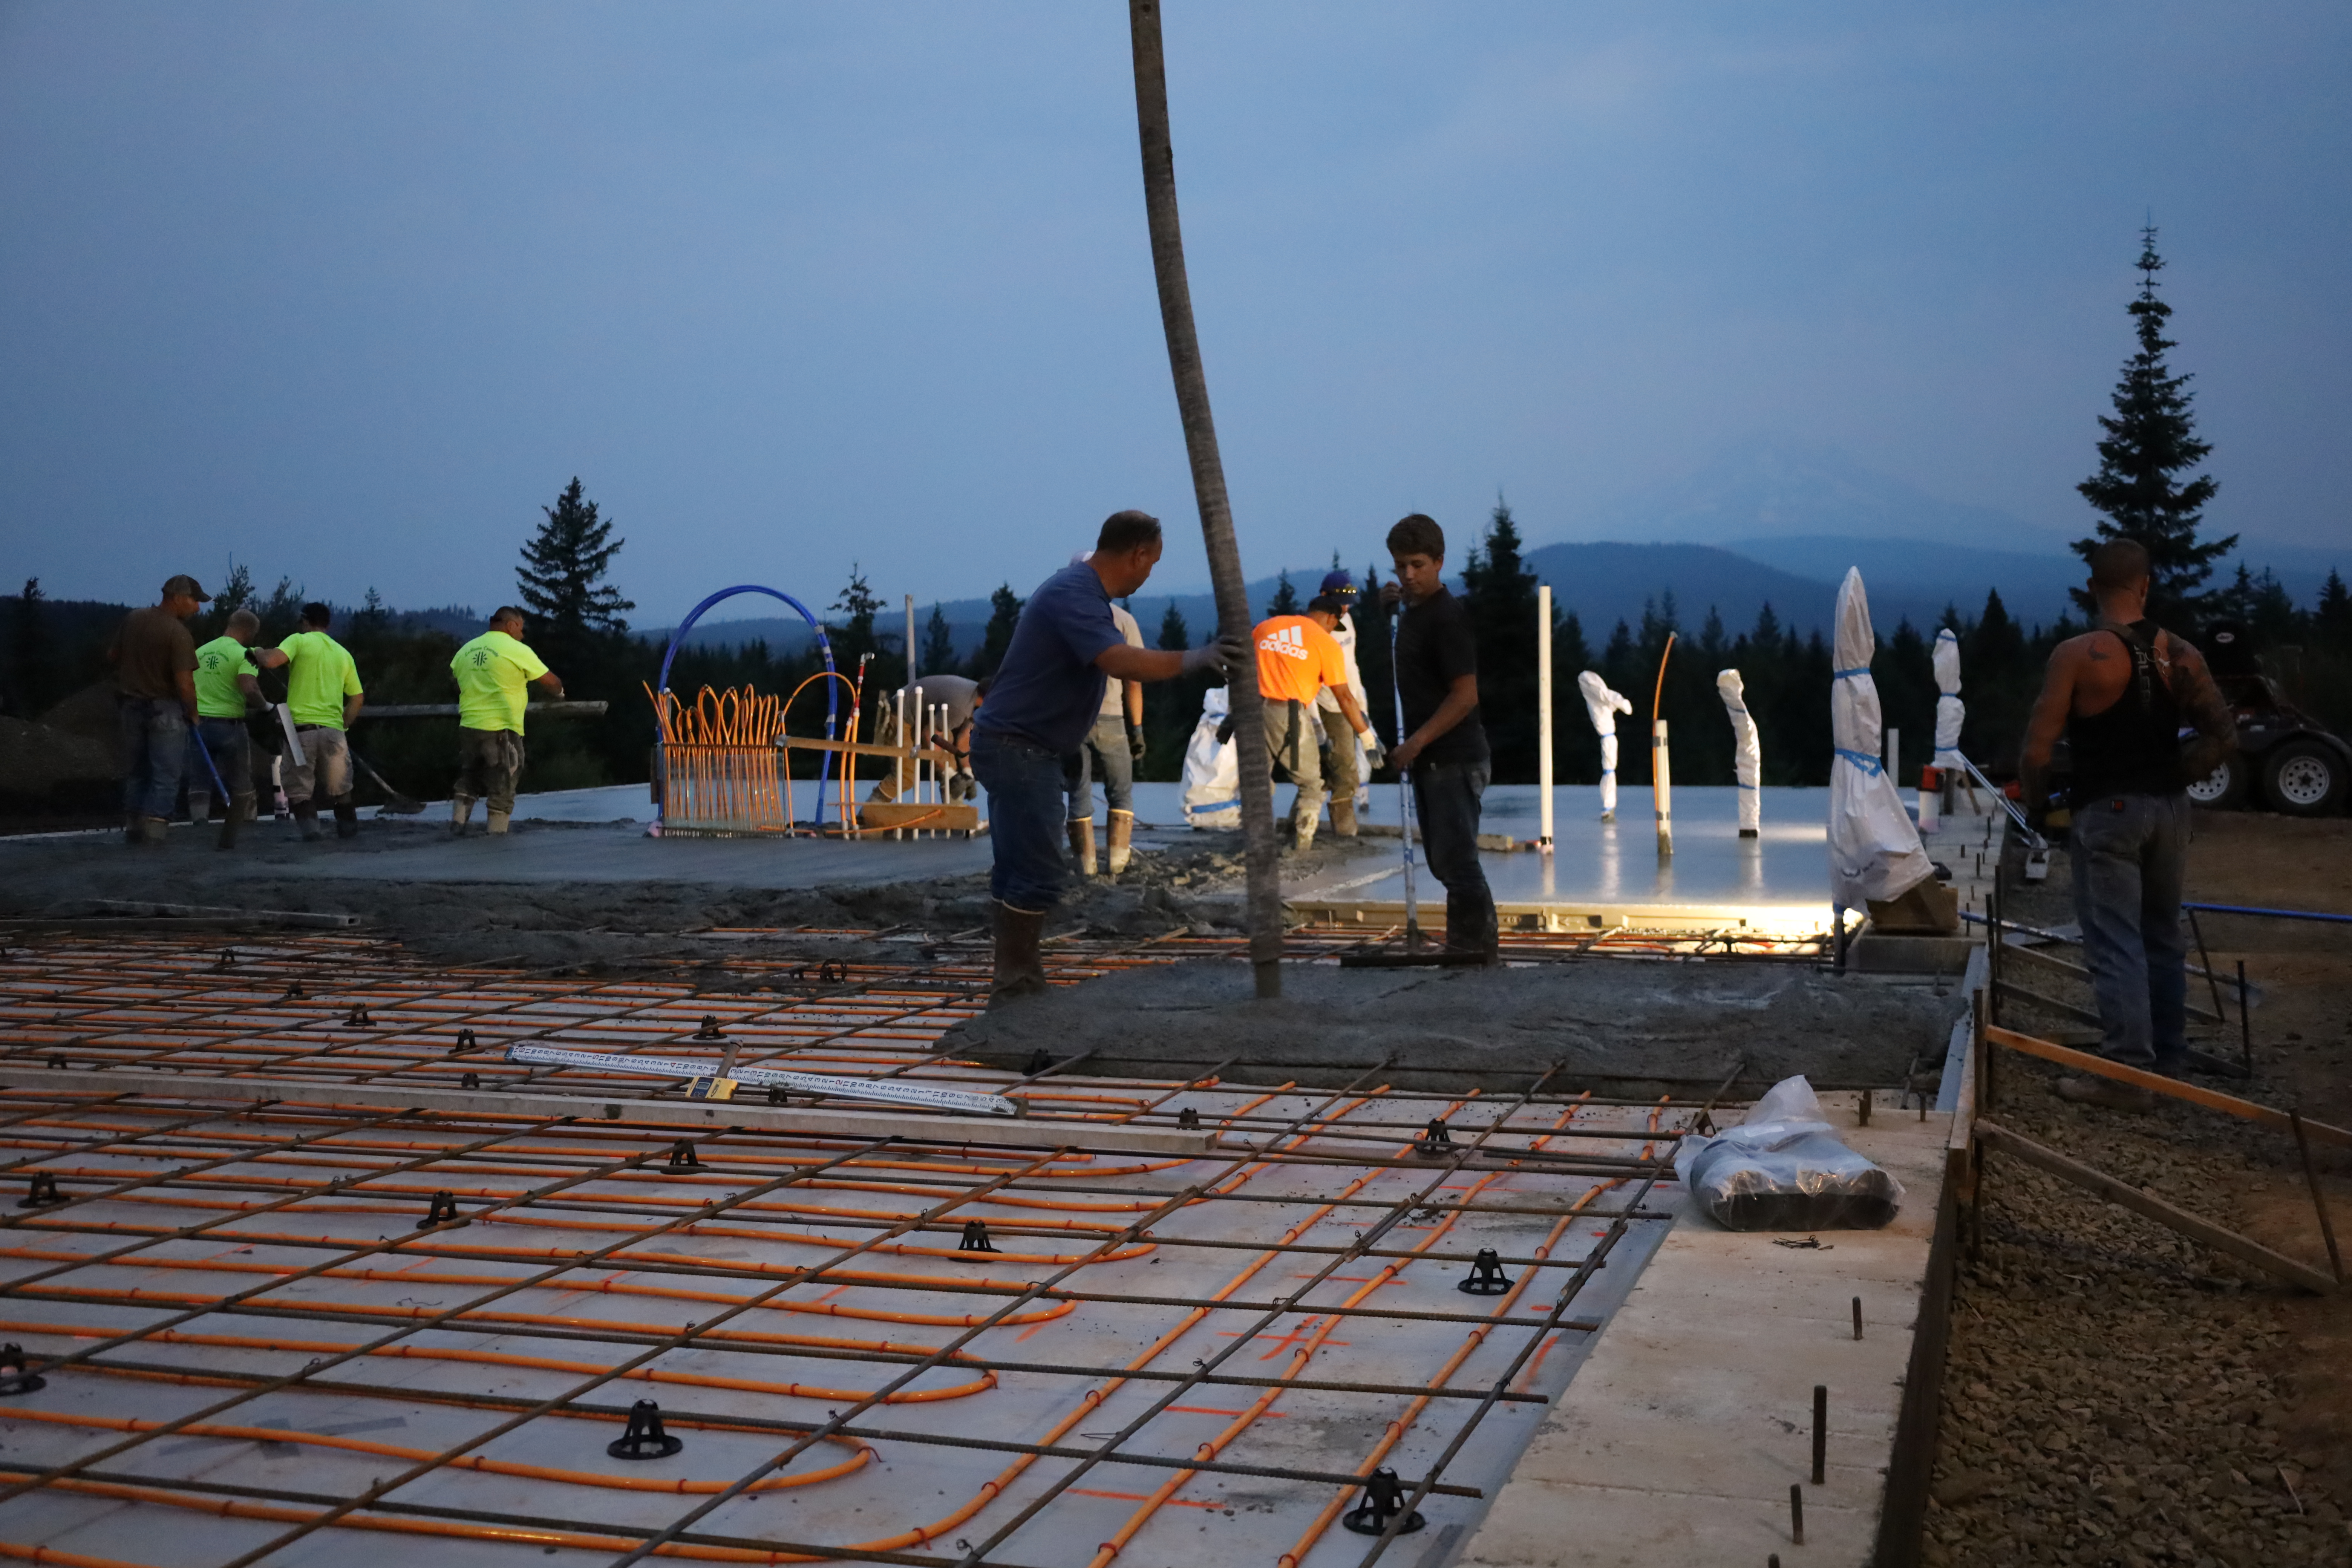
After the final plumbing installations, Matt returned to set up the rebar for the slab. The rebar is supported by little plastic hats to hold it a few inches above the foam, providing reinforcement near the middle of the concrete (instead of the bottom). The 18″ spaced grid made walking across the foam even more difficult.

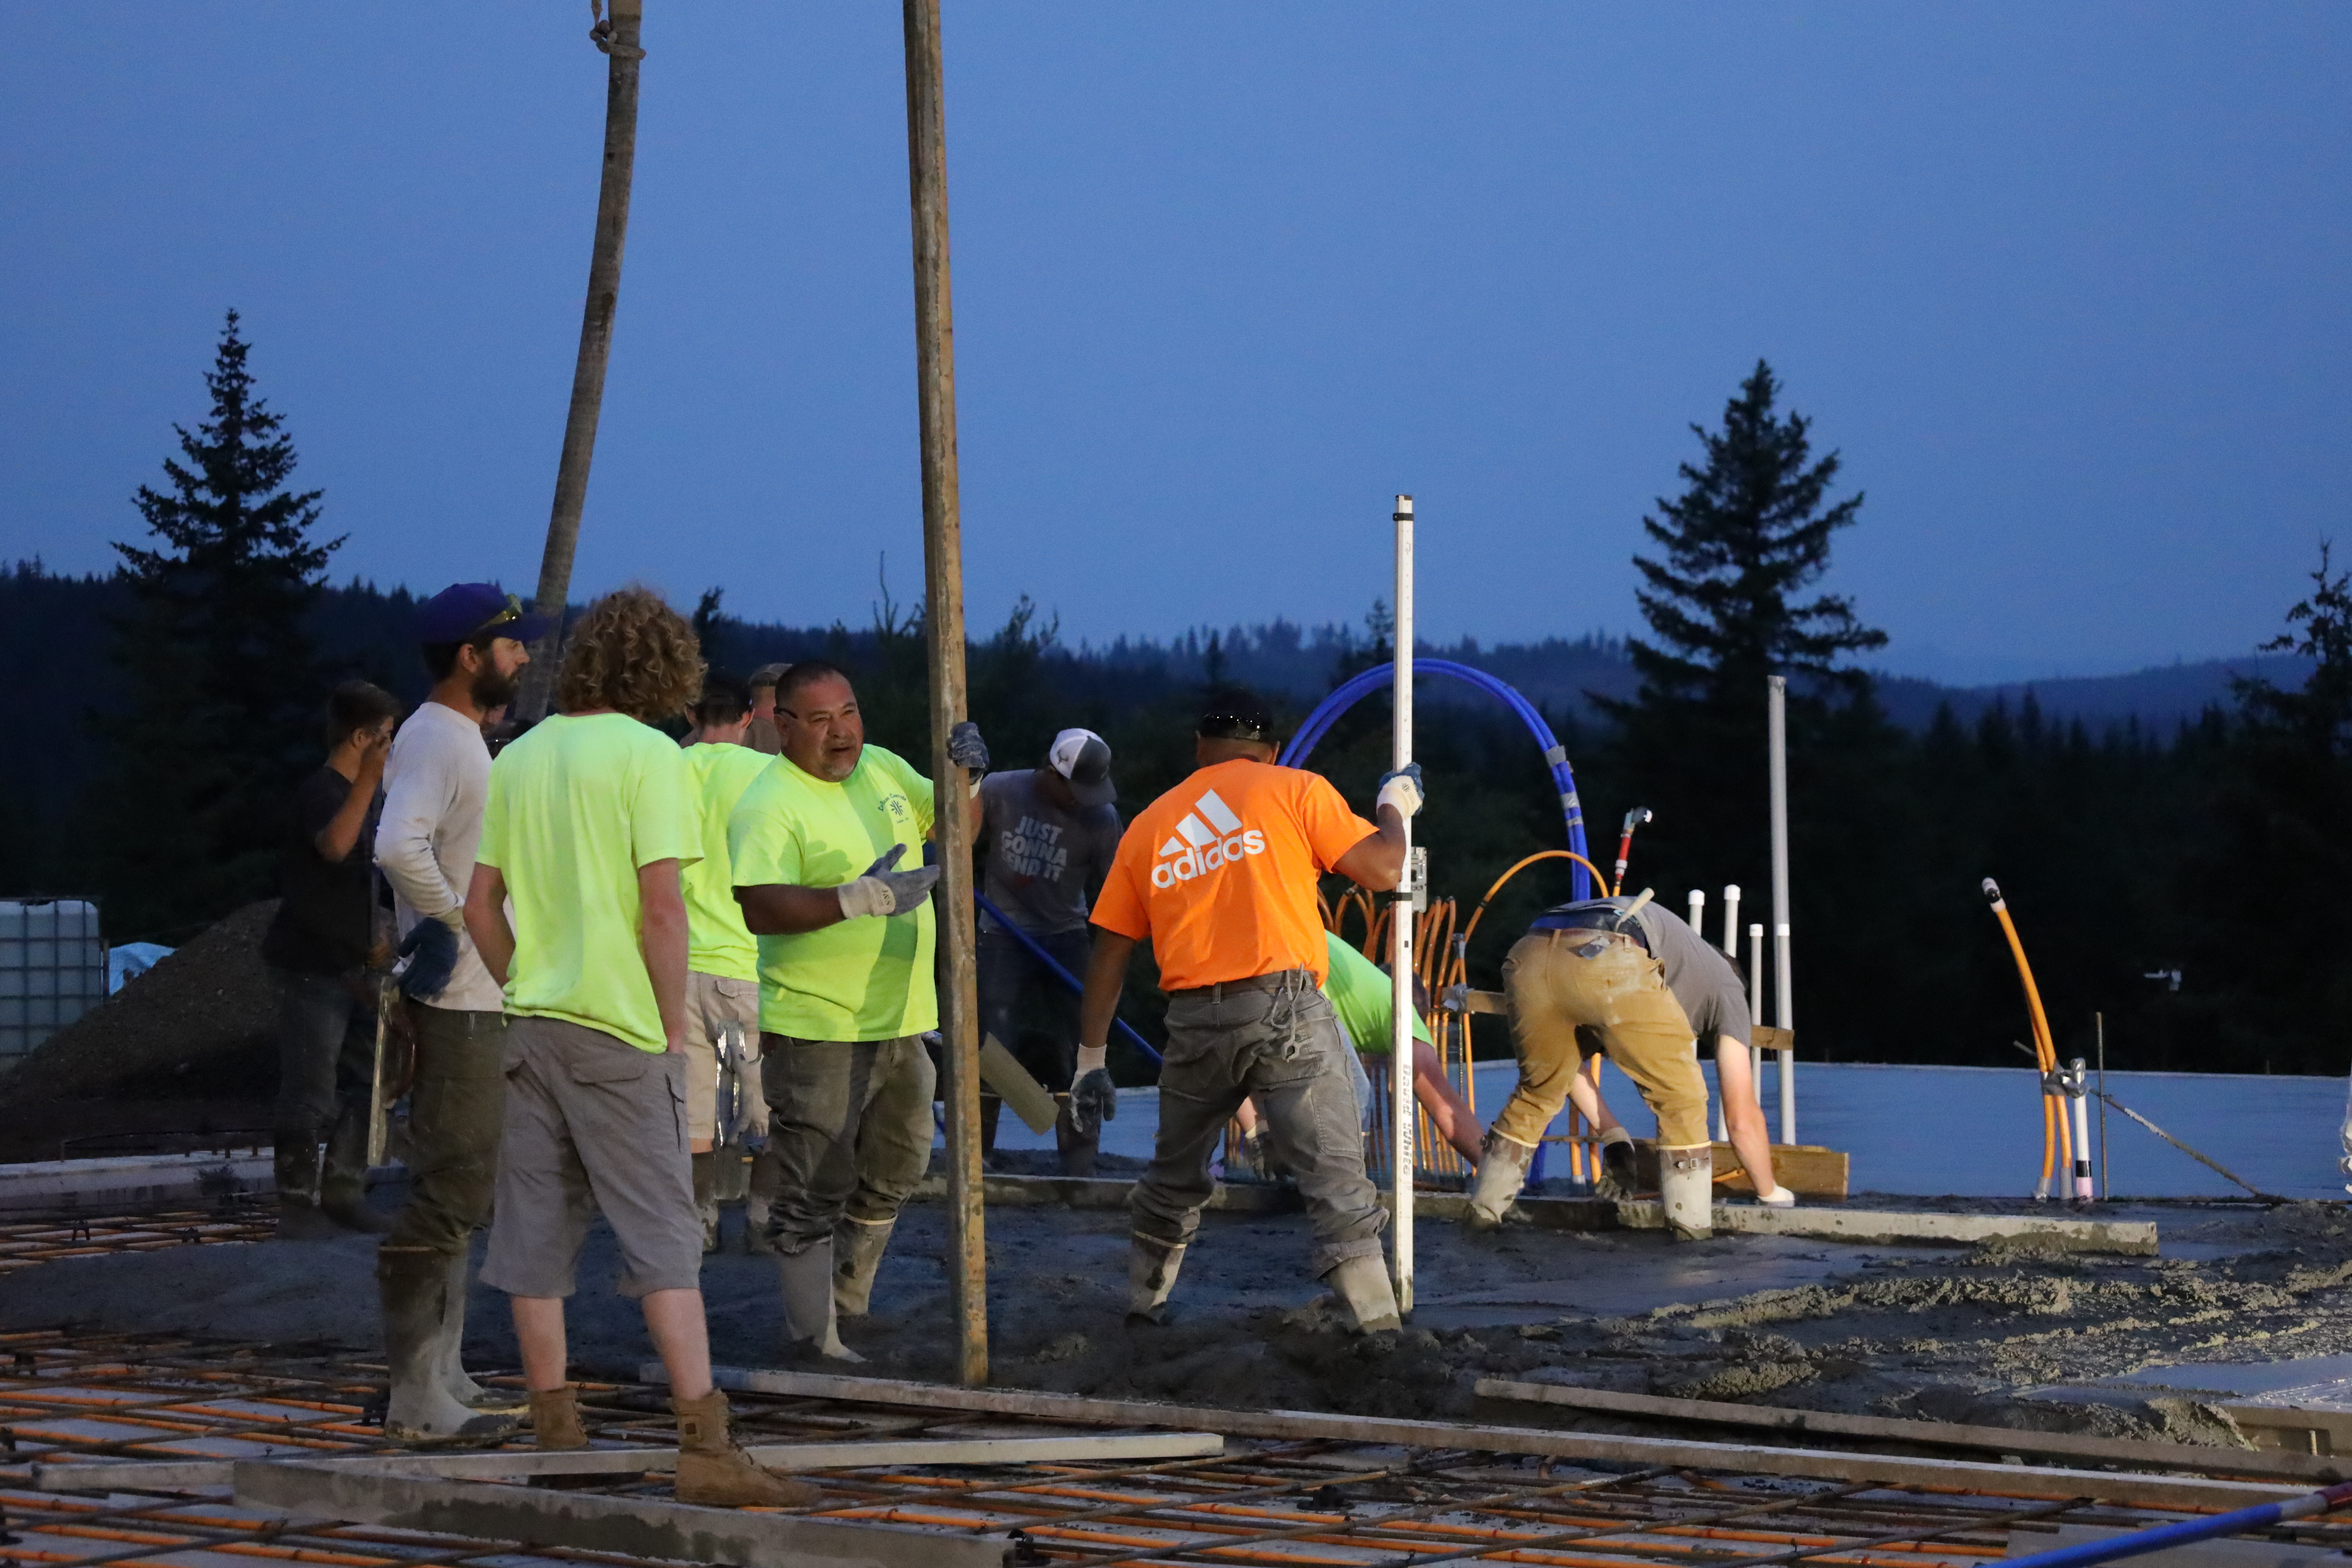
The big pour was scheduled for 3:00am. In preparation, the pump truck was dropped off the day before. Sam and I camped out for the early start as well. As we were grilling our dinner, some clouds rolled in, creating a lovely background for our photo shoot of the pump truck. We were awestruck as we hadn’t seen a single cloud in 45 days! We prayed the clouds would stay!

Why do we want clouds, and why are we starting the job at 3:00am? Concrete is a very sensitive material. The hotter and windier it is, the faster it cures, creating more cracks. In ideal conditions (not too hot, not too cold, not sunny, not windy) it cures slowly and evenly, drying with a flawless surface. You may have seen sprinklers on a freshly poured slab – the water keeps it cool to prevent cracks as it cures. However, you can’t water wet concrete and the first few hours are critical, so what can you do? Start at 3:00am, hoping to finish before the temperature reaches 100 degrees, and hope that it isn’t too windy. This is asking a lot where we live. It is sunny every day, and the temperature was in the triple digits every day that week. We were shocked to see clouds!
Sam and I were unable to sleep much, but we rested in the luxurious RV for a few hours. We “woke up” at 3:00 to the sound of trucks, and Sam sprung out of bed to turn the lights on. Luckily Sam had already set up some aerial lights.
I stumbled out of the RV shortly after and thought I was in a football stadium. Between the bright lights and the number of men outside, the scene looked like a professional sporting event.

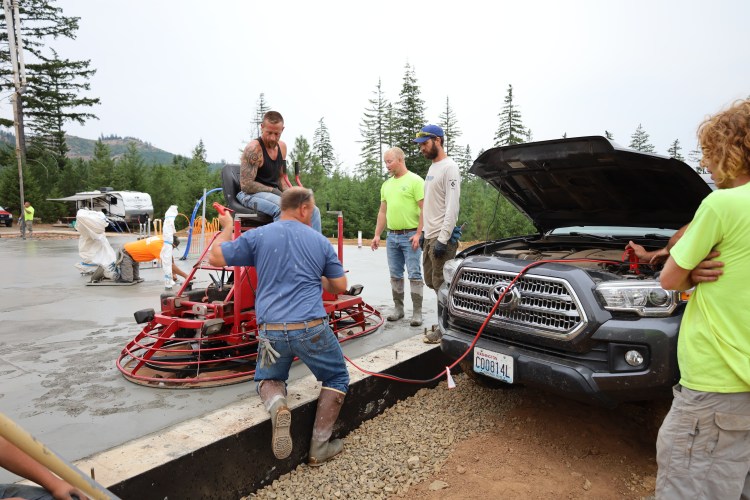
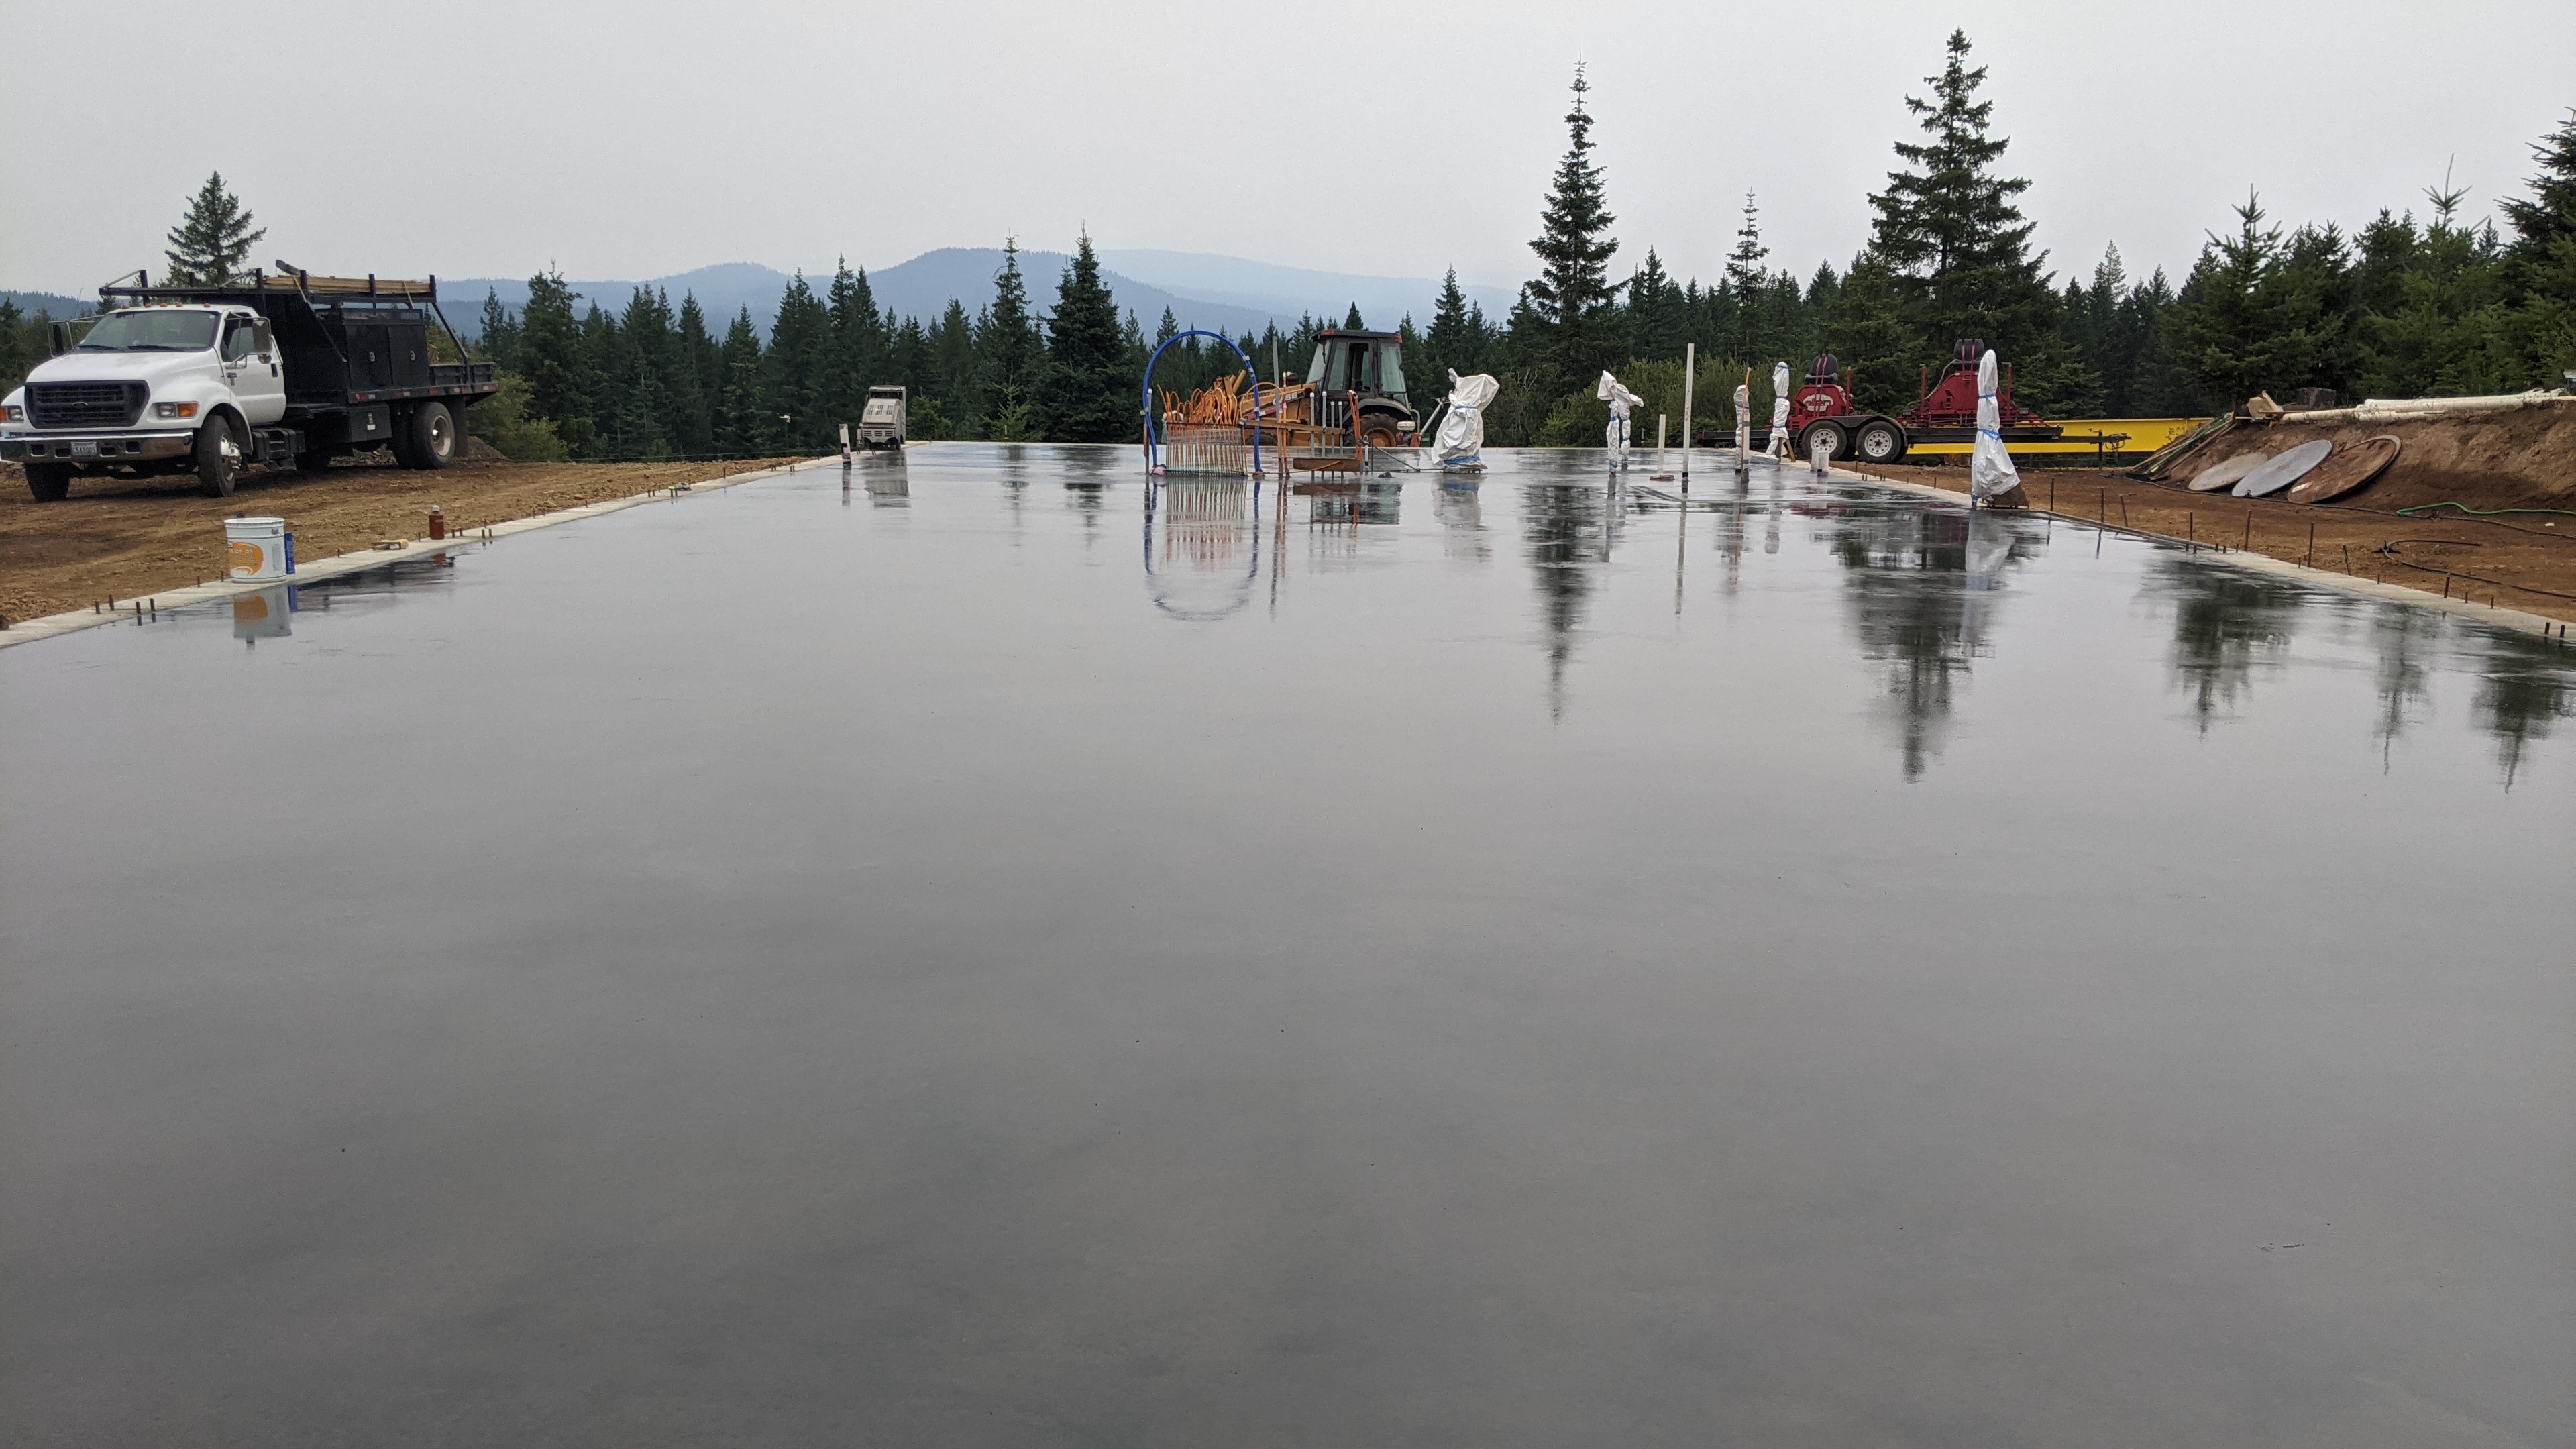
The first concrete truck arrived closer to 4:00, and the crew started pumping! The first truck was emptied quickly, and we waited around for the second truck to show up. There were 3 trucks, each making 2 trips to the concrete plant an hour away.


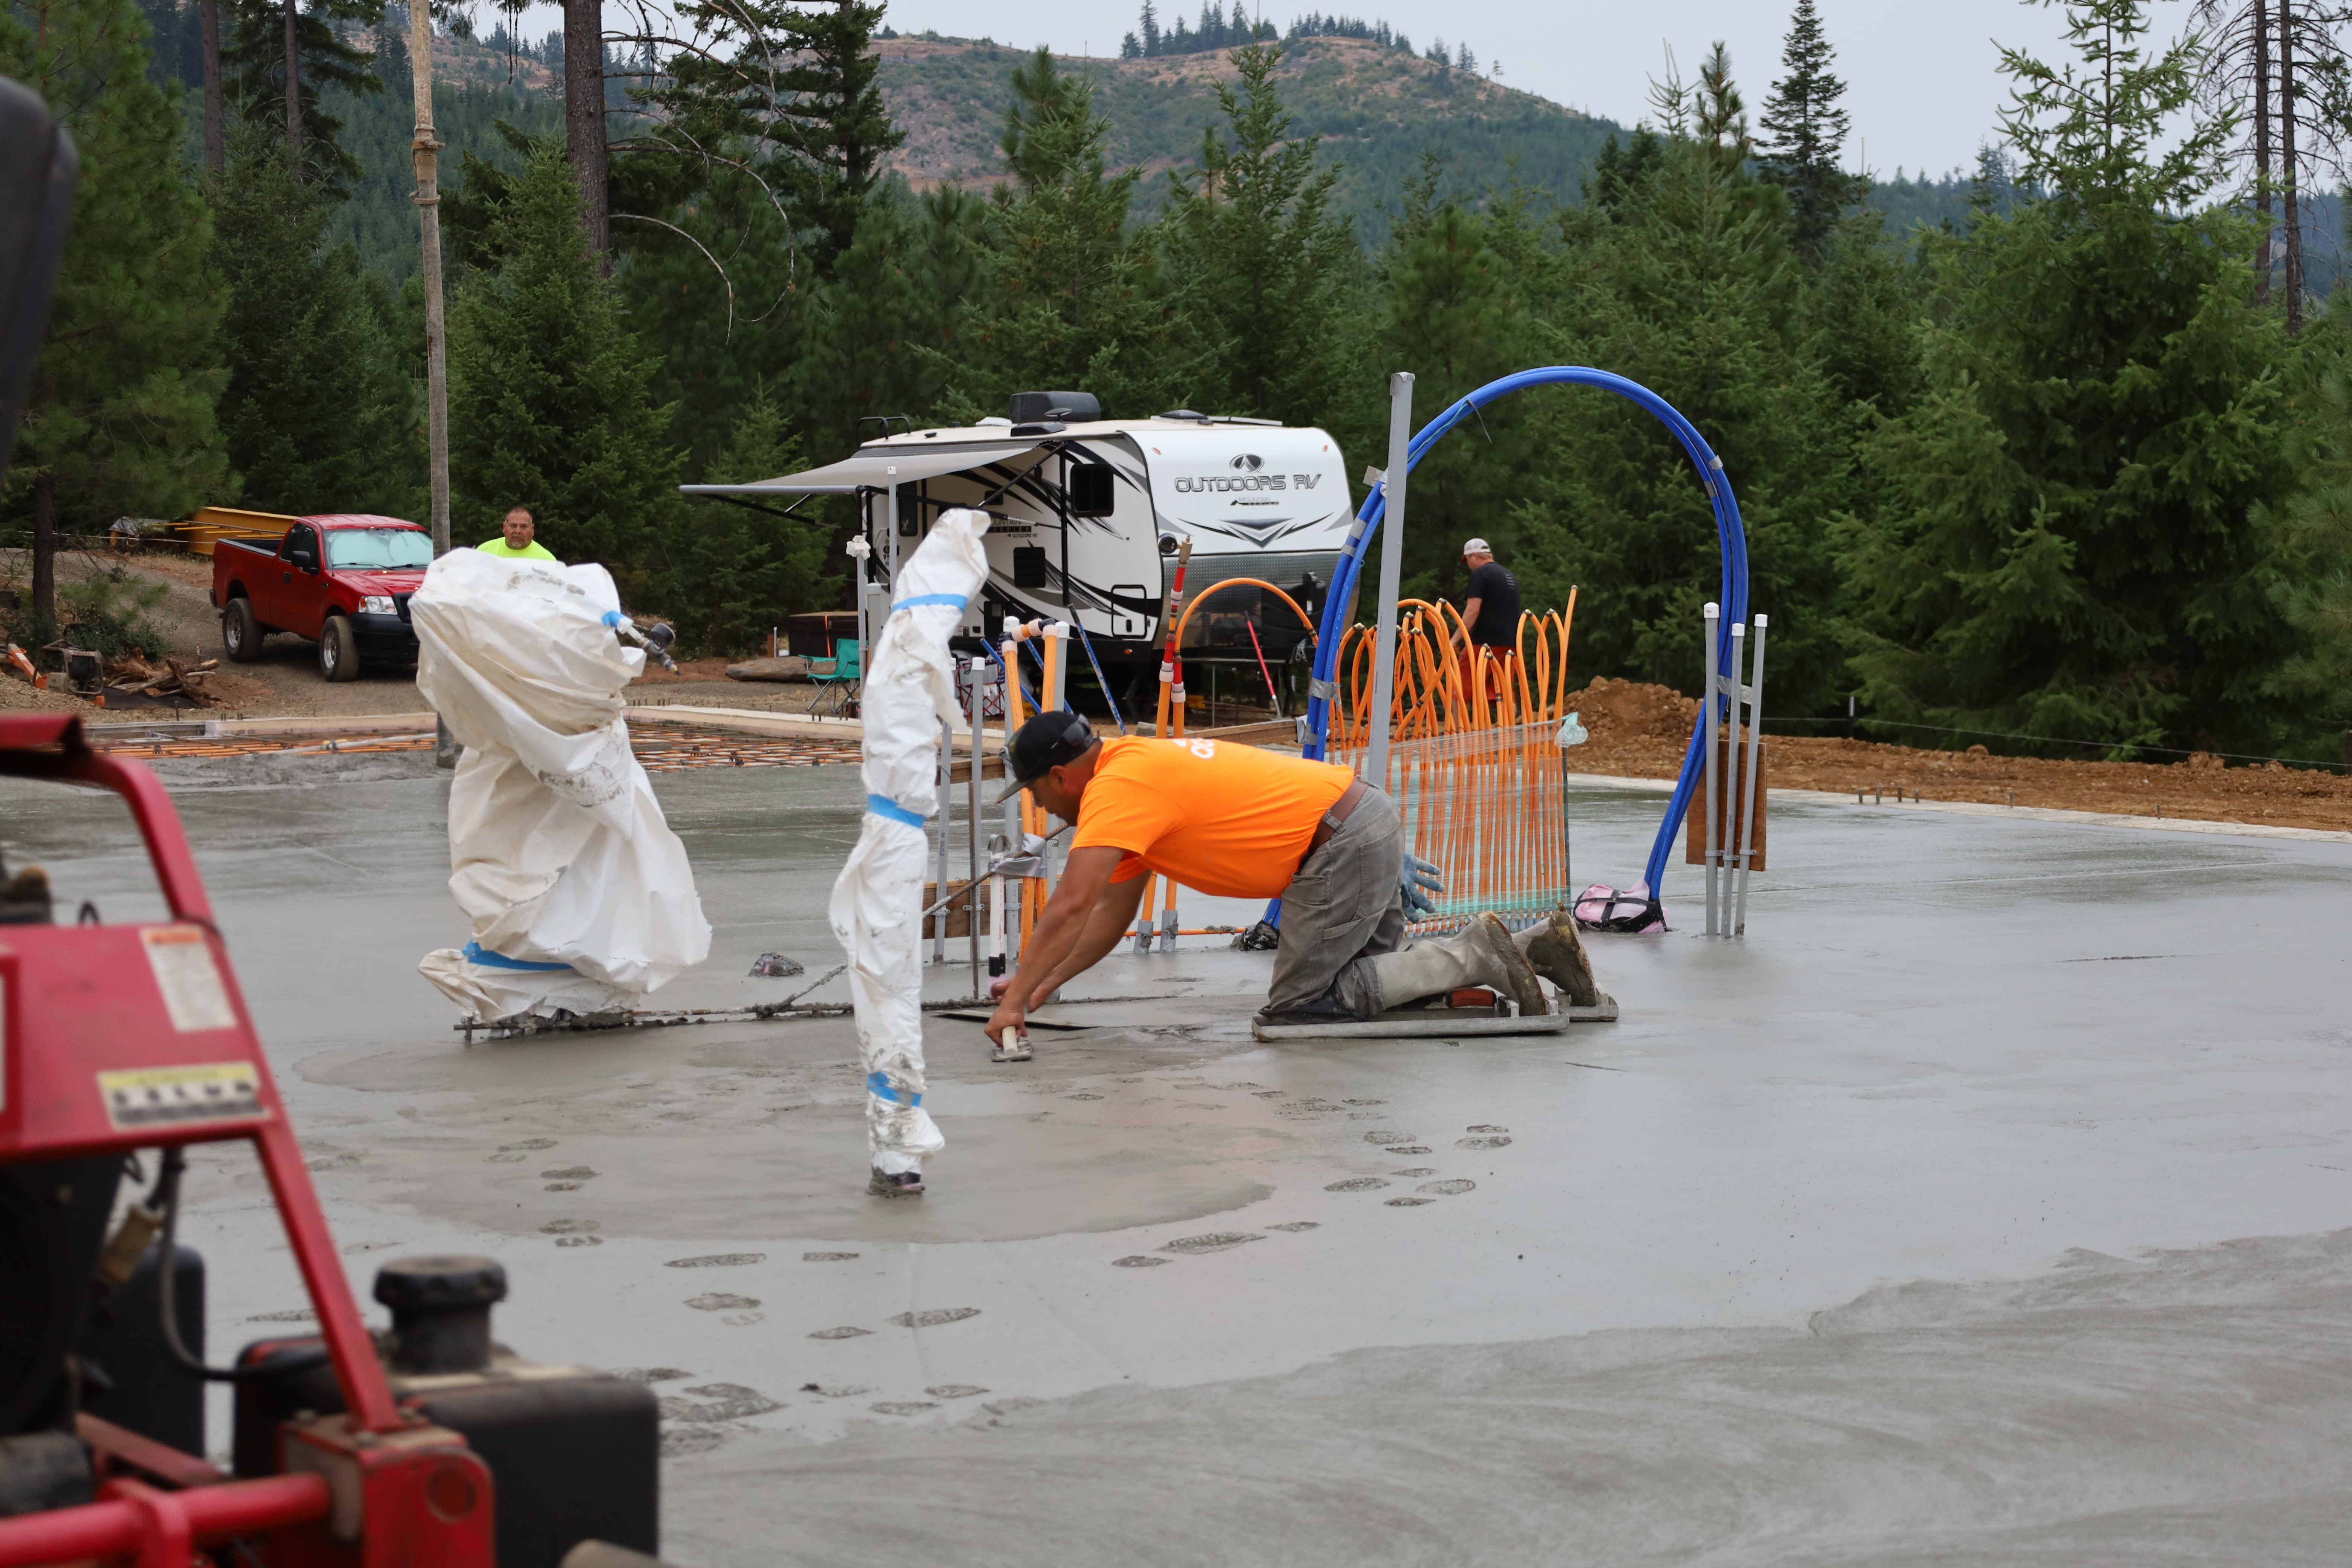
To level the surface, one guy used a laser to find the target height of the floor. (See the man in orange.)

He marked it by using a trowel to level out a small patch. Then a team would follow with a giant beam to hand screed a larger area, matching the height of the small patch.

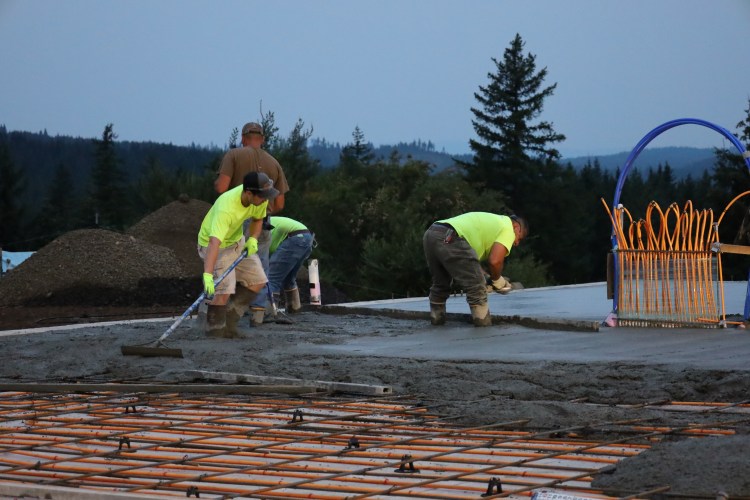
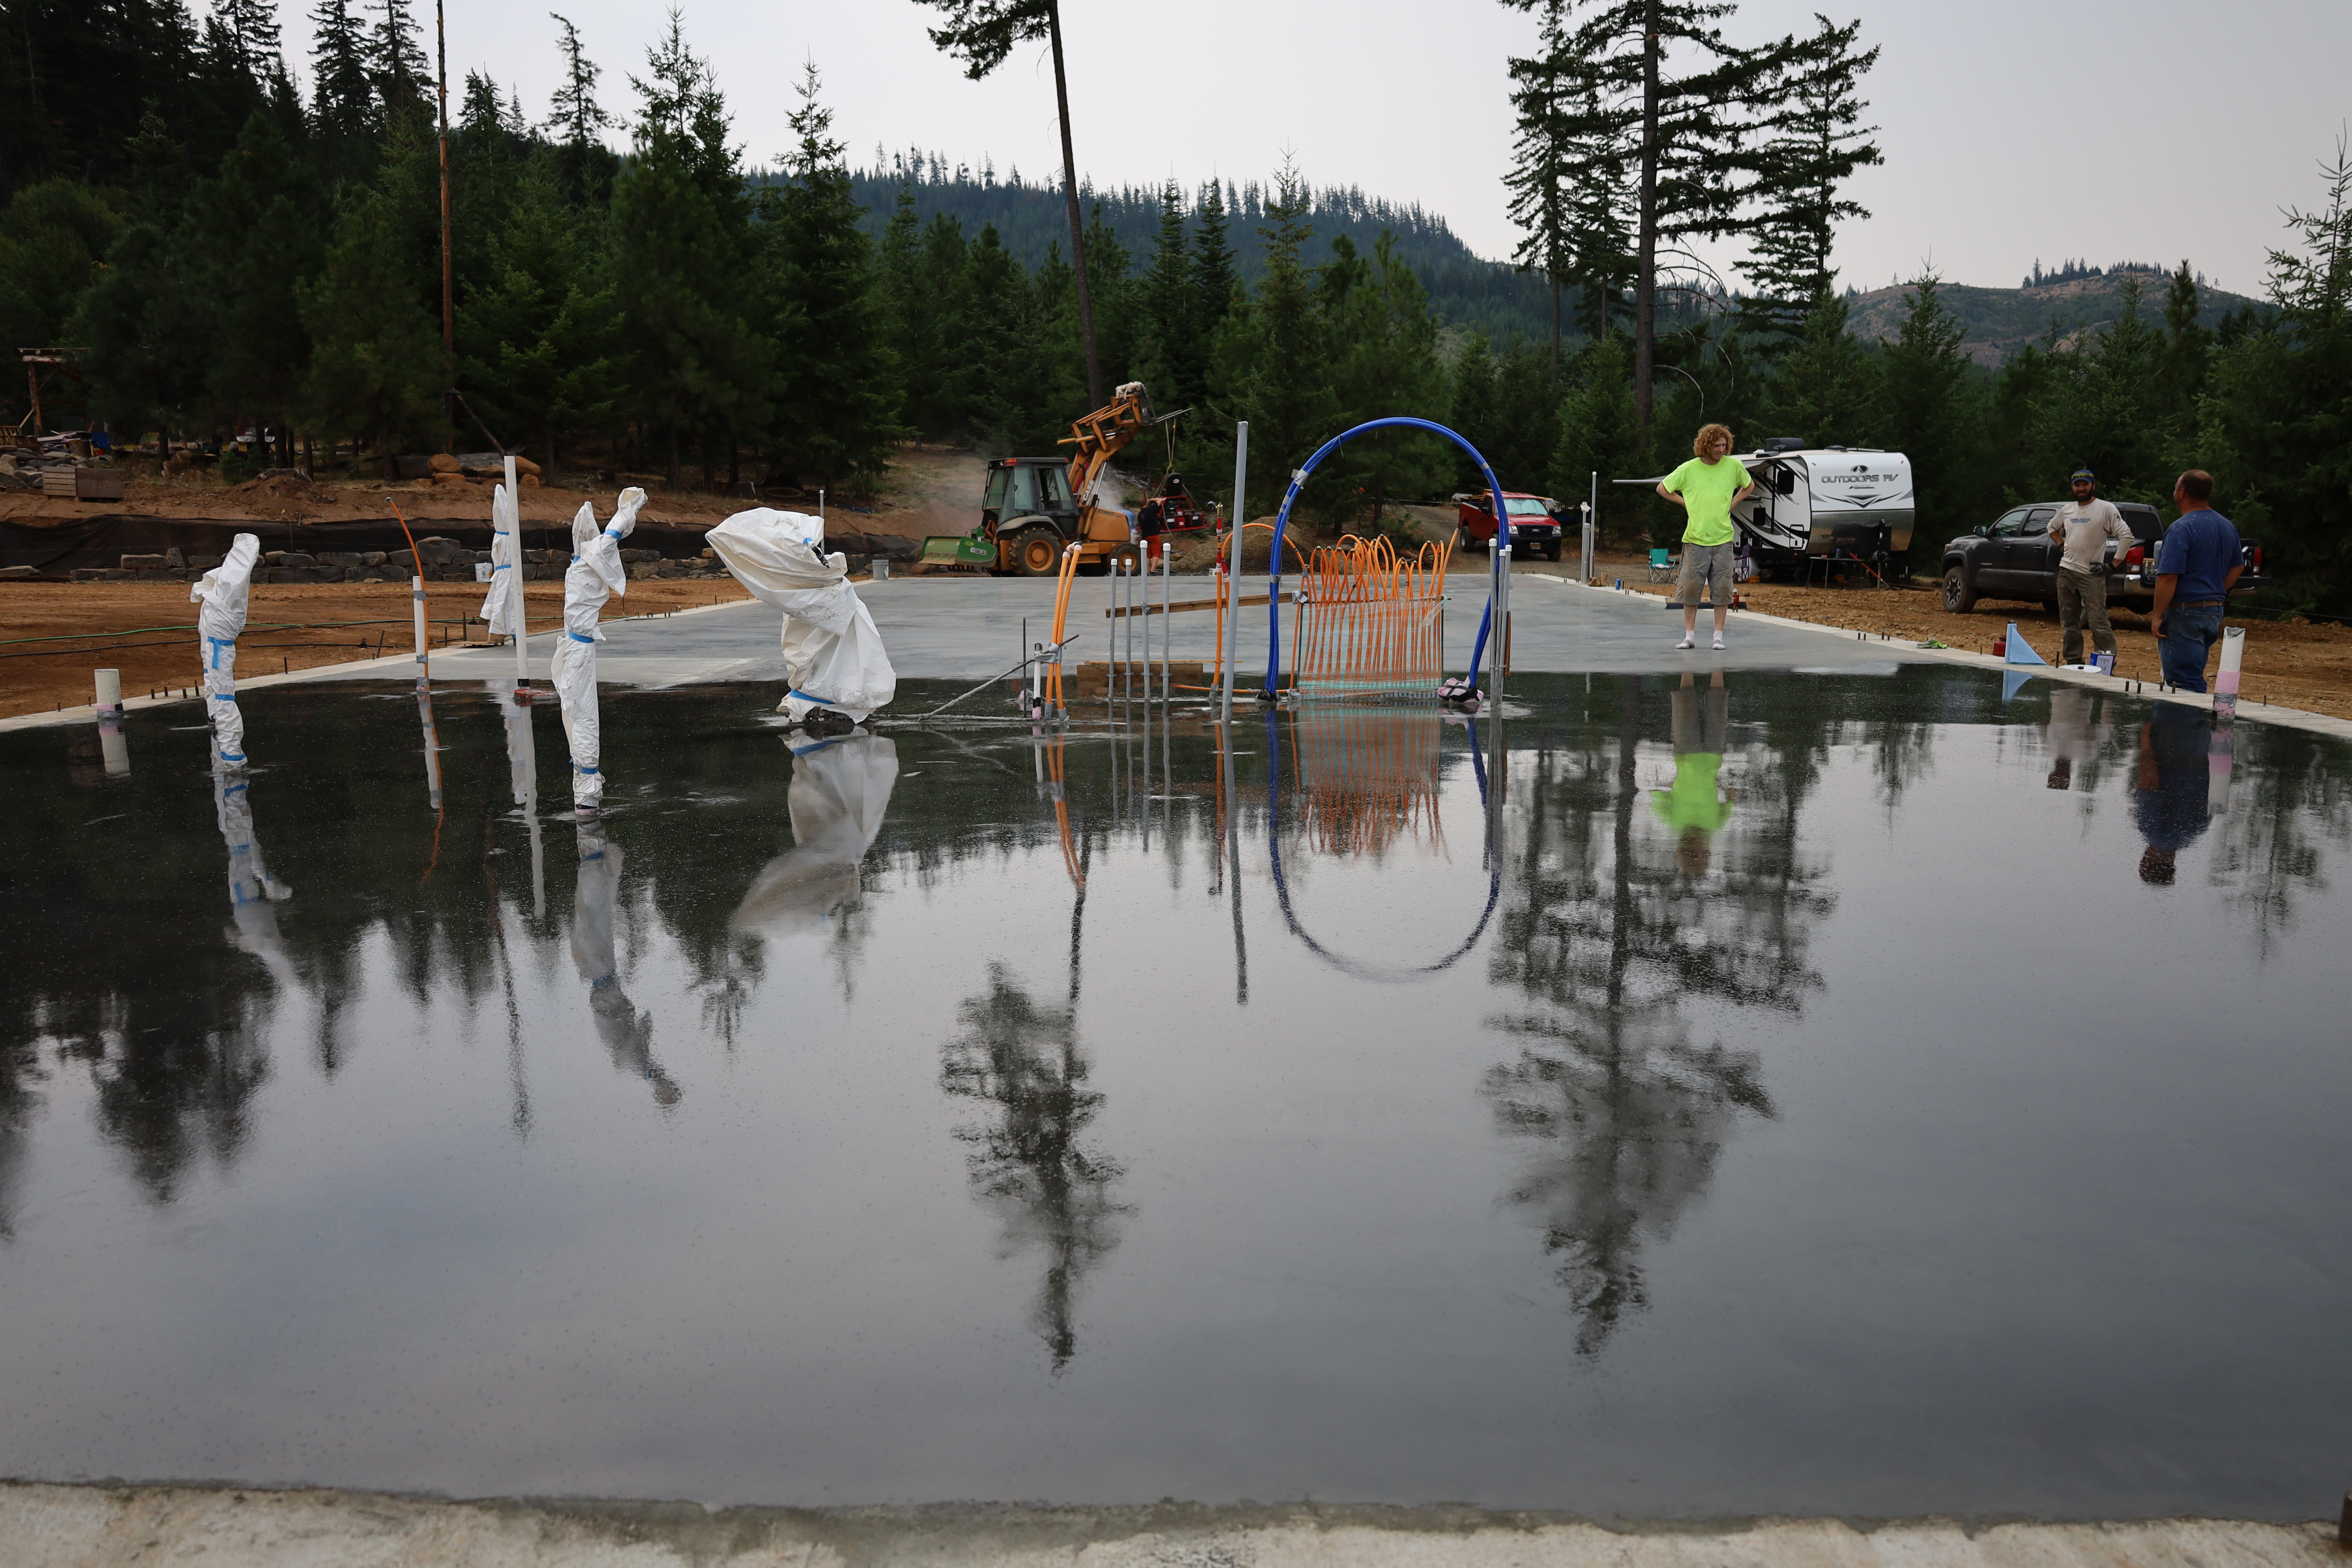
Everyone worked very quickly. It was amazing no one was knocked over by the long tools. It was also amazing that no one lost a boot in the concrete. I had a difficult time walking over the rebar when I could see my feet!

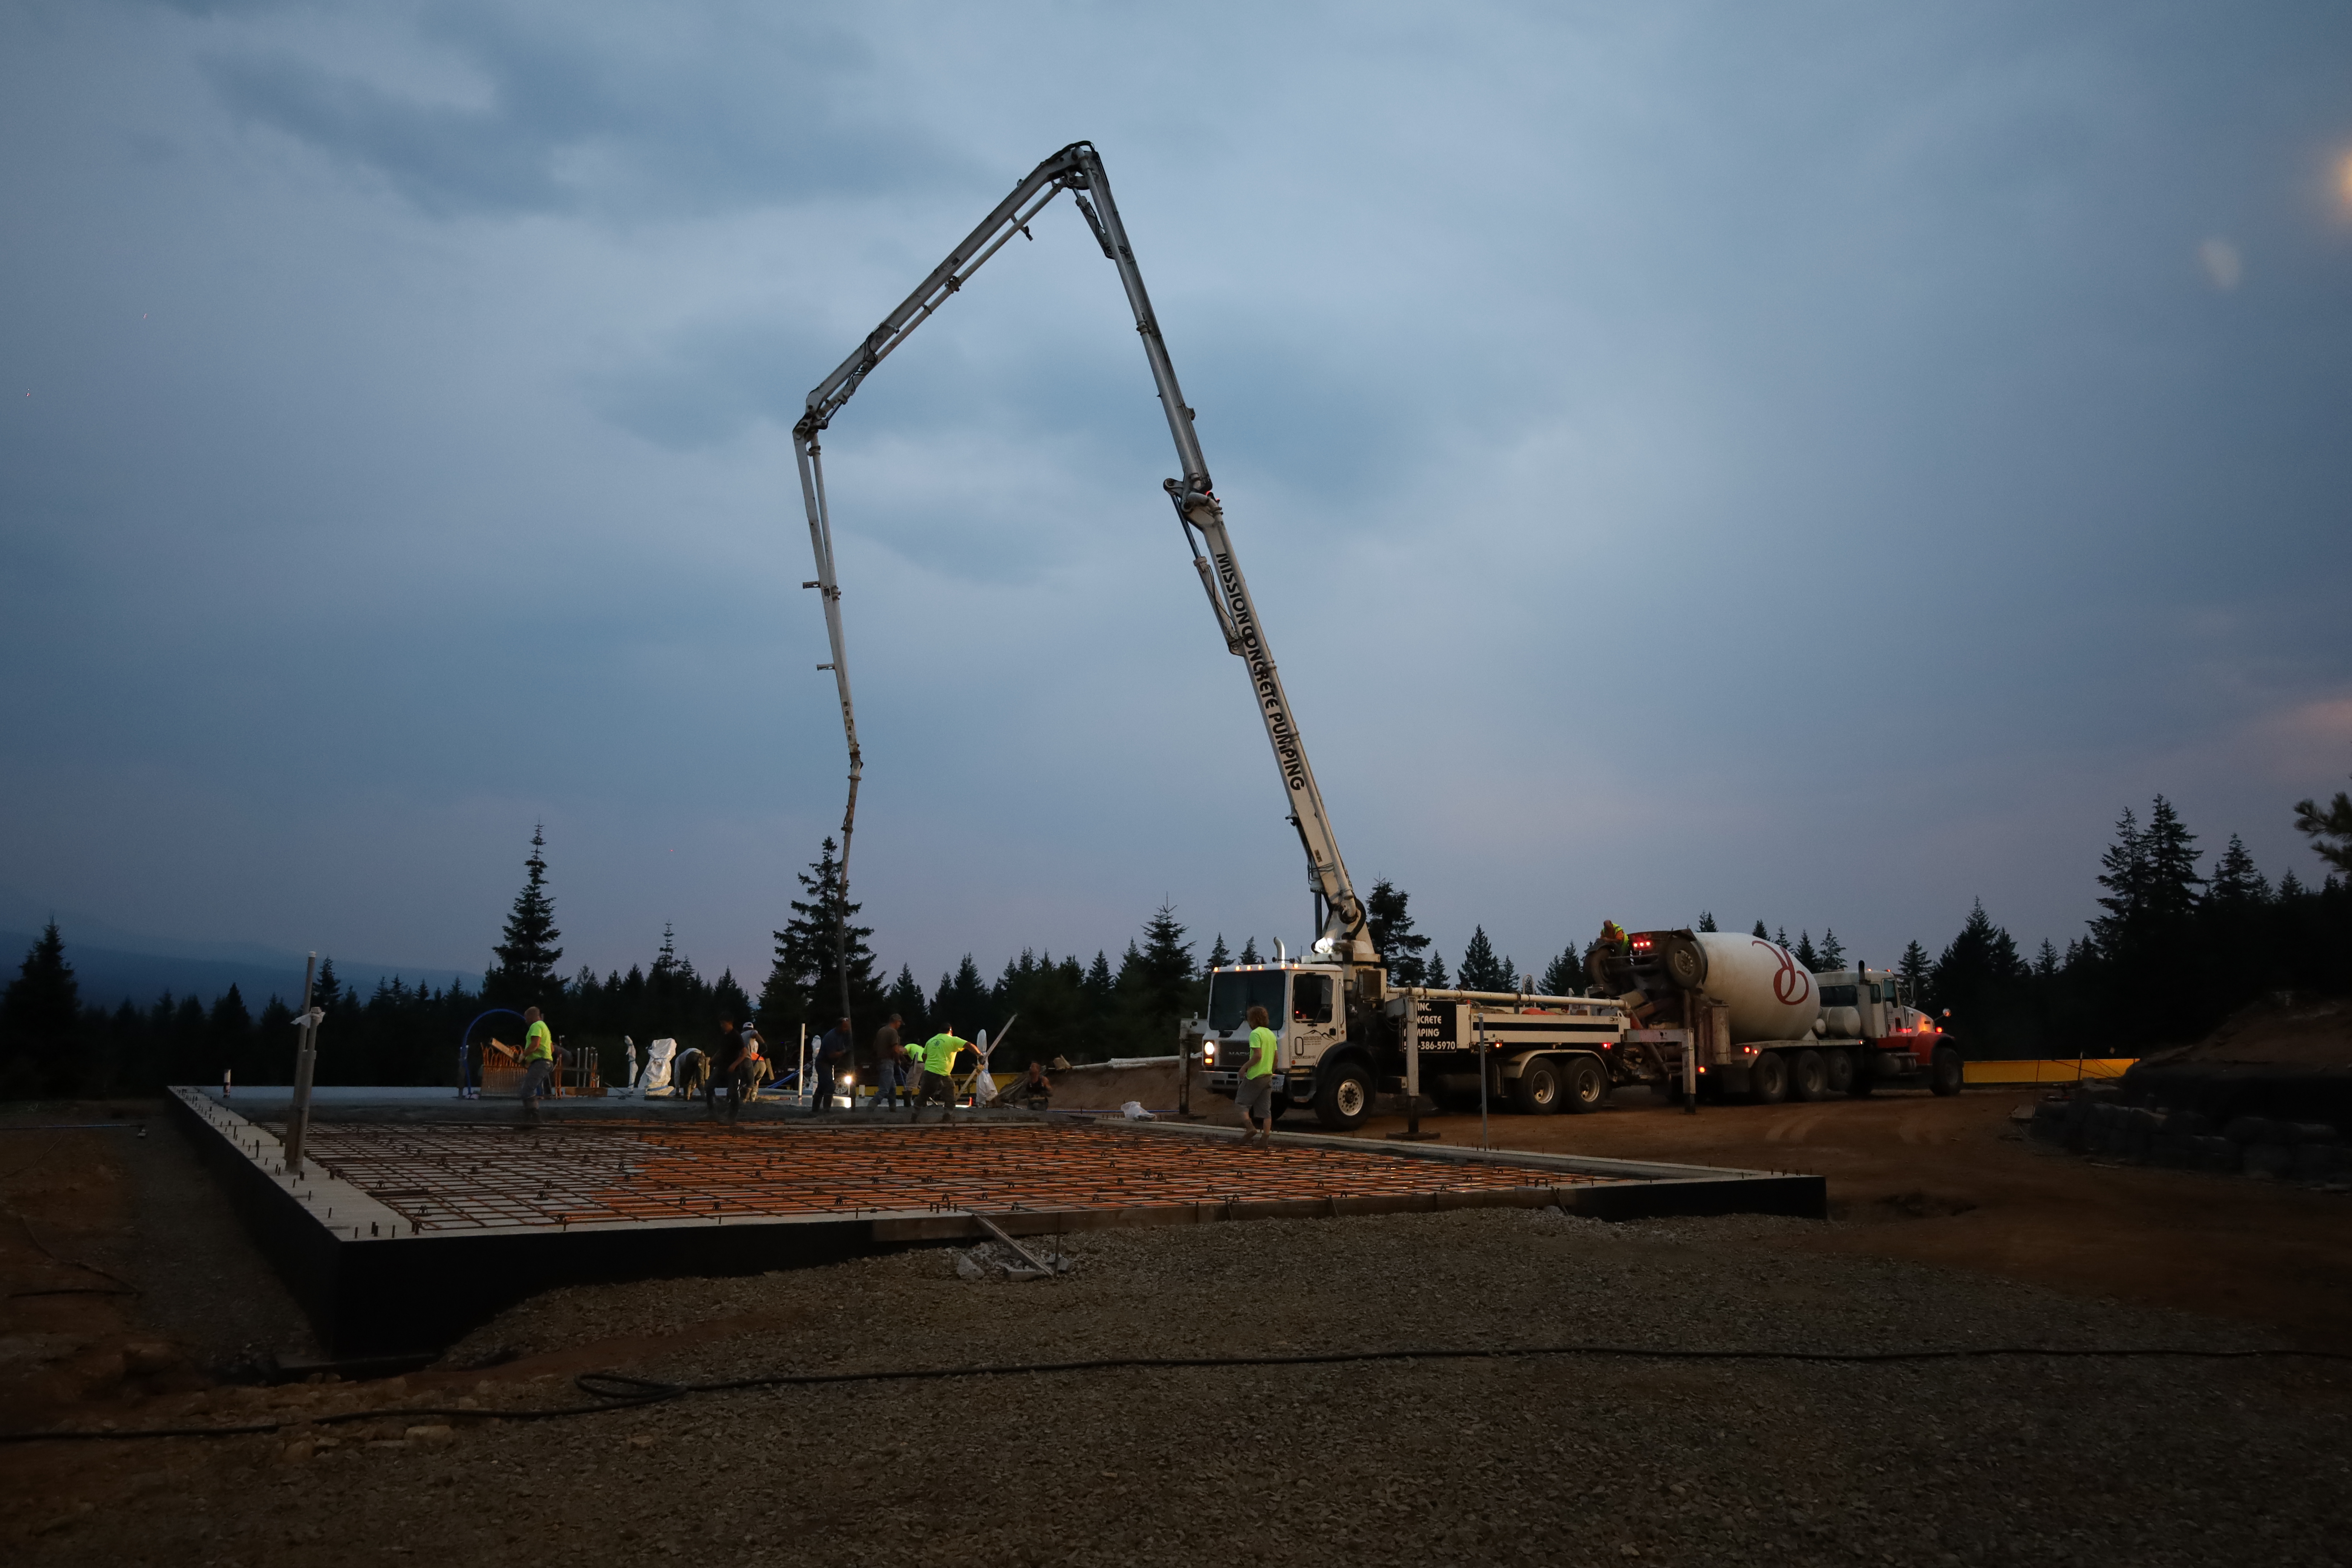


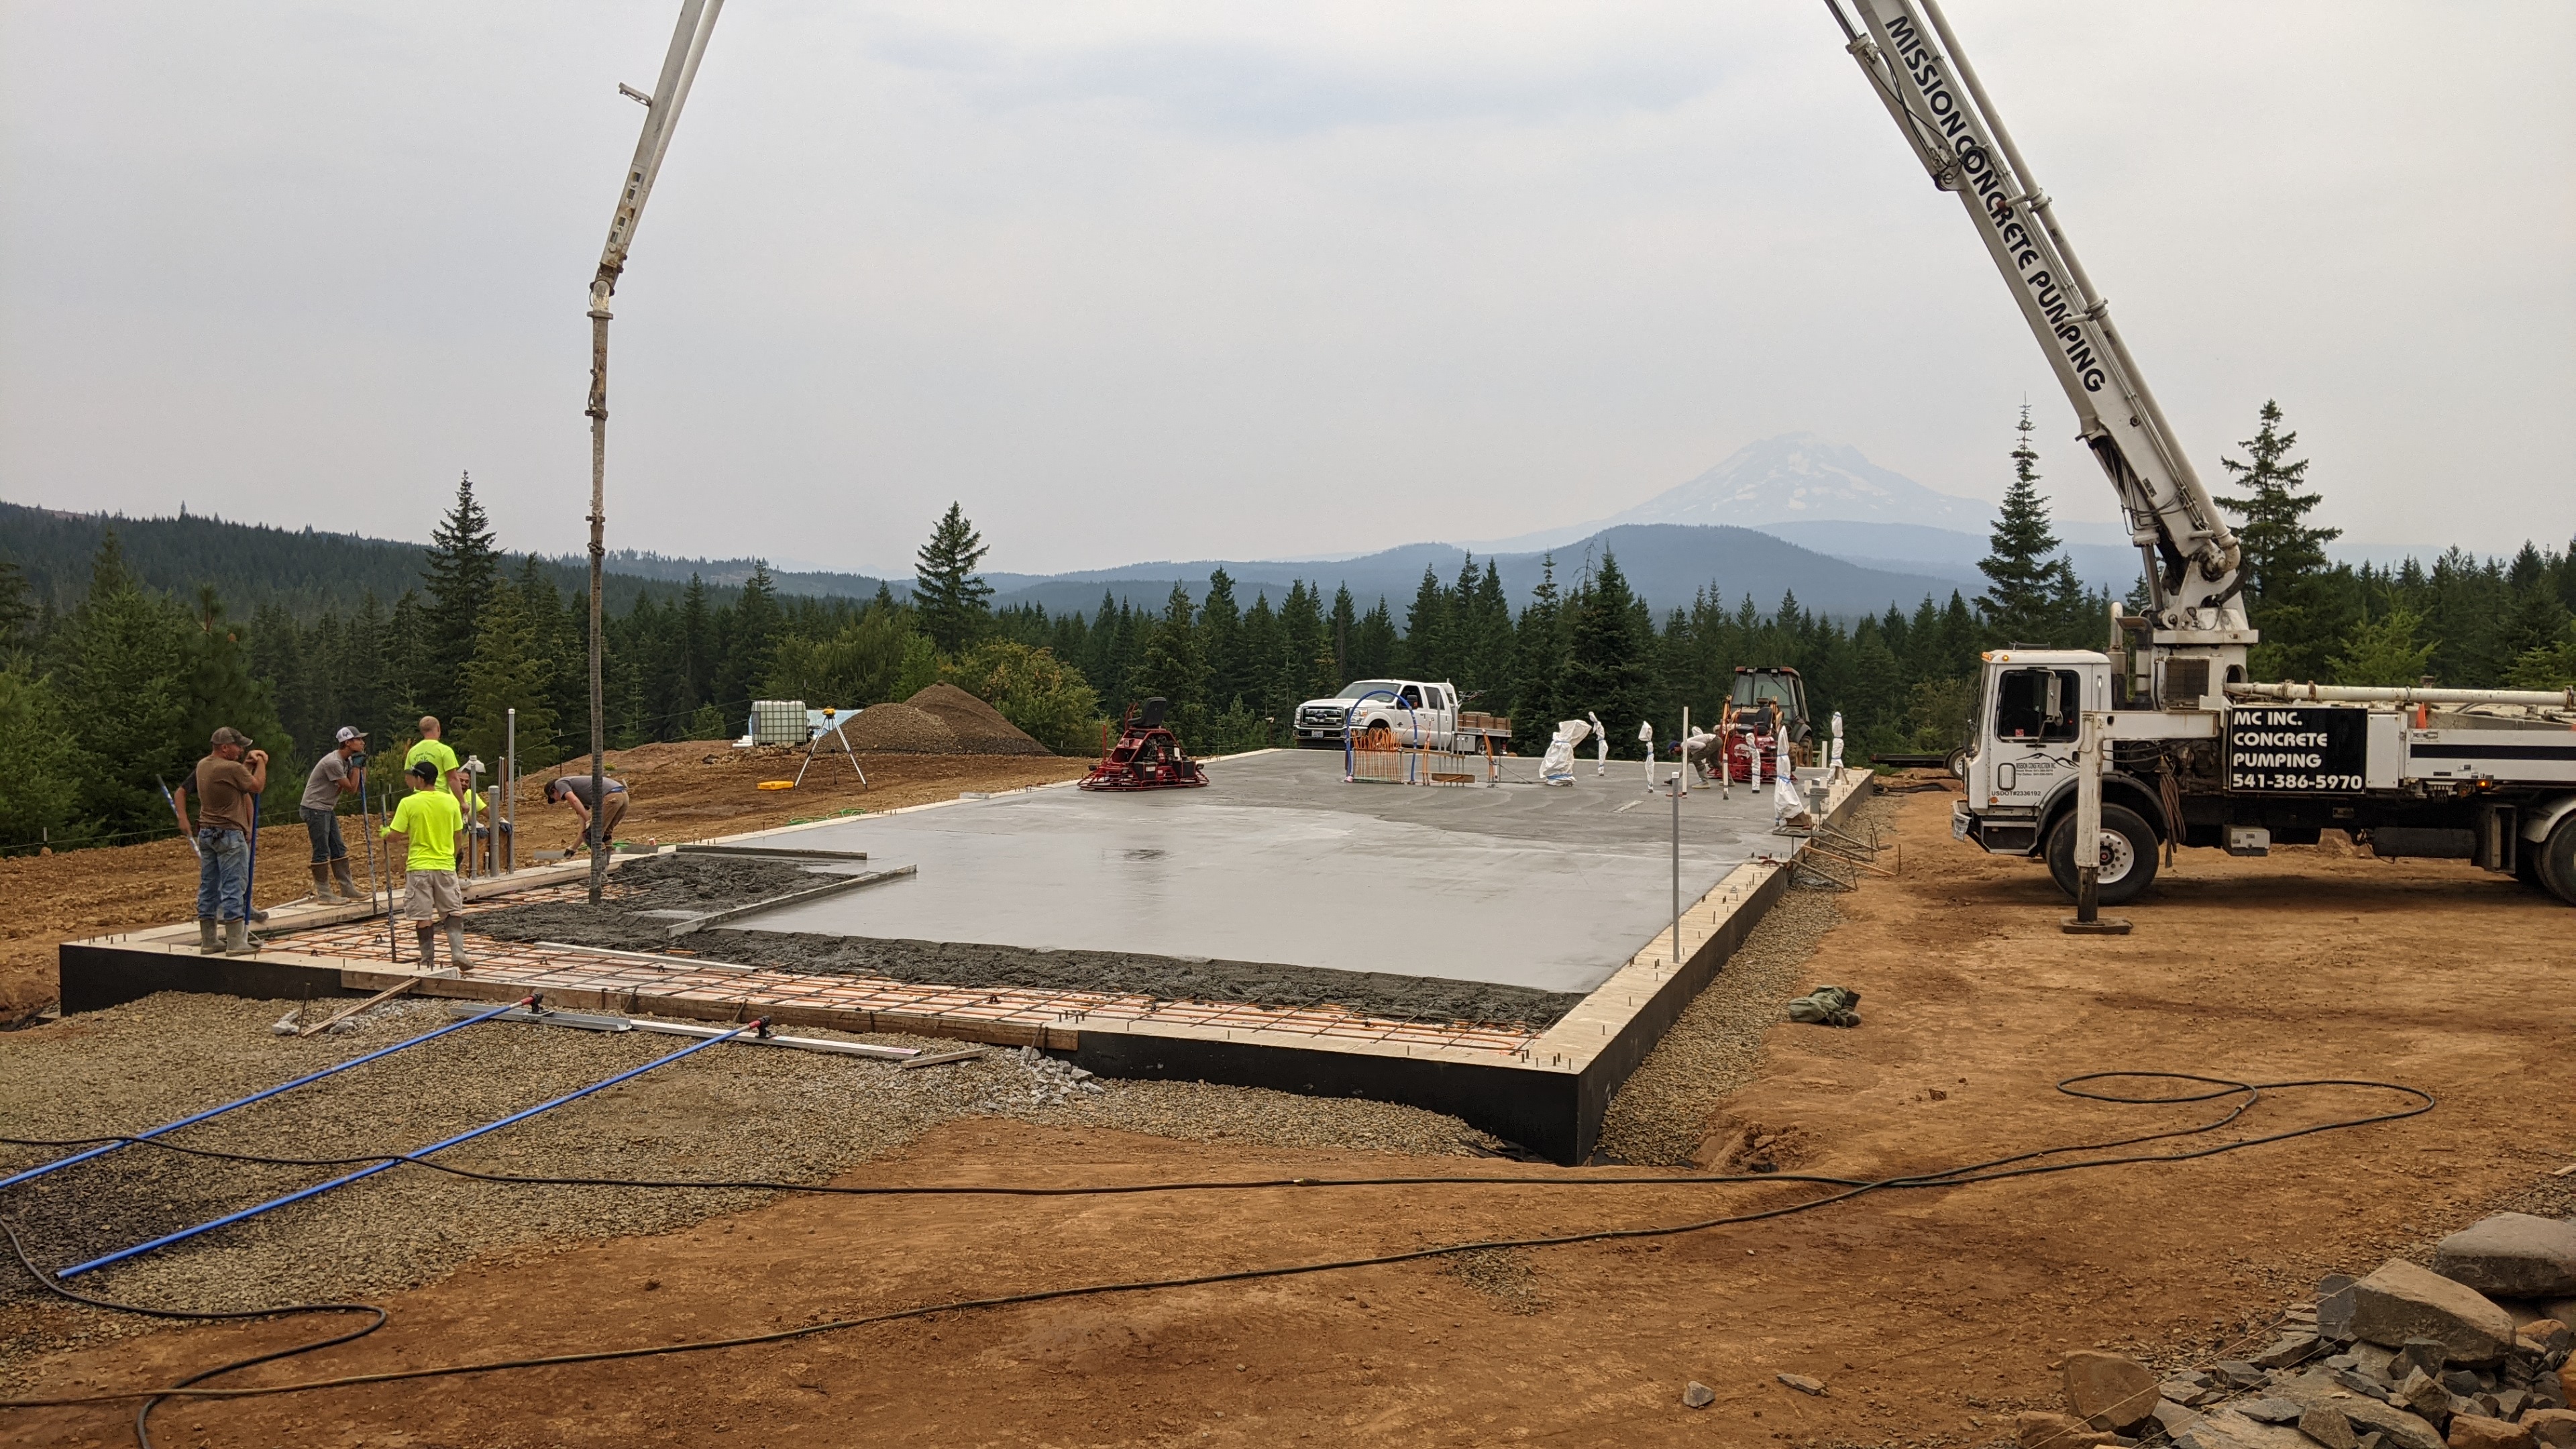
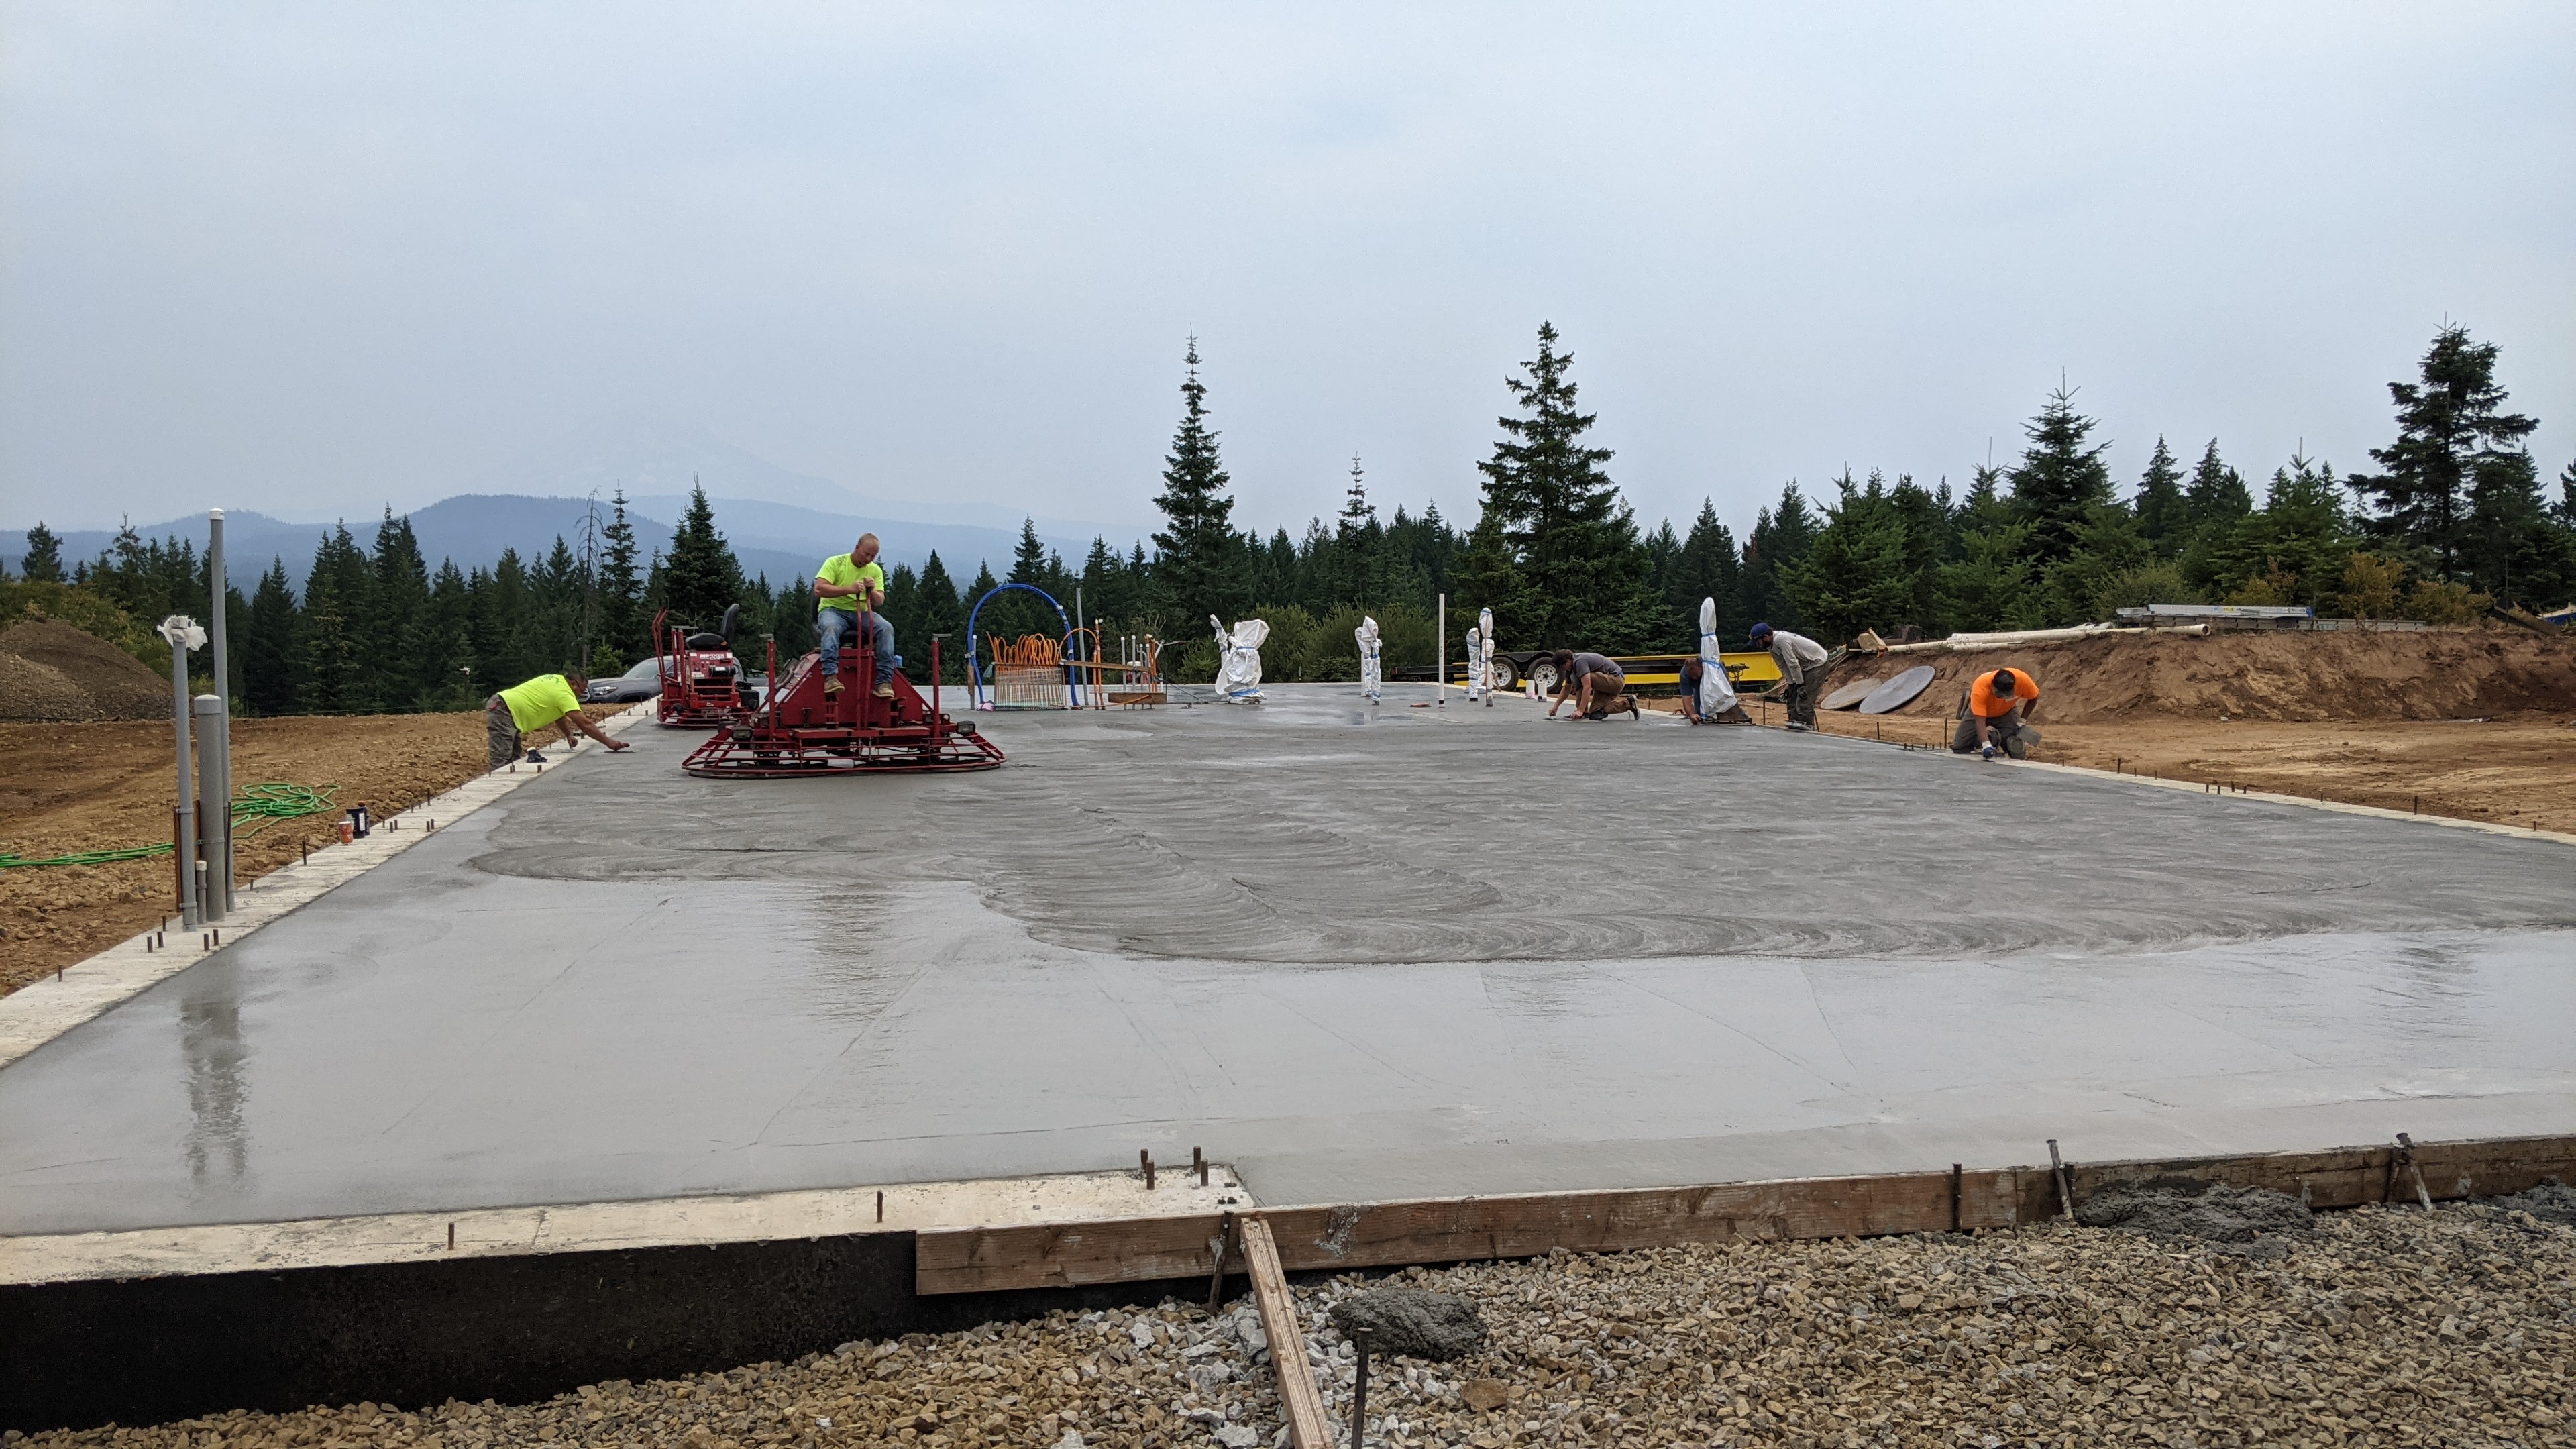
The slab required over 70 cubic yards of concrete! It wasn’t until lunchtime when the last concrete truck was emptied. Fortunately, the clouds hung around all day. We still couldn’t believe it! The unexpected weather made the long day slightly less stressful.


Concrete starts to harden very quickly. Shortly after it was poured, it was dry enough for hand troweling. A few men used small trowels around pipes and corners. One guy shaped a very large area around the trench drain by hand. We just told him what area we wanted to be sloped, he eyeballed it, and did a perfect job!

A few hours later, the concrete was hard enough for the power trowels. Check these “riders” out!
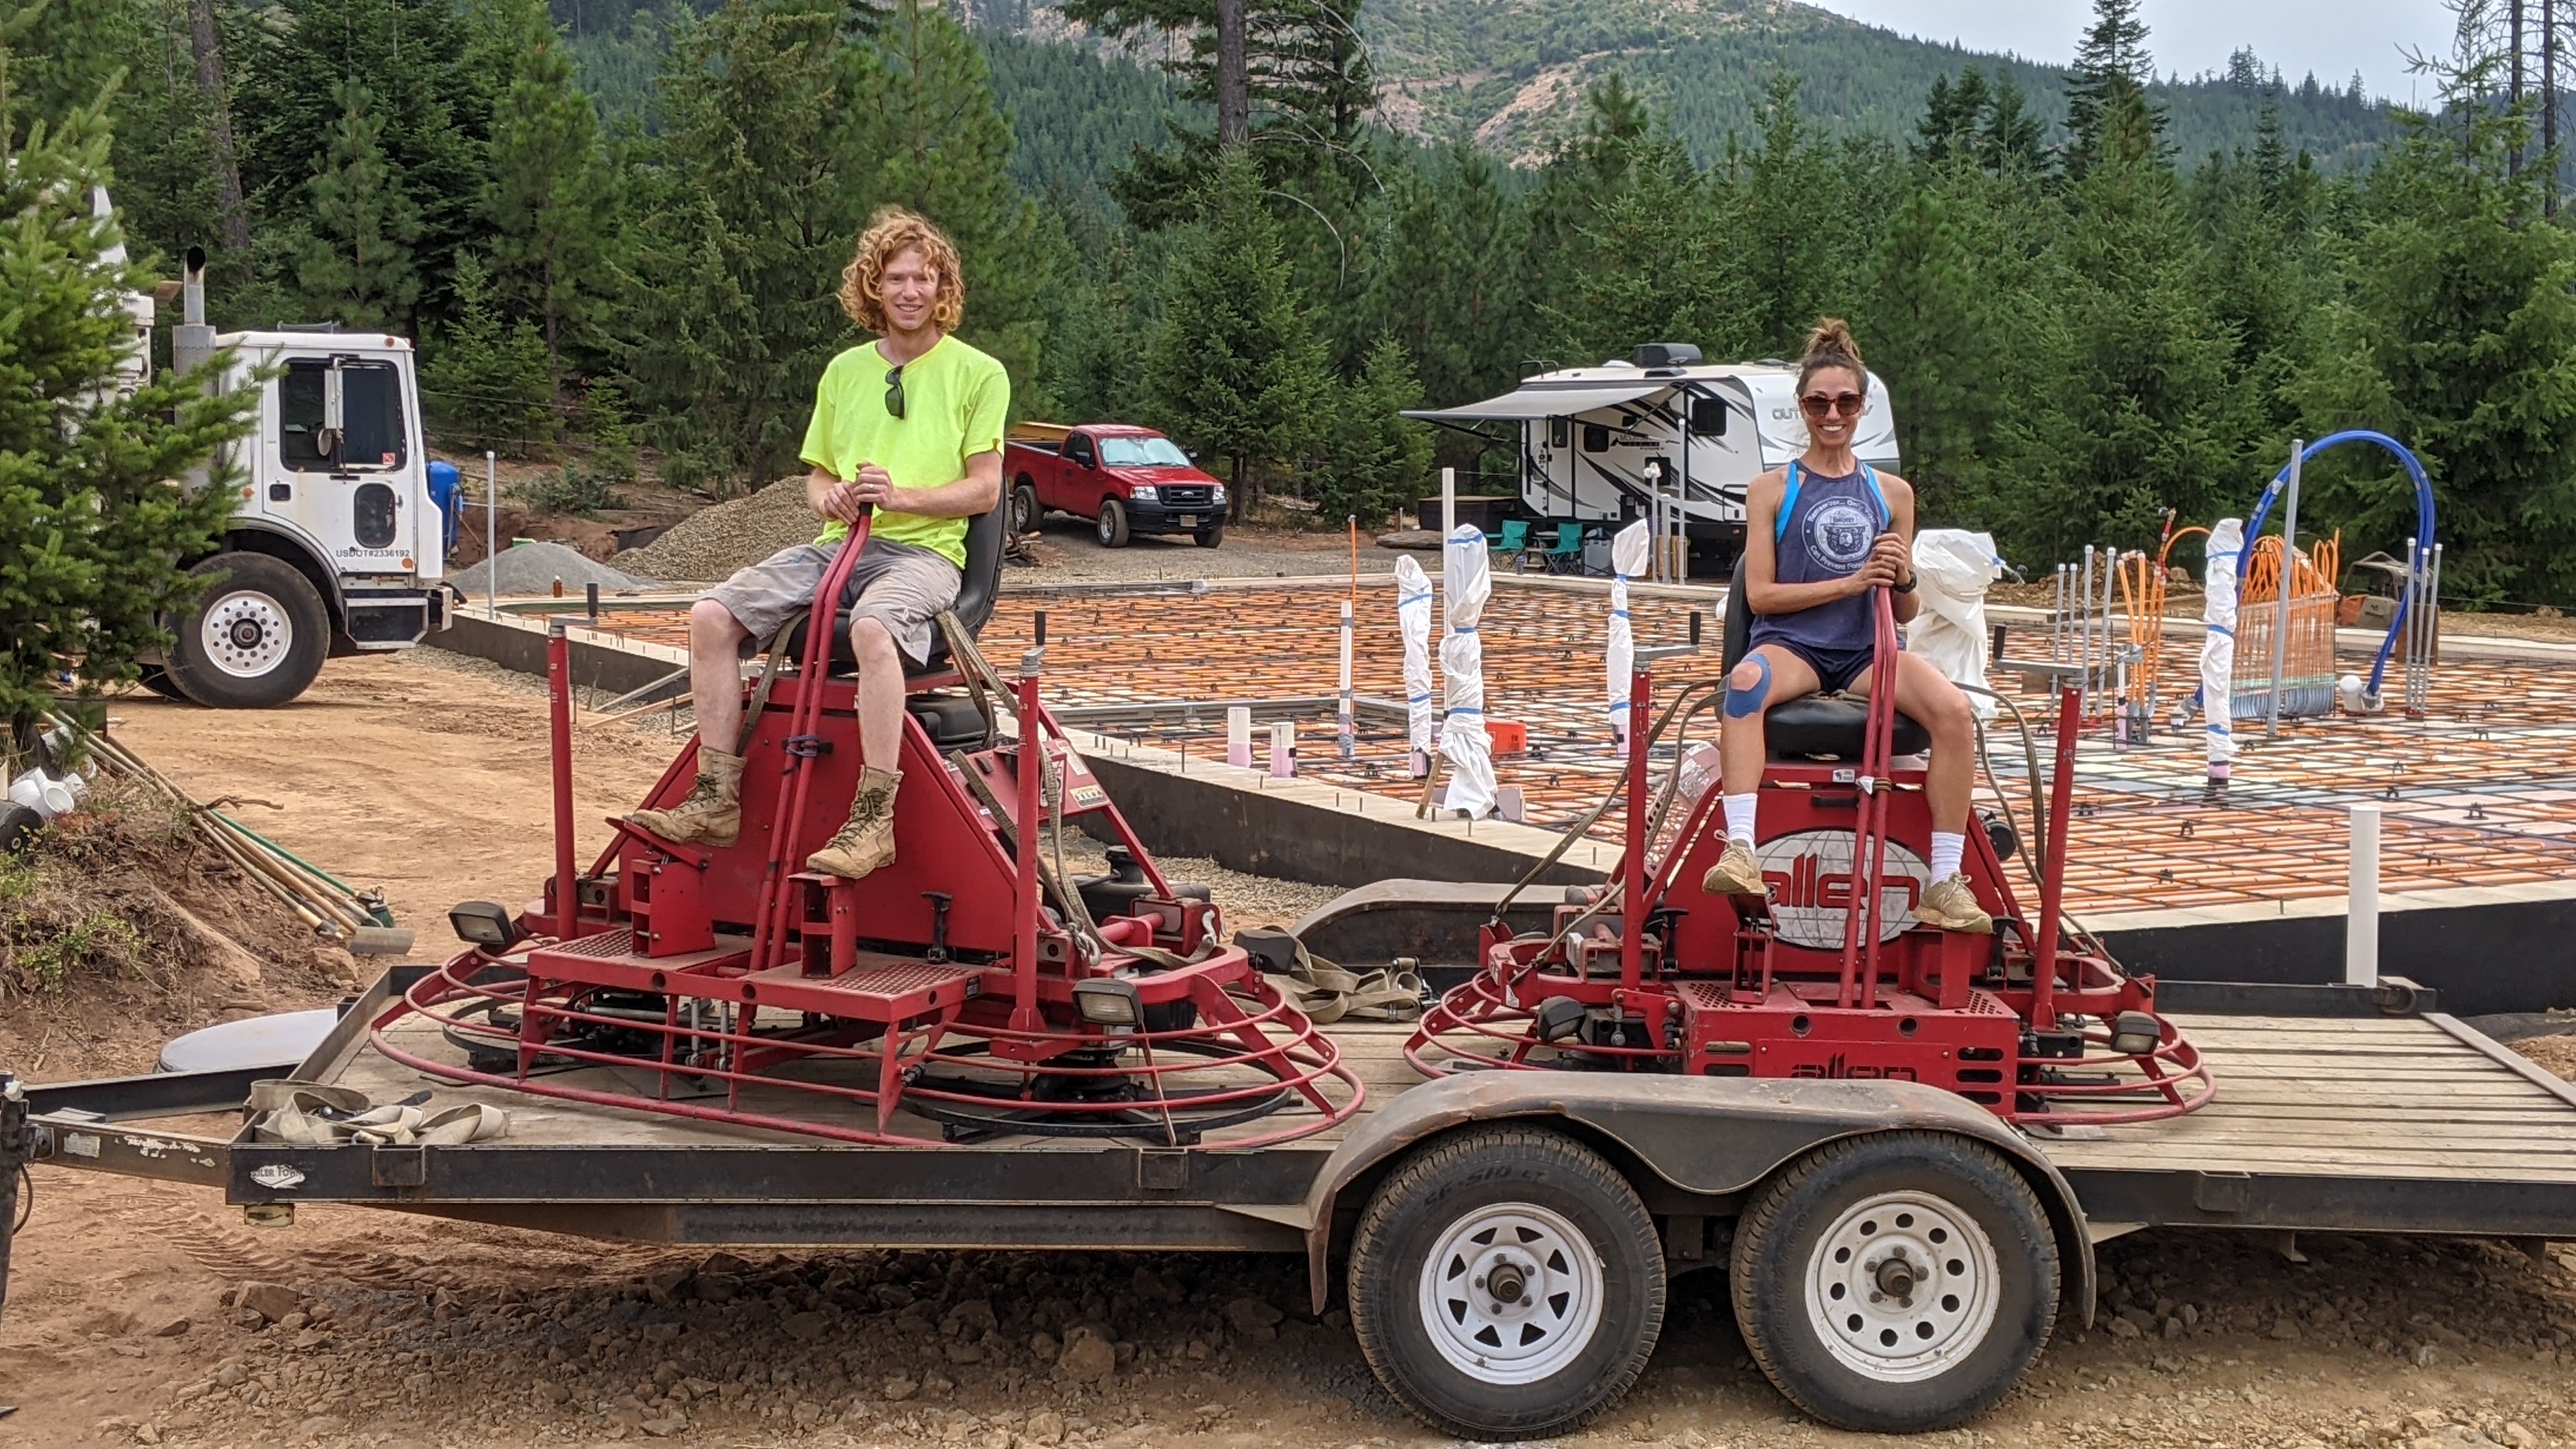
The looked like hover crafts, and did they fly! Well…they flew once they started up.
“Thing 1” was larger, used for the initial troweling or “panning”. It had two discs under it that looked like giant pizza pans. The operator drove it incredibly fast, getting right up to the pipes and turning at the last minute. It looked like fun, especially when he spun around in circles. He had clearly done this a few times.
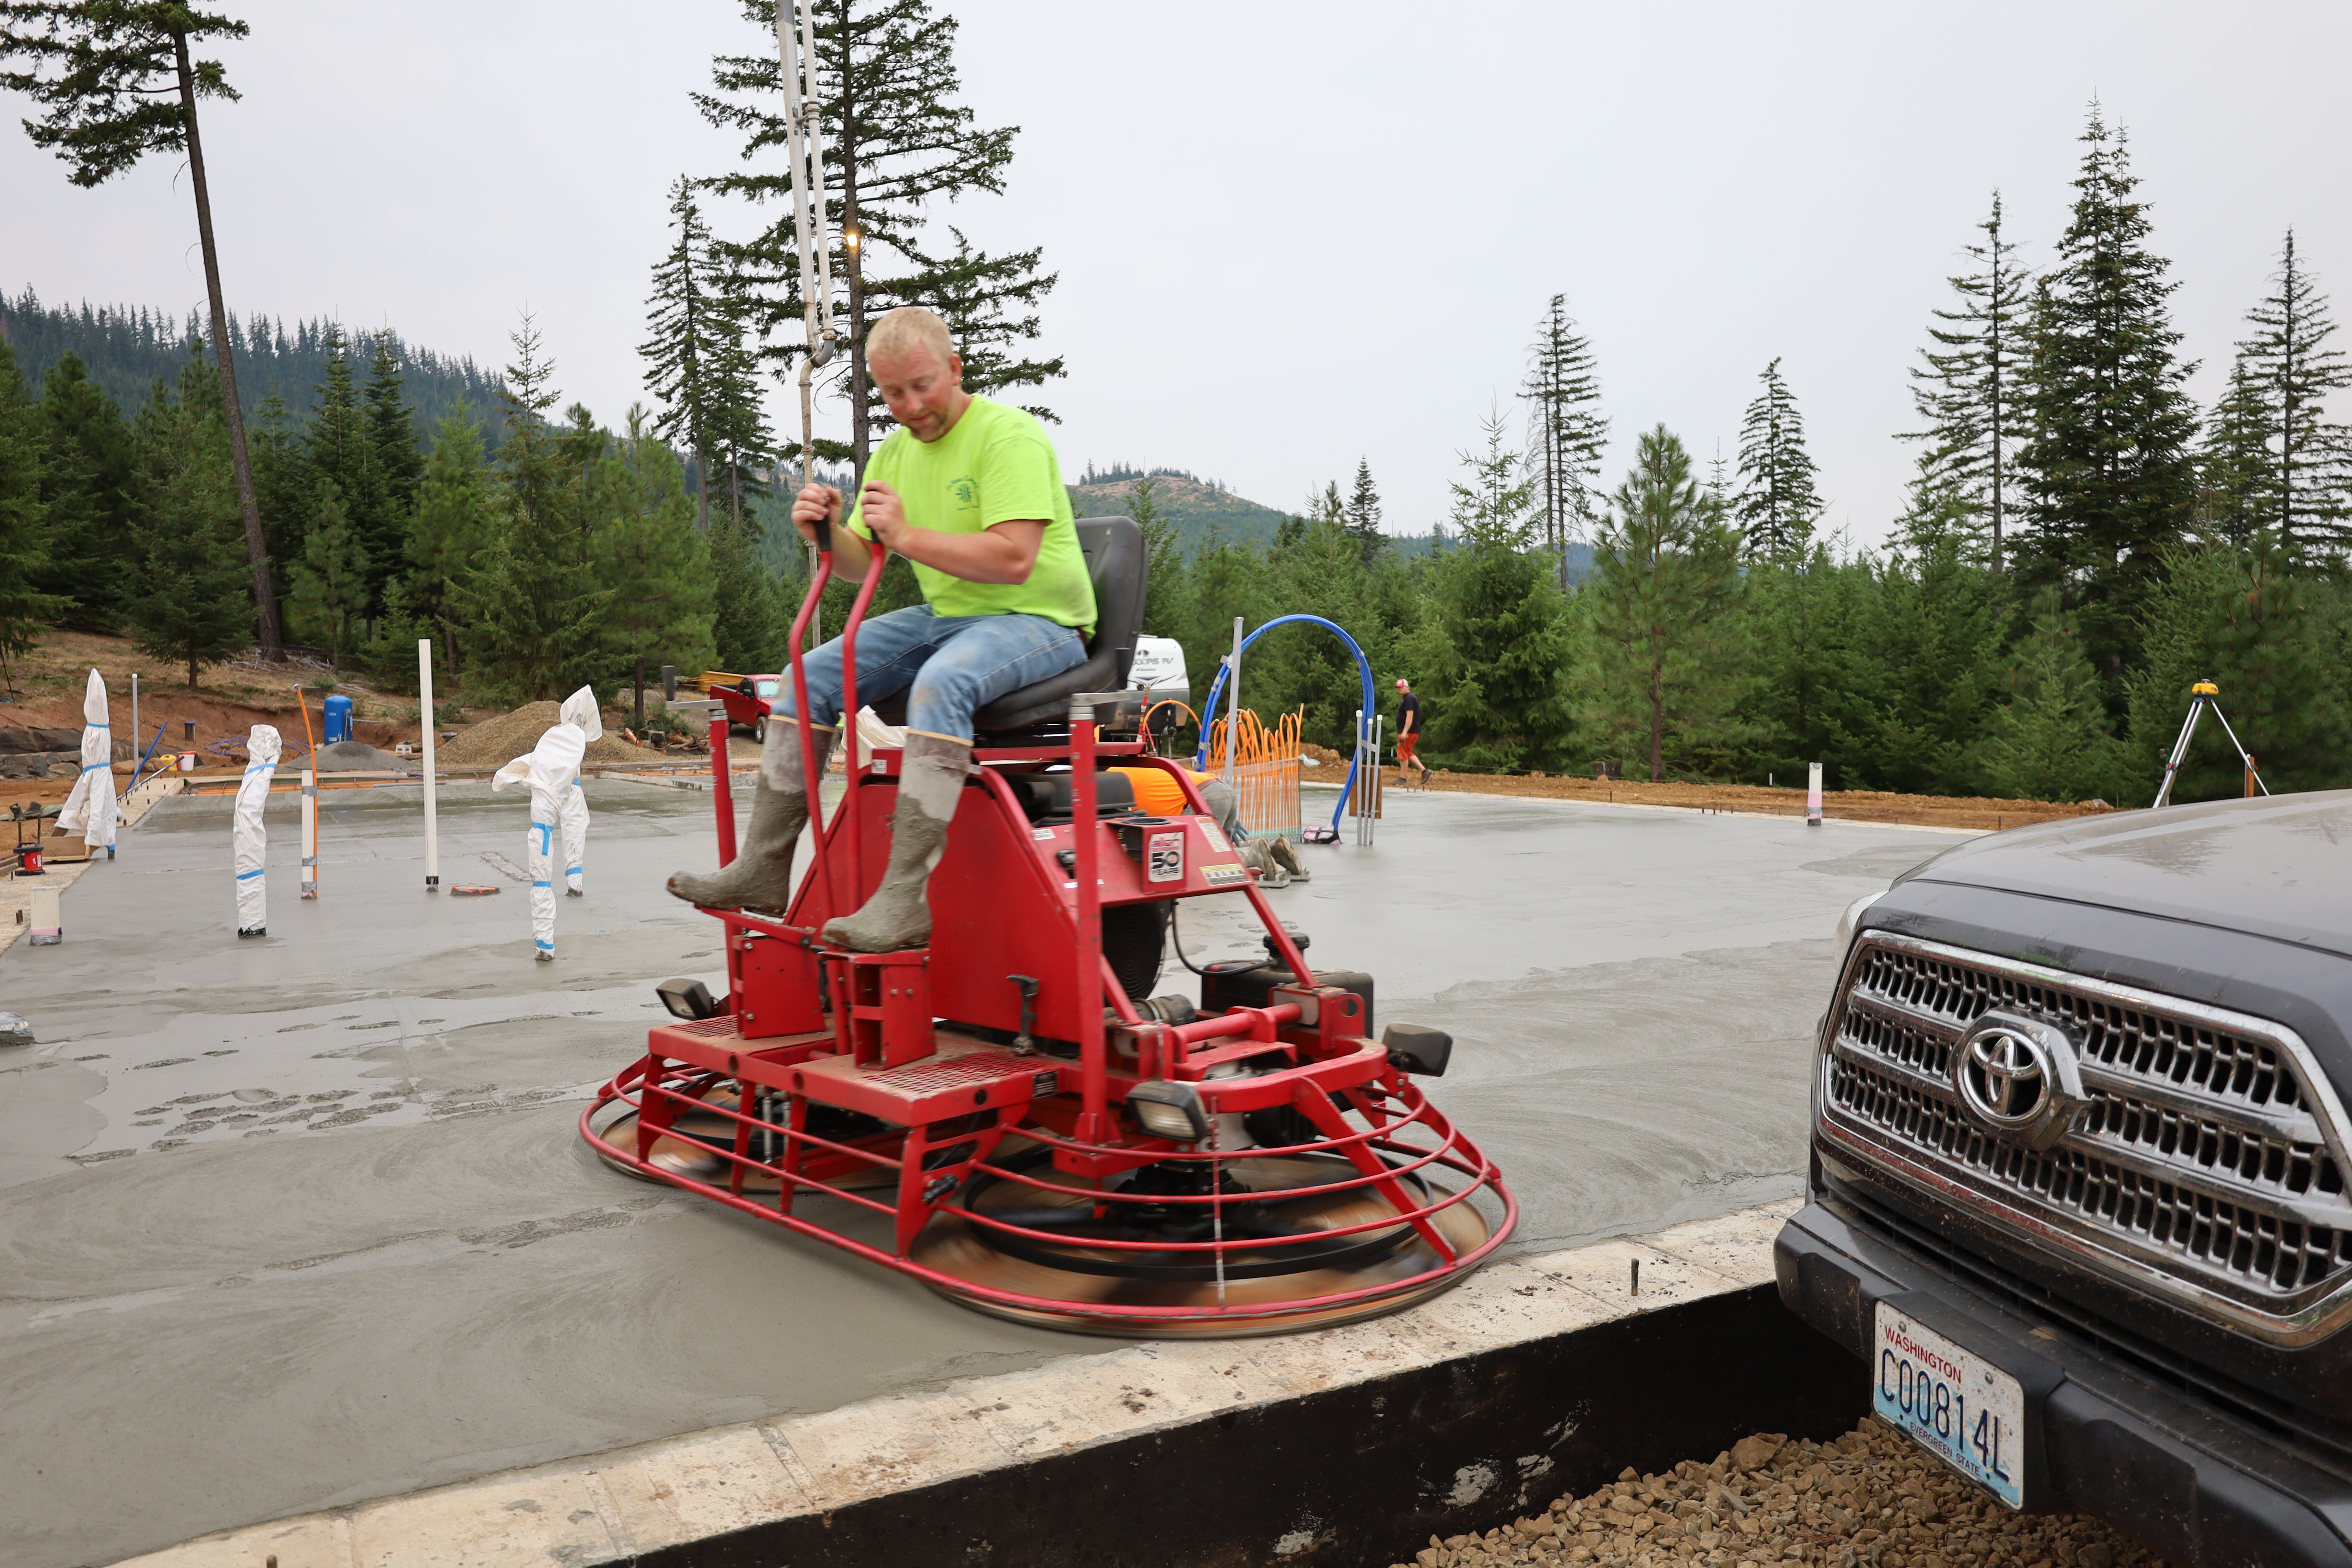

“Thing 2” was smaller and did the finishing passes. It’s blades looked more like ceiling fans.
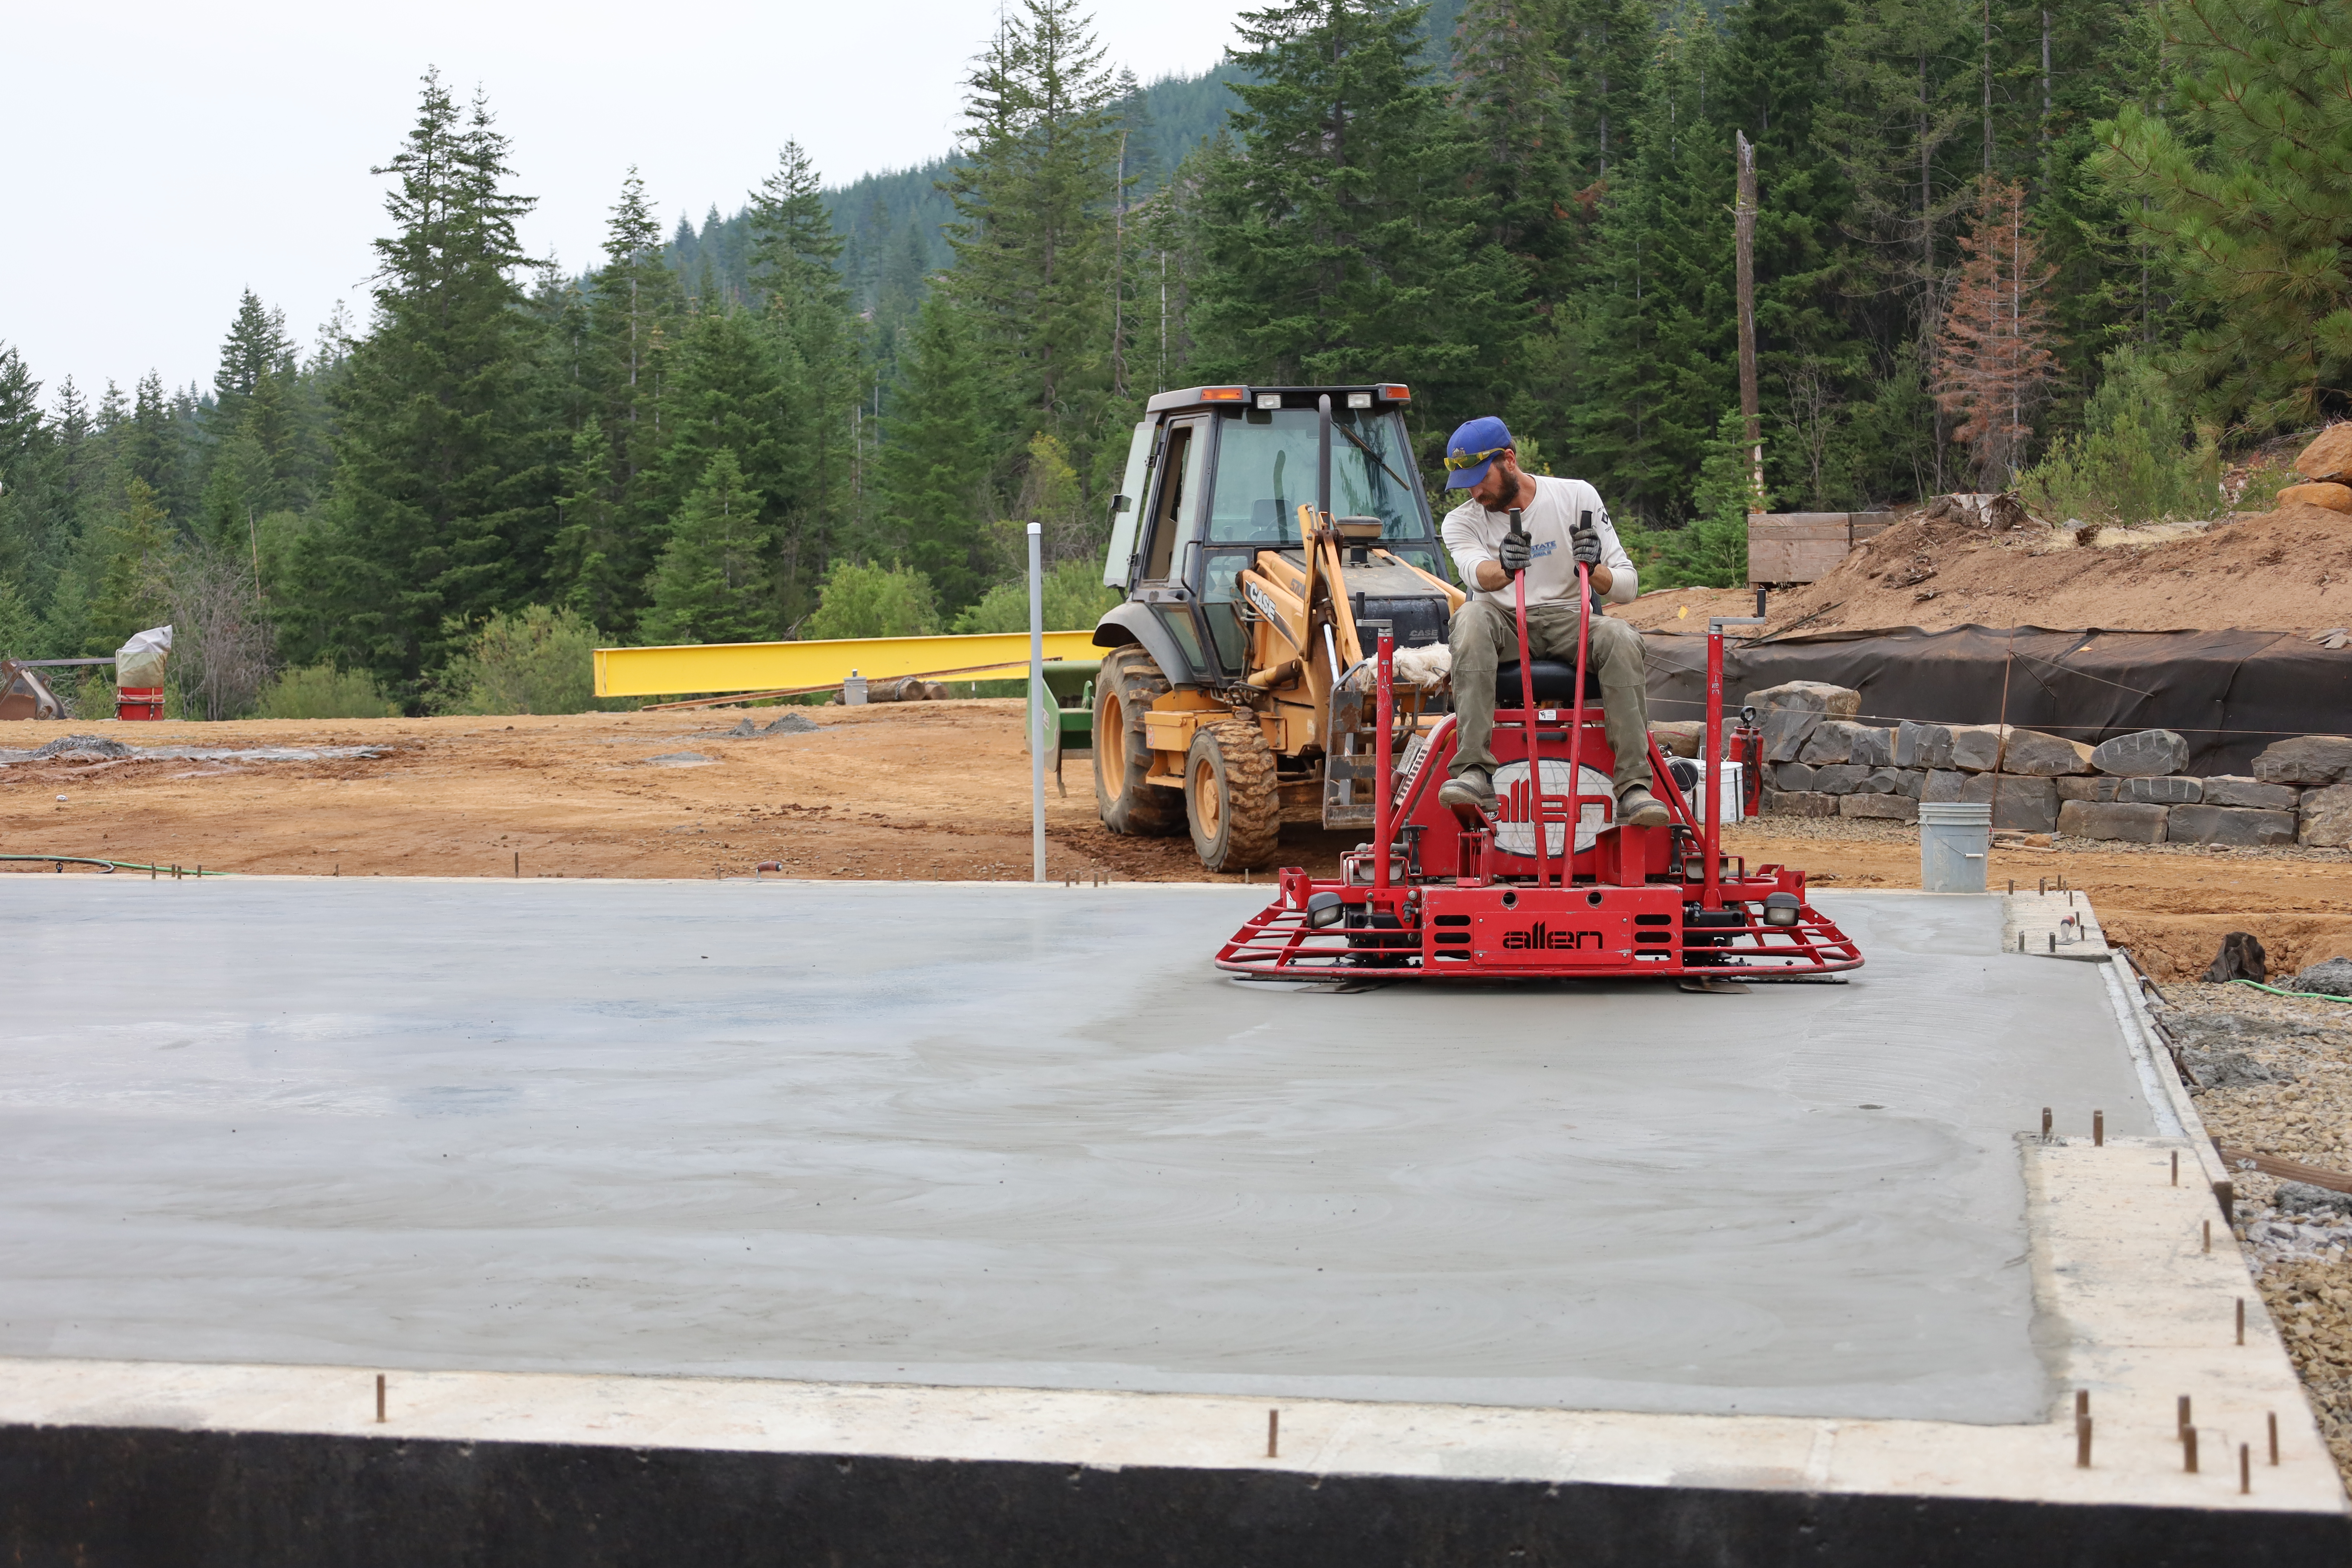
There are many nuances to working with concrete, so we were relieved to have such an experienced crew. They seemed to know exactly how long to wait before moving on to the next step. Power troweling took awhile, and most of the crew went home by the time it was complete.
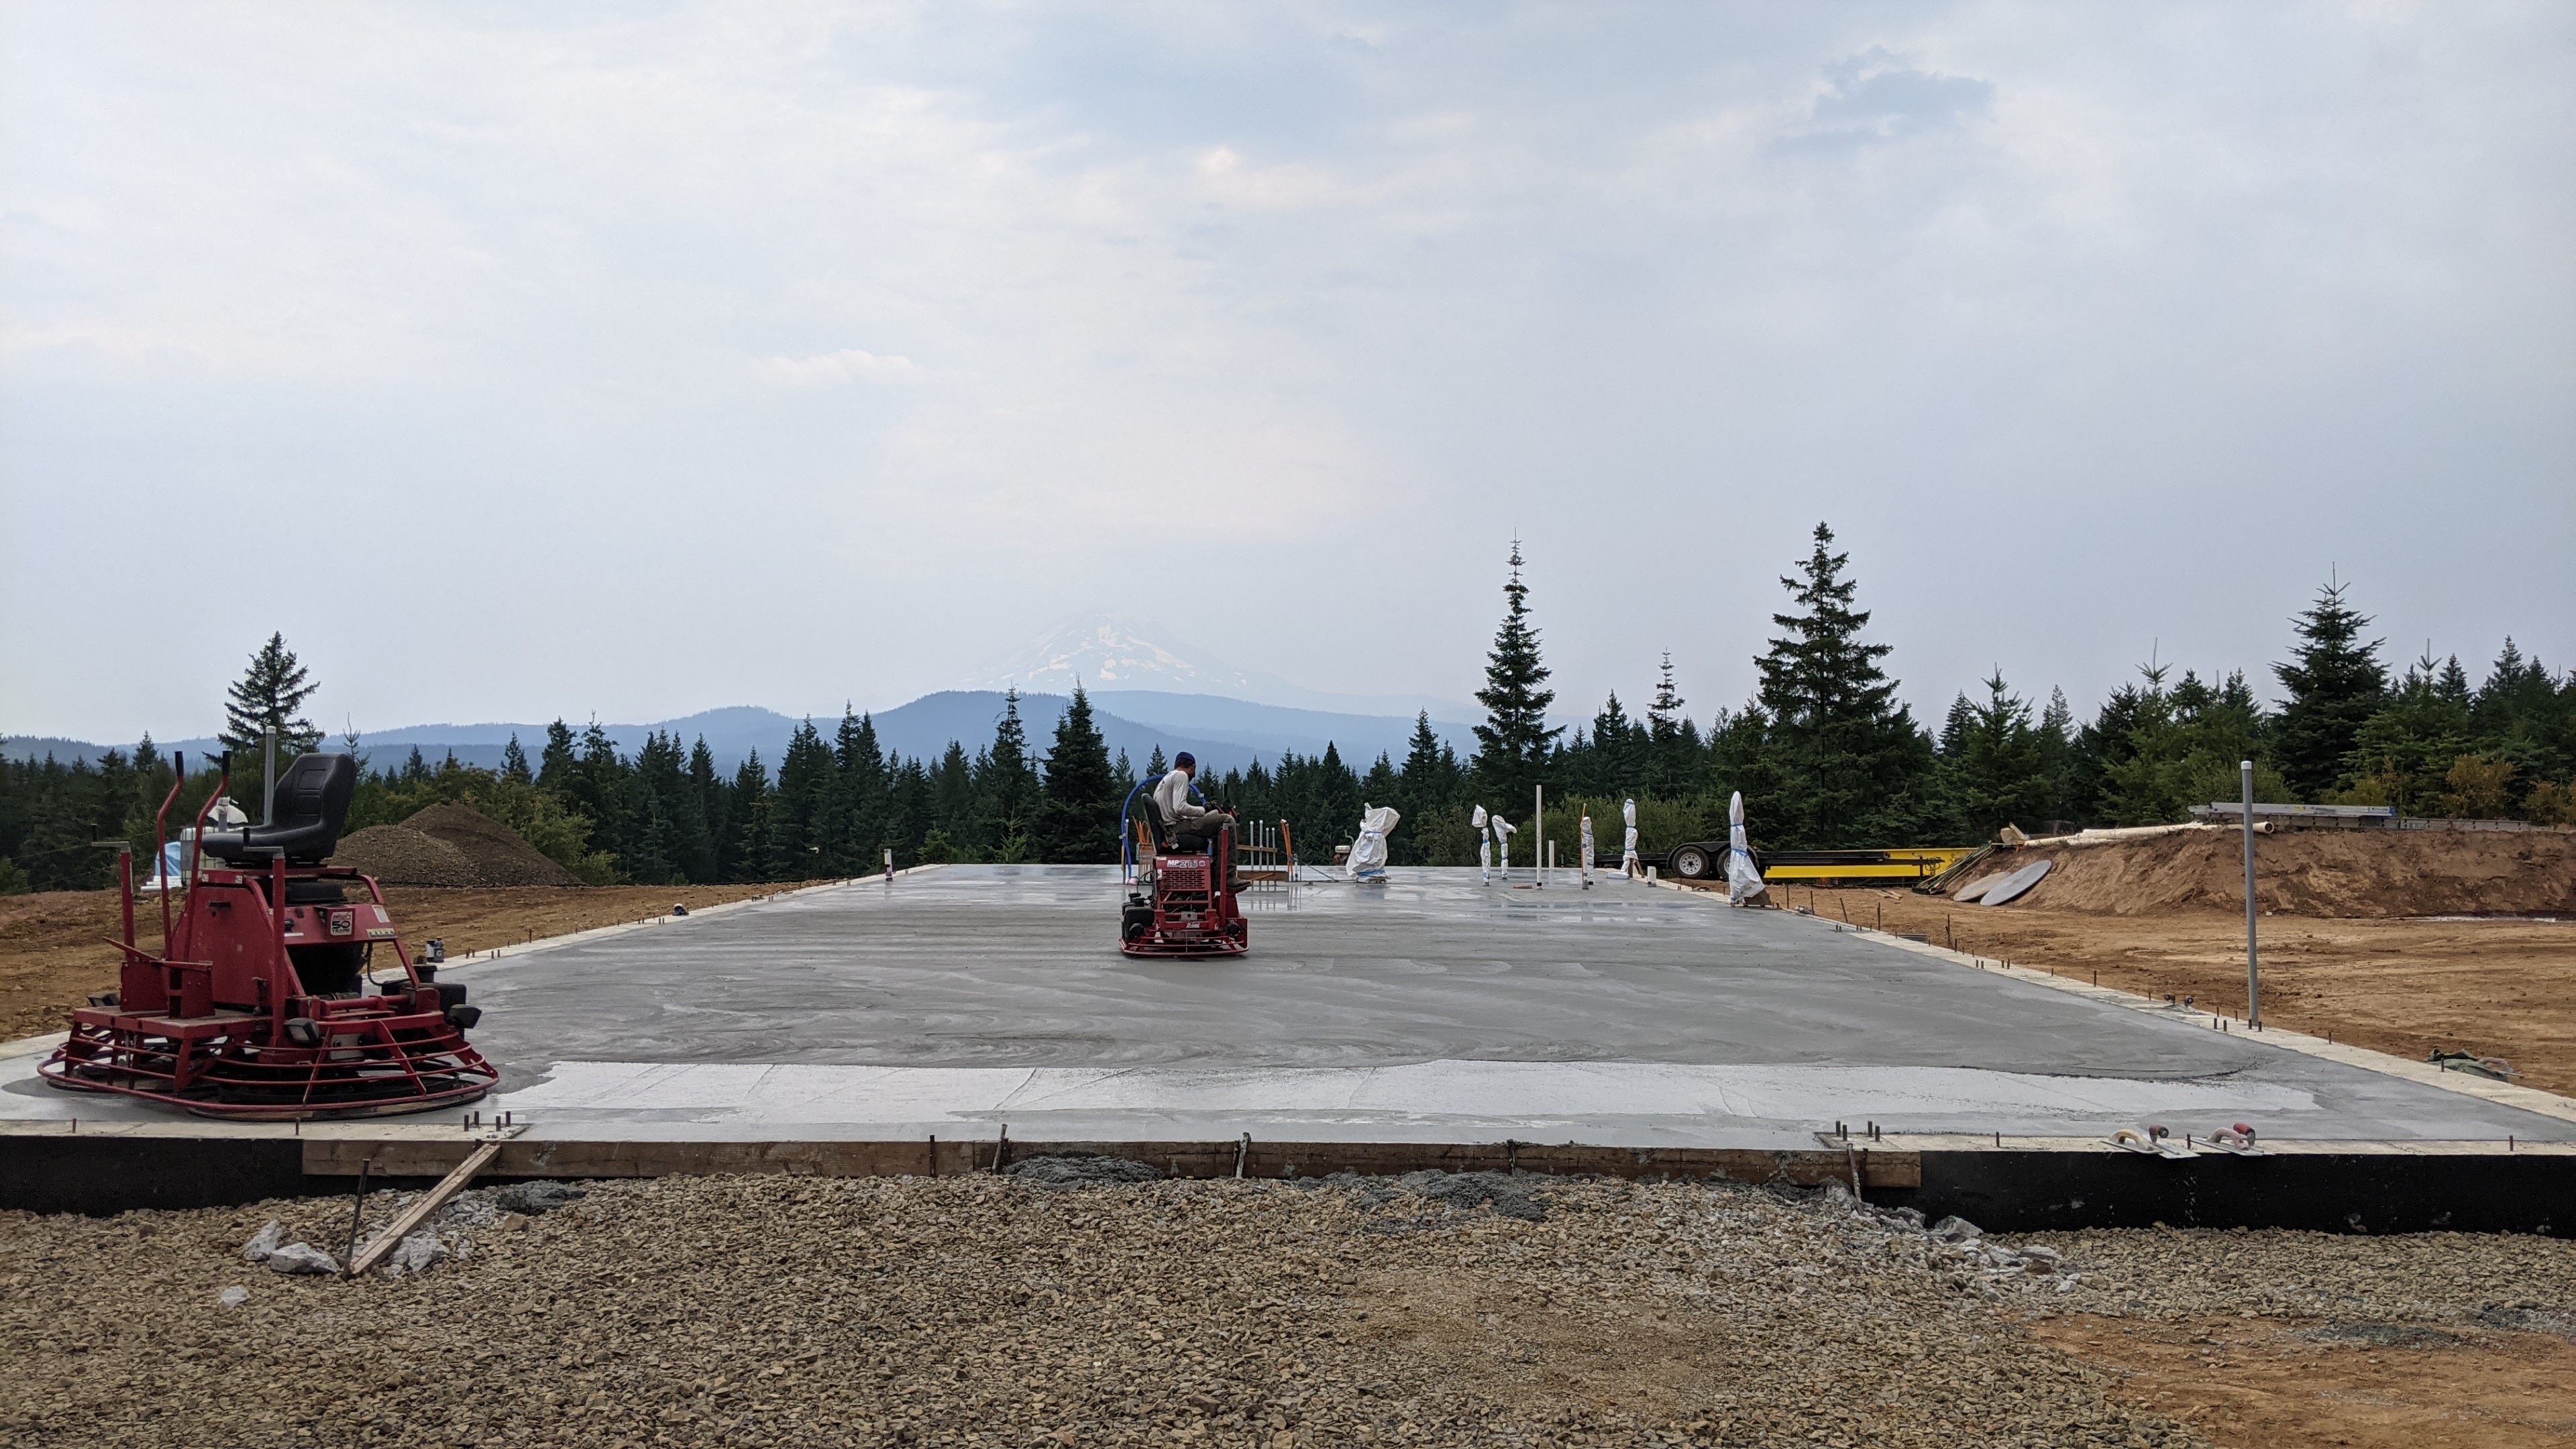

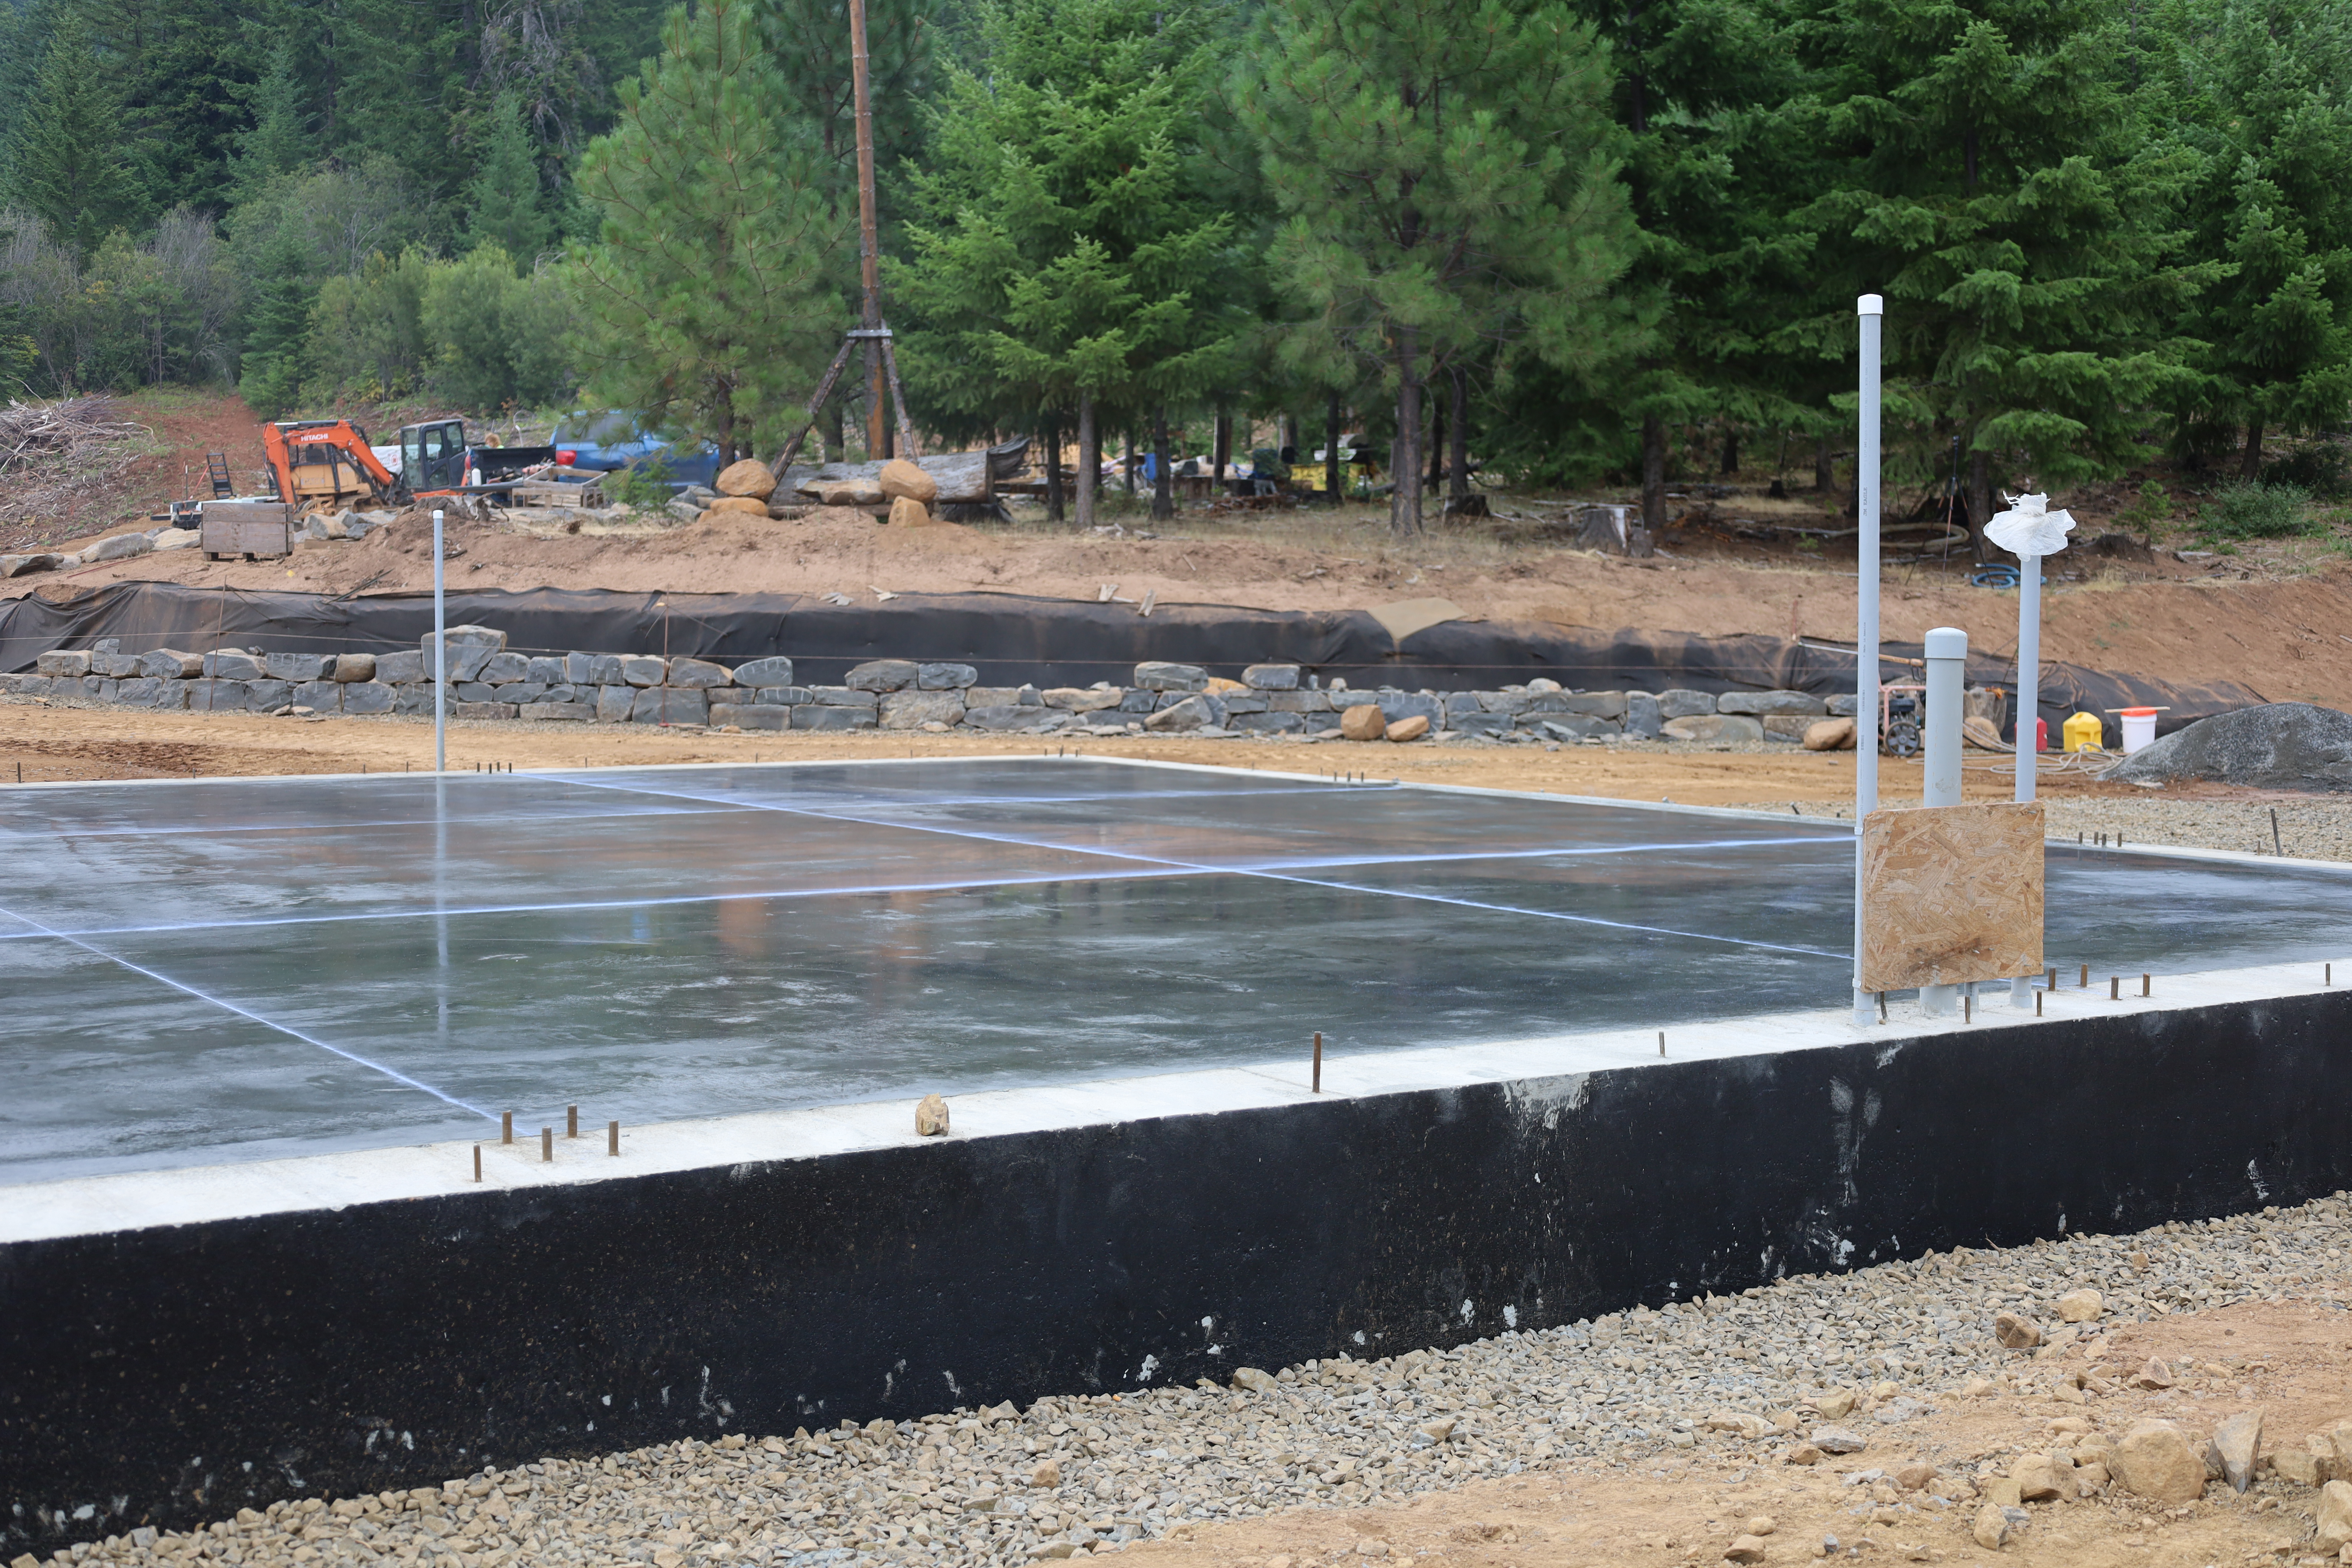
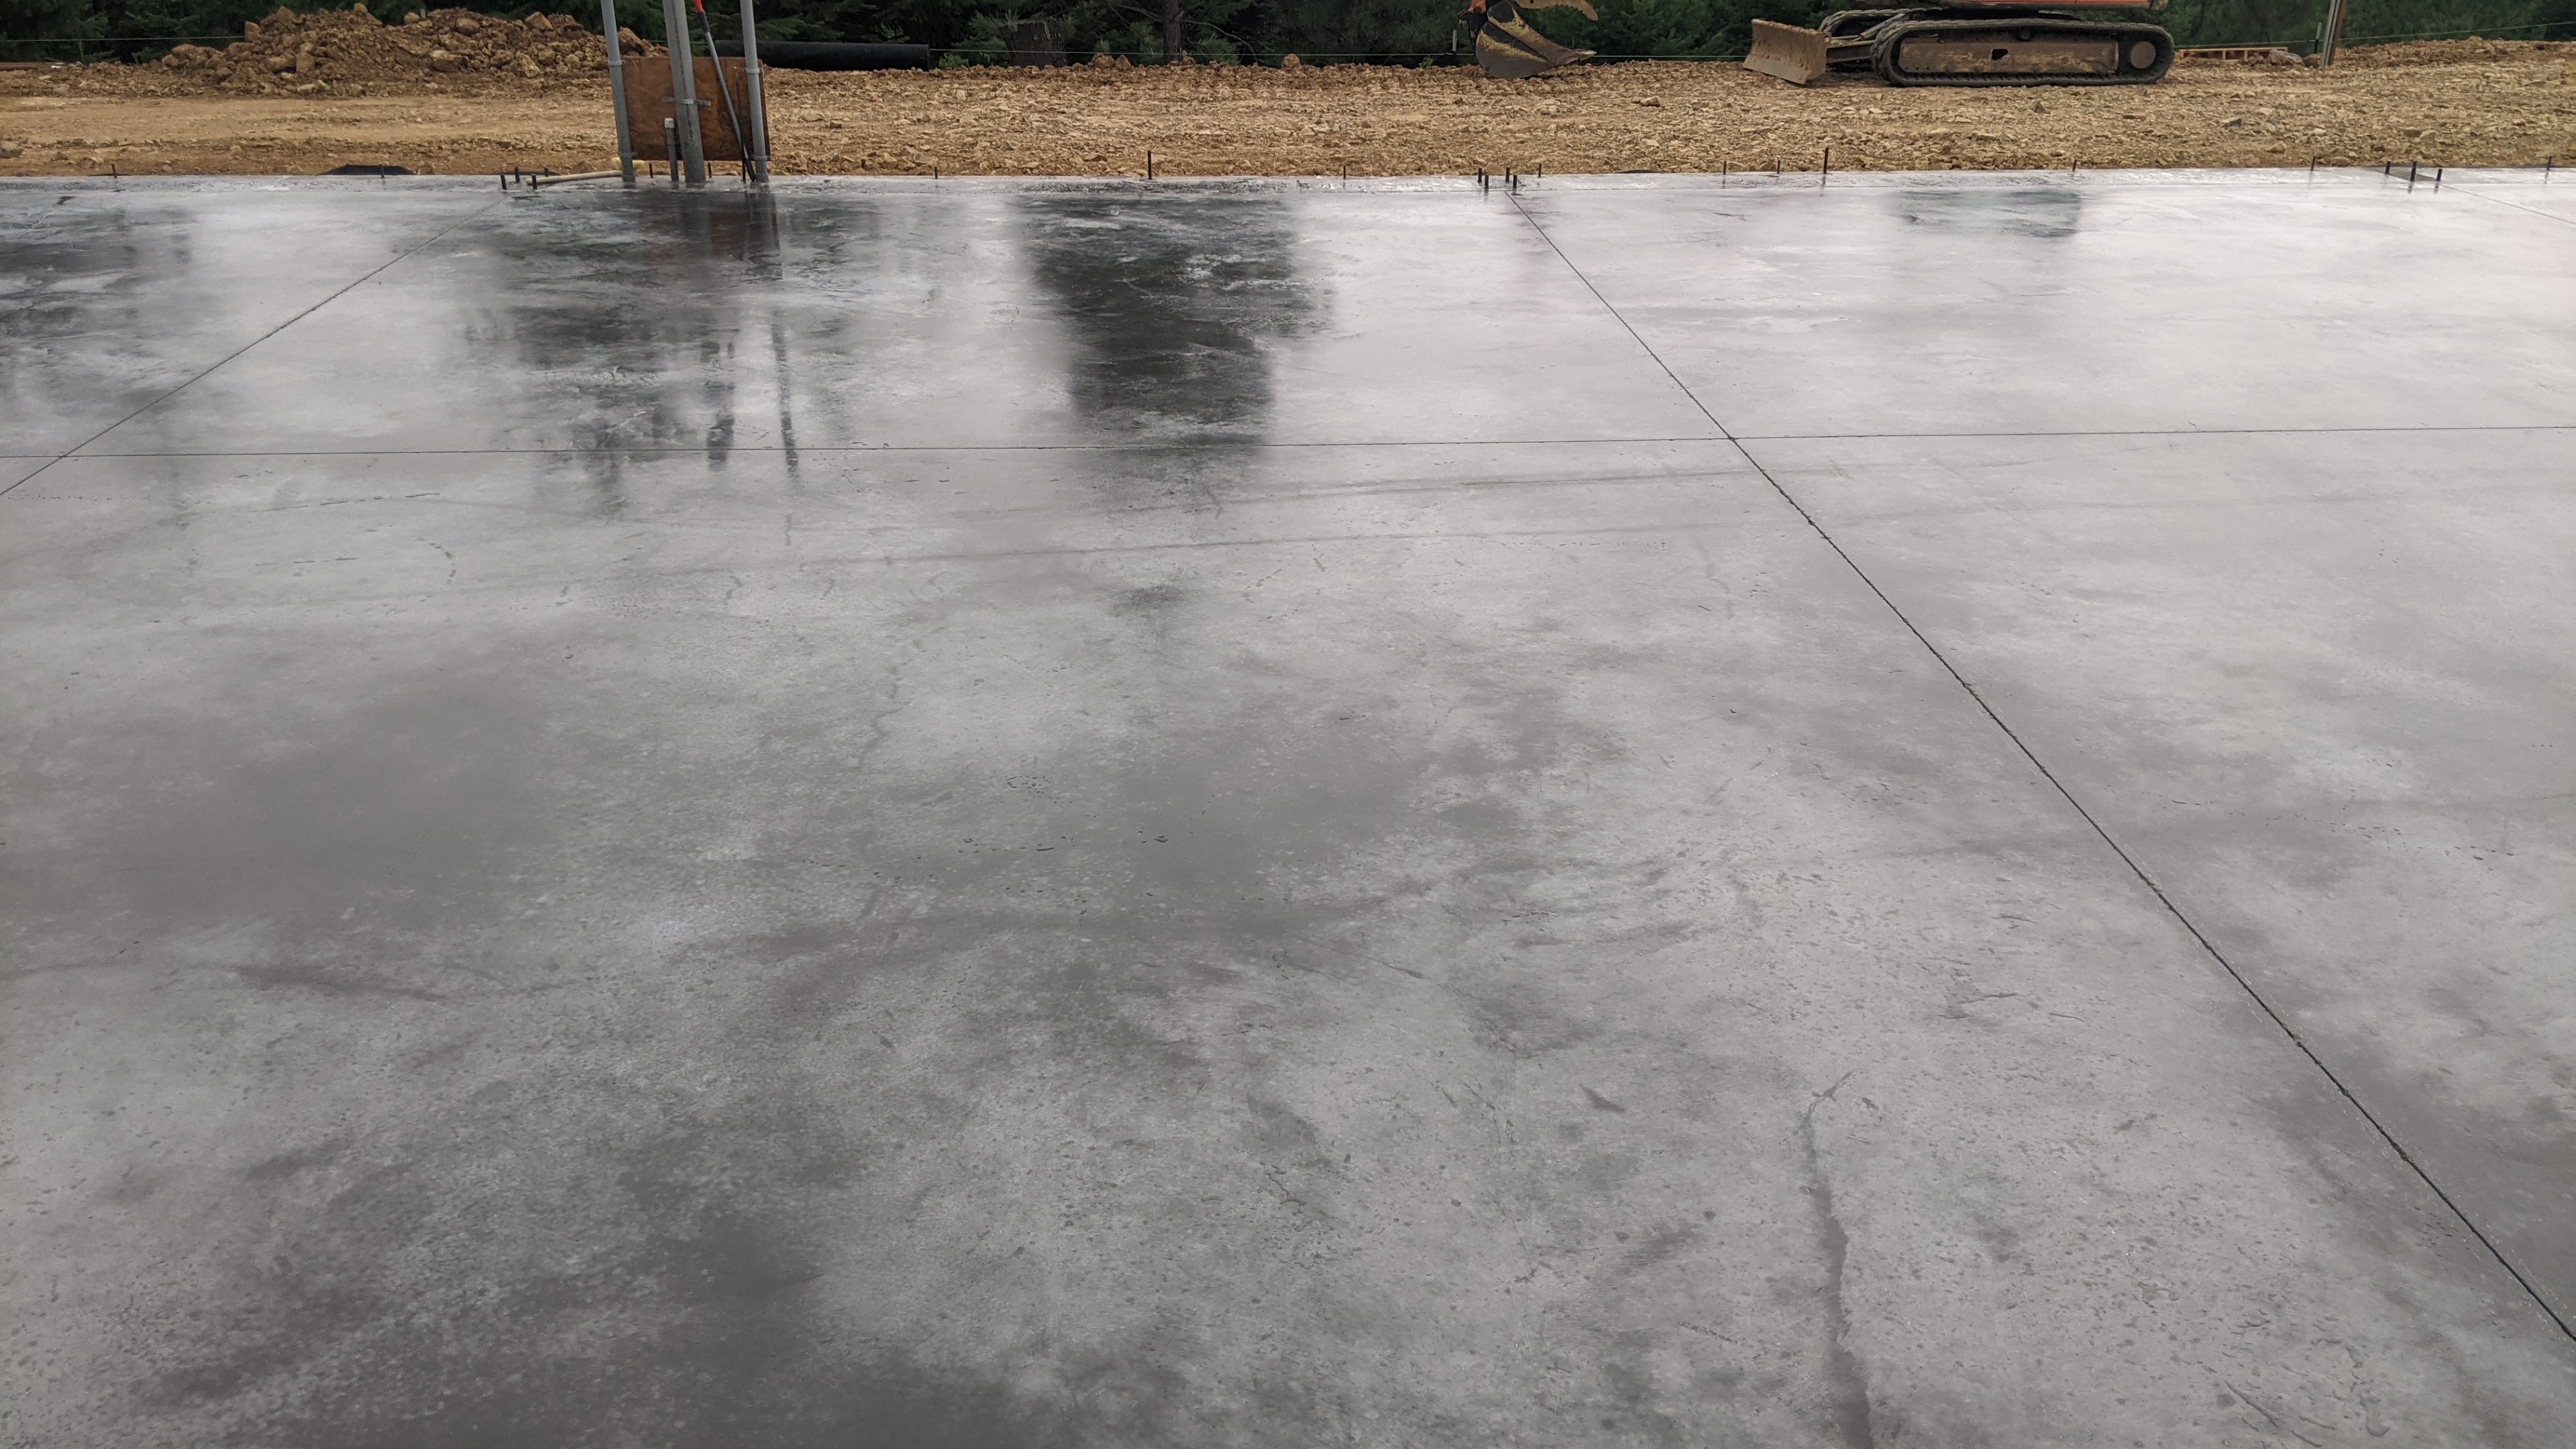
The slab was smooth and slightly glossy from this process, just as we had hoped. The riders left a lot of dust behind though, so Sam swept the slab before the sealant was applied.

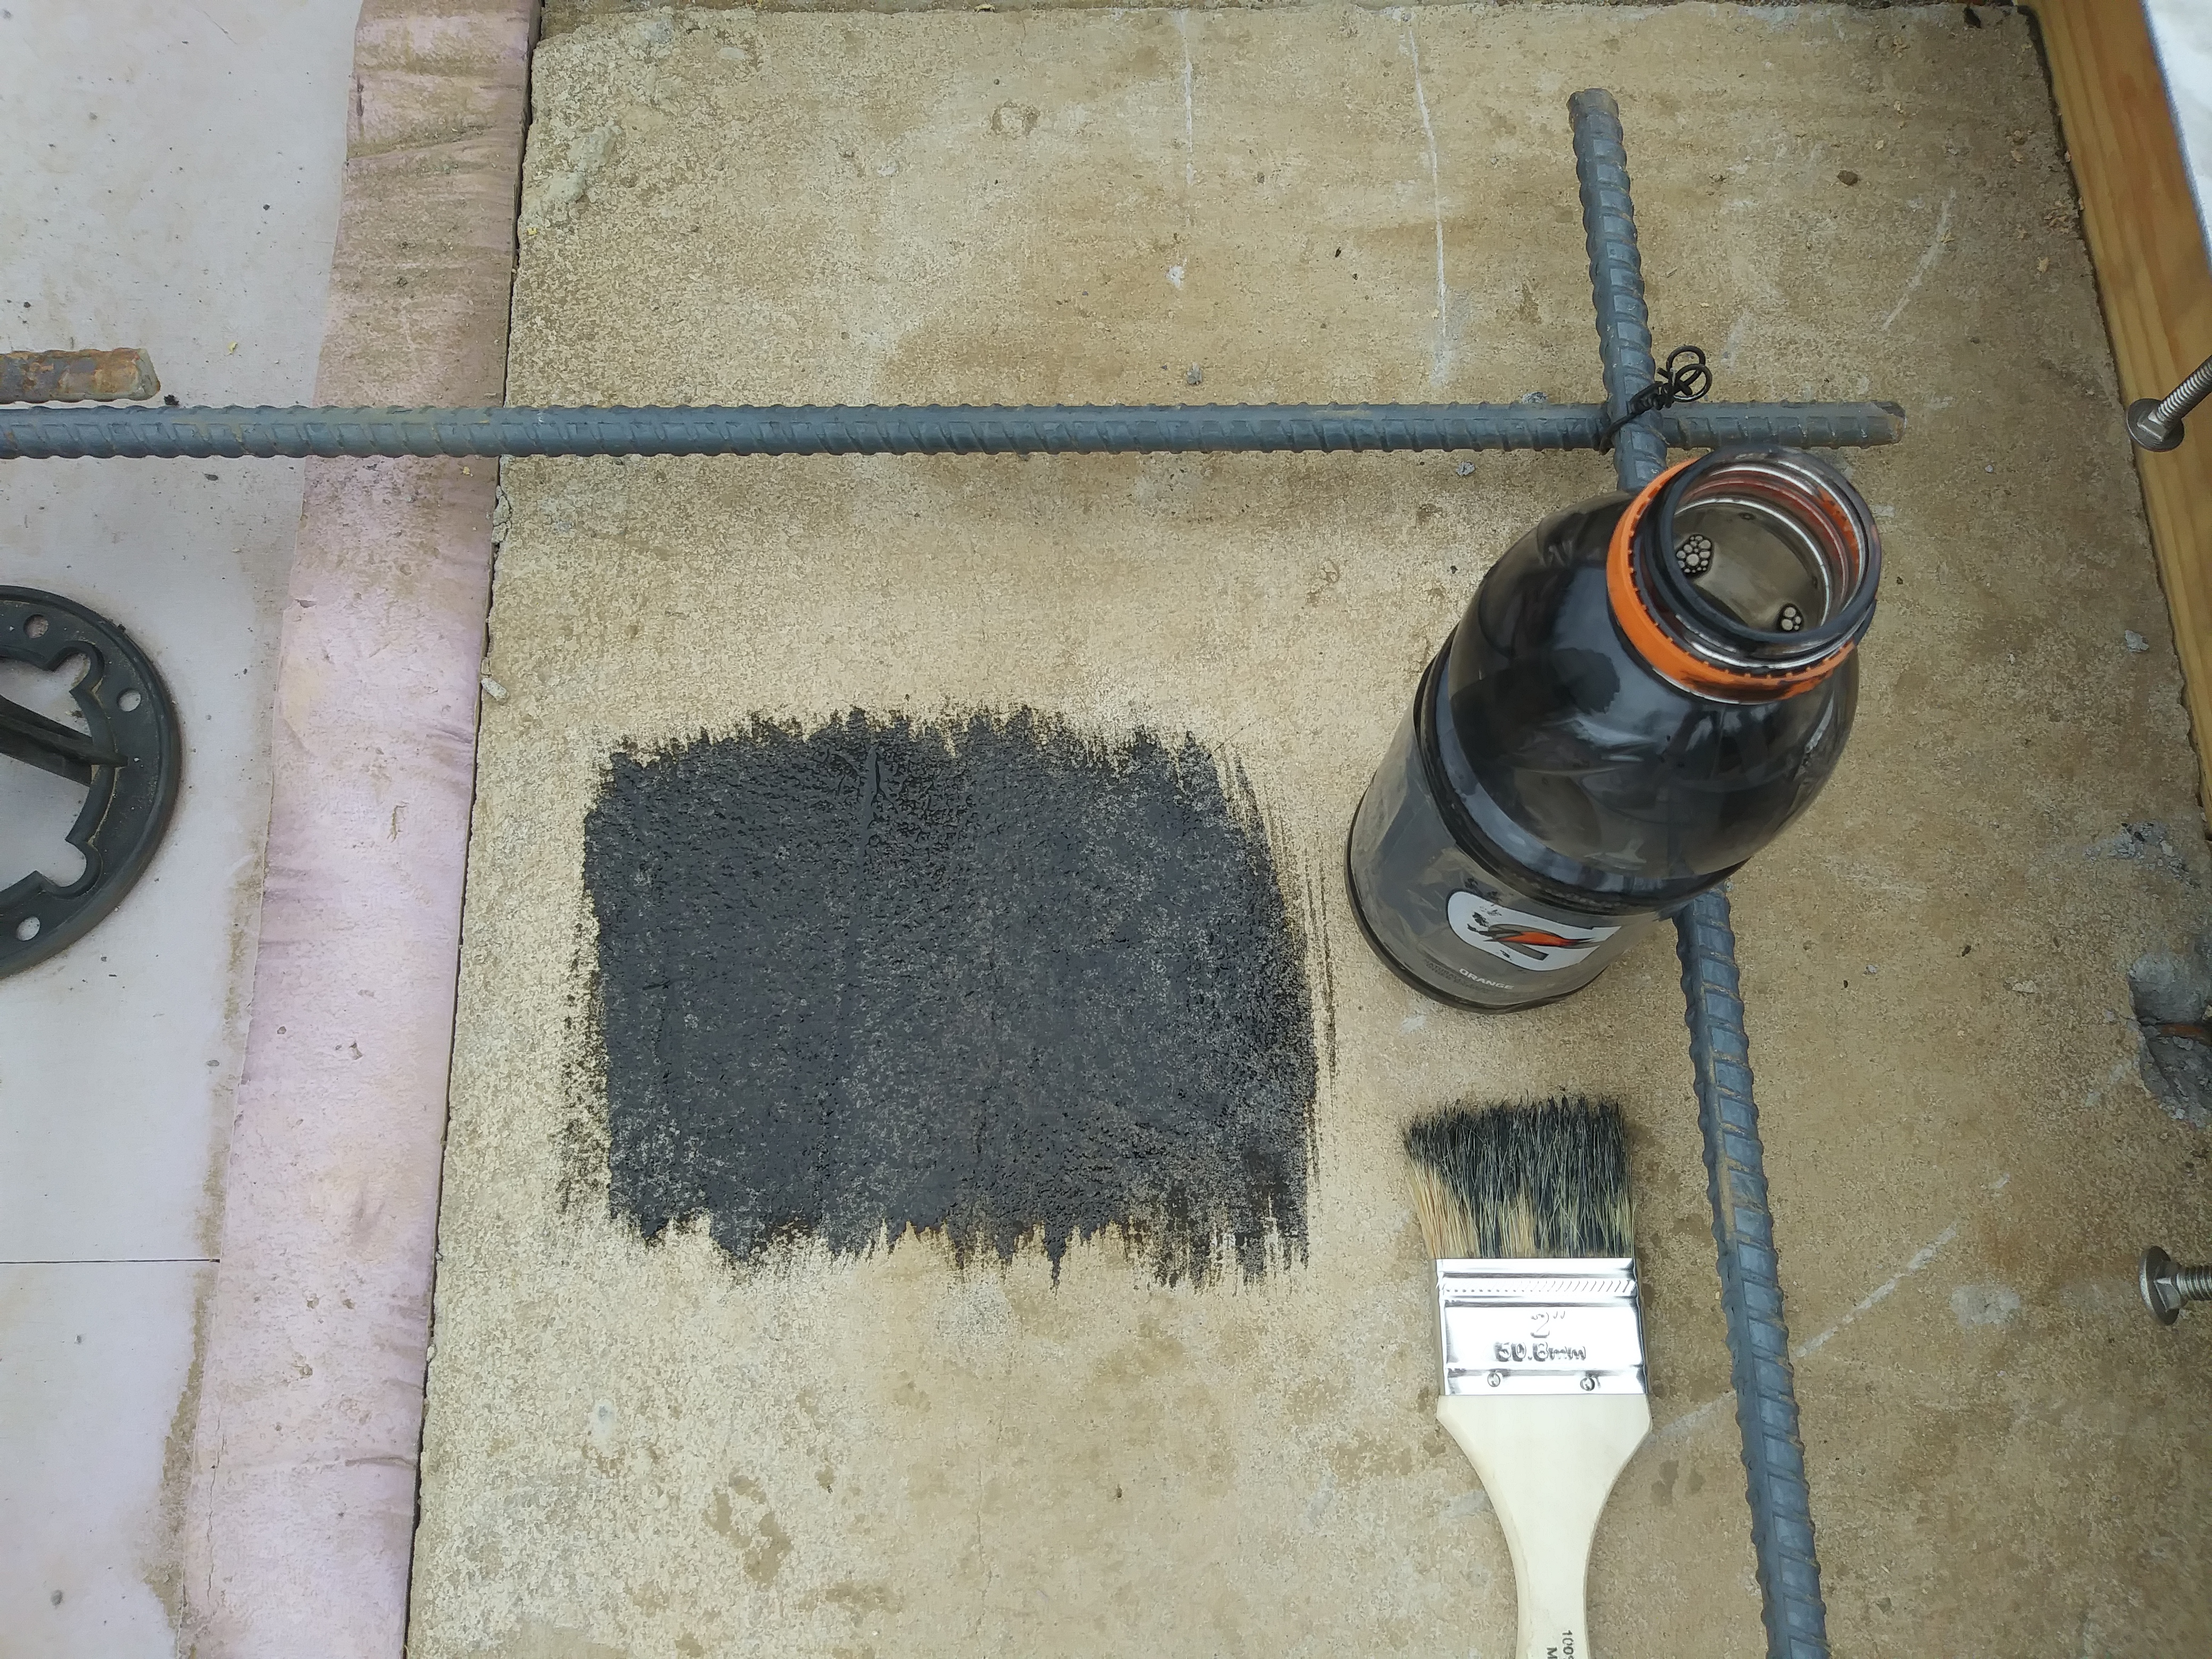
Once the slab was clean, we mixed up the sealant. Sam and I bought a black tint to mix in with the clear sealant. No one in the crew had used that particular tint before or had any idea how much to use. I tried to test it earlier, but I couldn’t dilute it enough, and it came out opaque (we were going for med-dark grey.) We decided to start with a very small amount of color. Matt tested it until we were all pleased with the results. (Don’t look under our future bed.)

Then, for the first time in 45 days, it started drizzling! We wished for clouds a little too much I guess. We were dumbfounded and sat around contemplating our next move. The rain creates bubbles and imperfections in the sealant. But, if you don’t seal the concrete quickly, moisture escapes and it cures faster, creating more cracks.
Then, there was a pause in the weather, and we decided to go for it. The rest of the spraying went on without a hitch. It looked great! We were very happy with the color (although it will lighten a lot as it continues to cure).
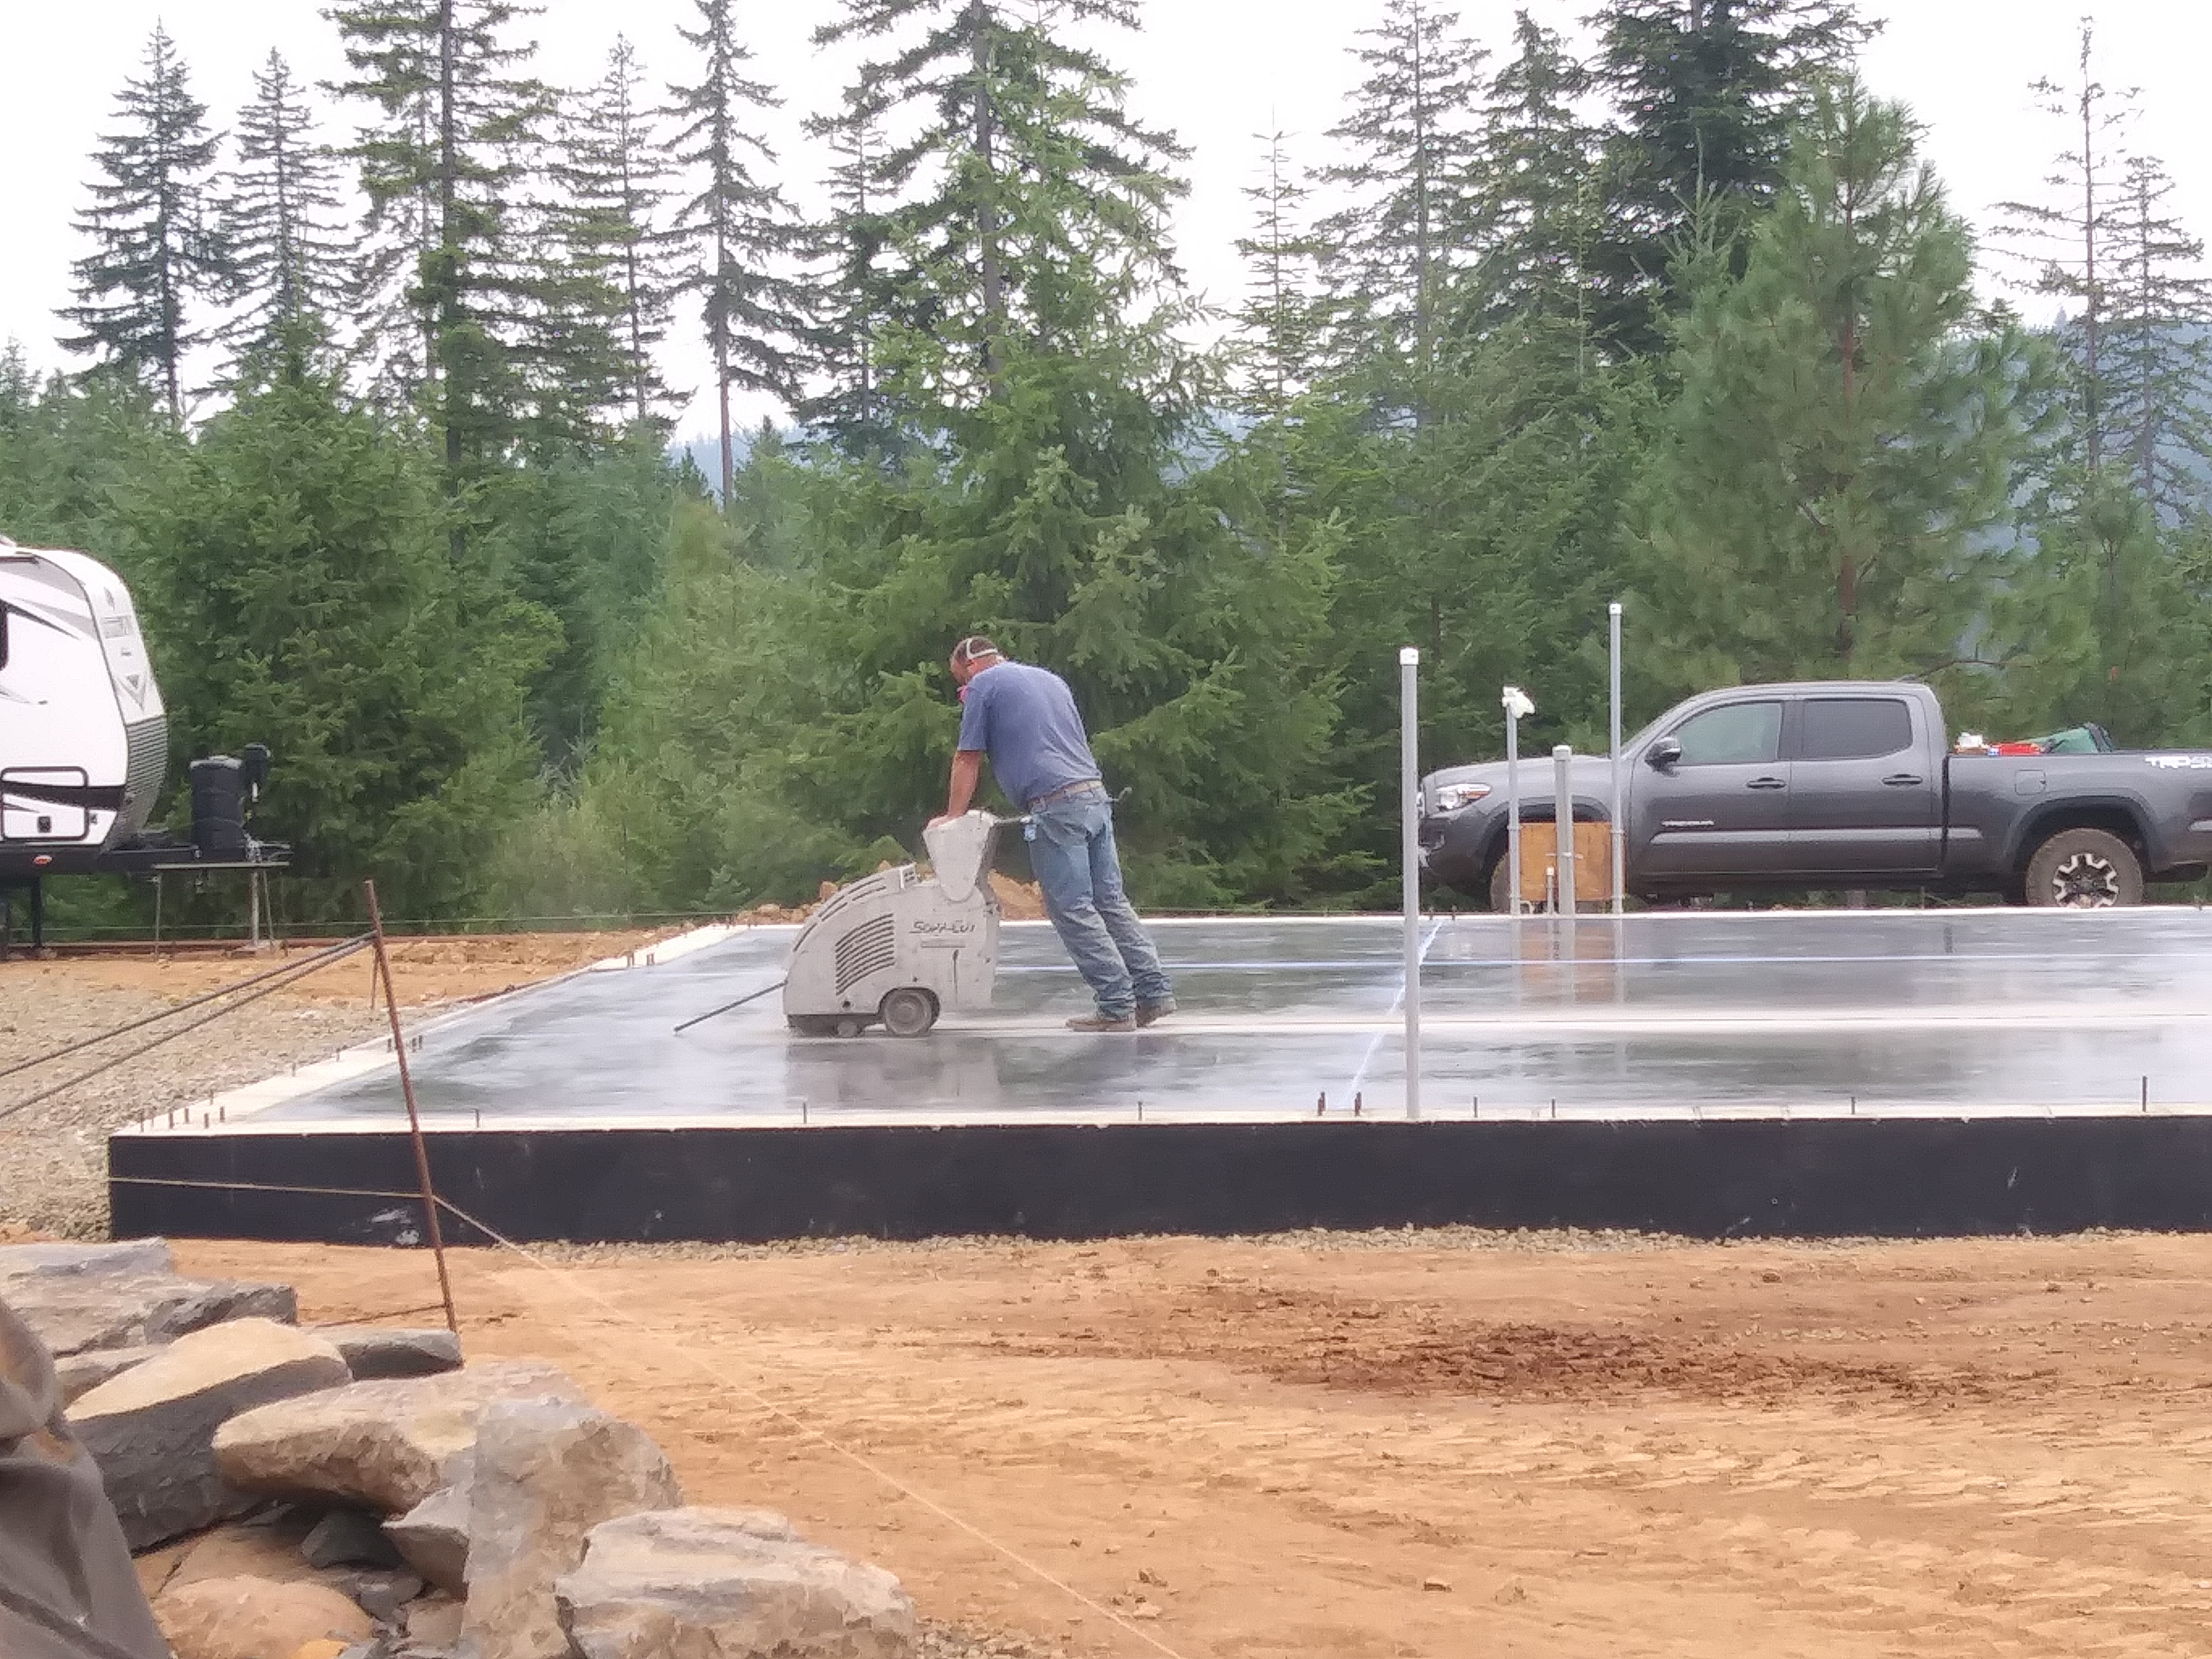
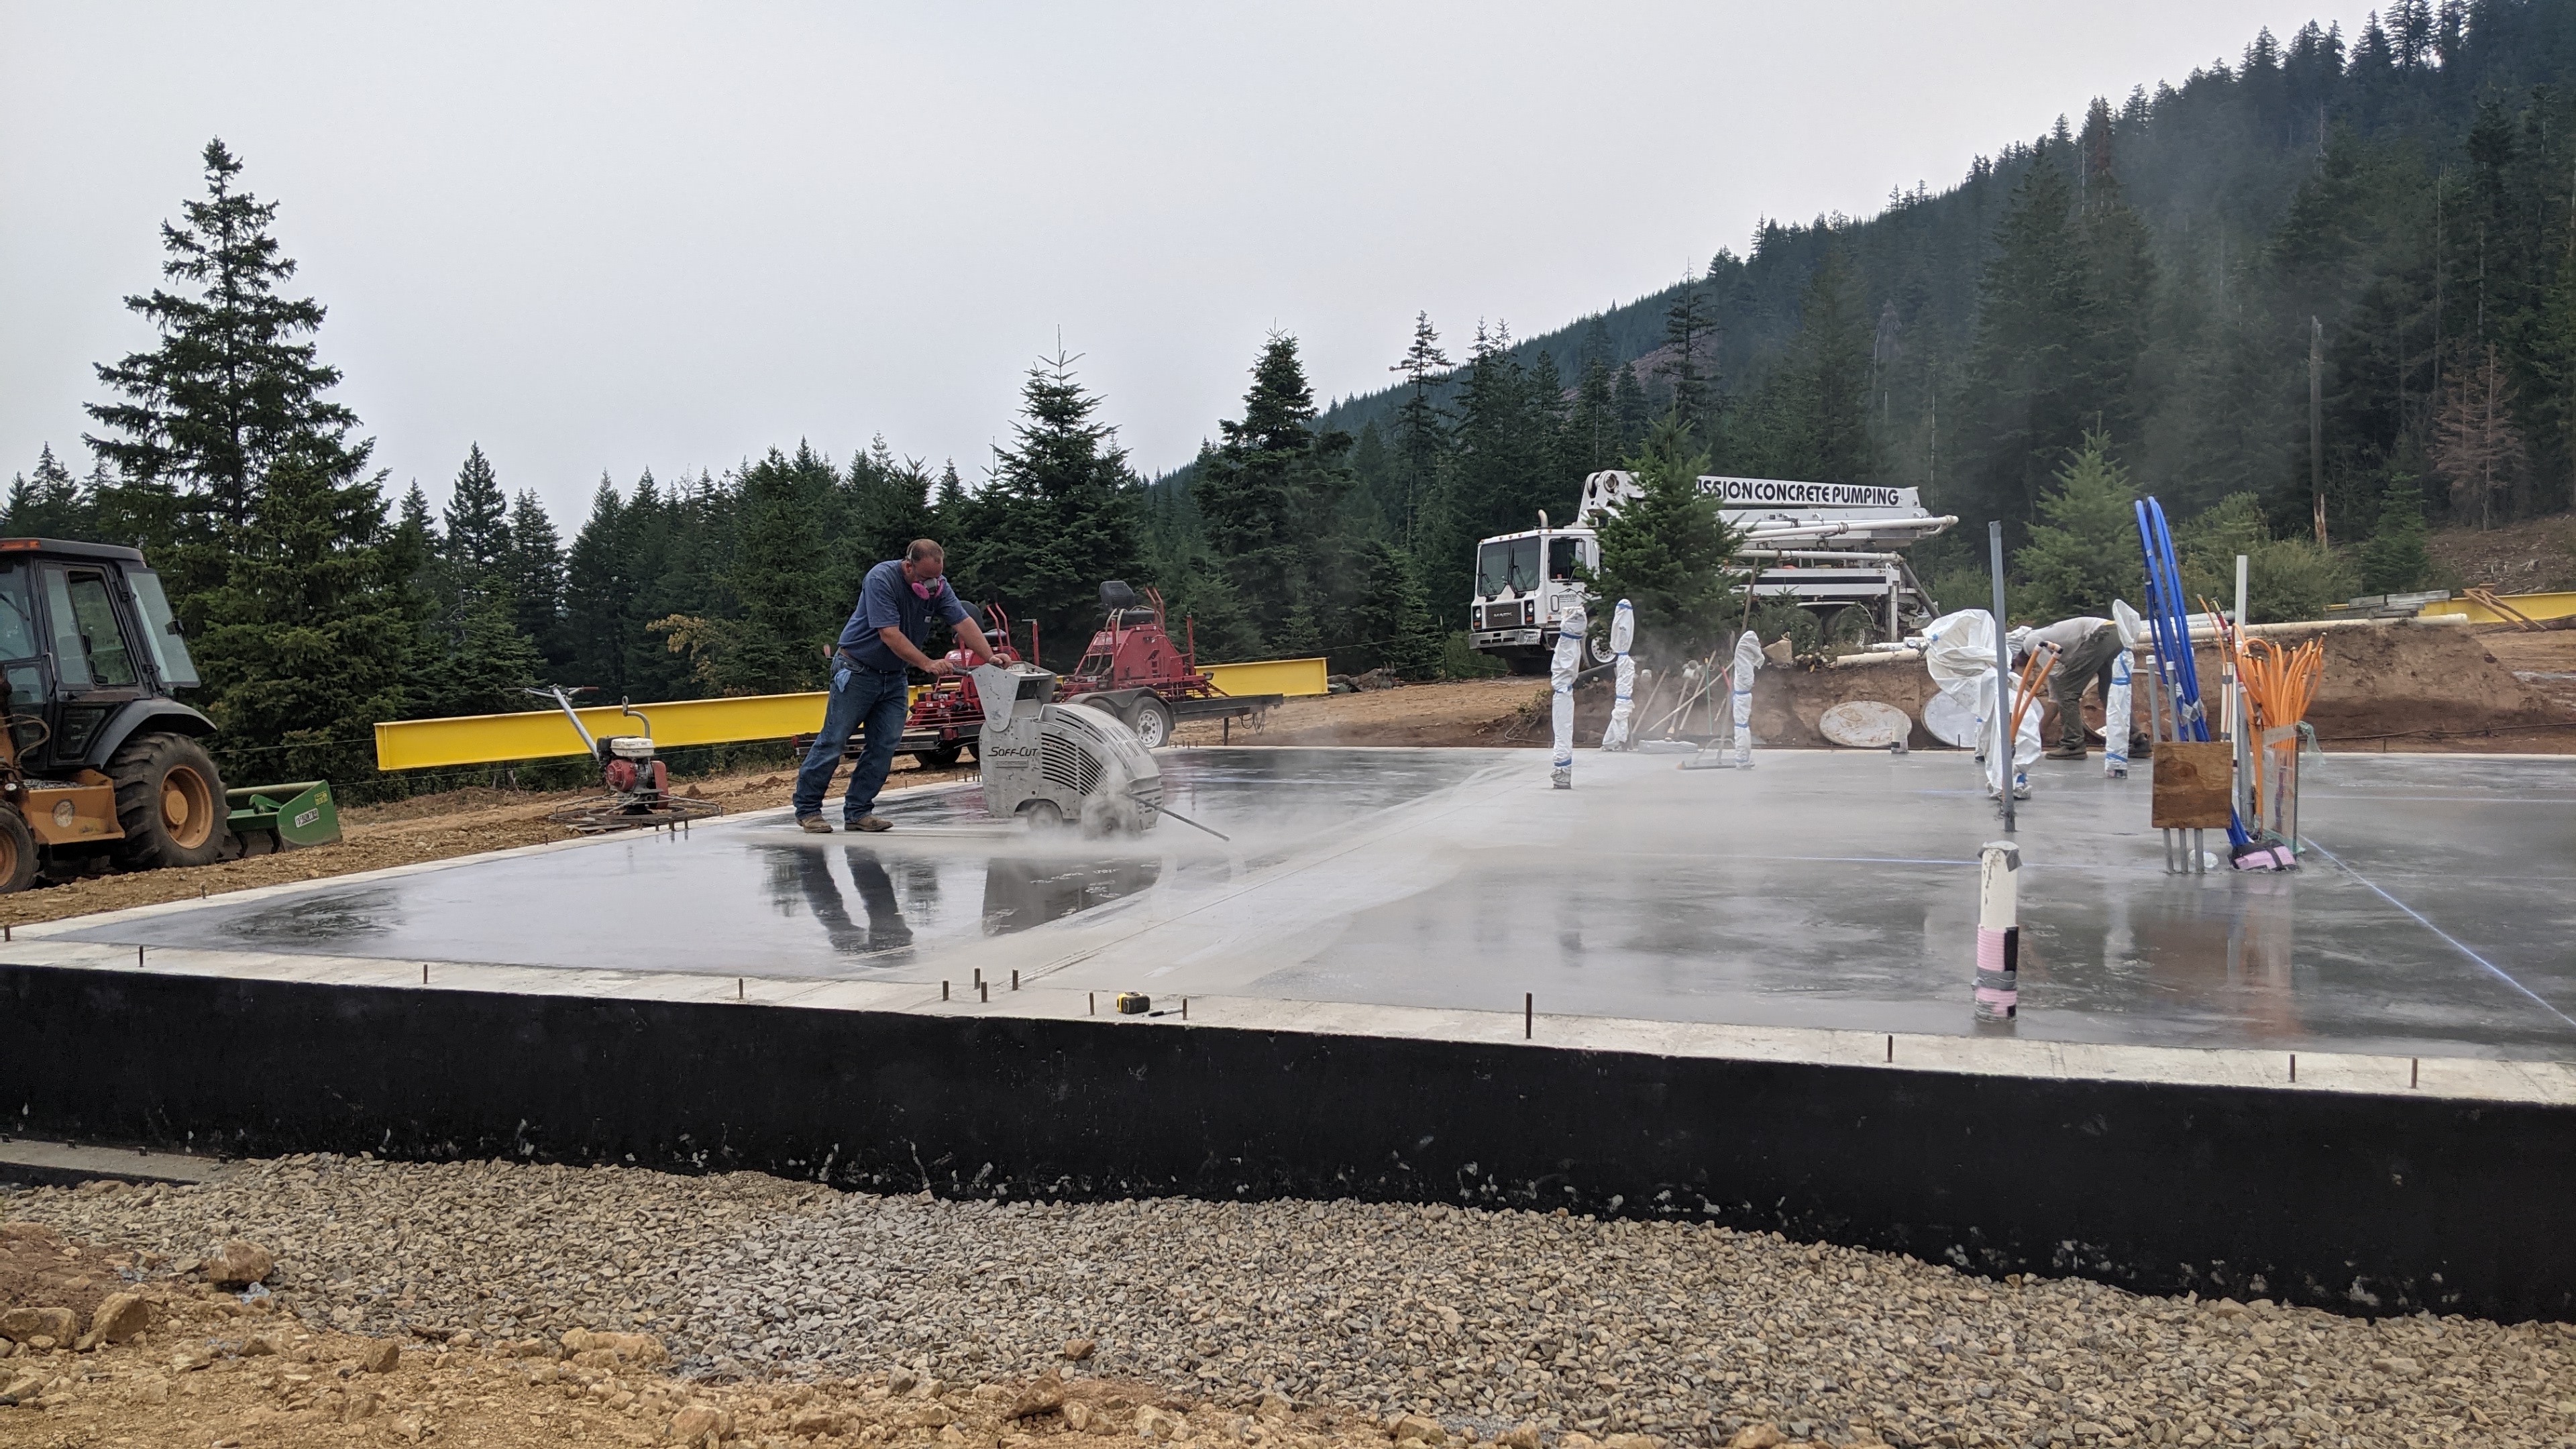
After another waiting period, the sealant was dry enough to walk on. Matt drew chalk lines to cut along.

Saw cutting the slab is another method to prevent cracking. It relieves stress when the concrete expands. This also produced a lot of dust- another reason the make sure the sealant is completely dry first.
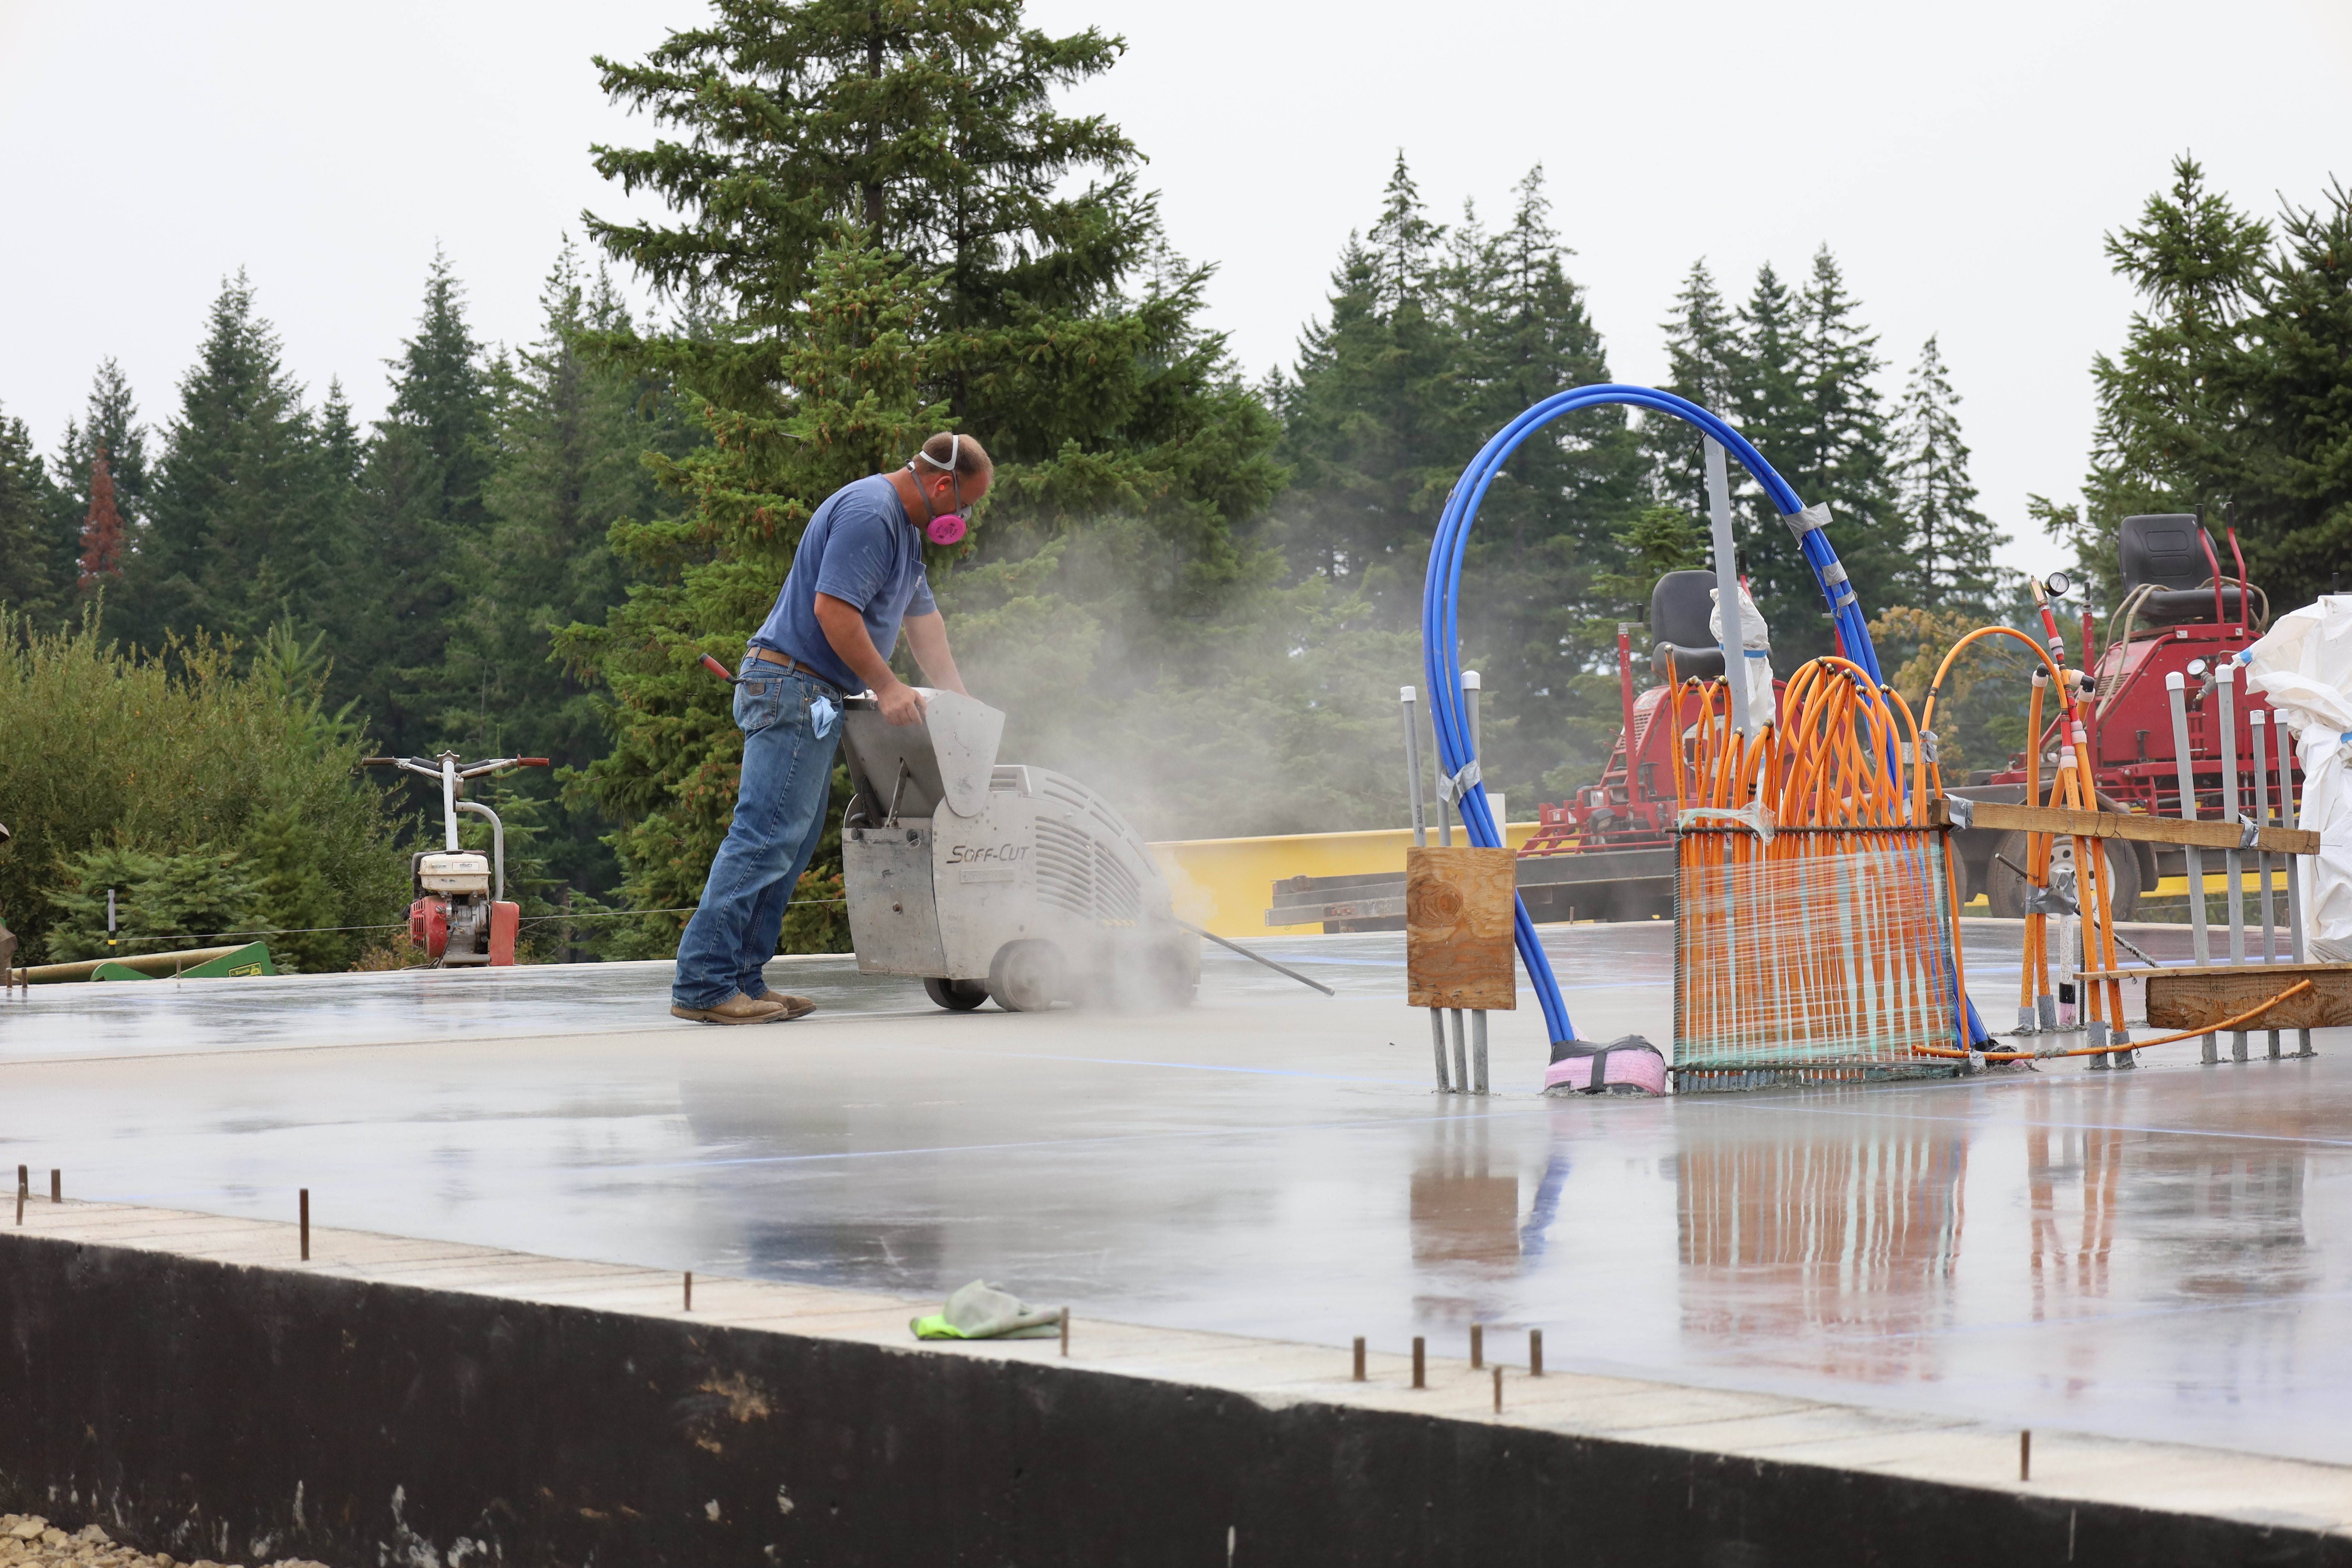
Matt did the saw cutting himself. It required a lot of focus, and he did a good job staying on the lines. It was a very slow process.

Finally, 14 hours later, it was all done! We have a beautiful floor now. We are going to apply another coat of sealant to darken the color in some areas, but we are so happy with the results!


Wow, what an operation! Man, you guys are going to LERVE that in-floor heat! Well done to all the crew!
LikeLike
This is incredible. We are good friends of Barb and Paul Smith. Love your journey. The views are incredible
LikeLike