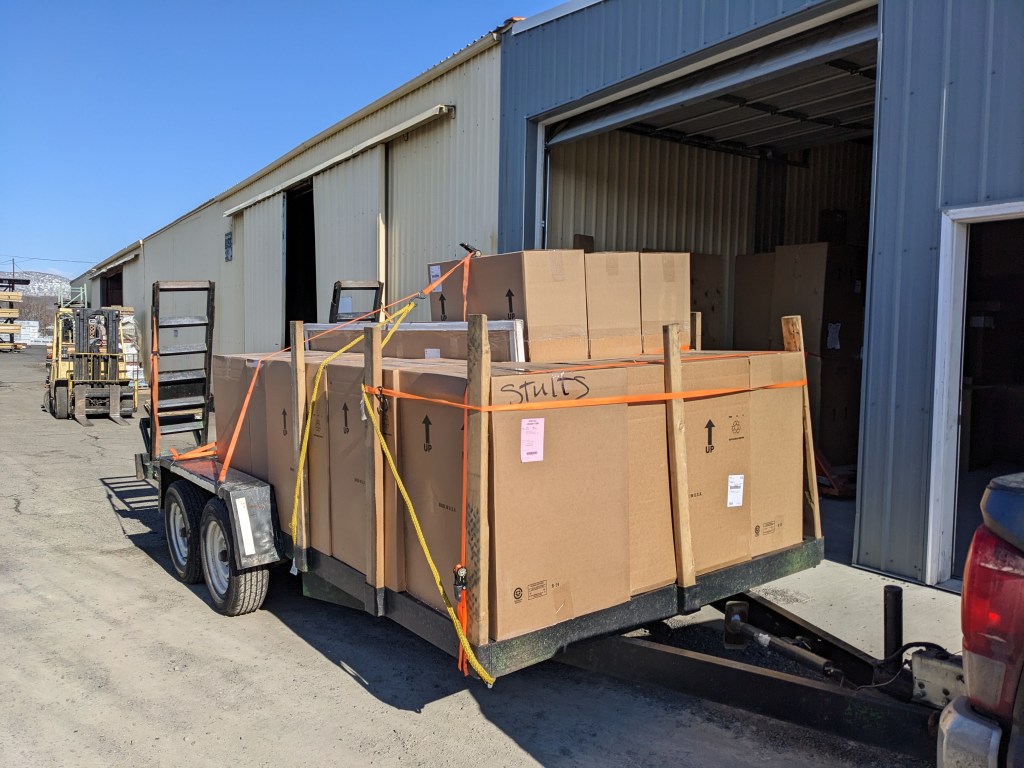
Our kitchen cabinets arrived! Selecting a brand was just as lengthy of a process as designing the kitchen layout. We went with a brand called DeWils, made here in WA. They only took 4 months to arrive (faster than some!). We picked them up in The Dalles and fit all 15 boxes onto the trailer.
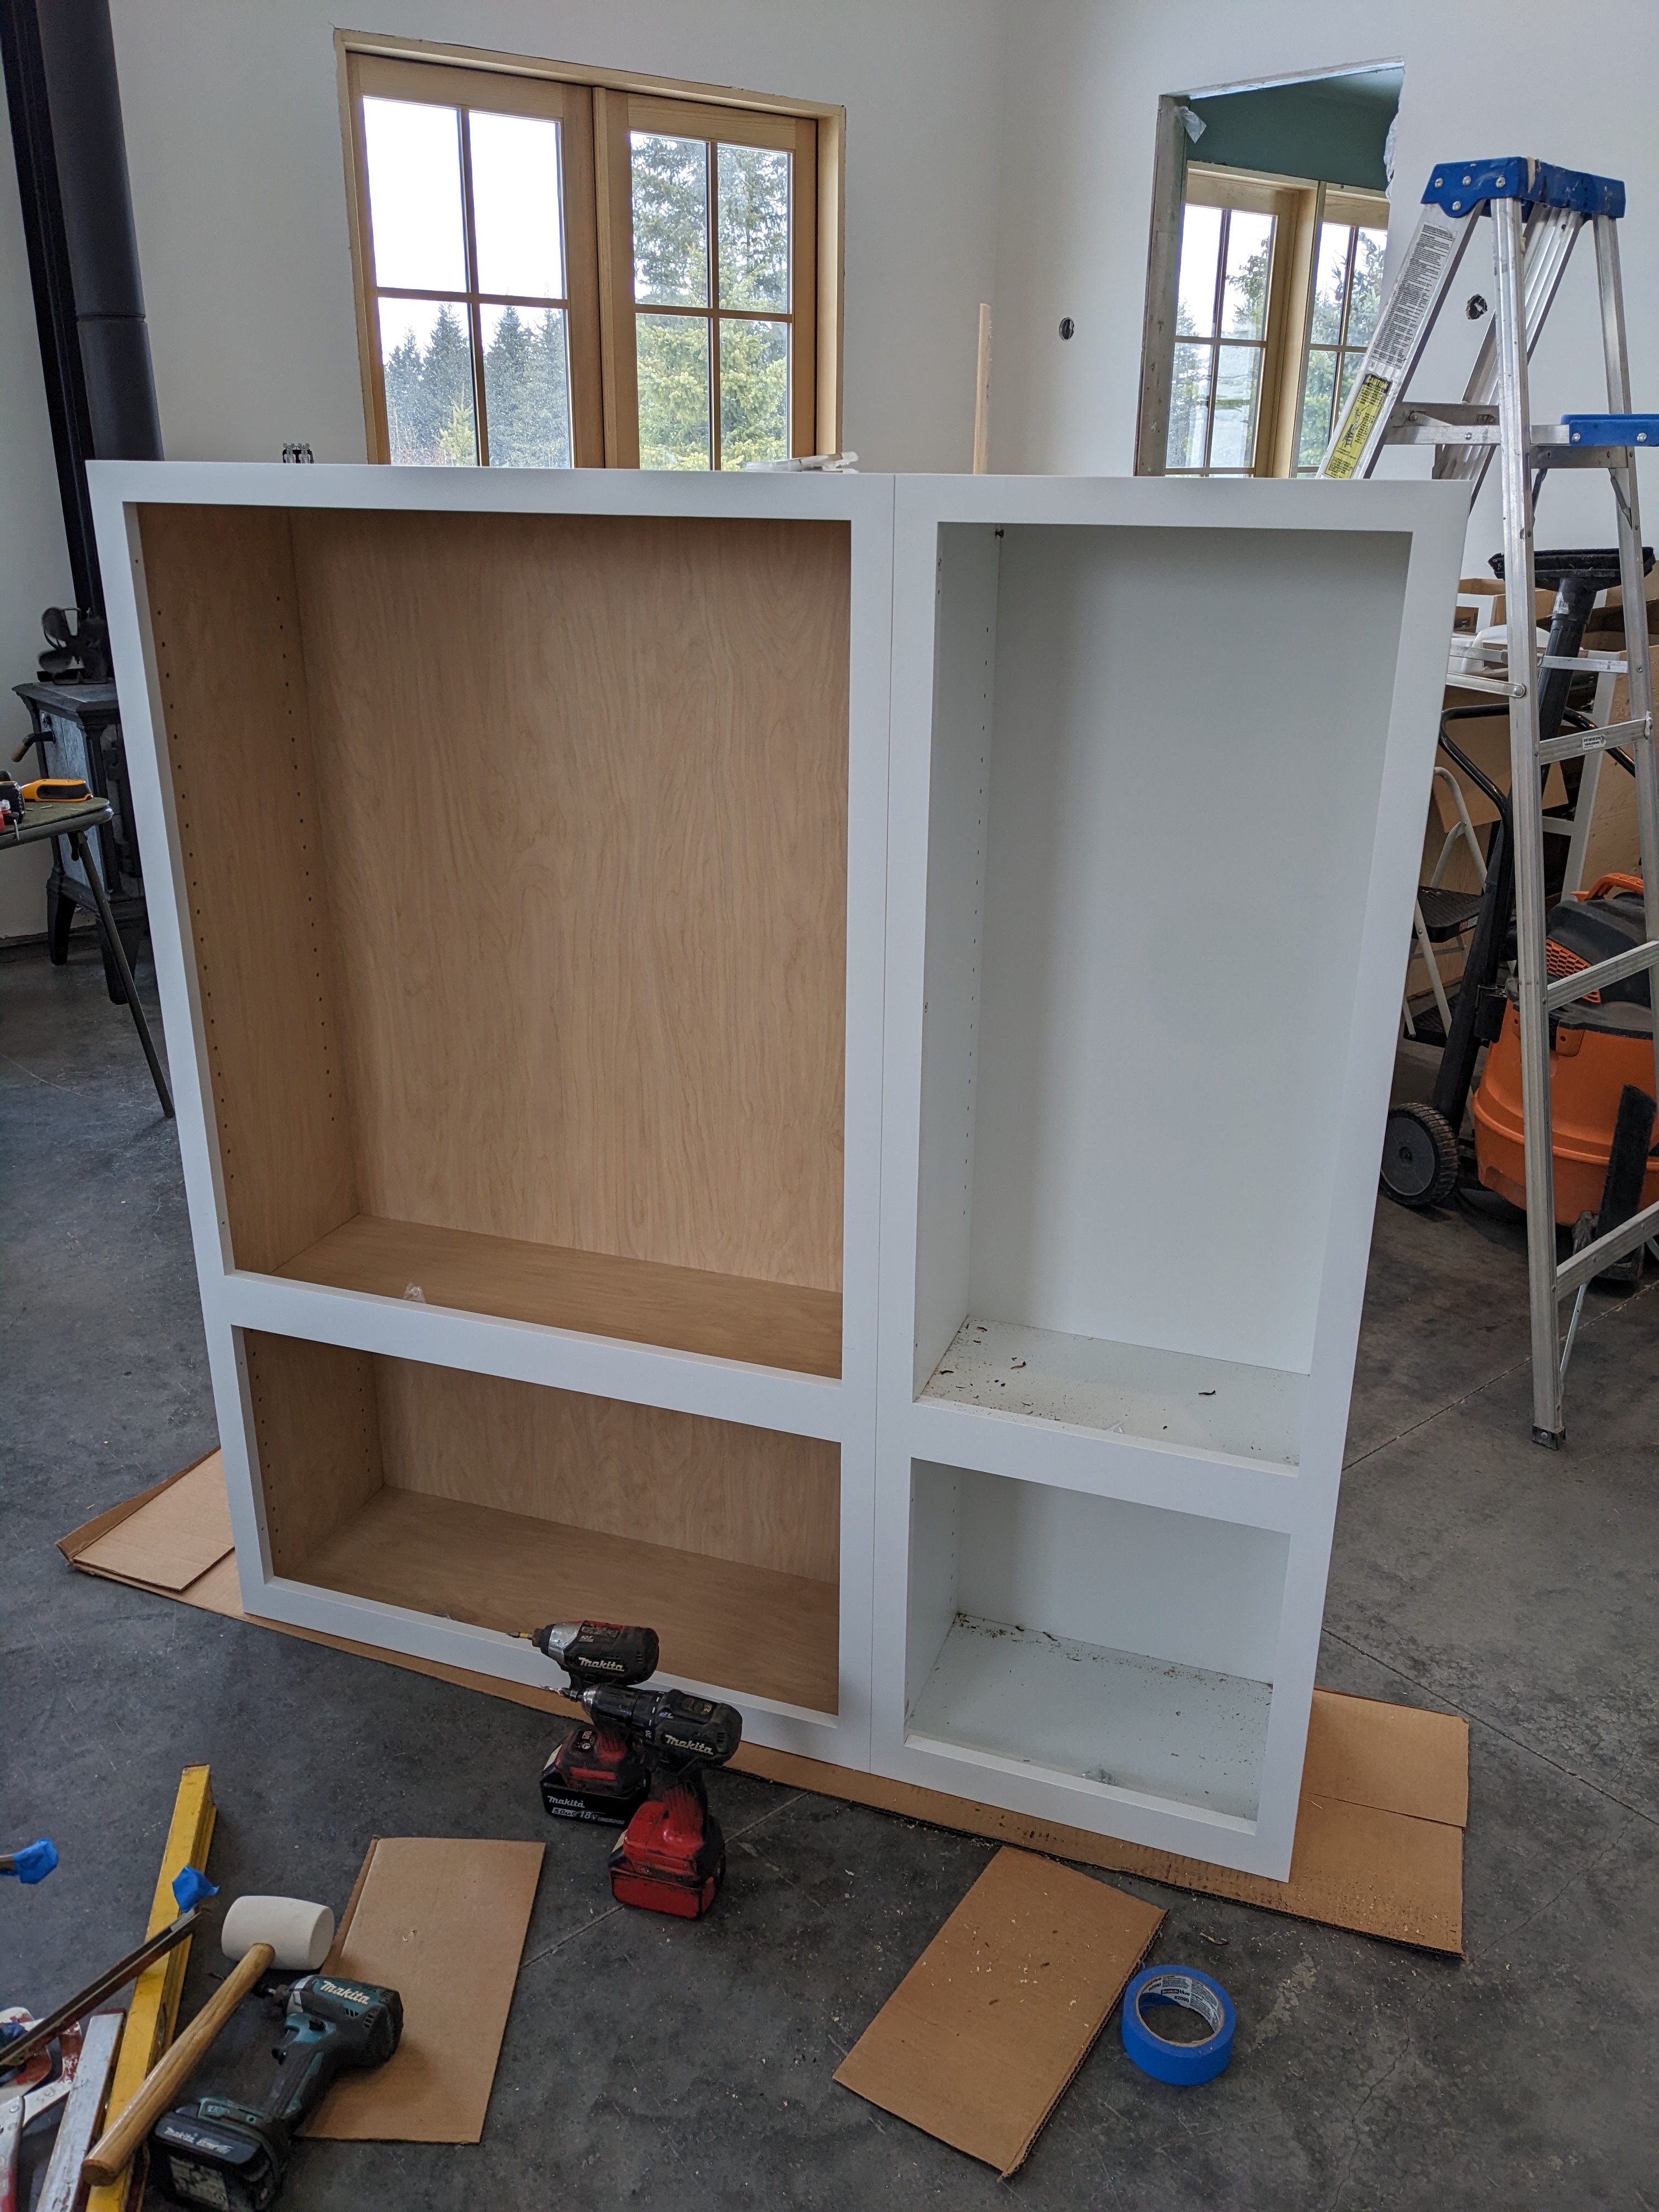
As soon as the cabinets arrived, we called Douglas, the carpenter who helped with the attic floor. He had a small window in his schedule to help us with the cabinet installation. Sam and I spent a few days making preparations. It took awhile just to unbox everything. Then we removed all of the doors, drawers, and shelves from each cabinet. While I was labeling the 10th drawer we took out, I realized they sent the wrong drawer fronts! Luckily everything was sorted out for us, and the new drawer fronts were shipped quickly.


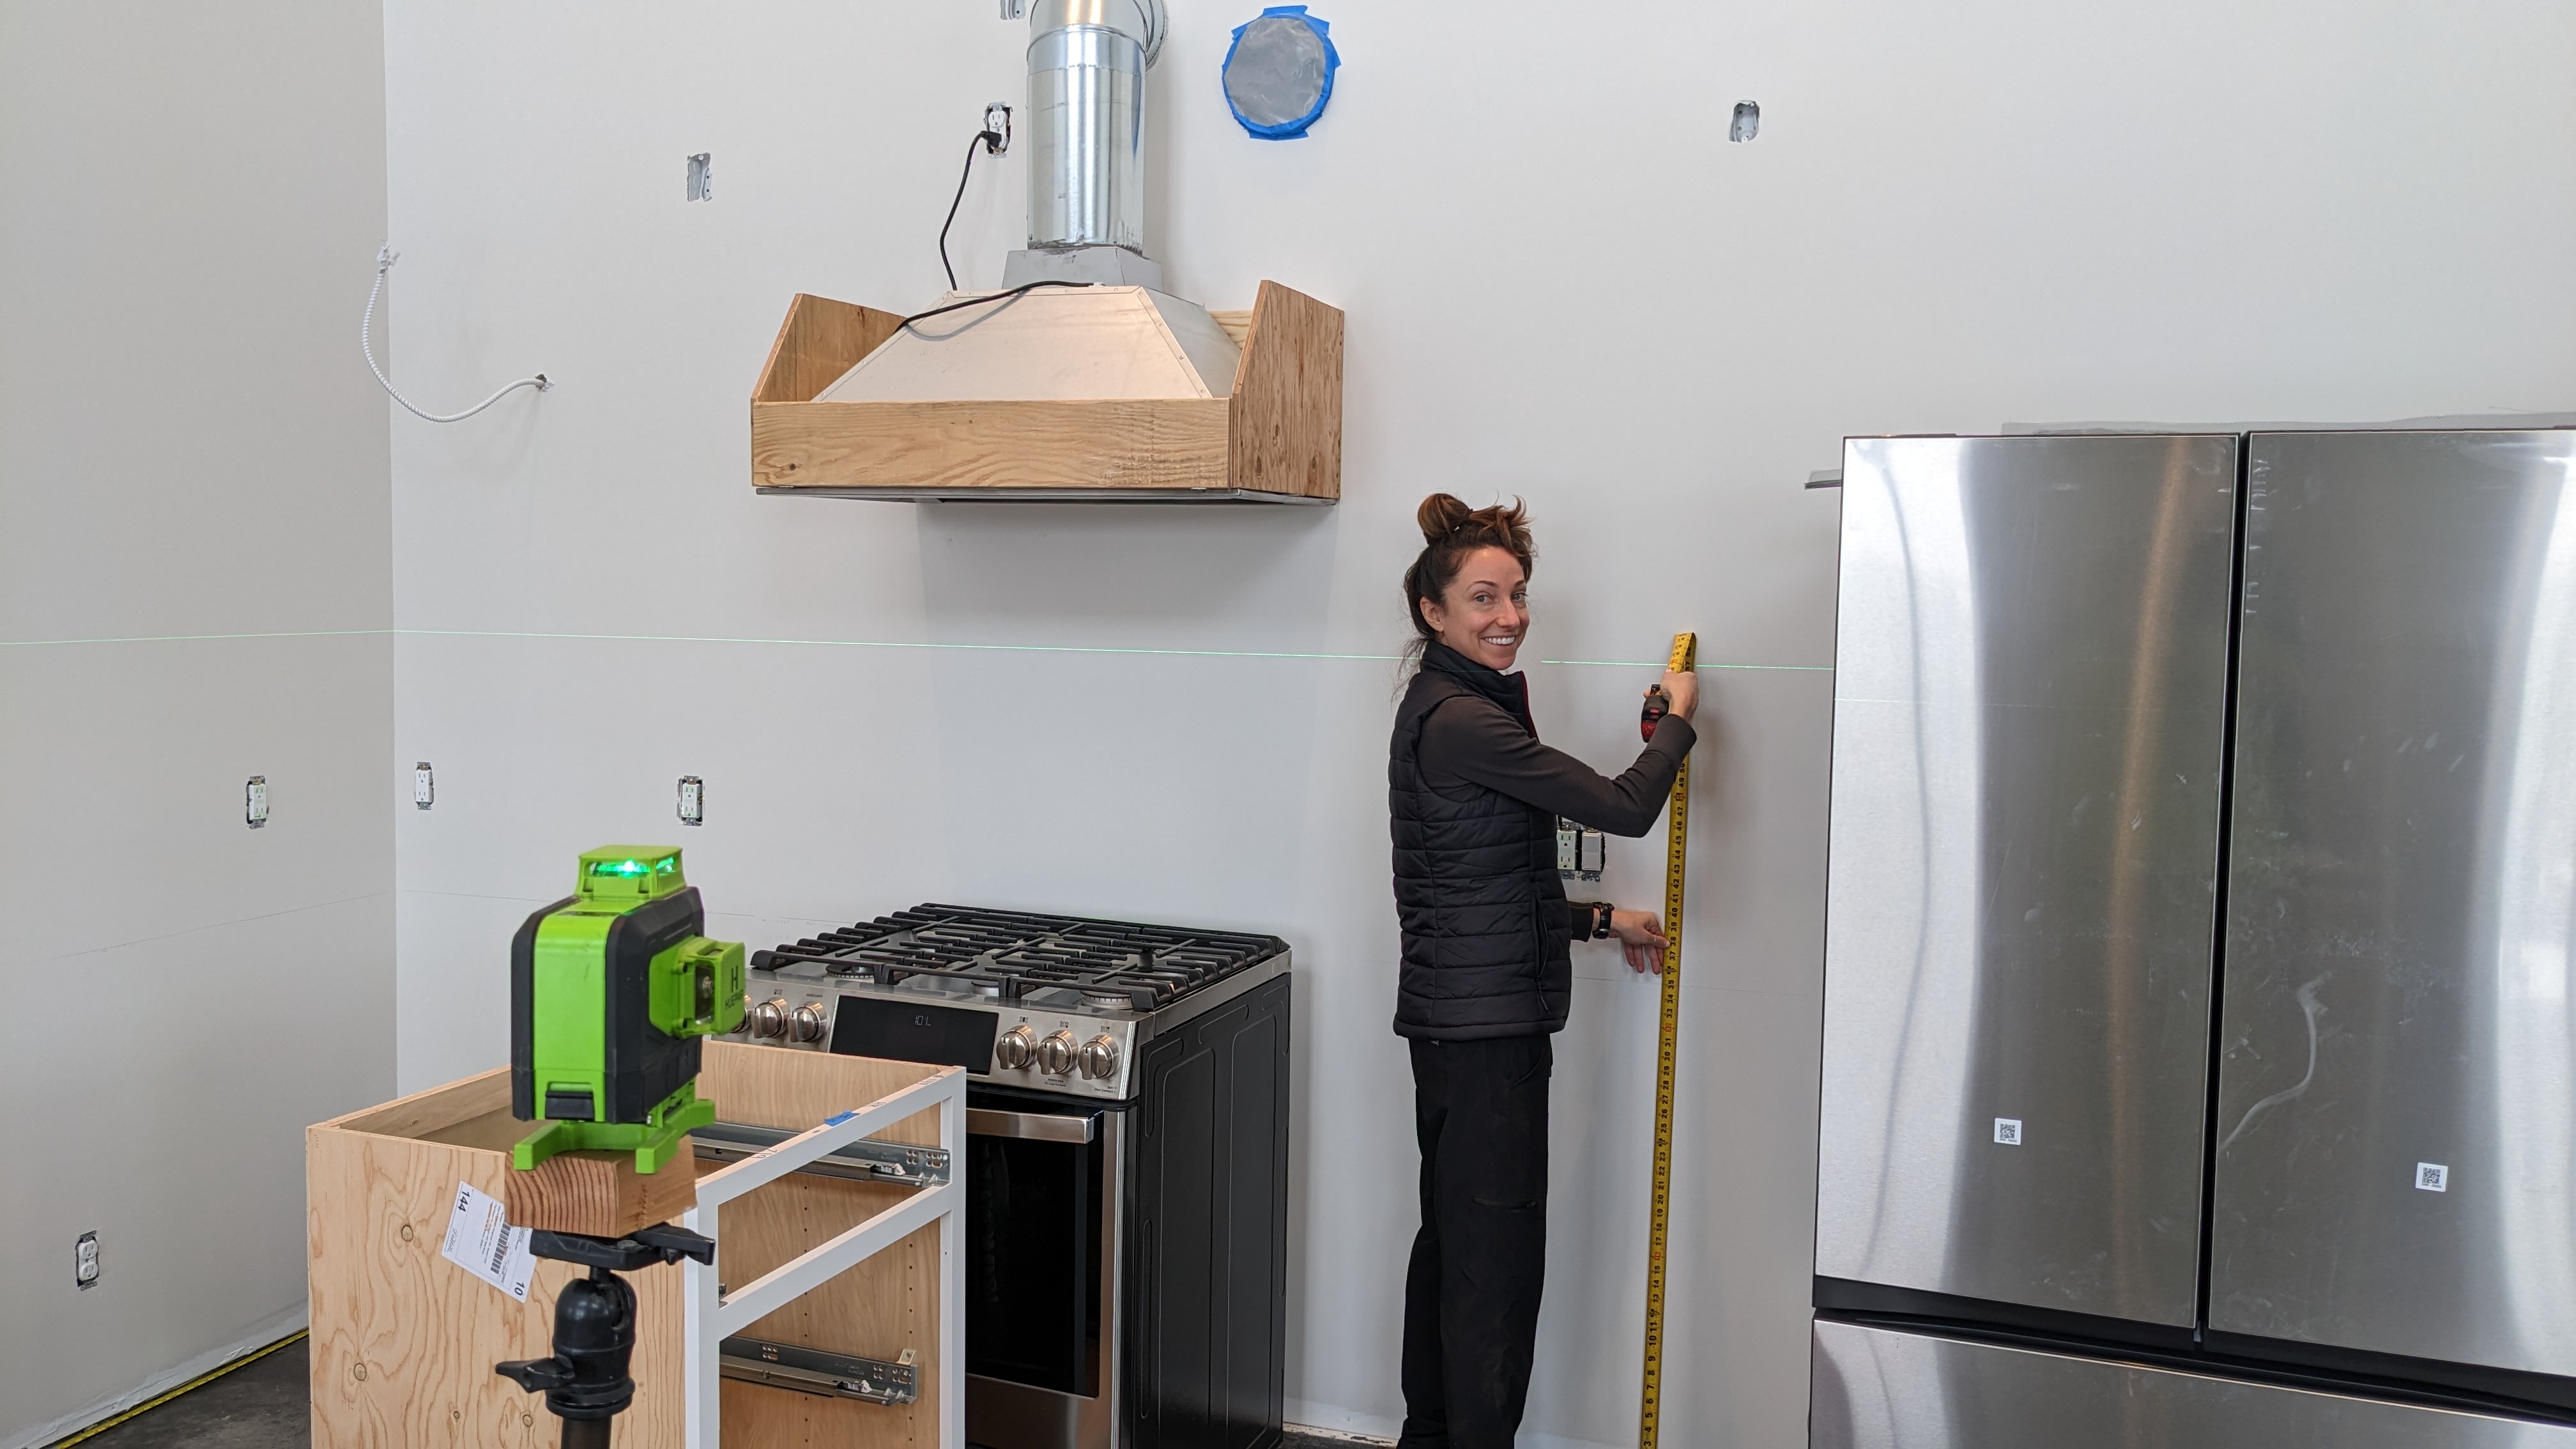
Next, we set up the laser and marked a line near the tops of the base cabinets. This step was important, since the floor isn’t flat. We set a similar line for the upper cabinets. Then we located the studs in the wall. We also looked through our photos and noted a few locations dense with wires where we shouldn’t drill.
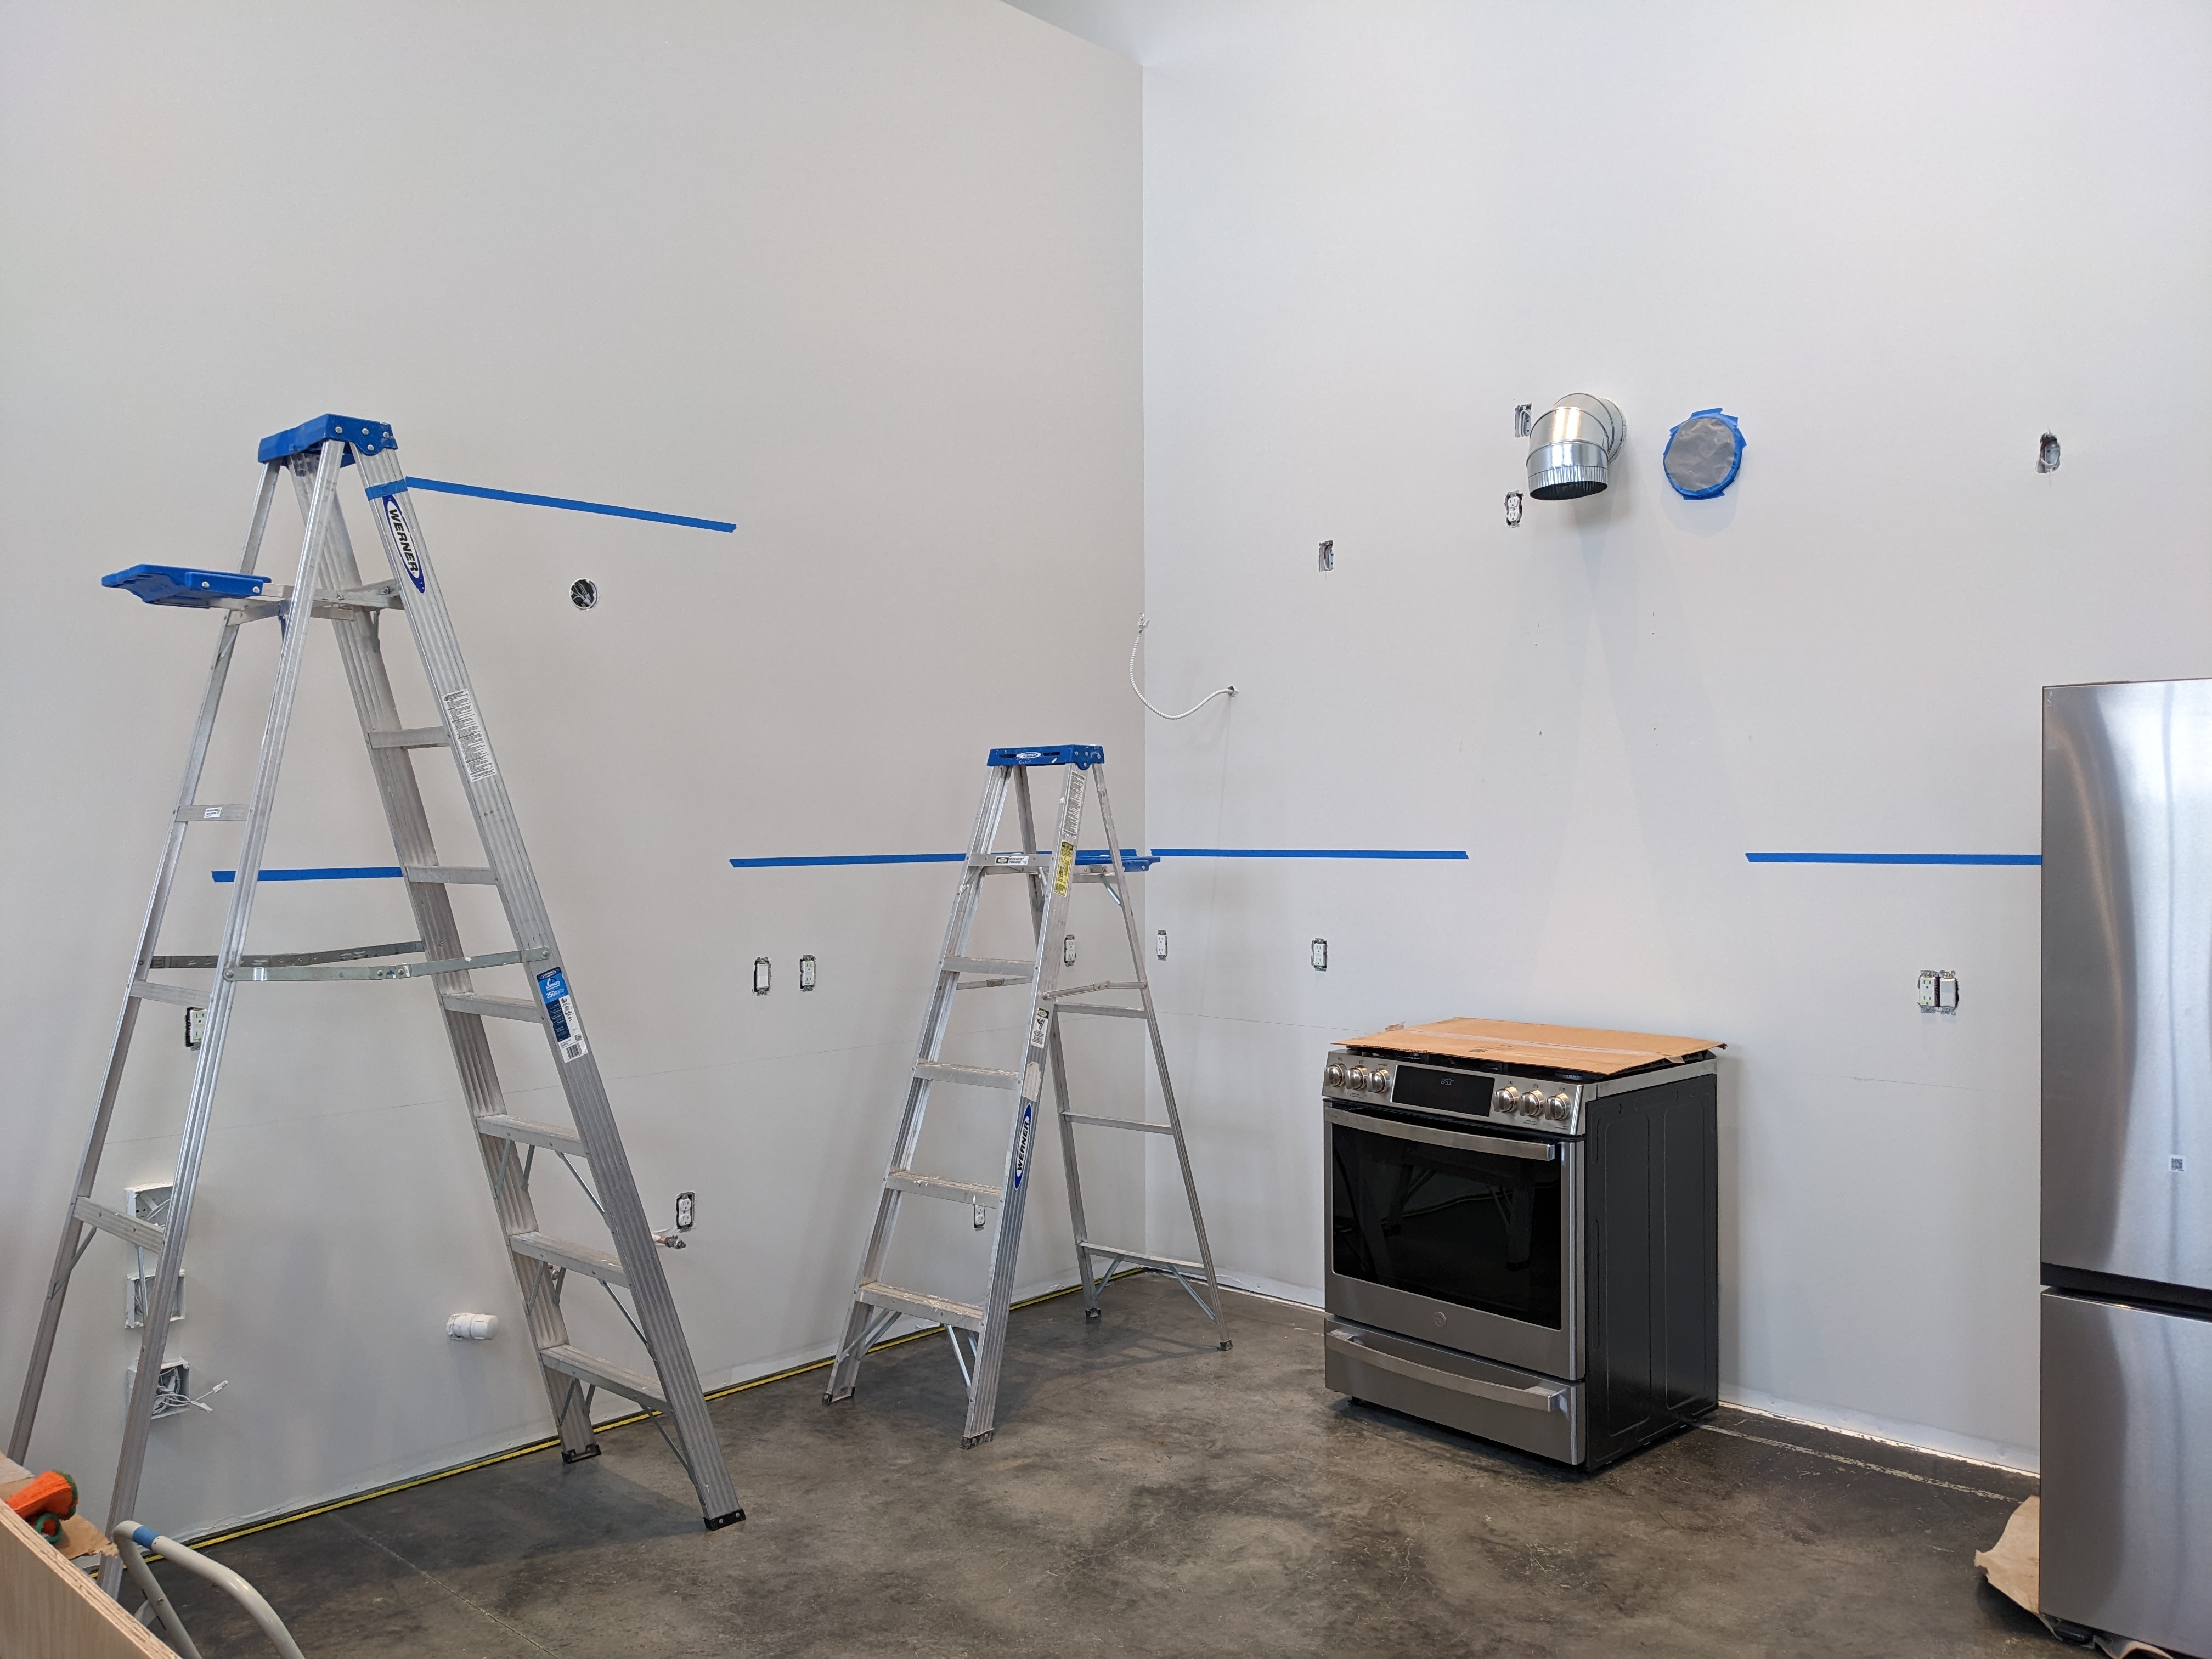
We were ready for Douglas! He was only available for 3 days, so we didn’t want to waste a minute. We began with the upper cabinets, starting in the corner. The first cabinet was very easy to install.
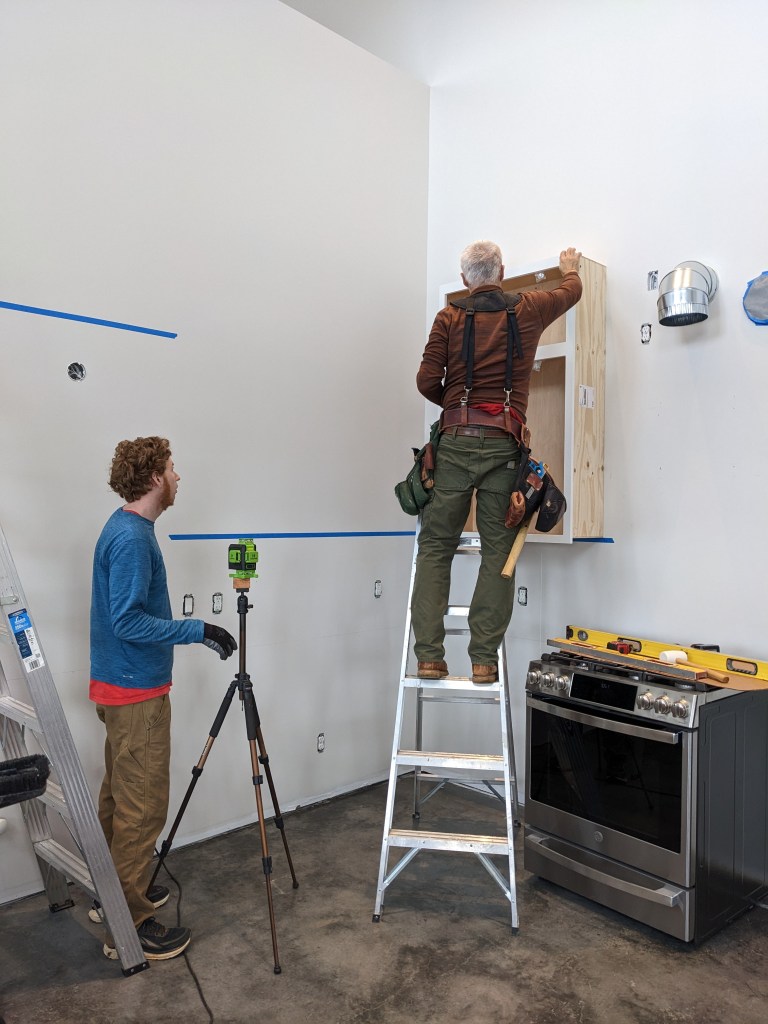
Douglas showed us how to screw neighboring units to each other before hanging them. We purchased some white screws so they would be less noticeable on the face frames.
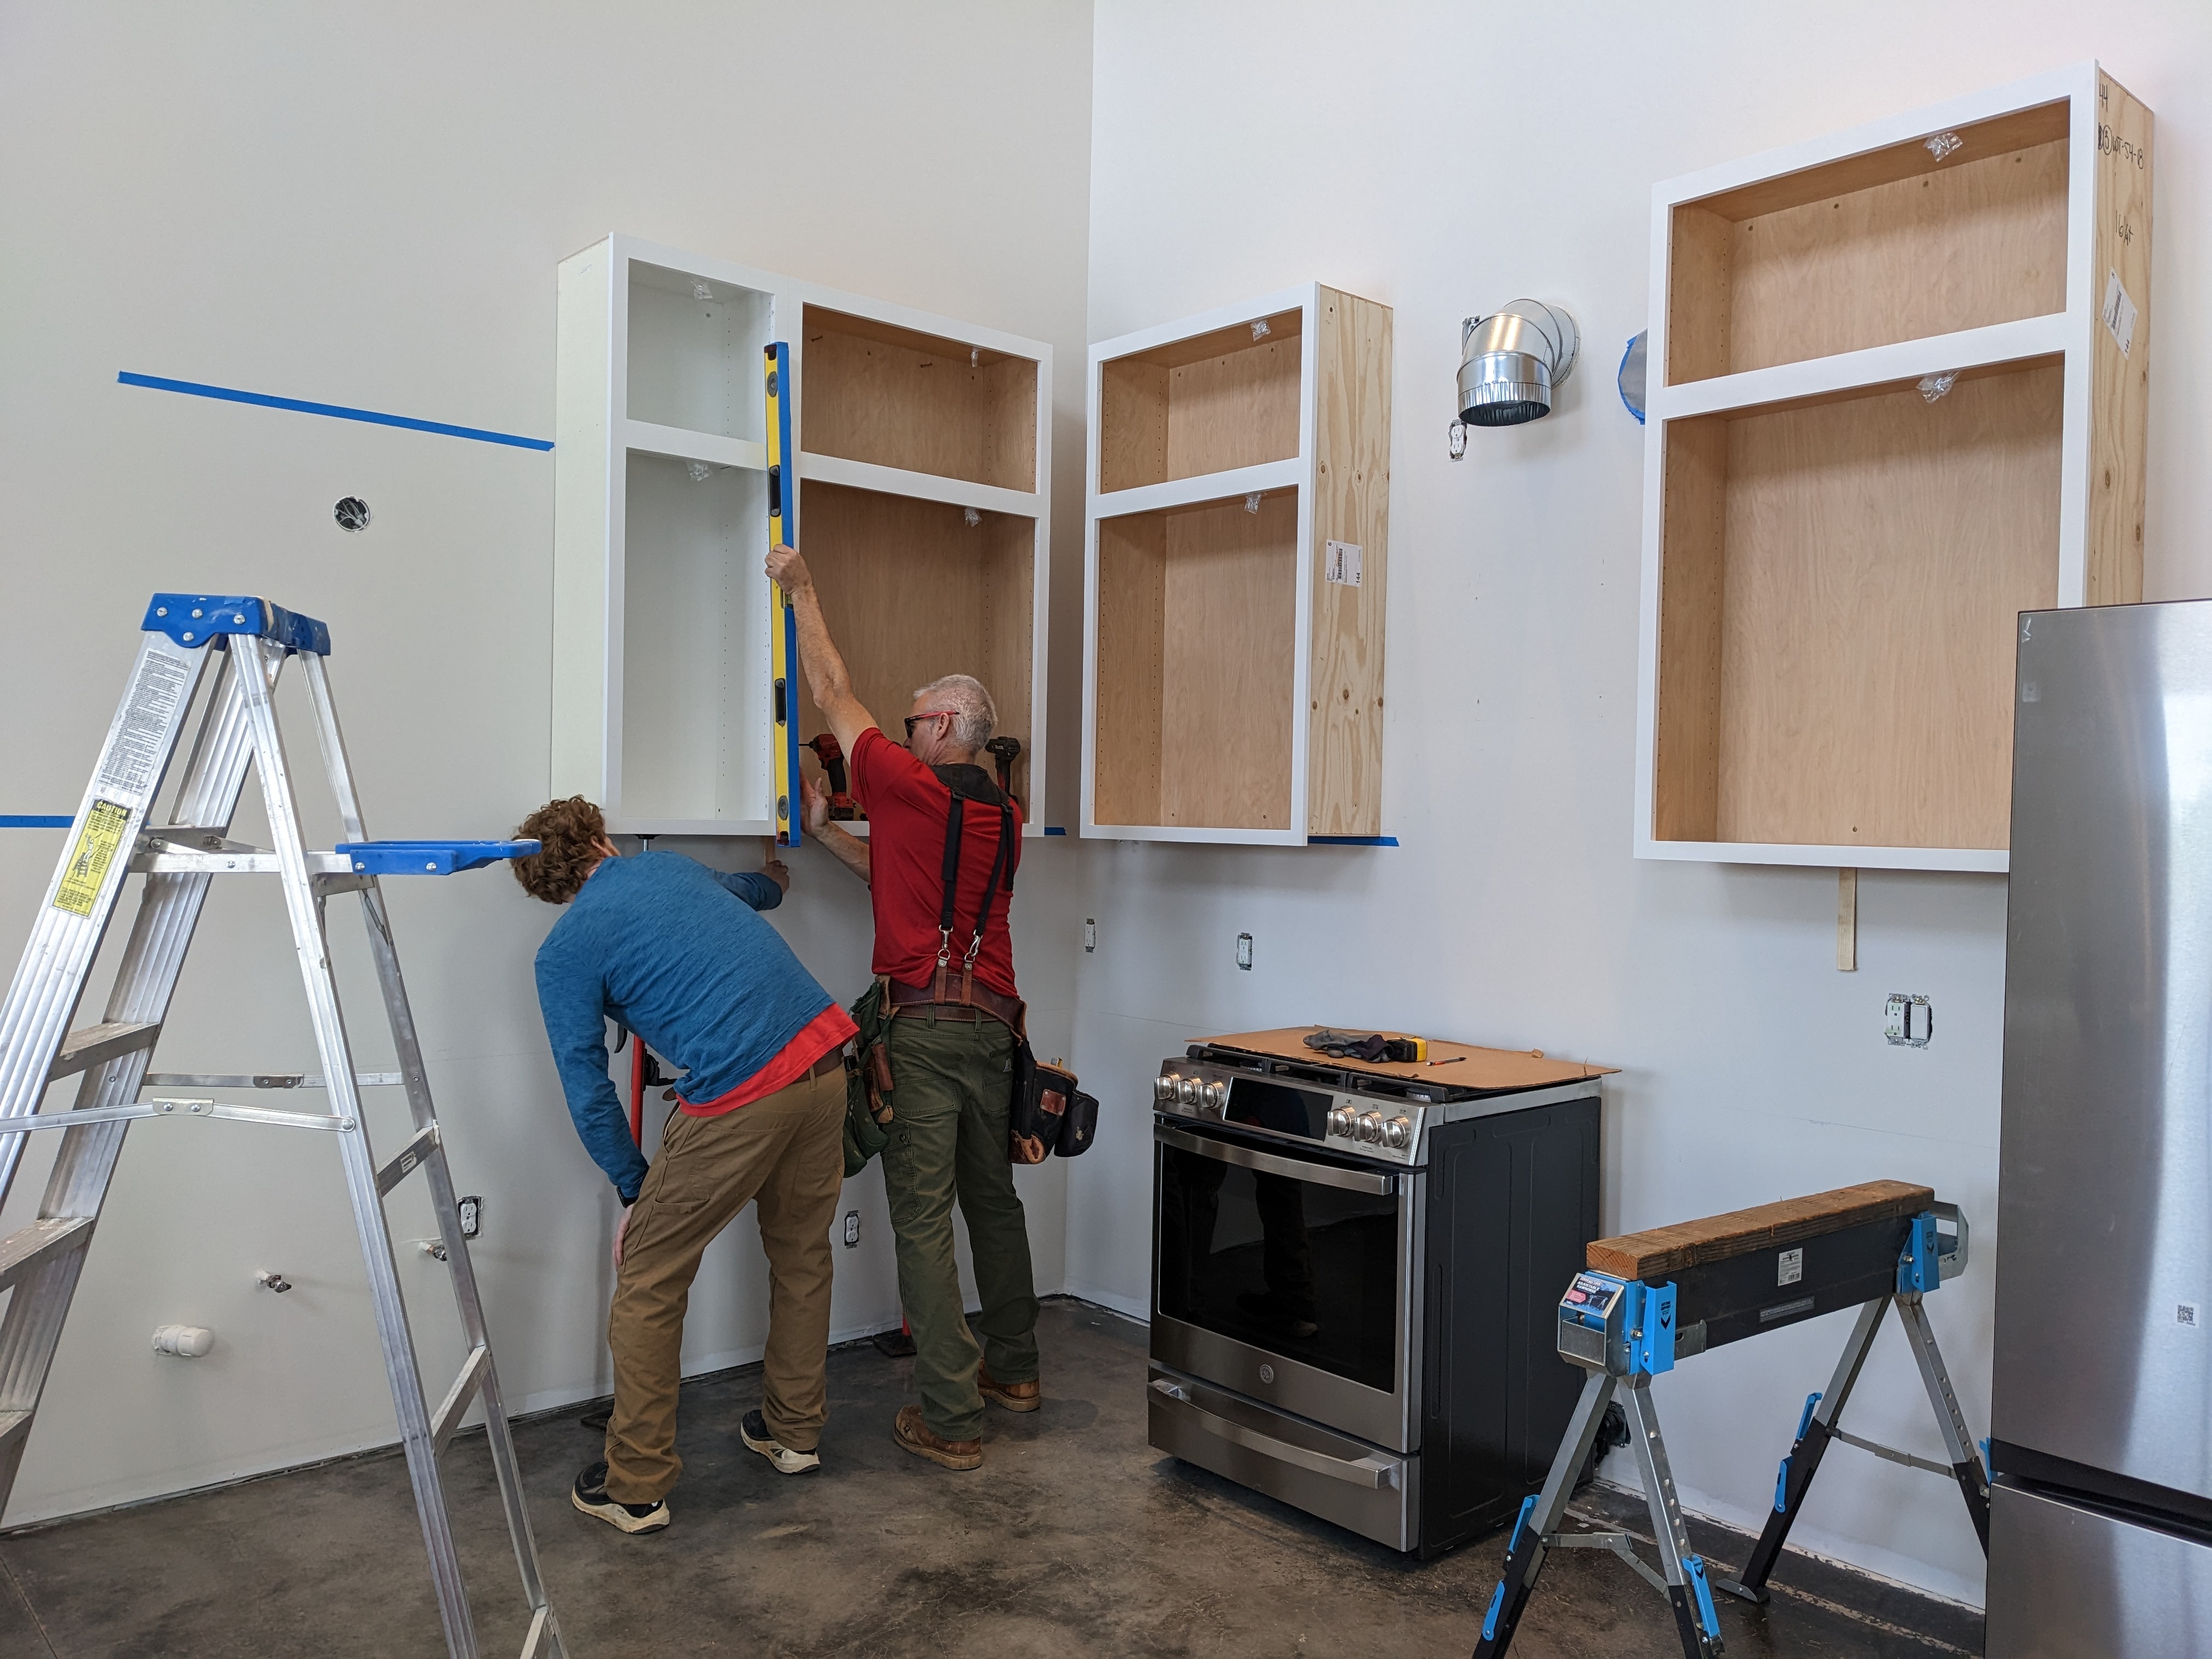
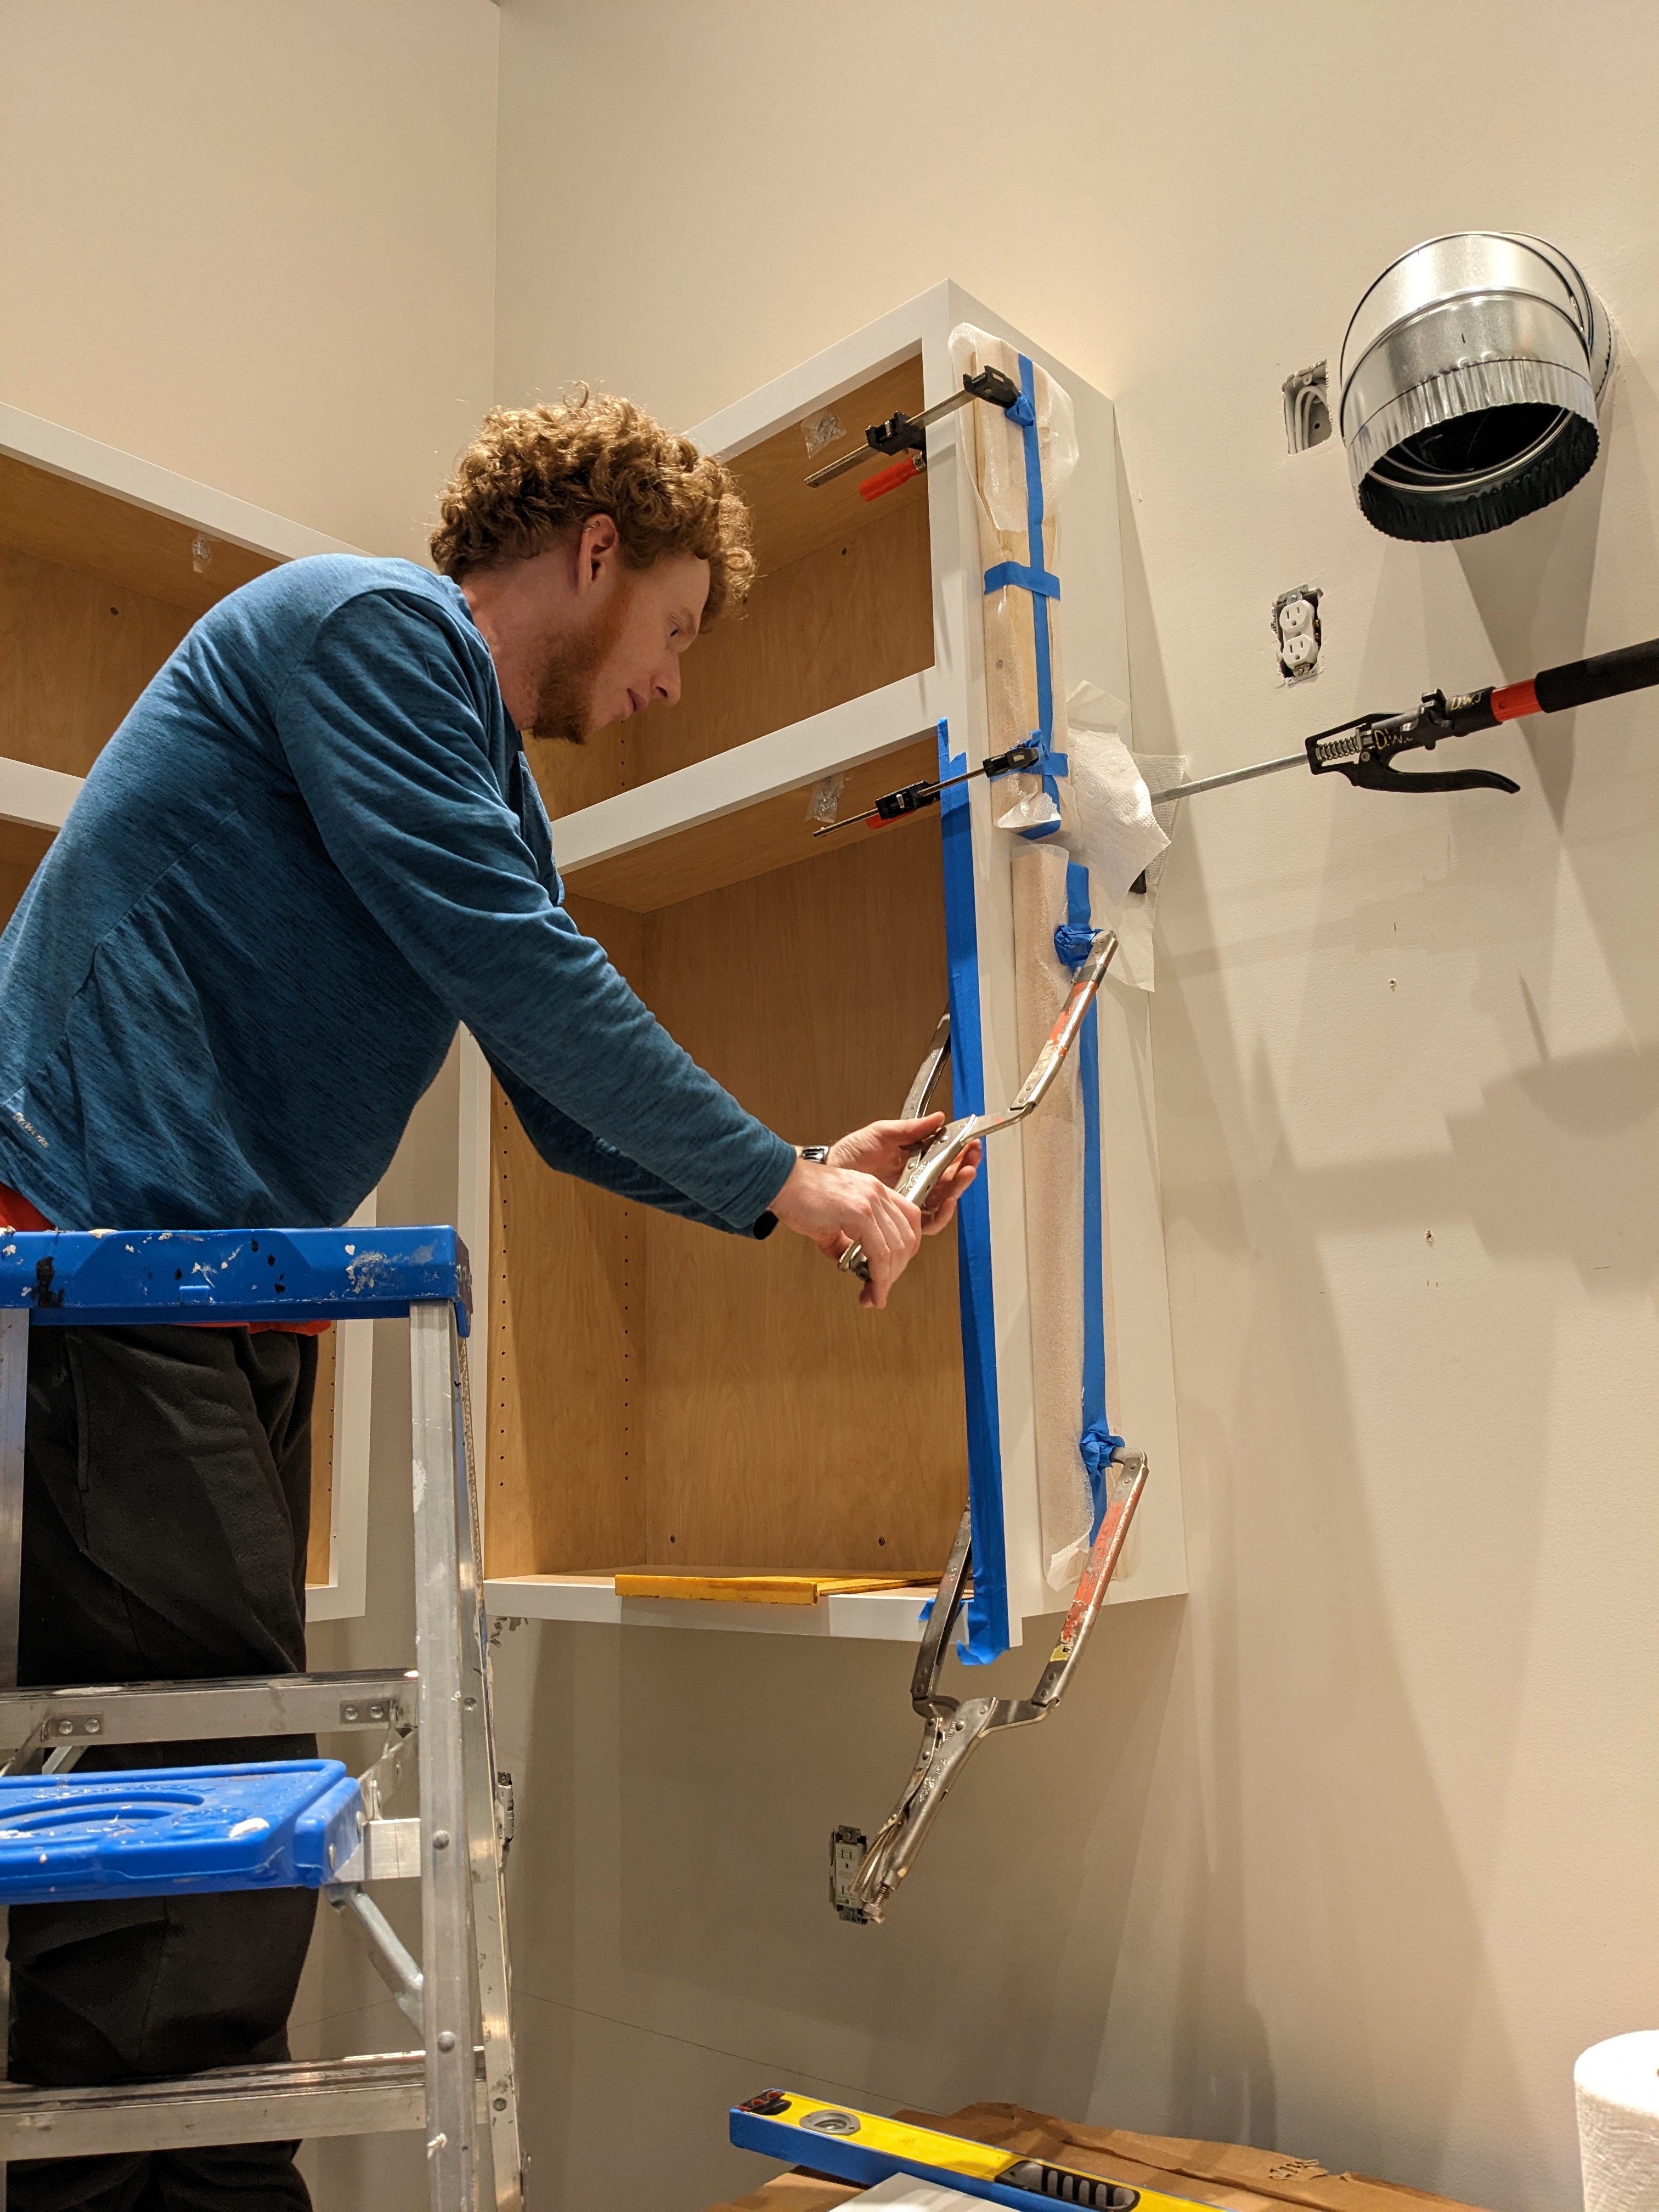
The upper cabinets went up very quickly, but it wasn’t long before we ran into some tricky situations. The first was the filler pieces in the corner. Sam was very glad Douglas was here to deal with it.

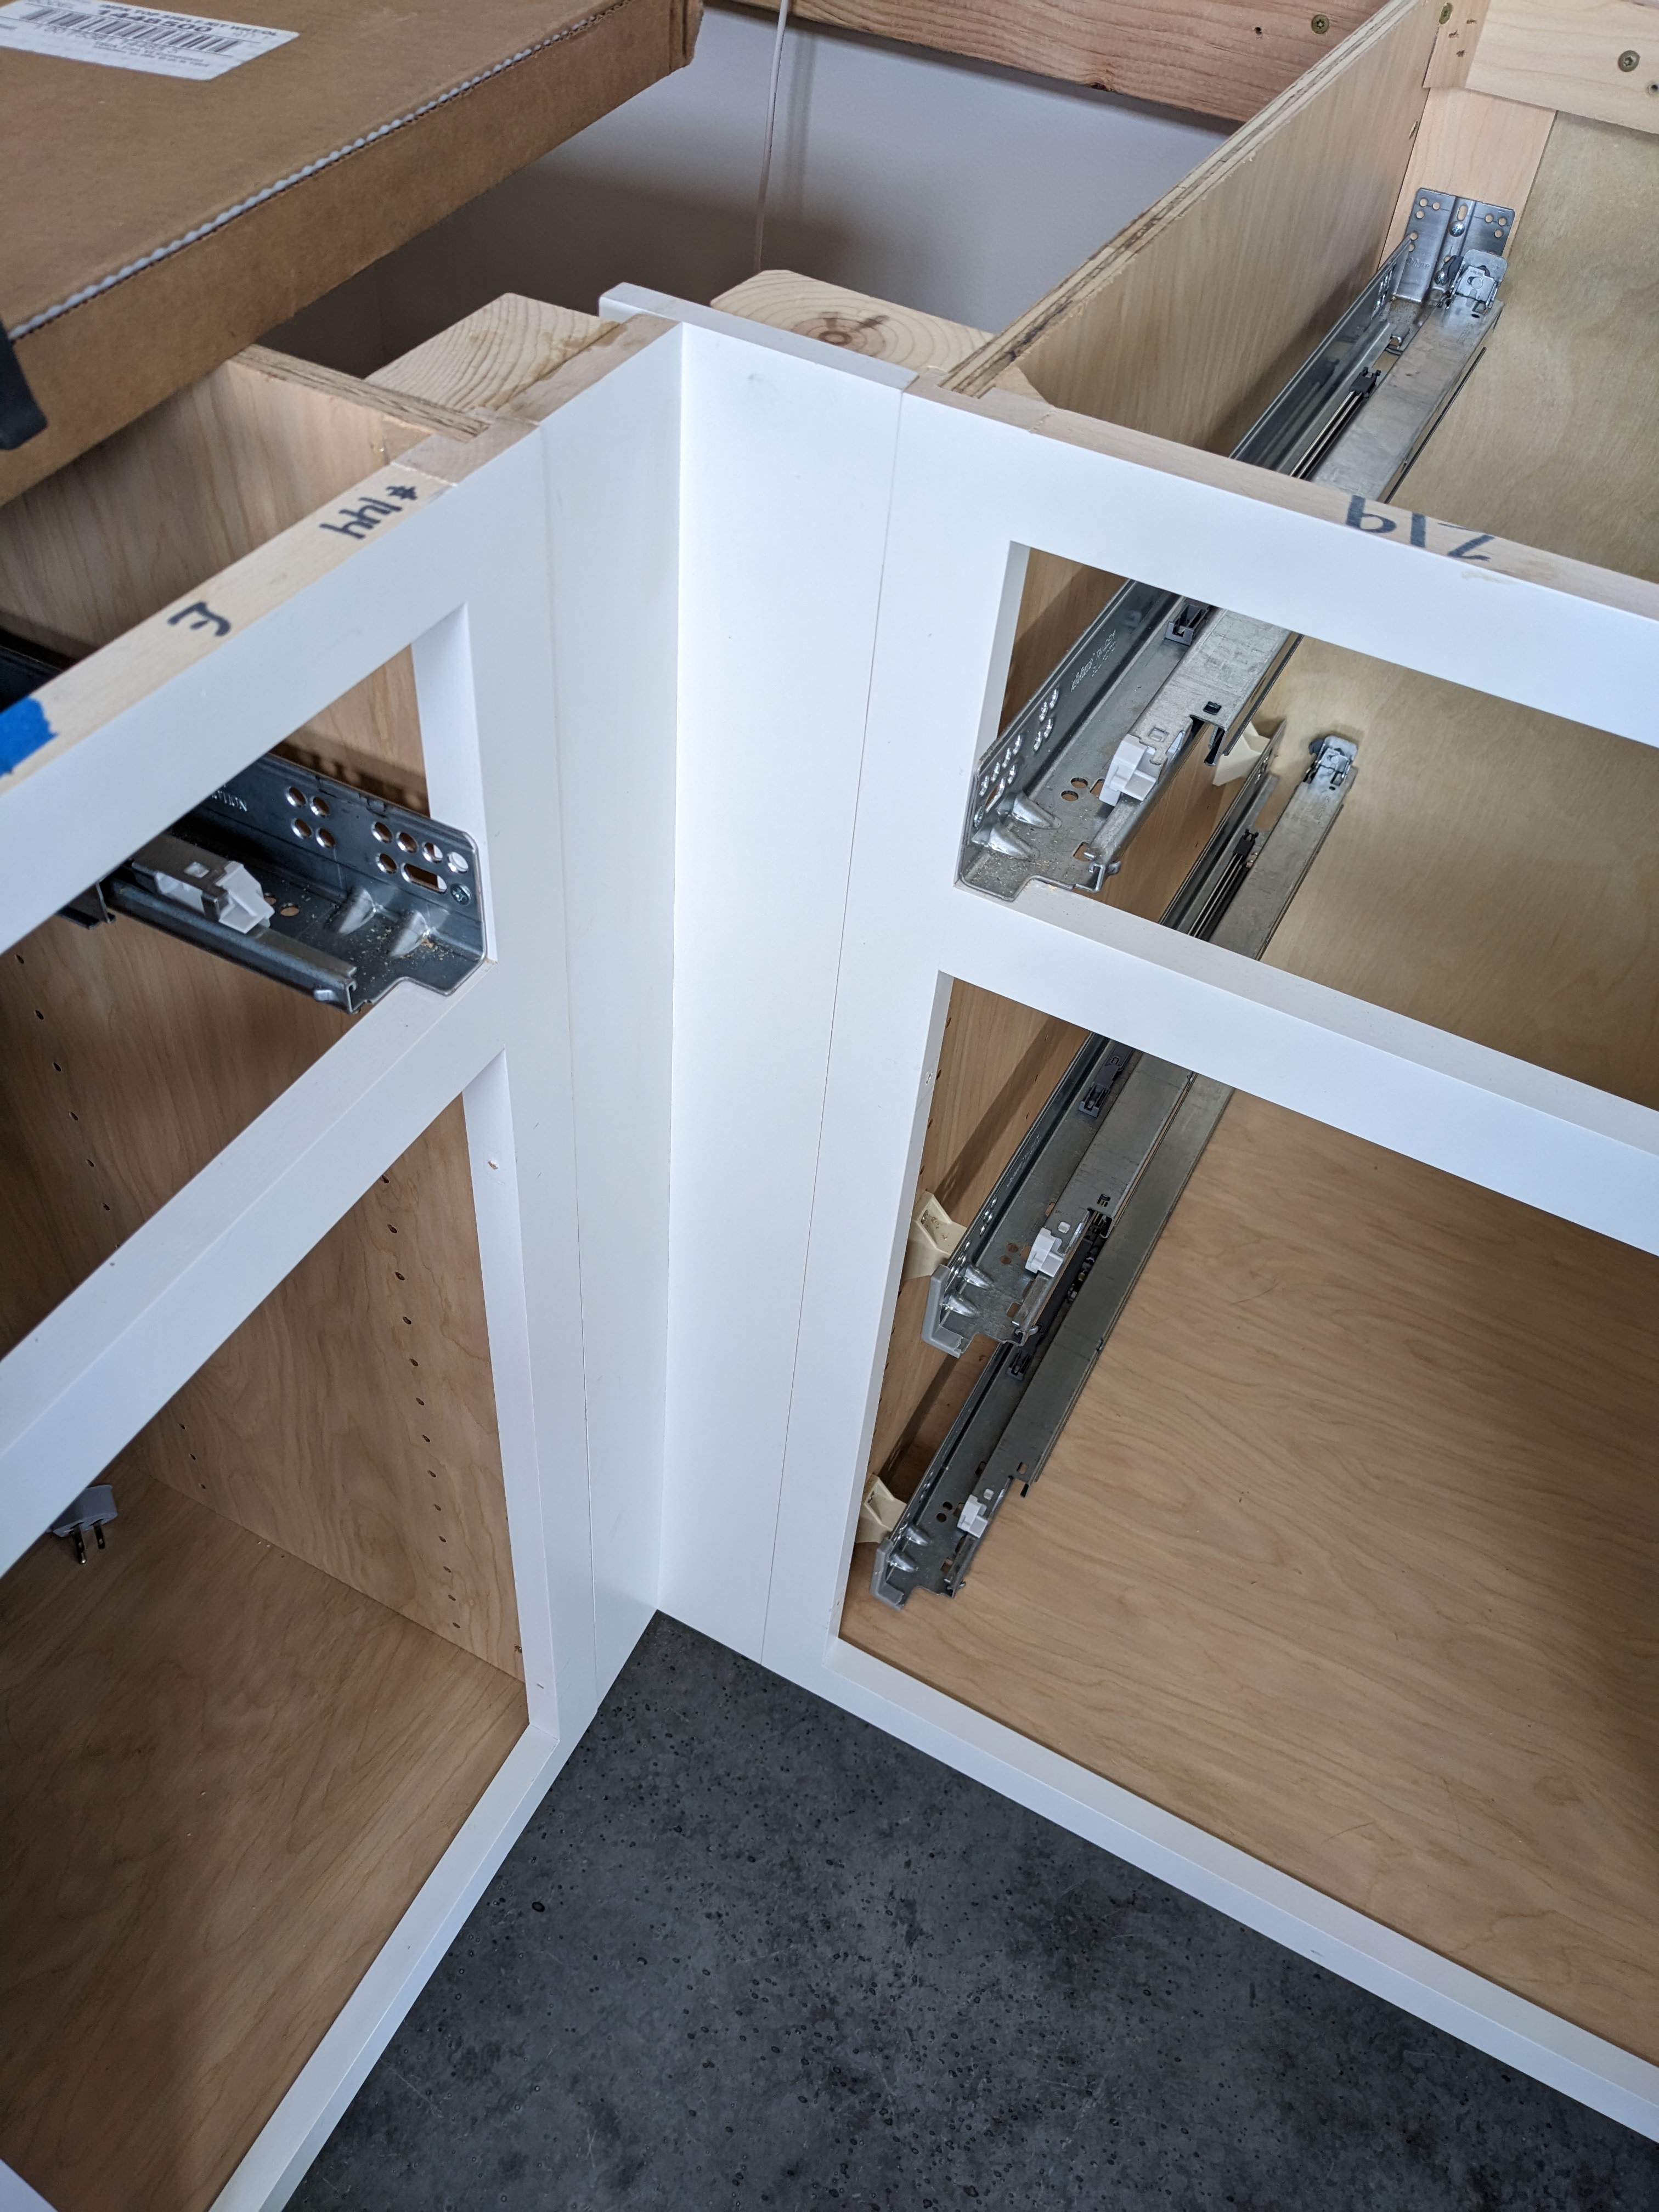
The filler boards were too thin to attach to anything, plus nothing was square. Douglas put some blocking in behind them first. Then he spent a few hours cutting and finessing all the little pieces to fit nicely. Another difficultly was concealing the fasteners. Here is what the corner situation looked like on the base cabinets.
Another tricky part was putting the skin panels on the sides of the cabinets. The walls aren’t perfectly flat, so one edge of each skin had to be custom cut to fit against the wall. Sam and Douglas set a saw up outside, while I measured and traced lines. I didn’t get any pictures of them sawing because it was snowing heavily (in March!). After a lot of sawing, fitting, re-sawing and sanding, the skins fit perfectly. We glued them on, taking extra care not to dirty the white paint.

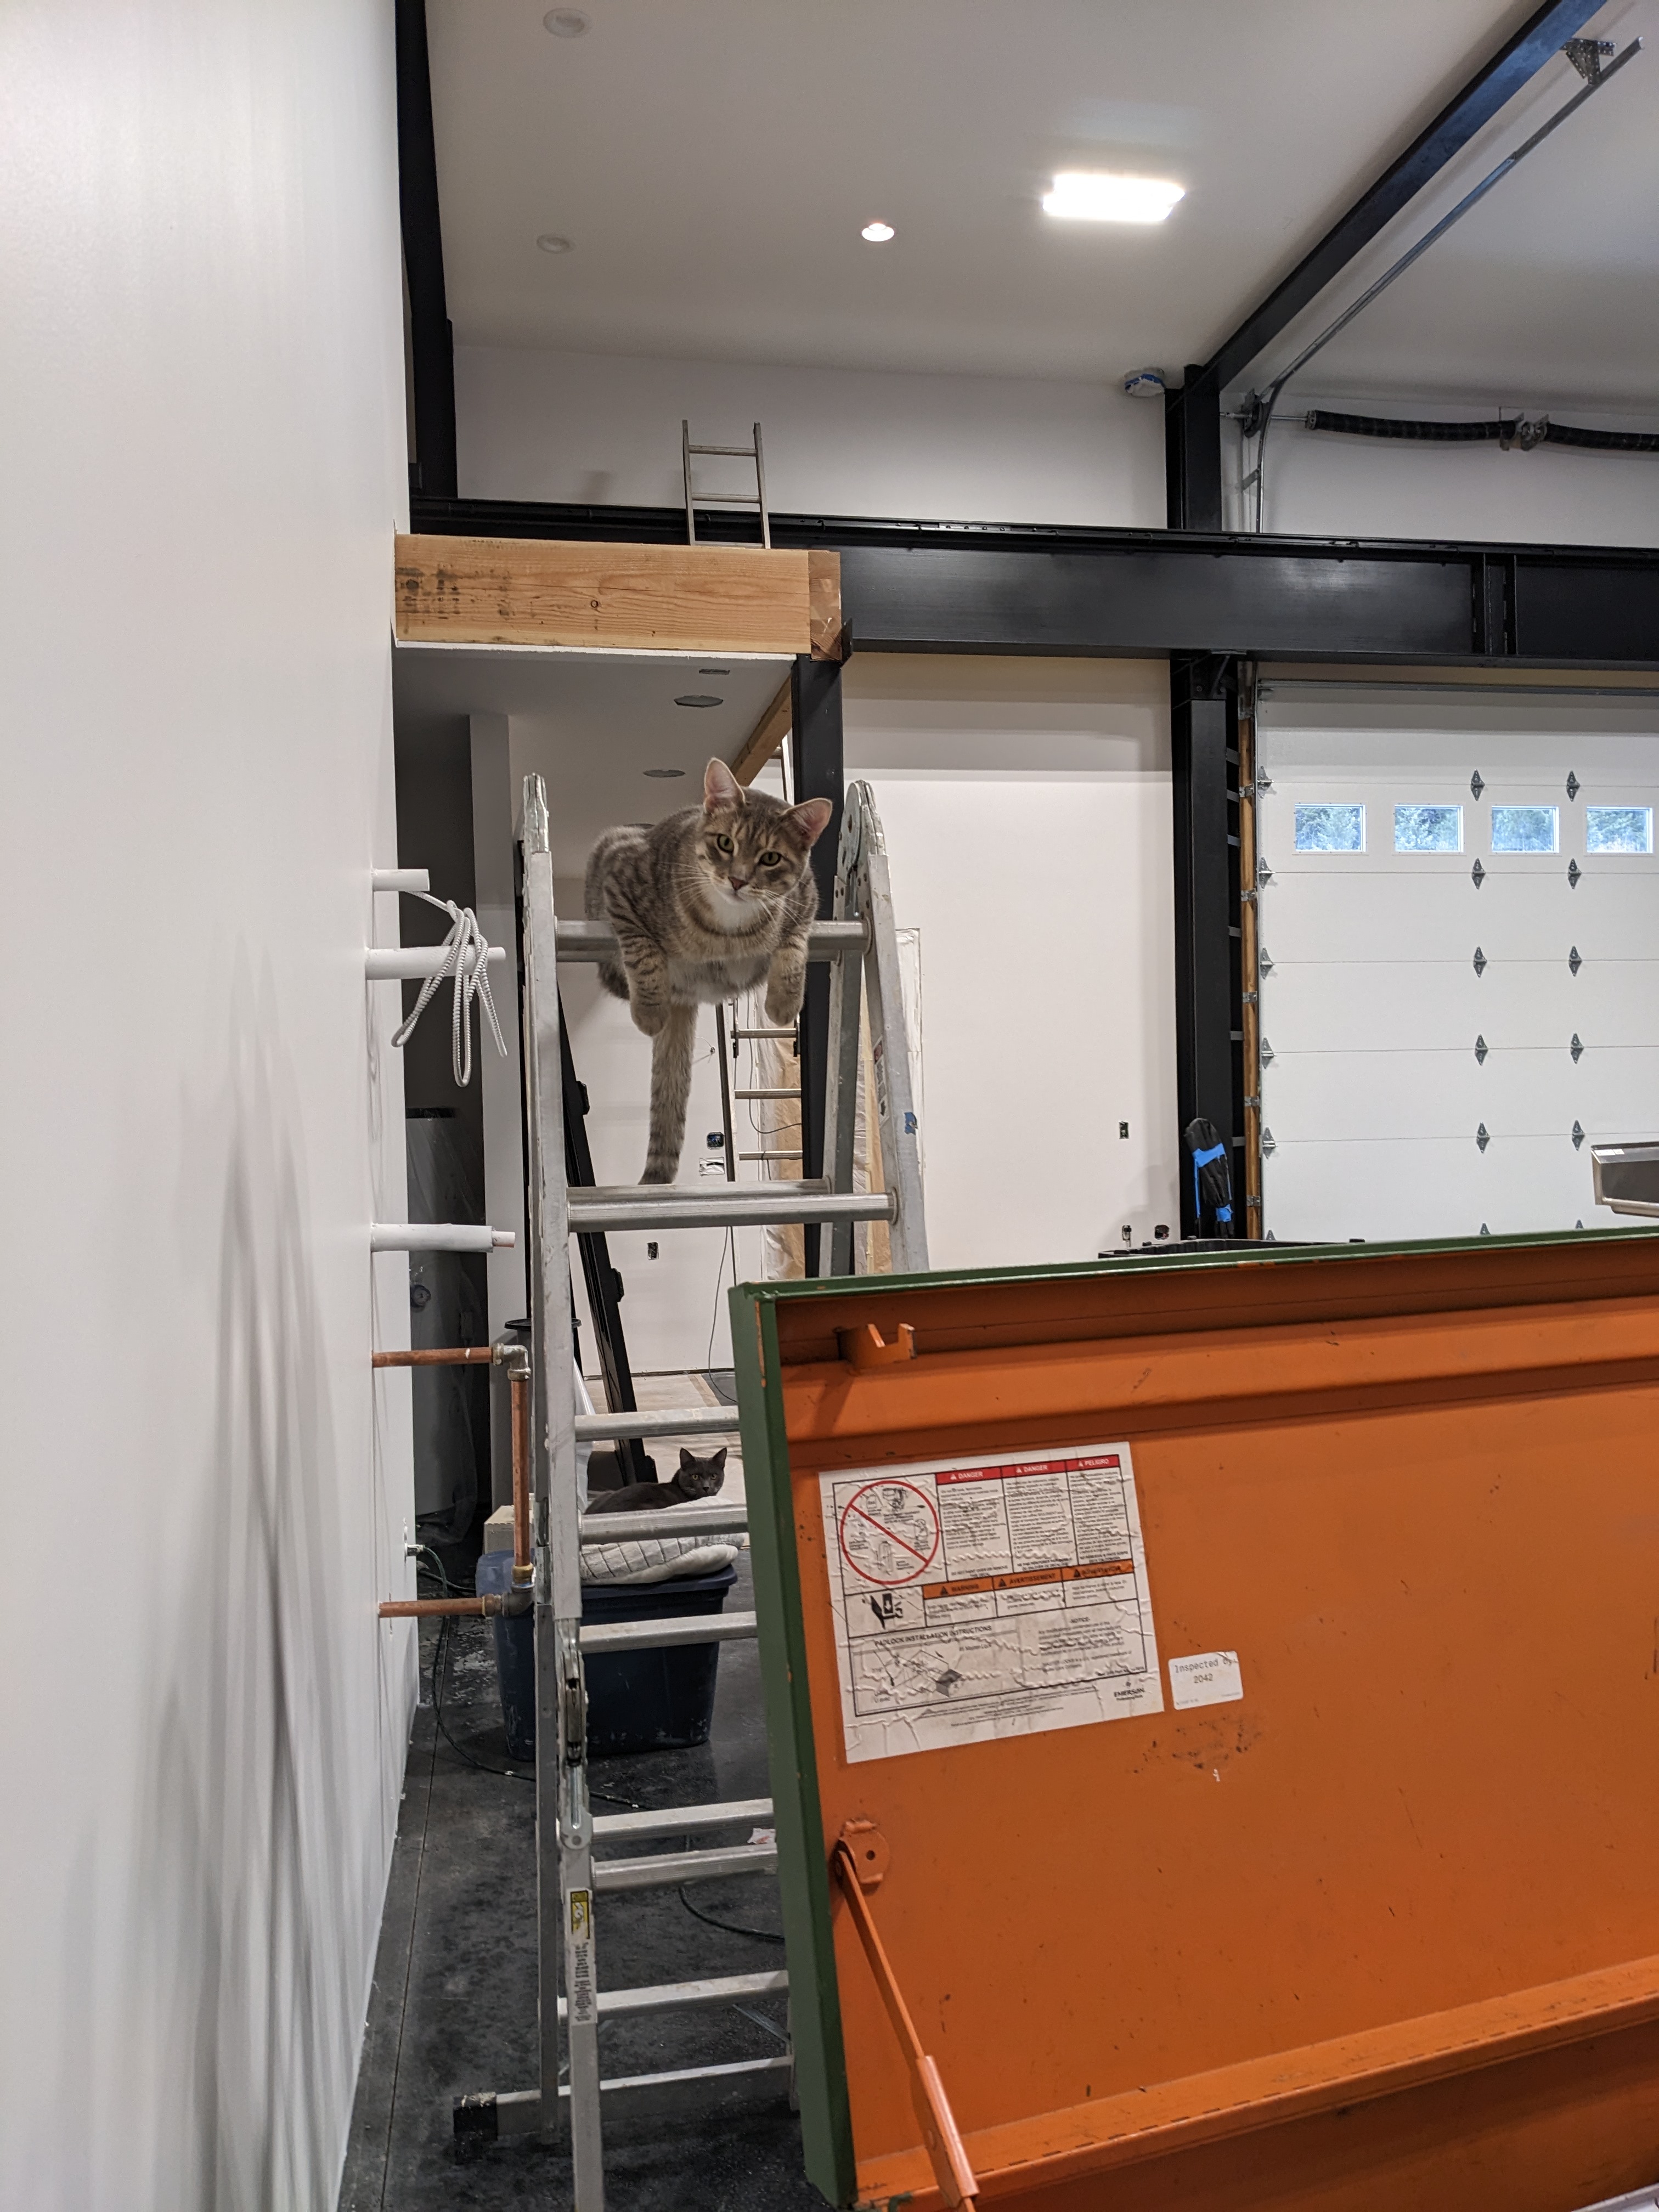
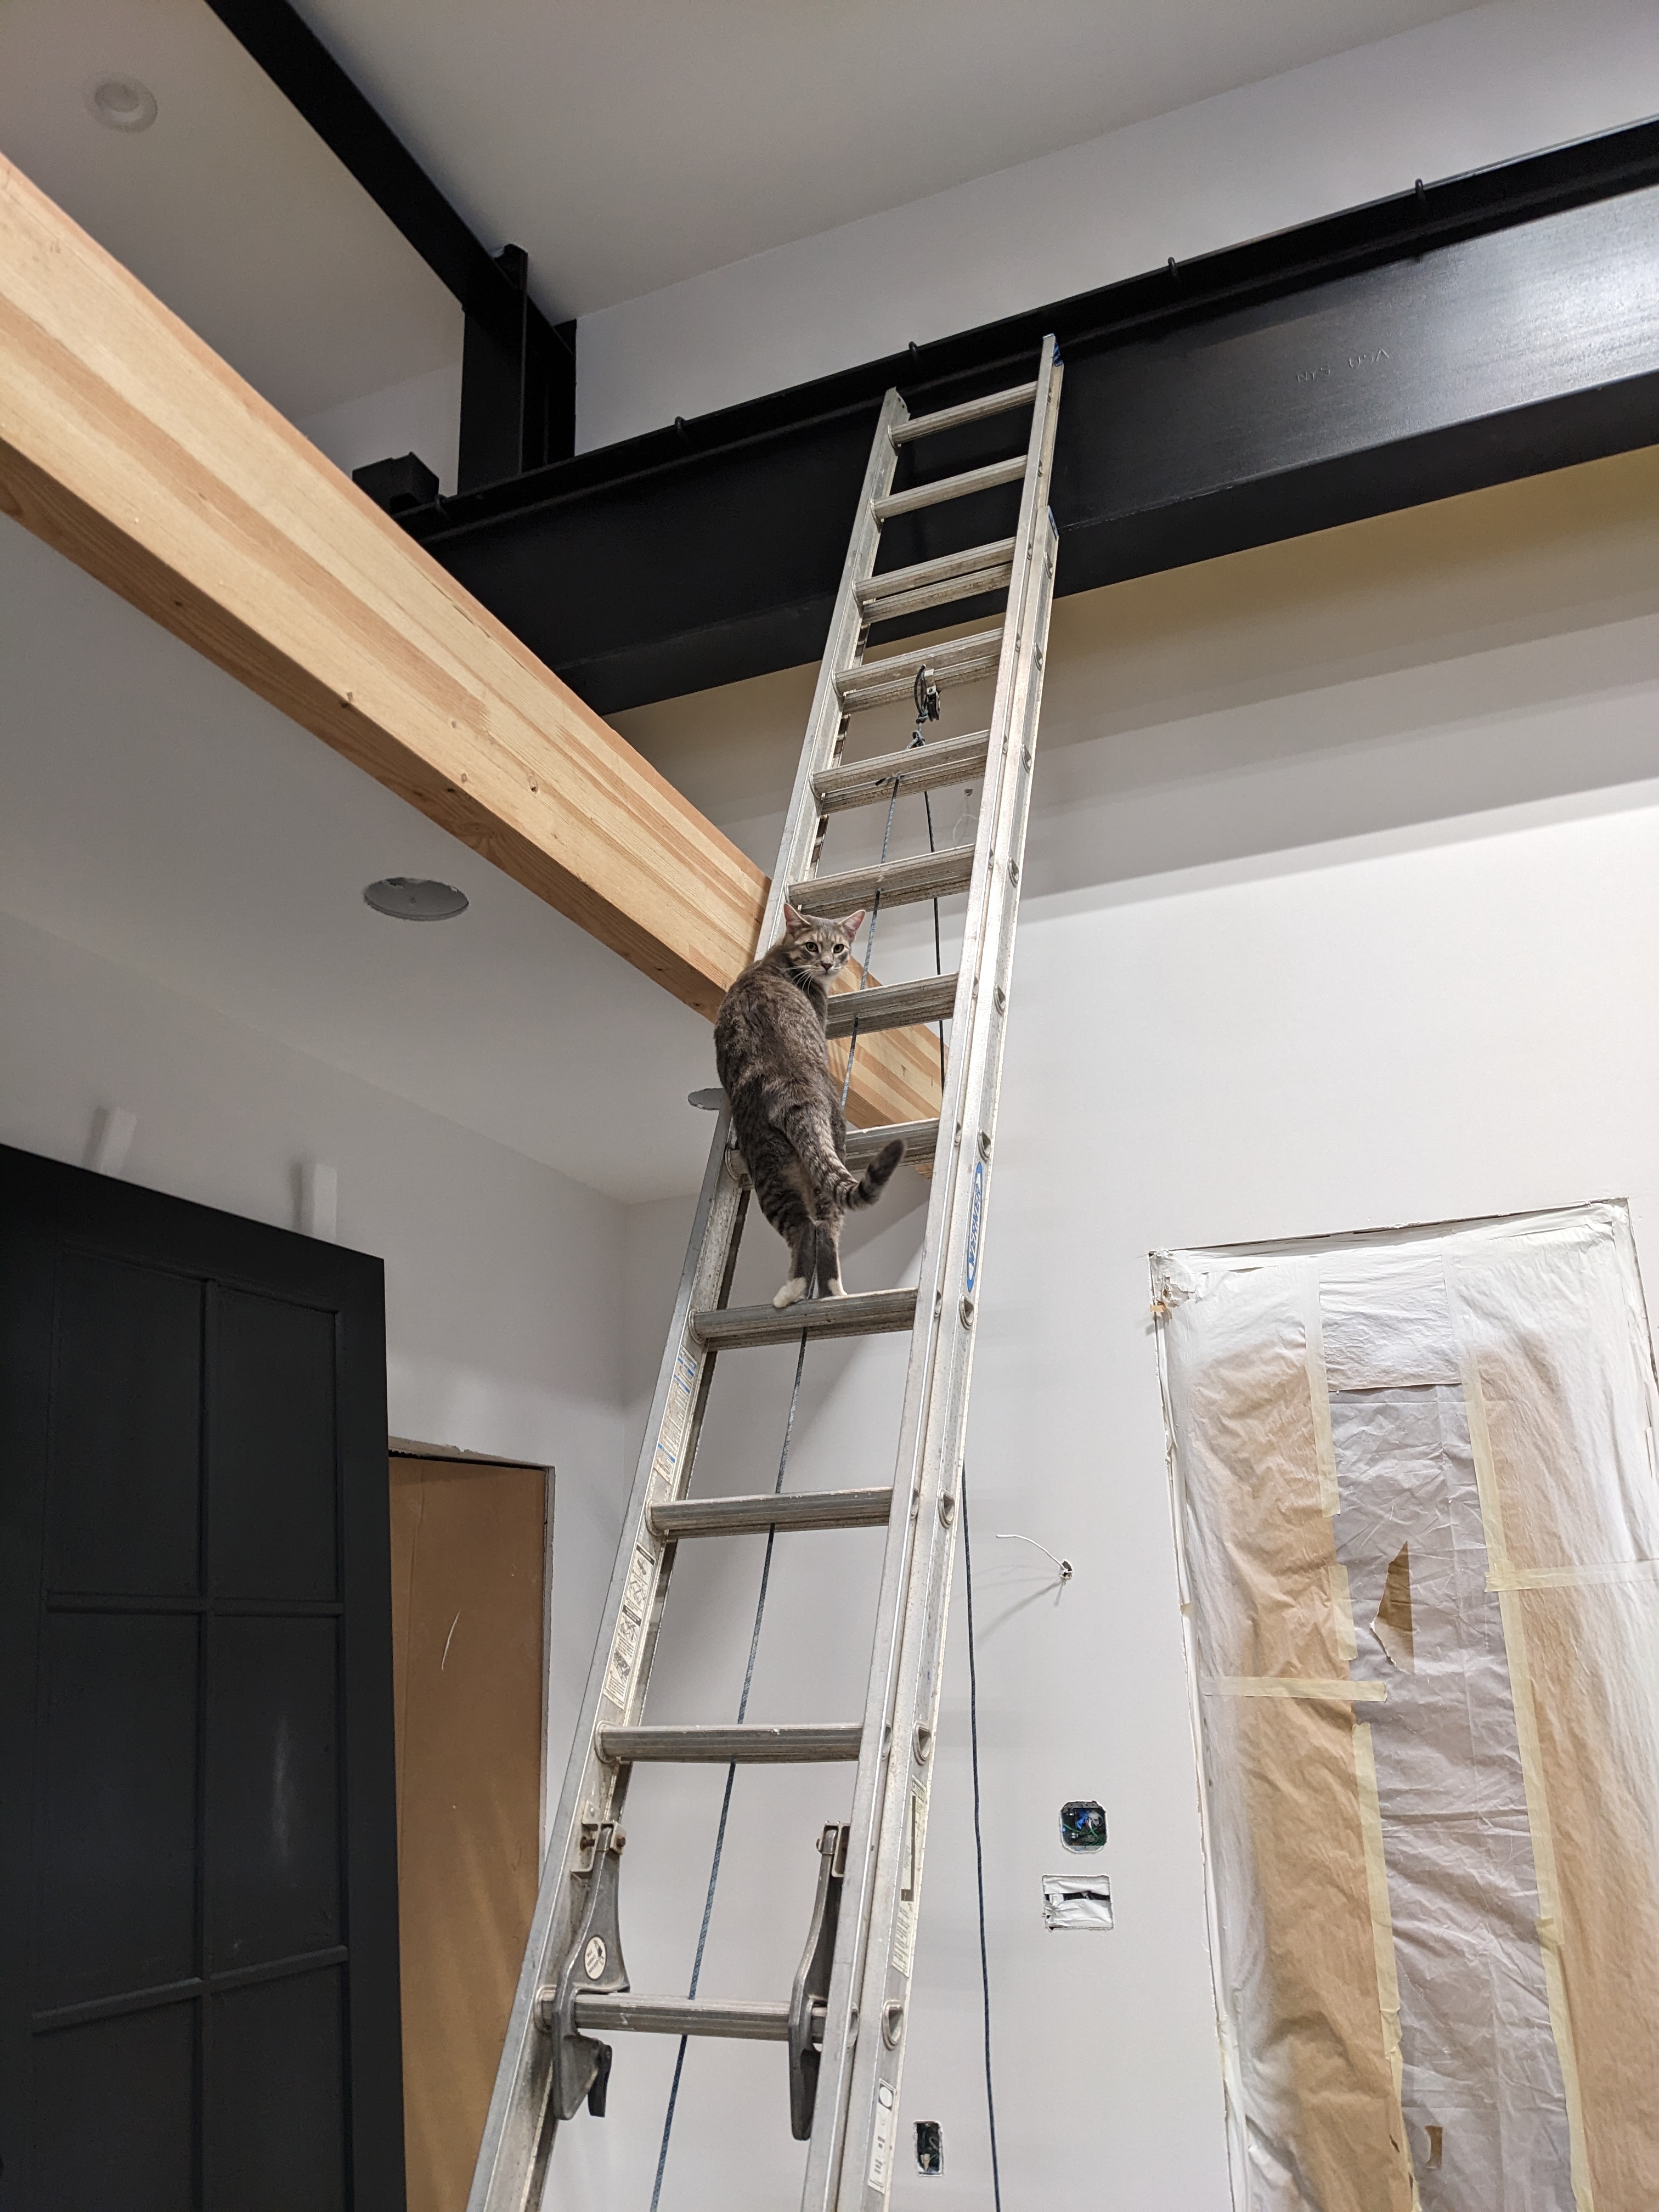
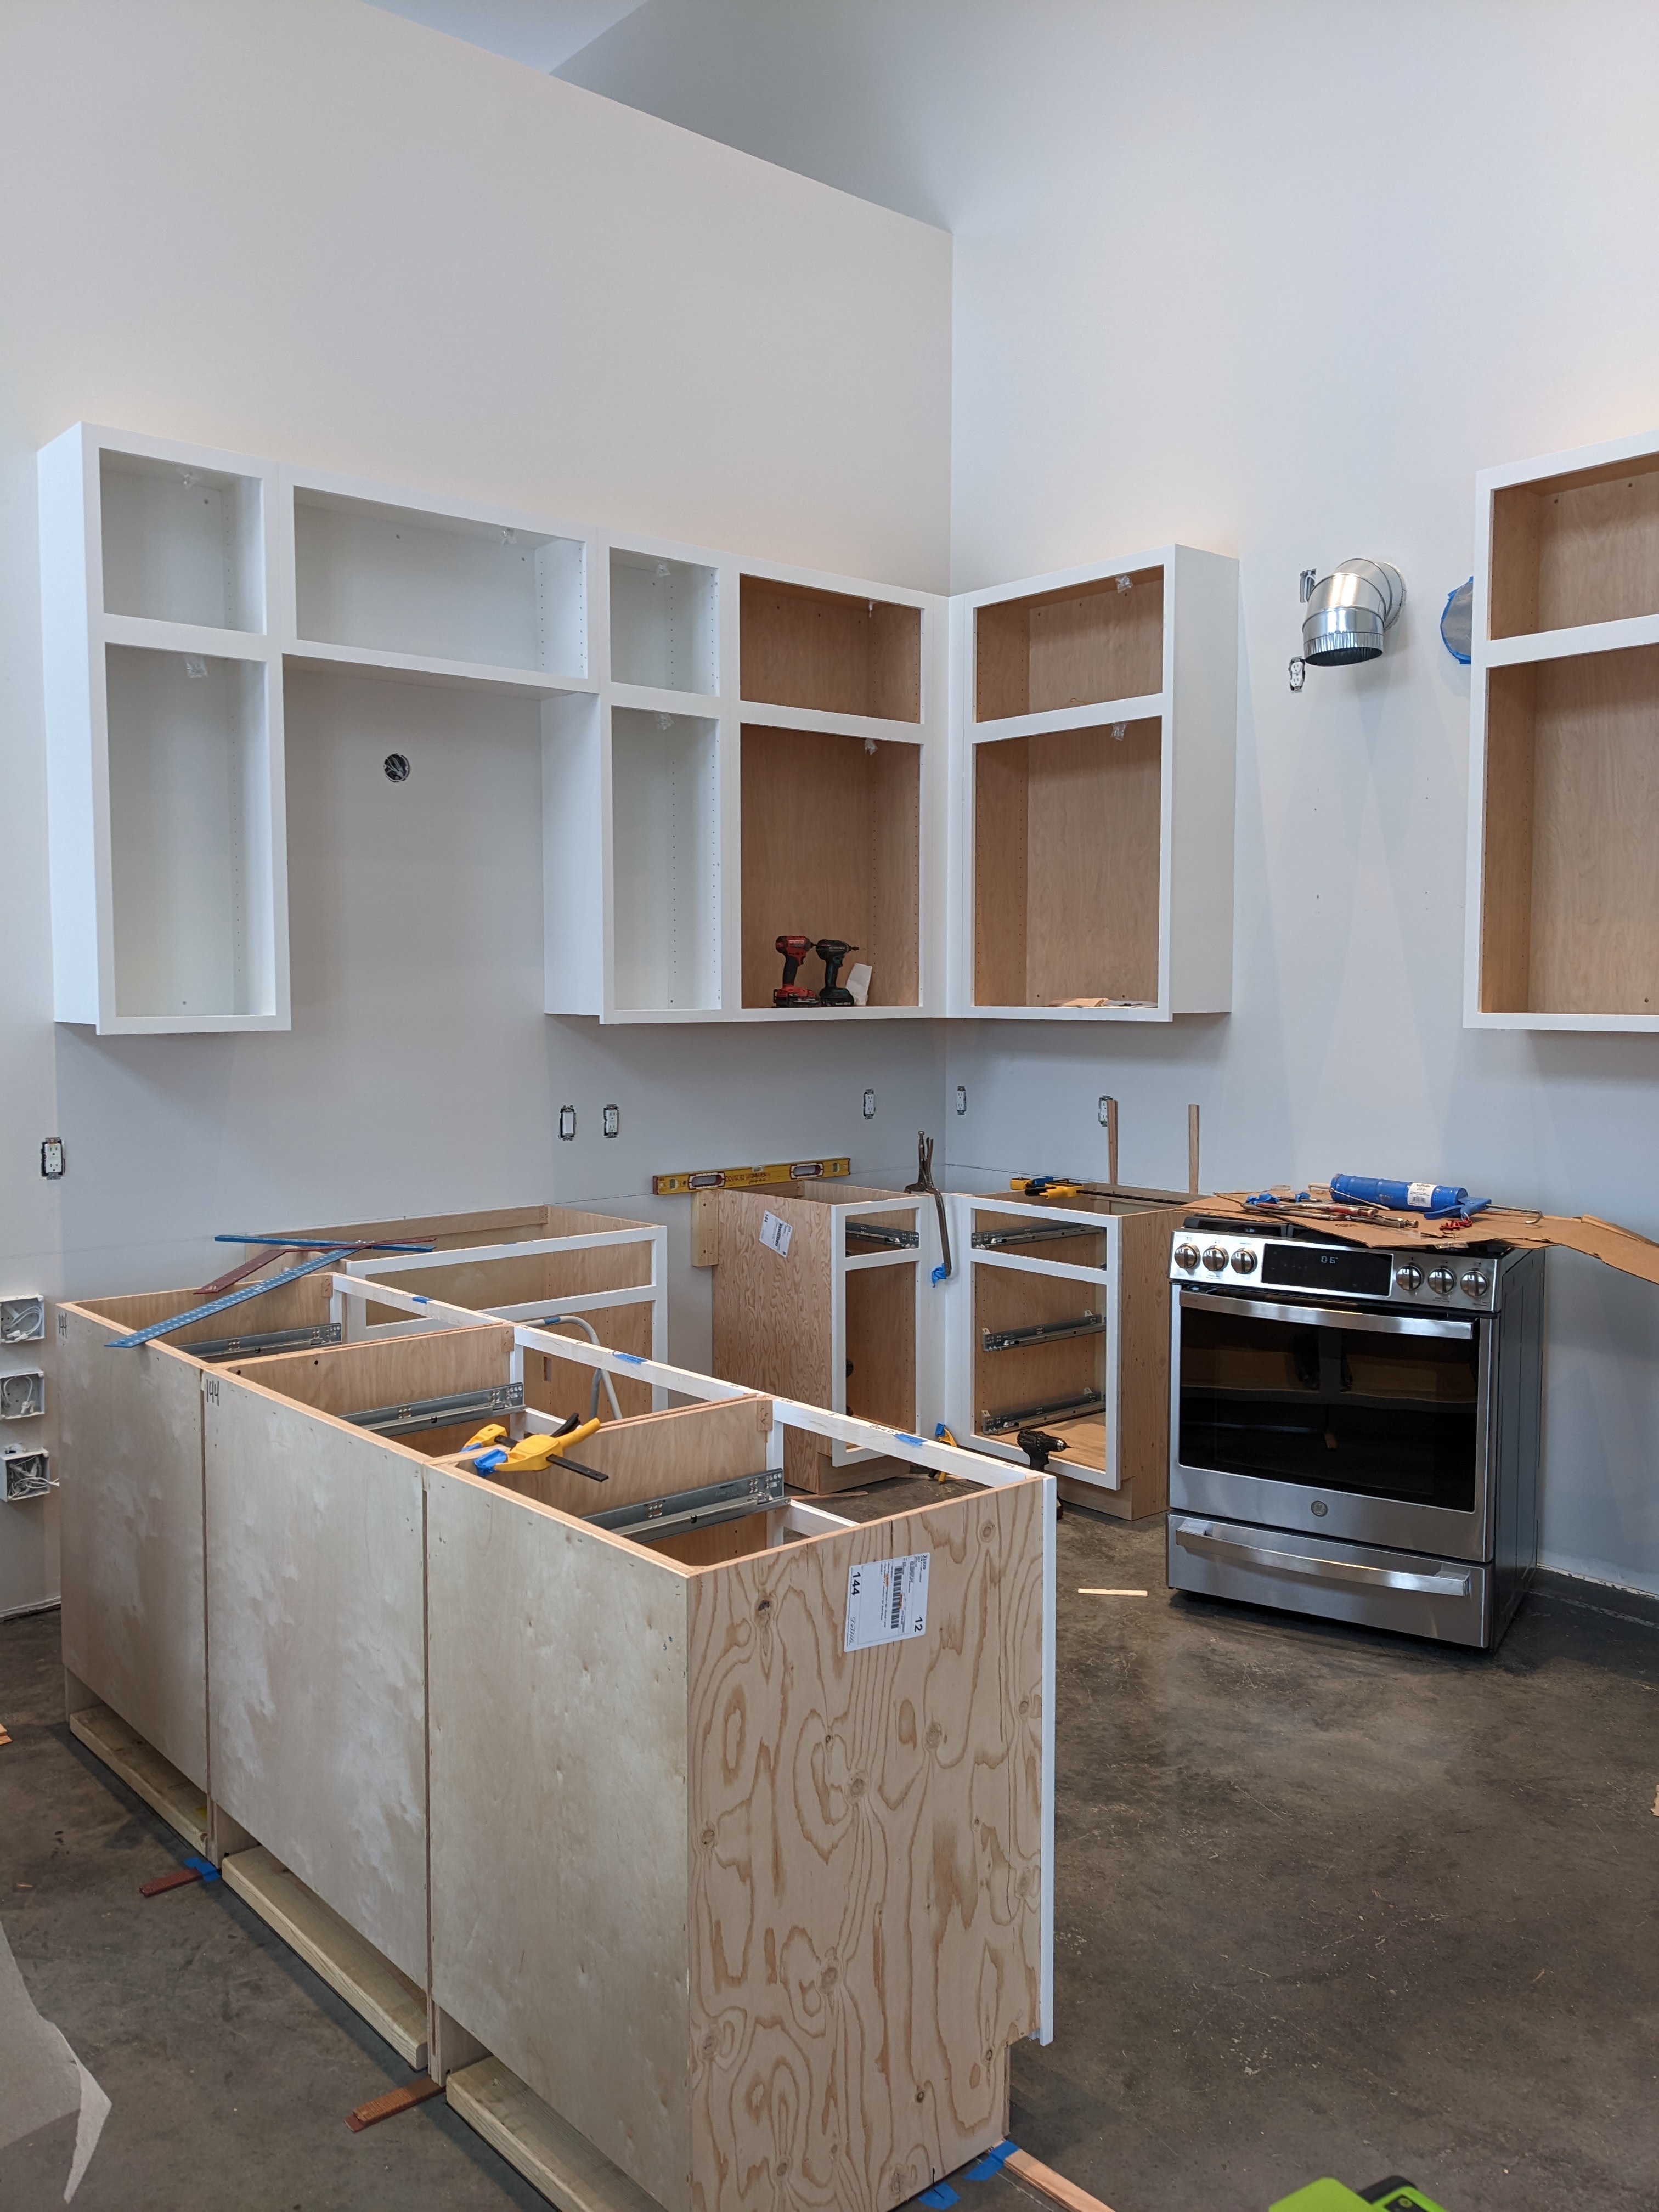
We finished the upper cabinets in a day. They passed Buster’s inspection. Have I mentioned his love of ladders? These were all taken on the same day.

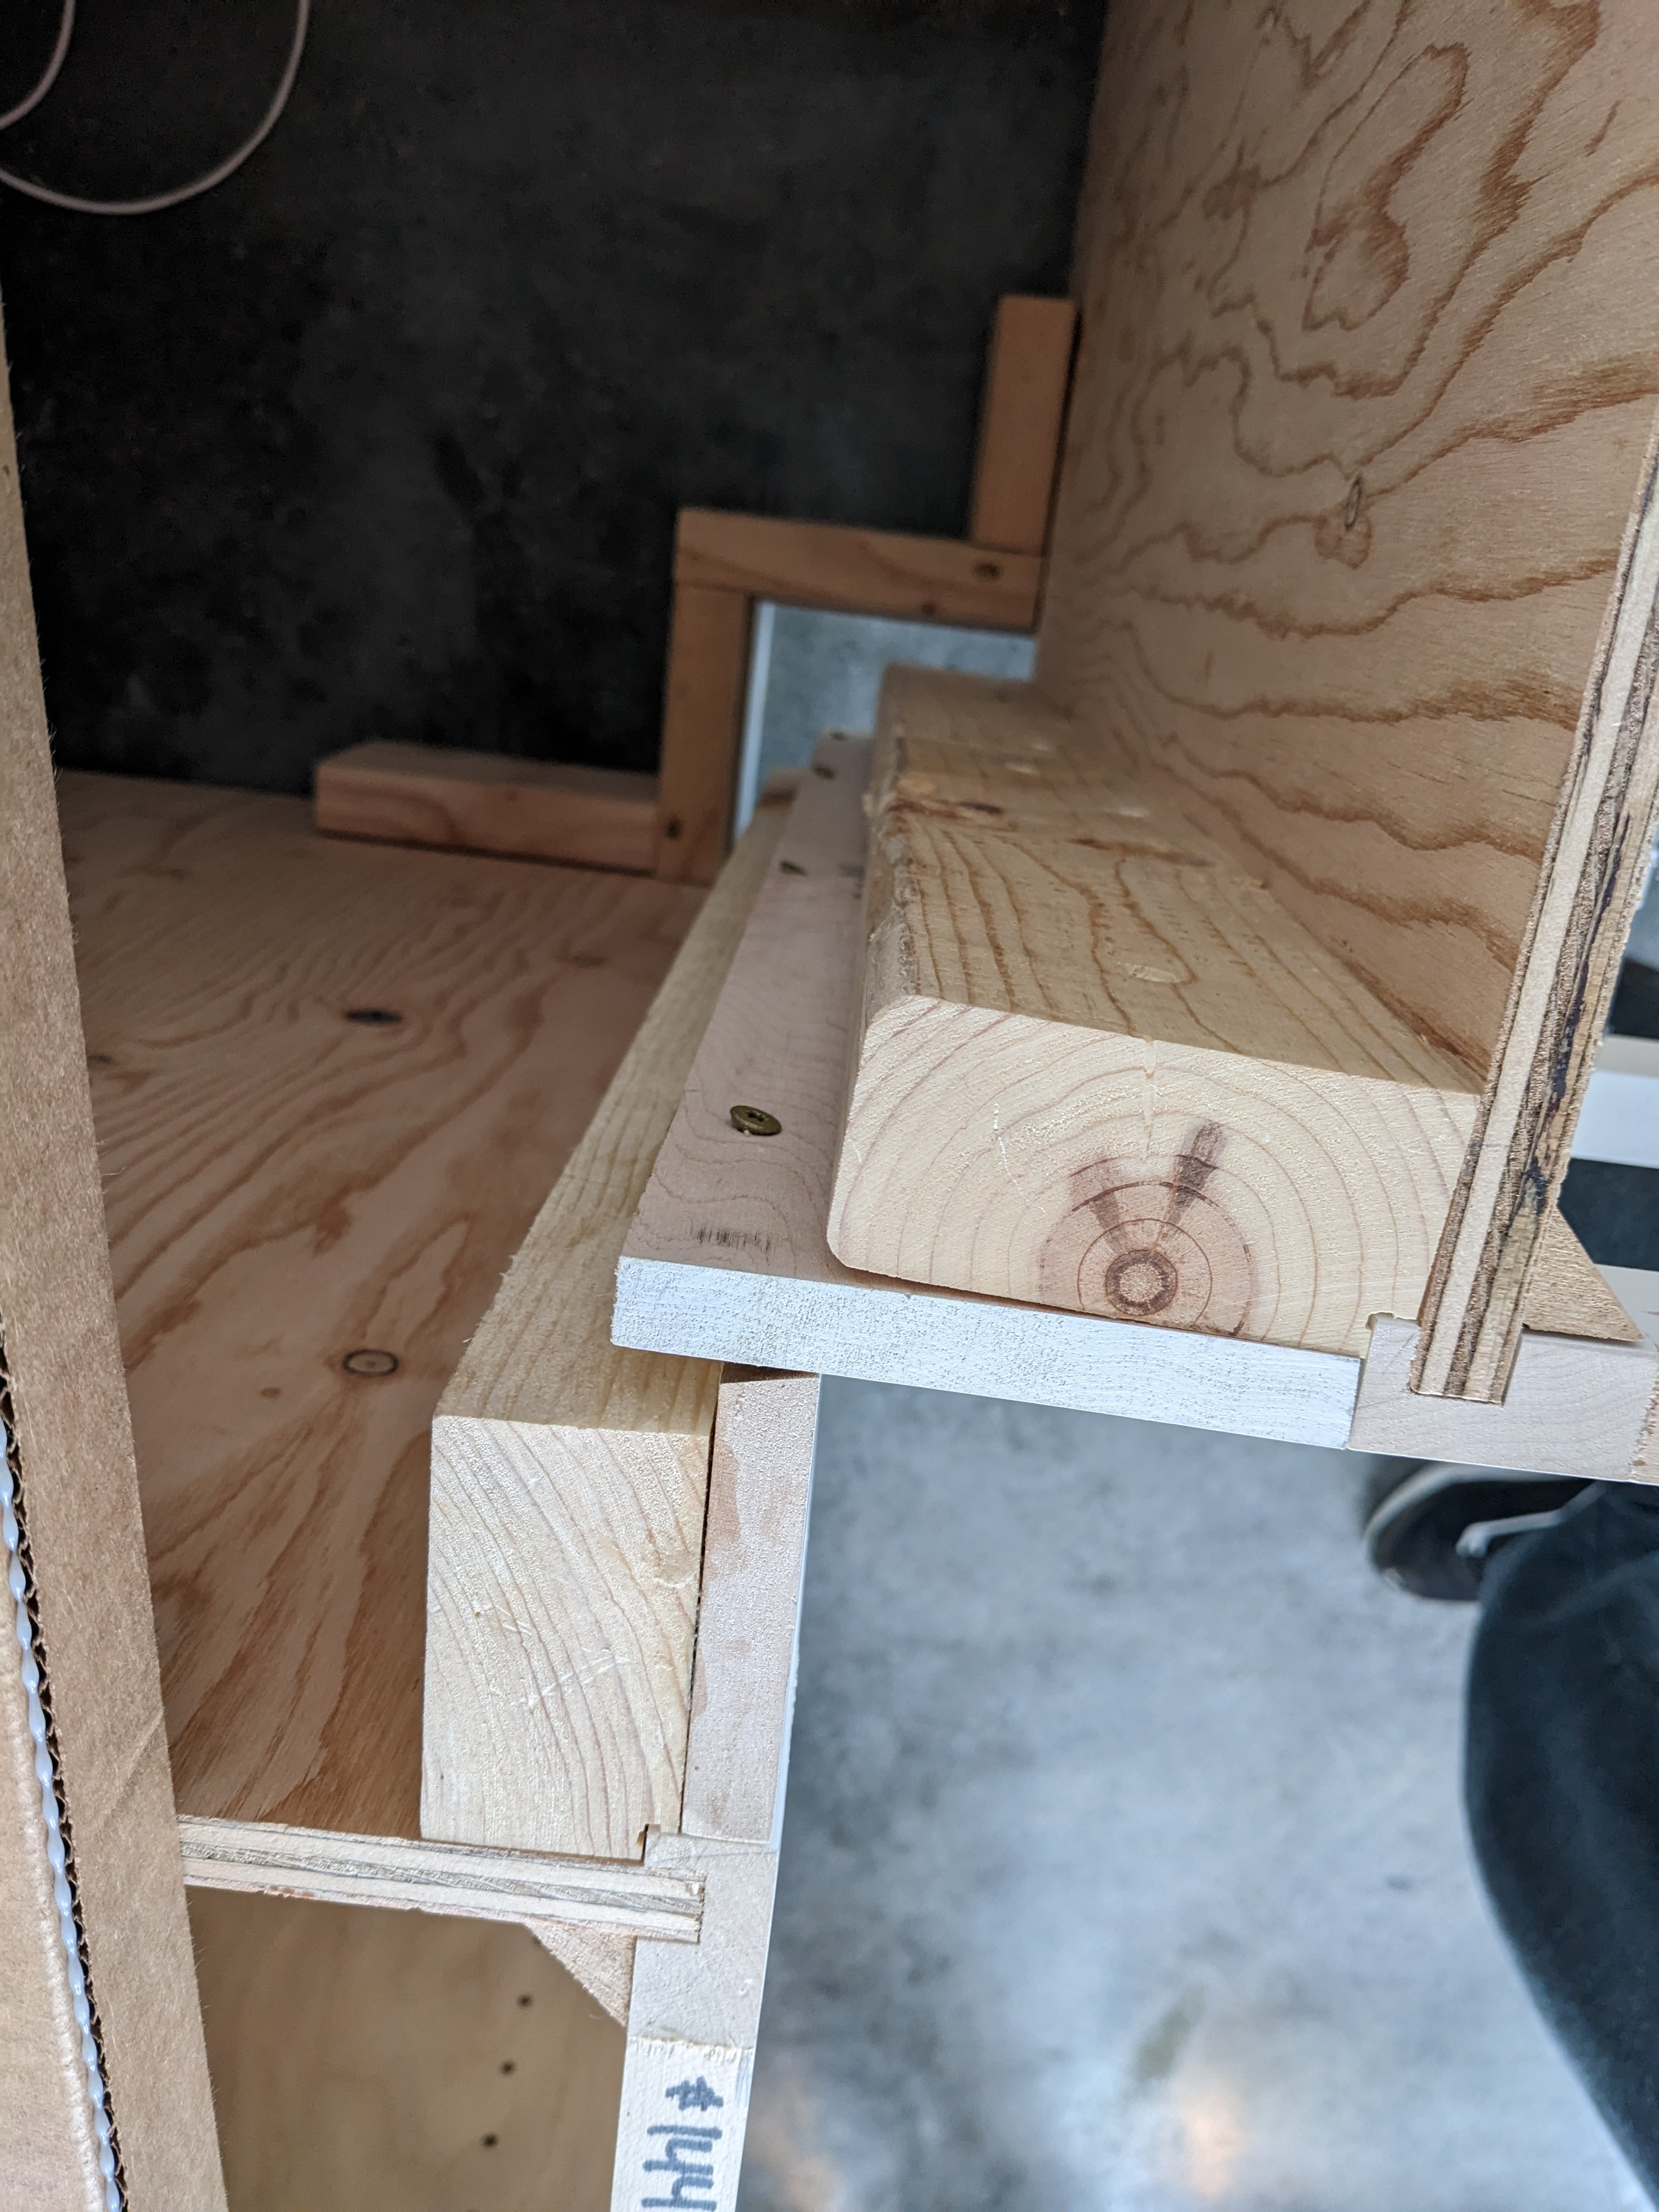
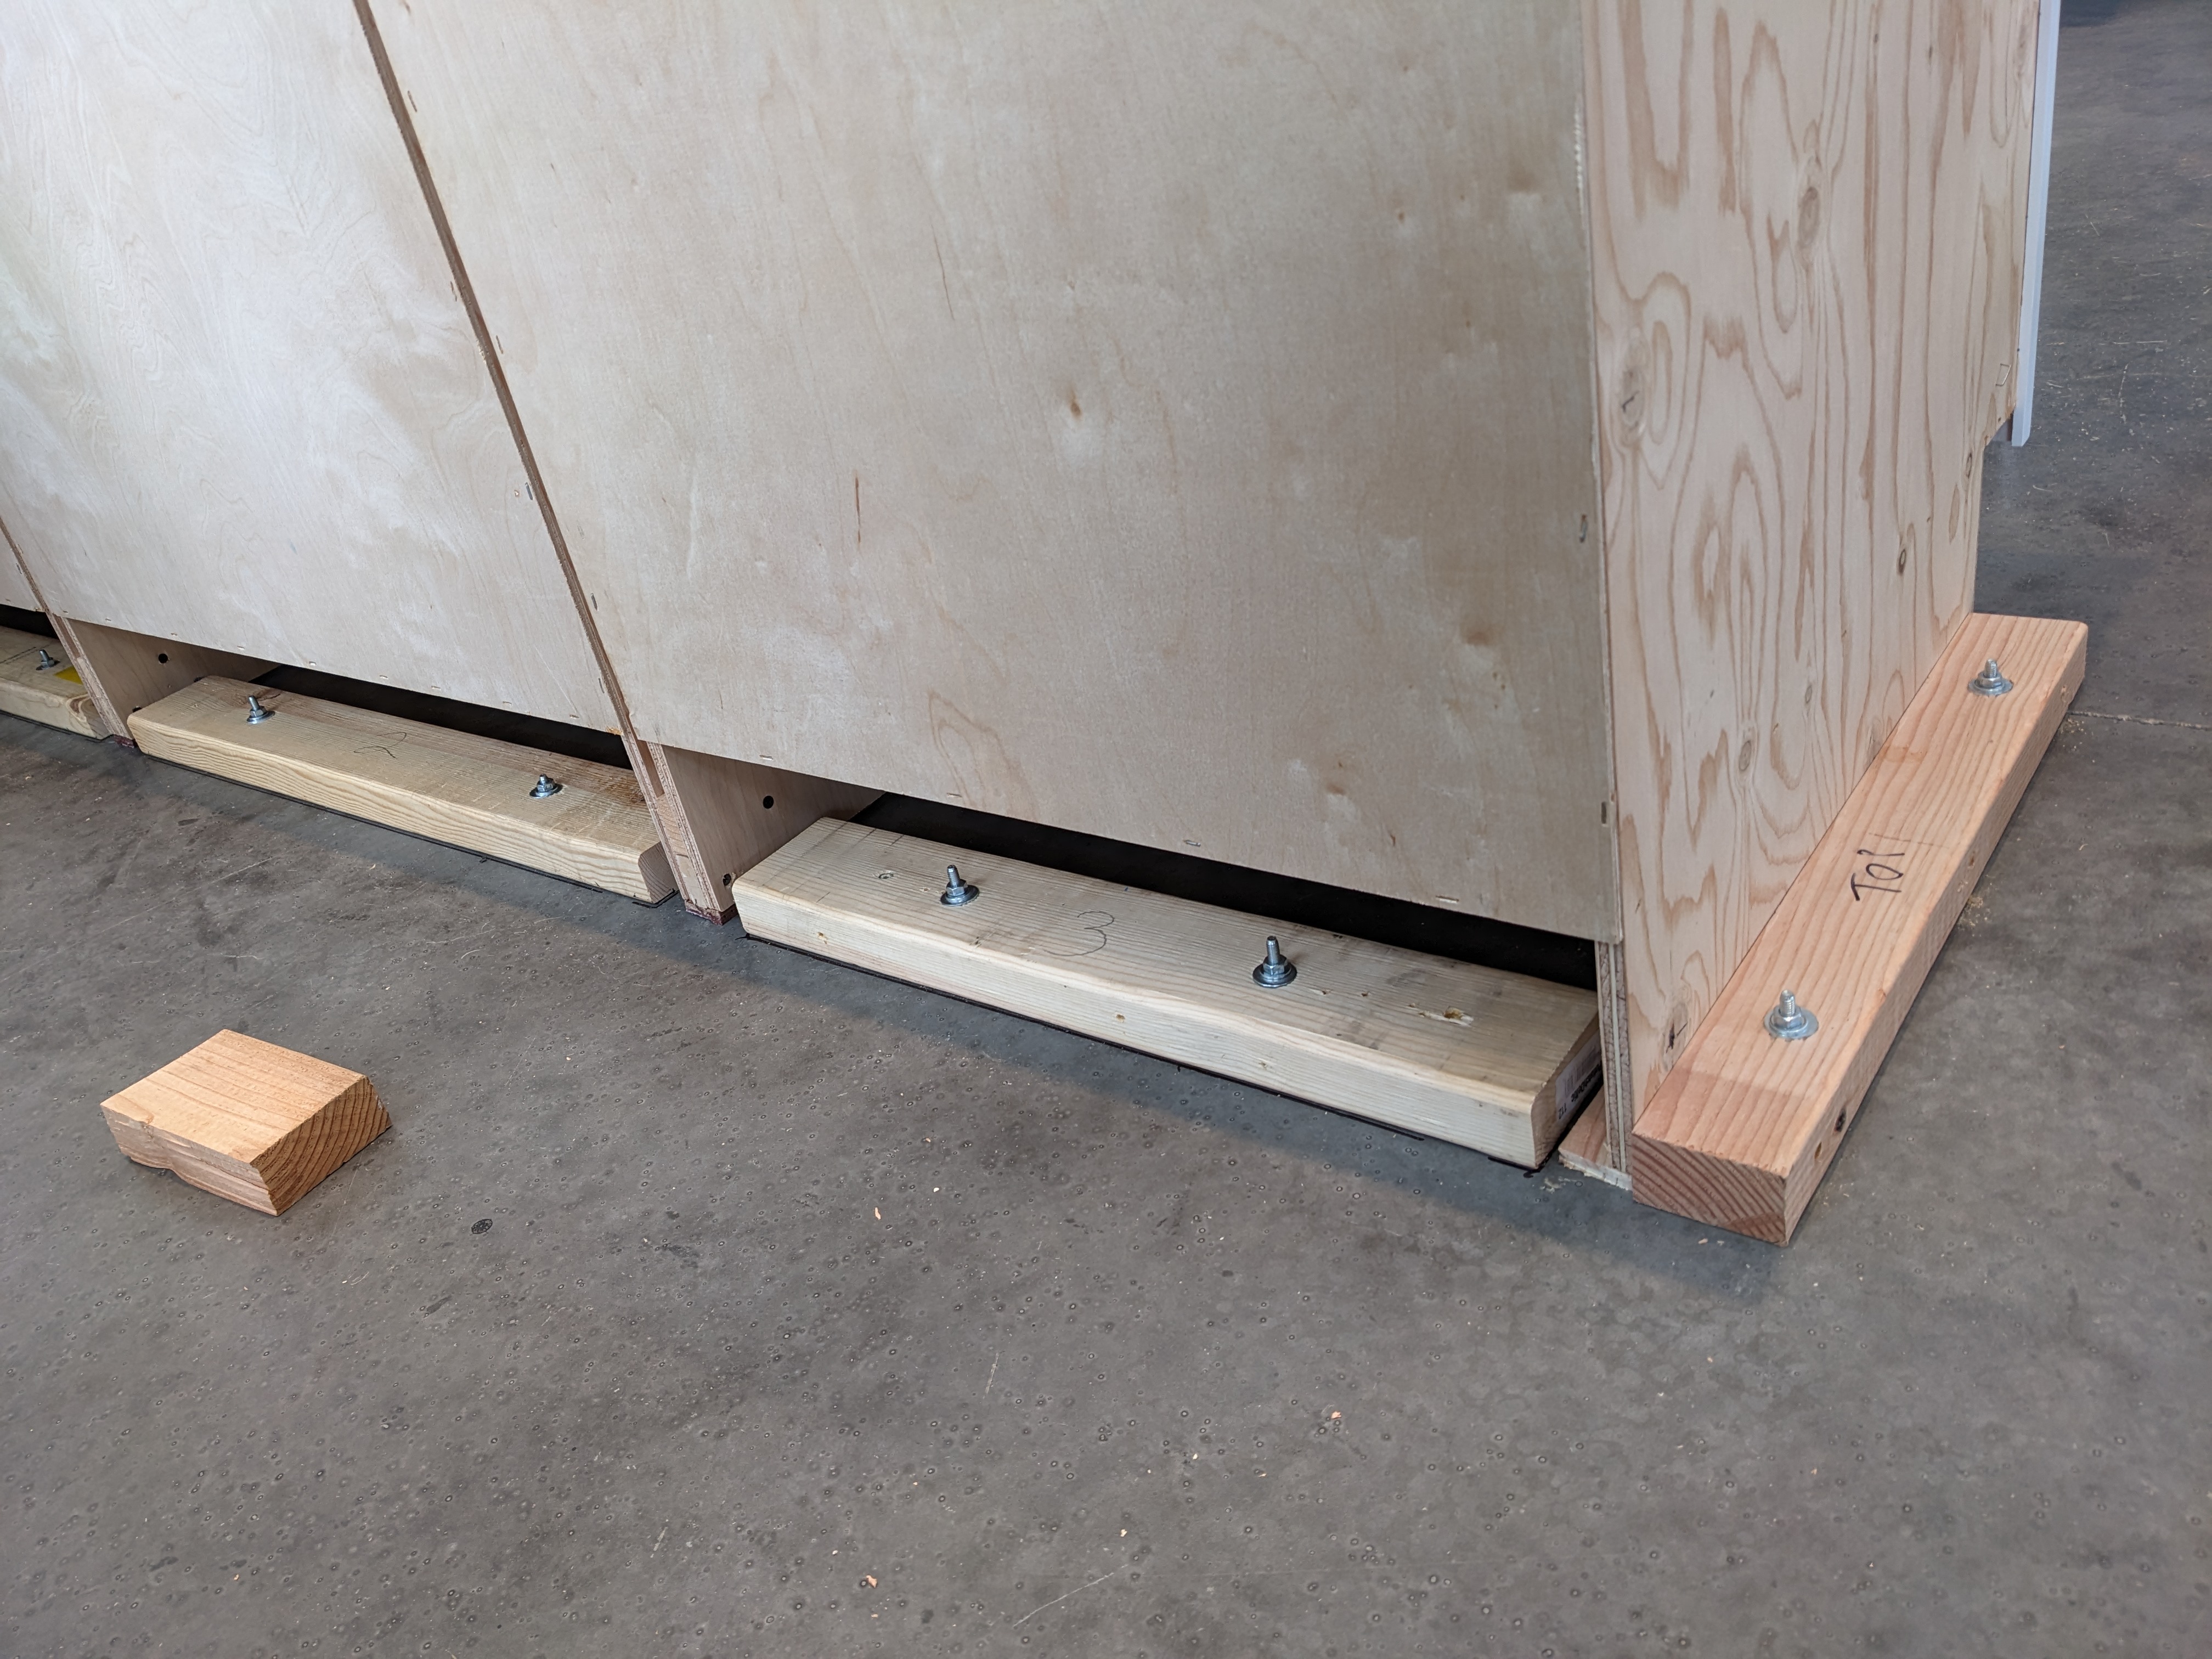
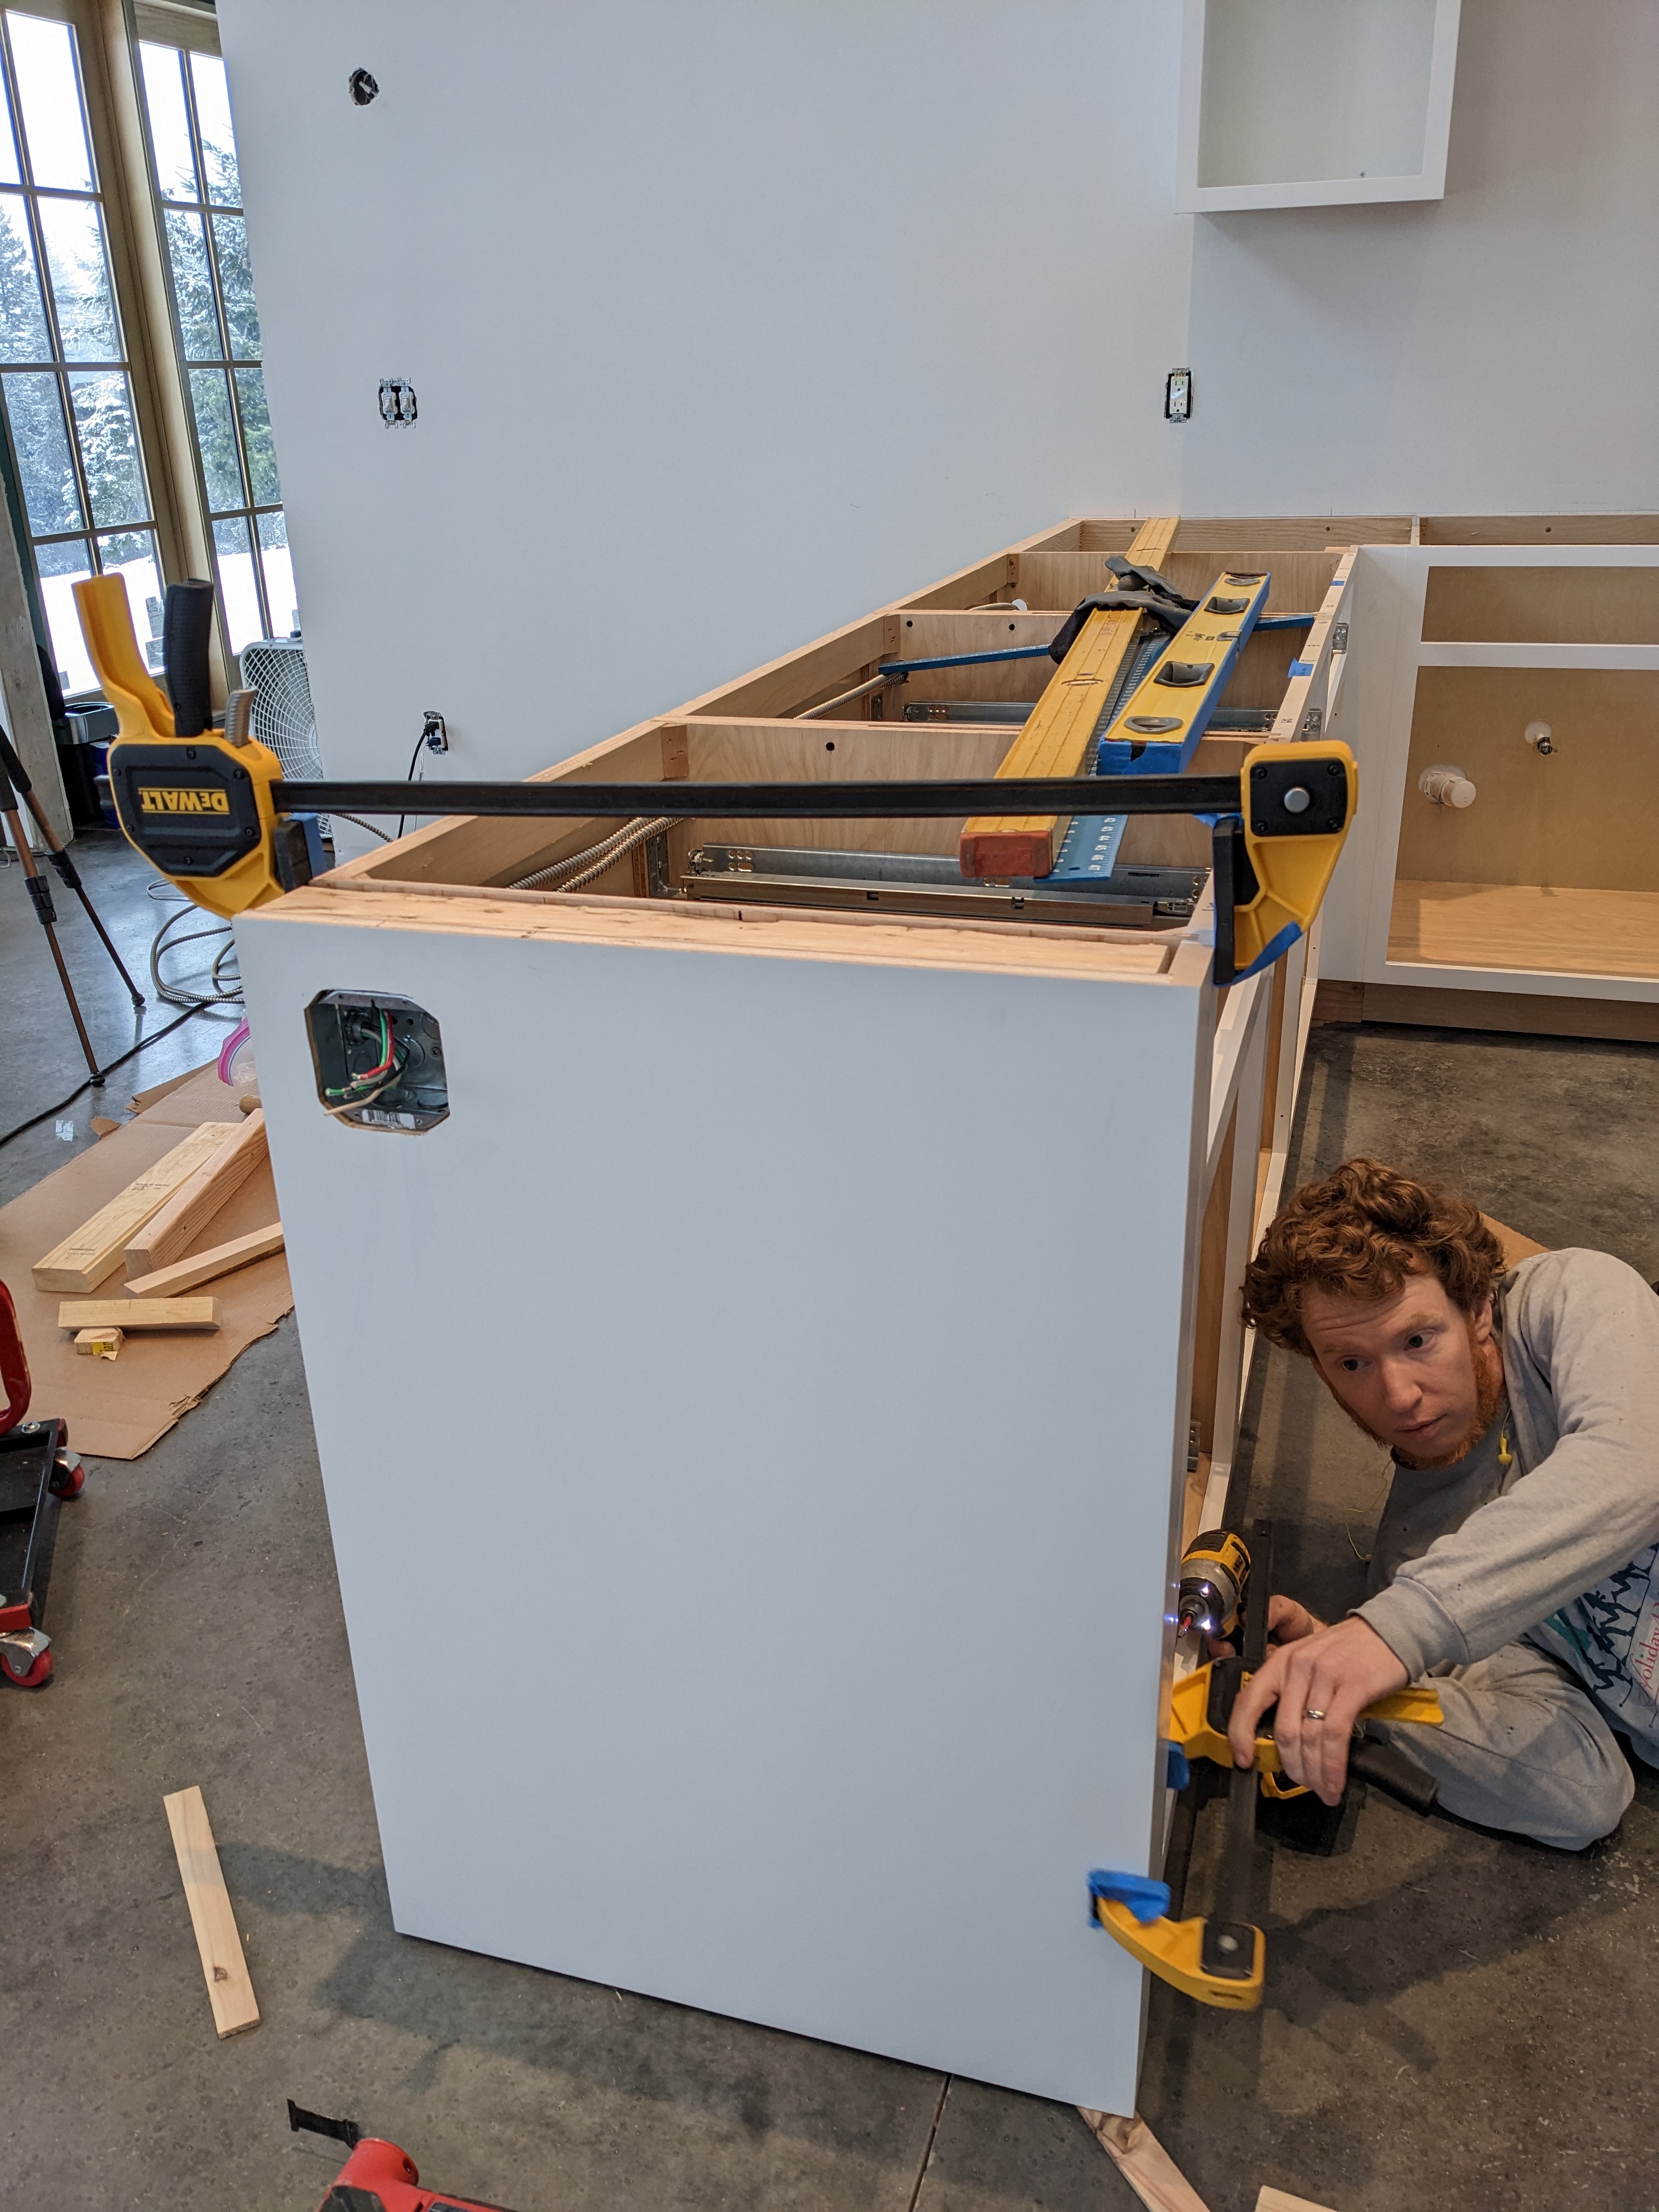
The lower cabinets took a little more time to install. We began by finding the highest spot on the floor and locating the corresponding cabinet. We shimmed the cabinet until the top was level and the face was plumb. That became the reference for the rest of the cabinets. They all had to be shimmed and level.
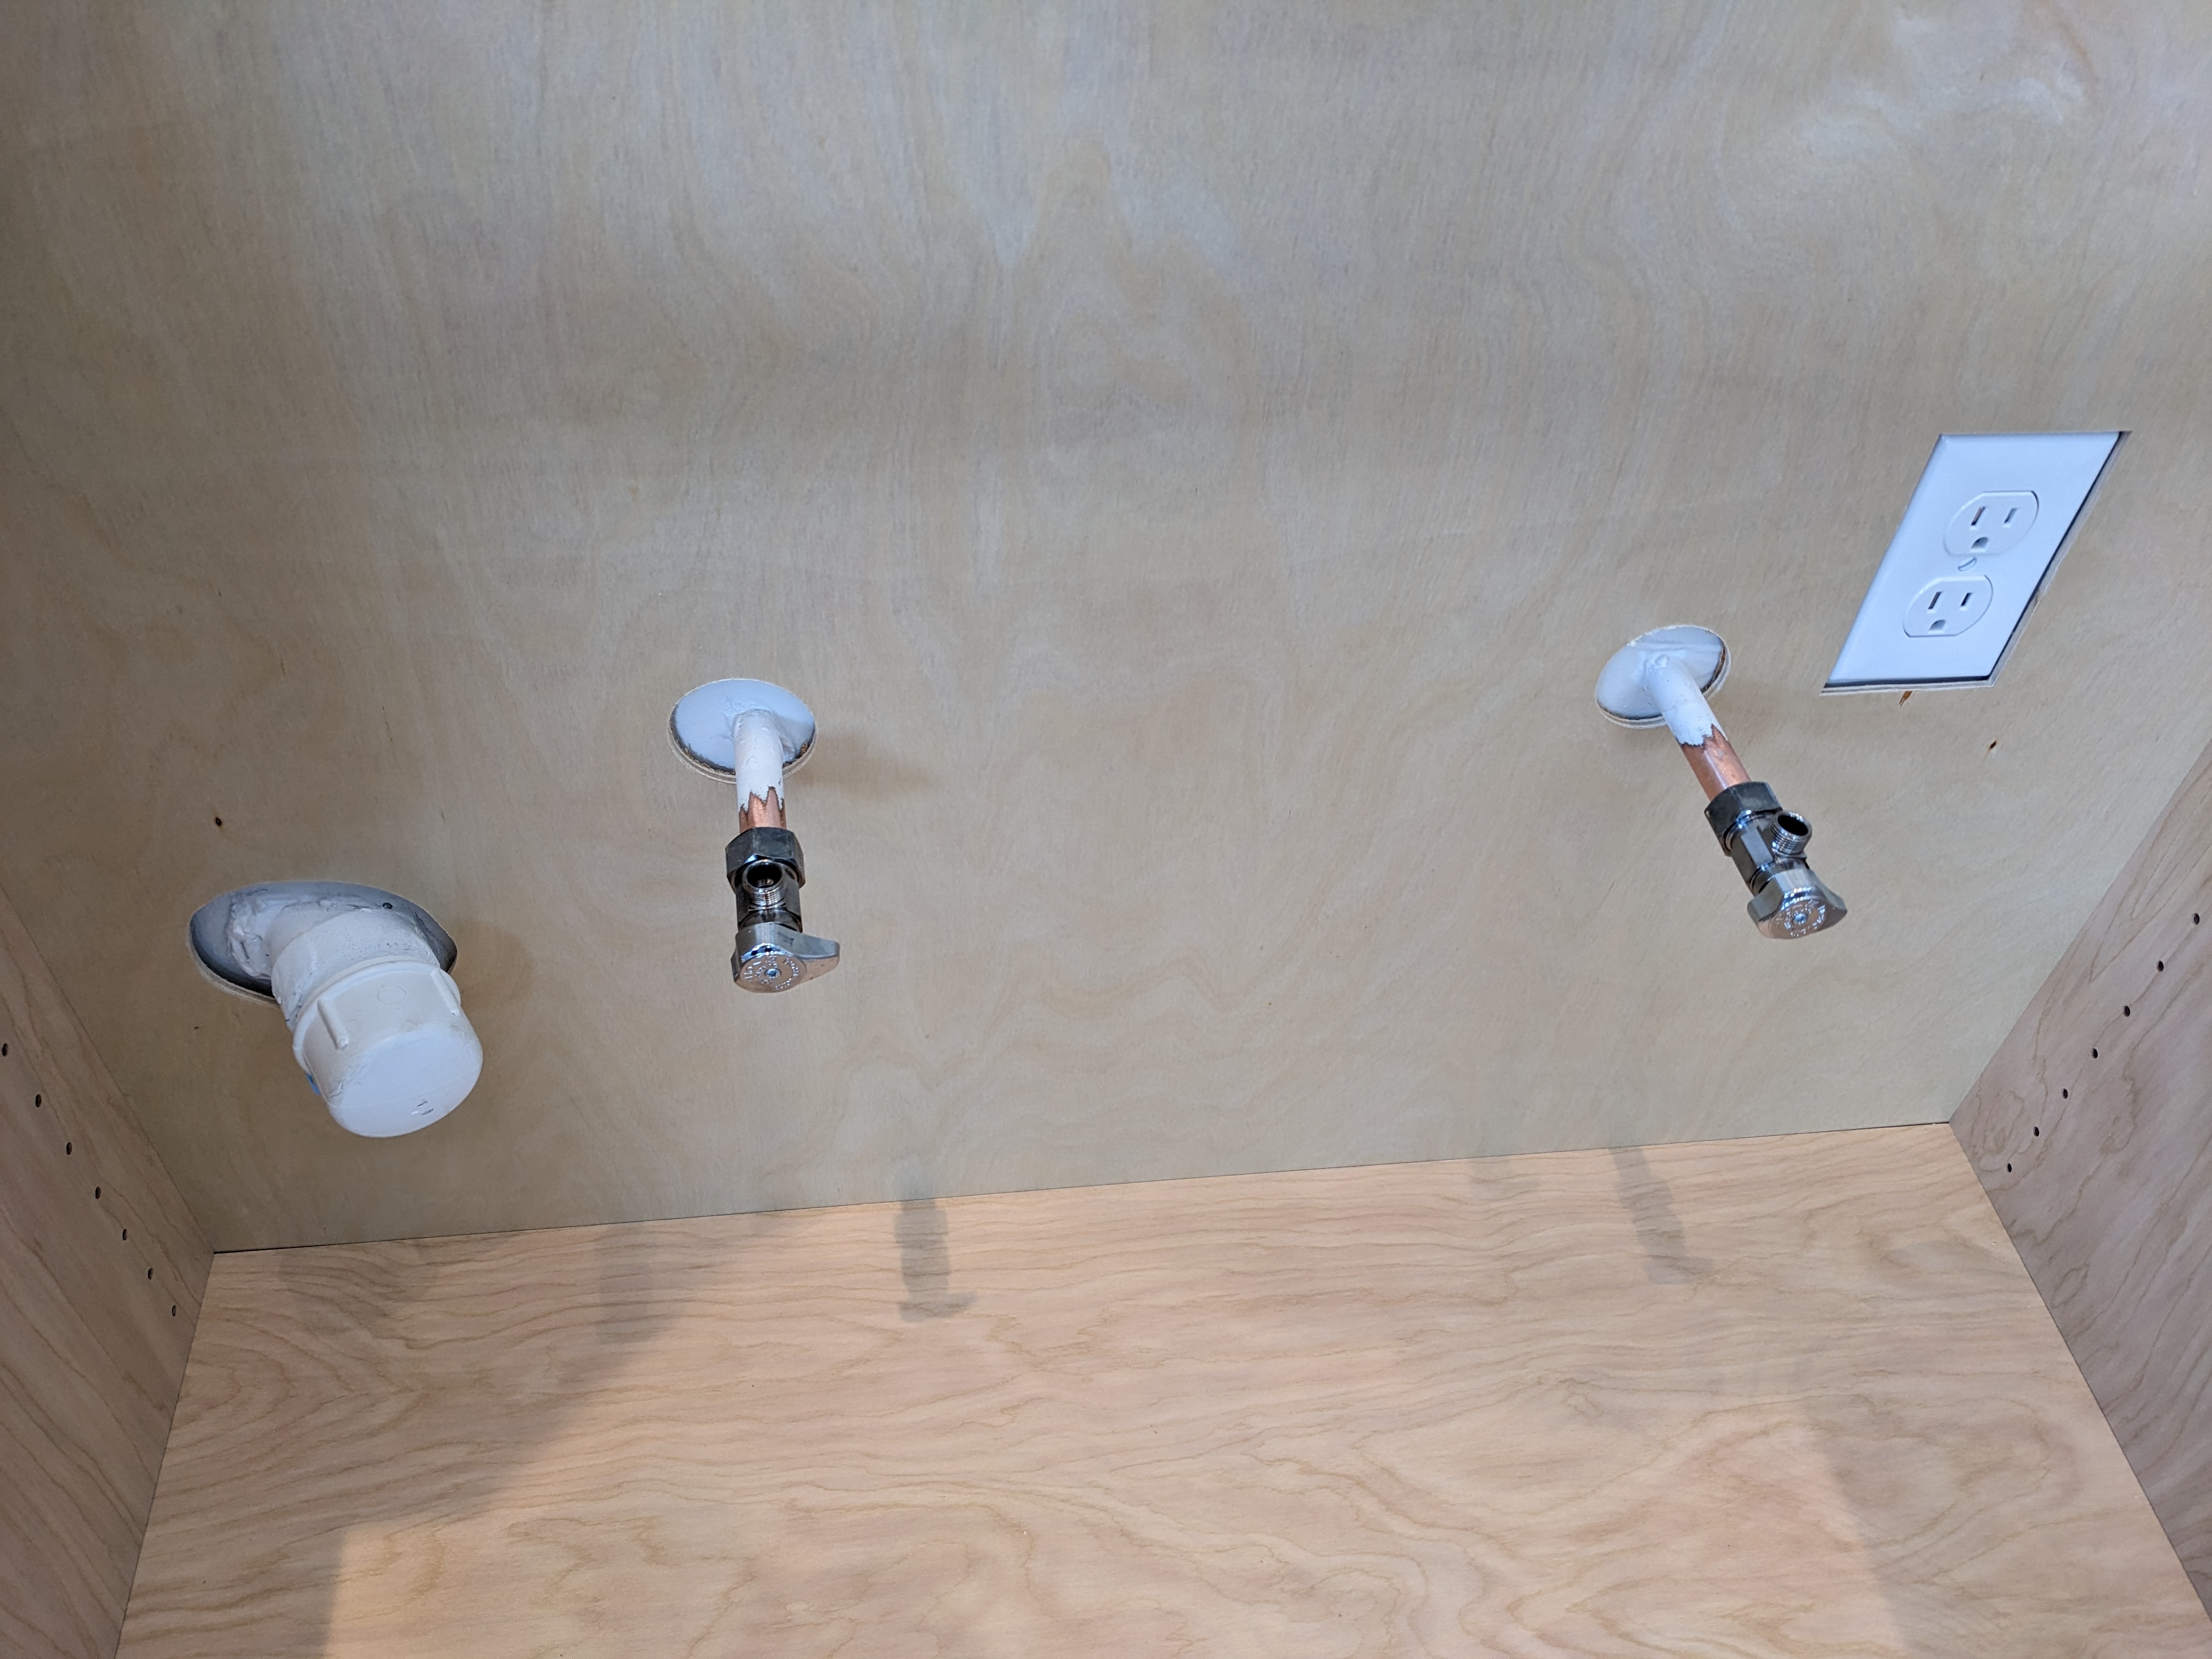
Some custom cutouts were required for receptacles and pipes. The sink cabinet had a lot going on. Sam and I cut some holes out while Douglas did more nuanced carpentry in the corners. I thought Douglas might be more impressed with our work.

Base cabinets typically screw into the wall and each other. Islands and peninsulas are more challenging. We screwed the three peninsula cabinets to each other first. Then we wiggled the mass around until we were content with its location. We had to compromise between it being parallel to one wall and 90 degrees to the other wall. Then we drilled some holes in the floor to anchor some blocks down.
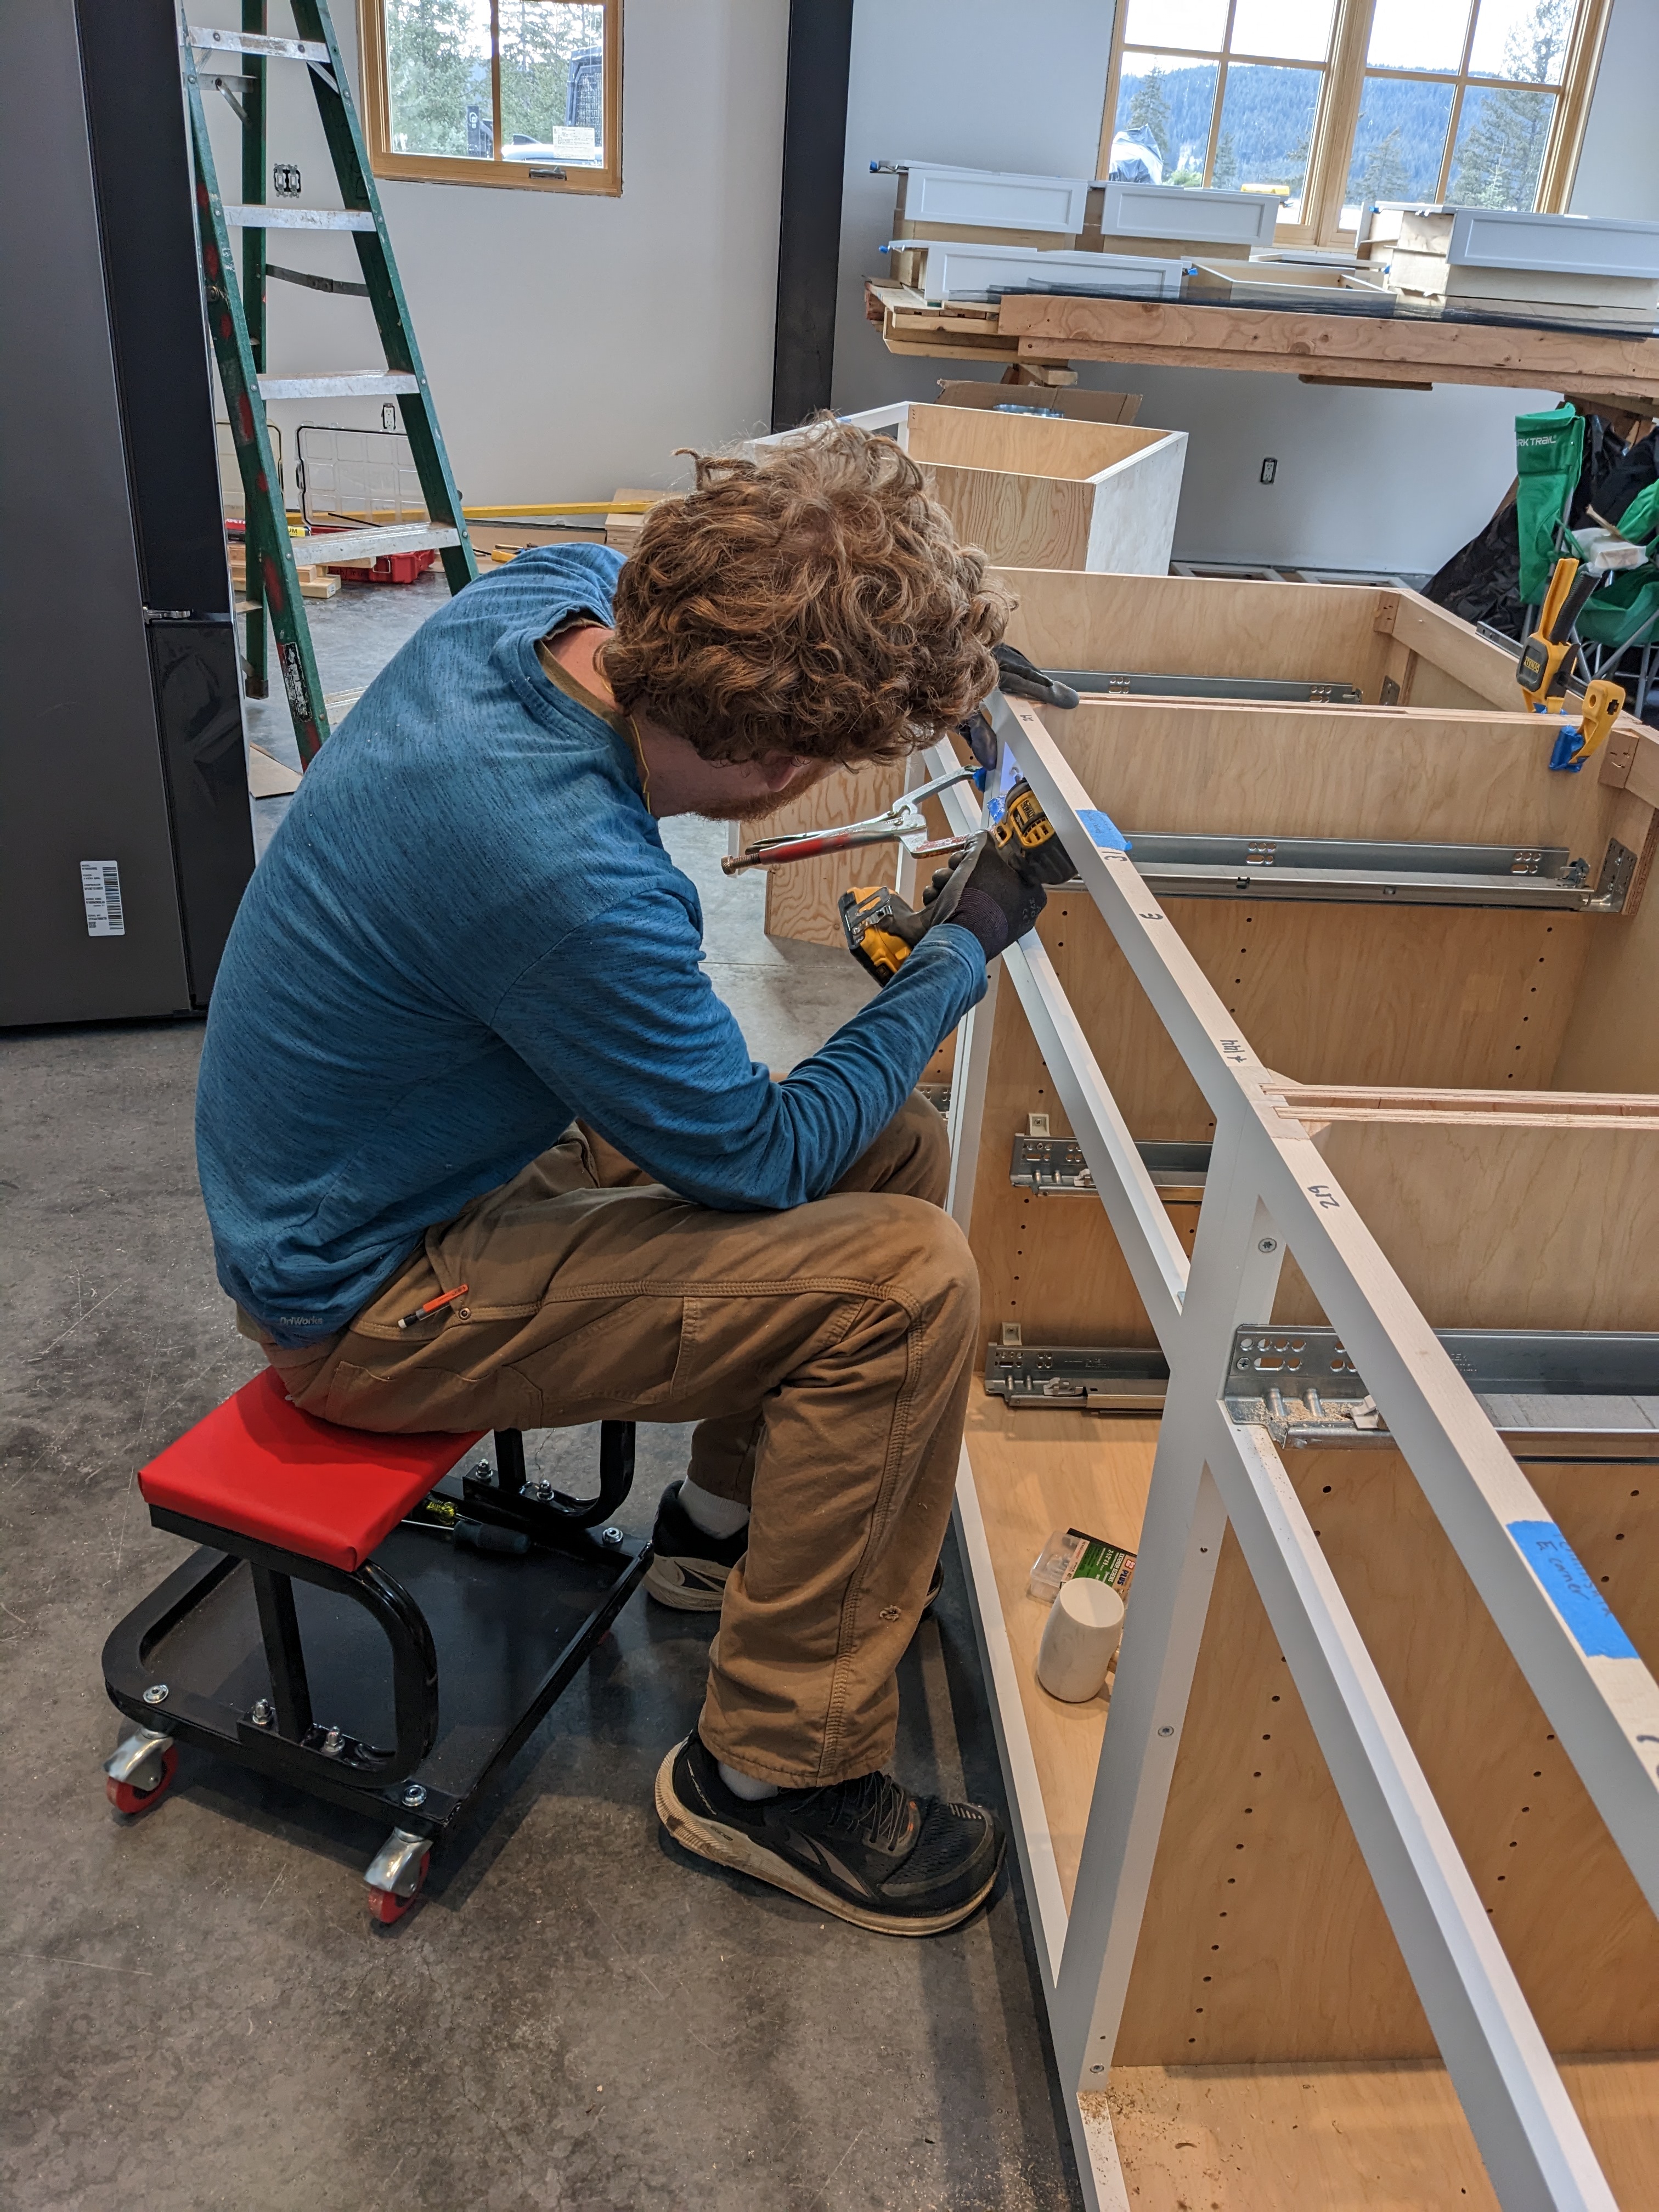

The cabinets could then be screwed into the blocks. But first, more shimming.


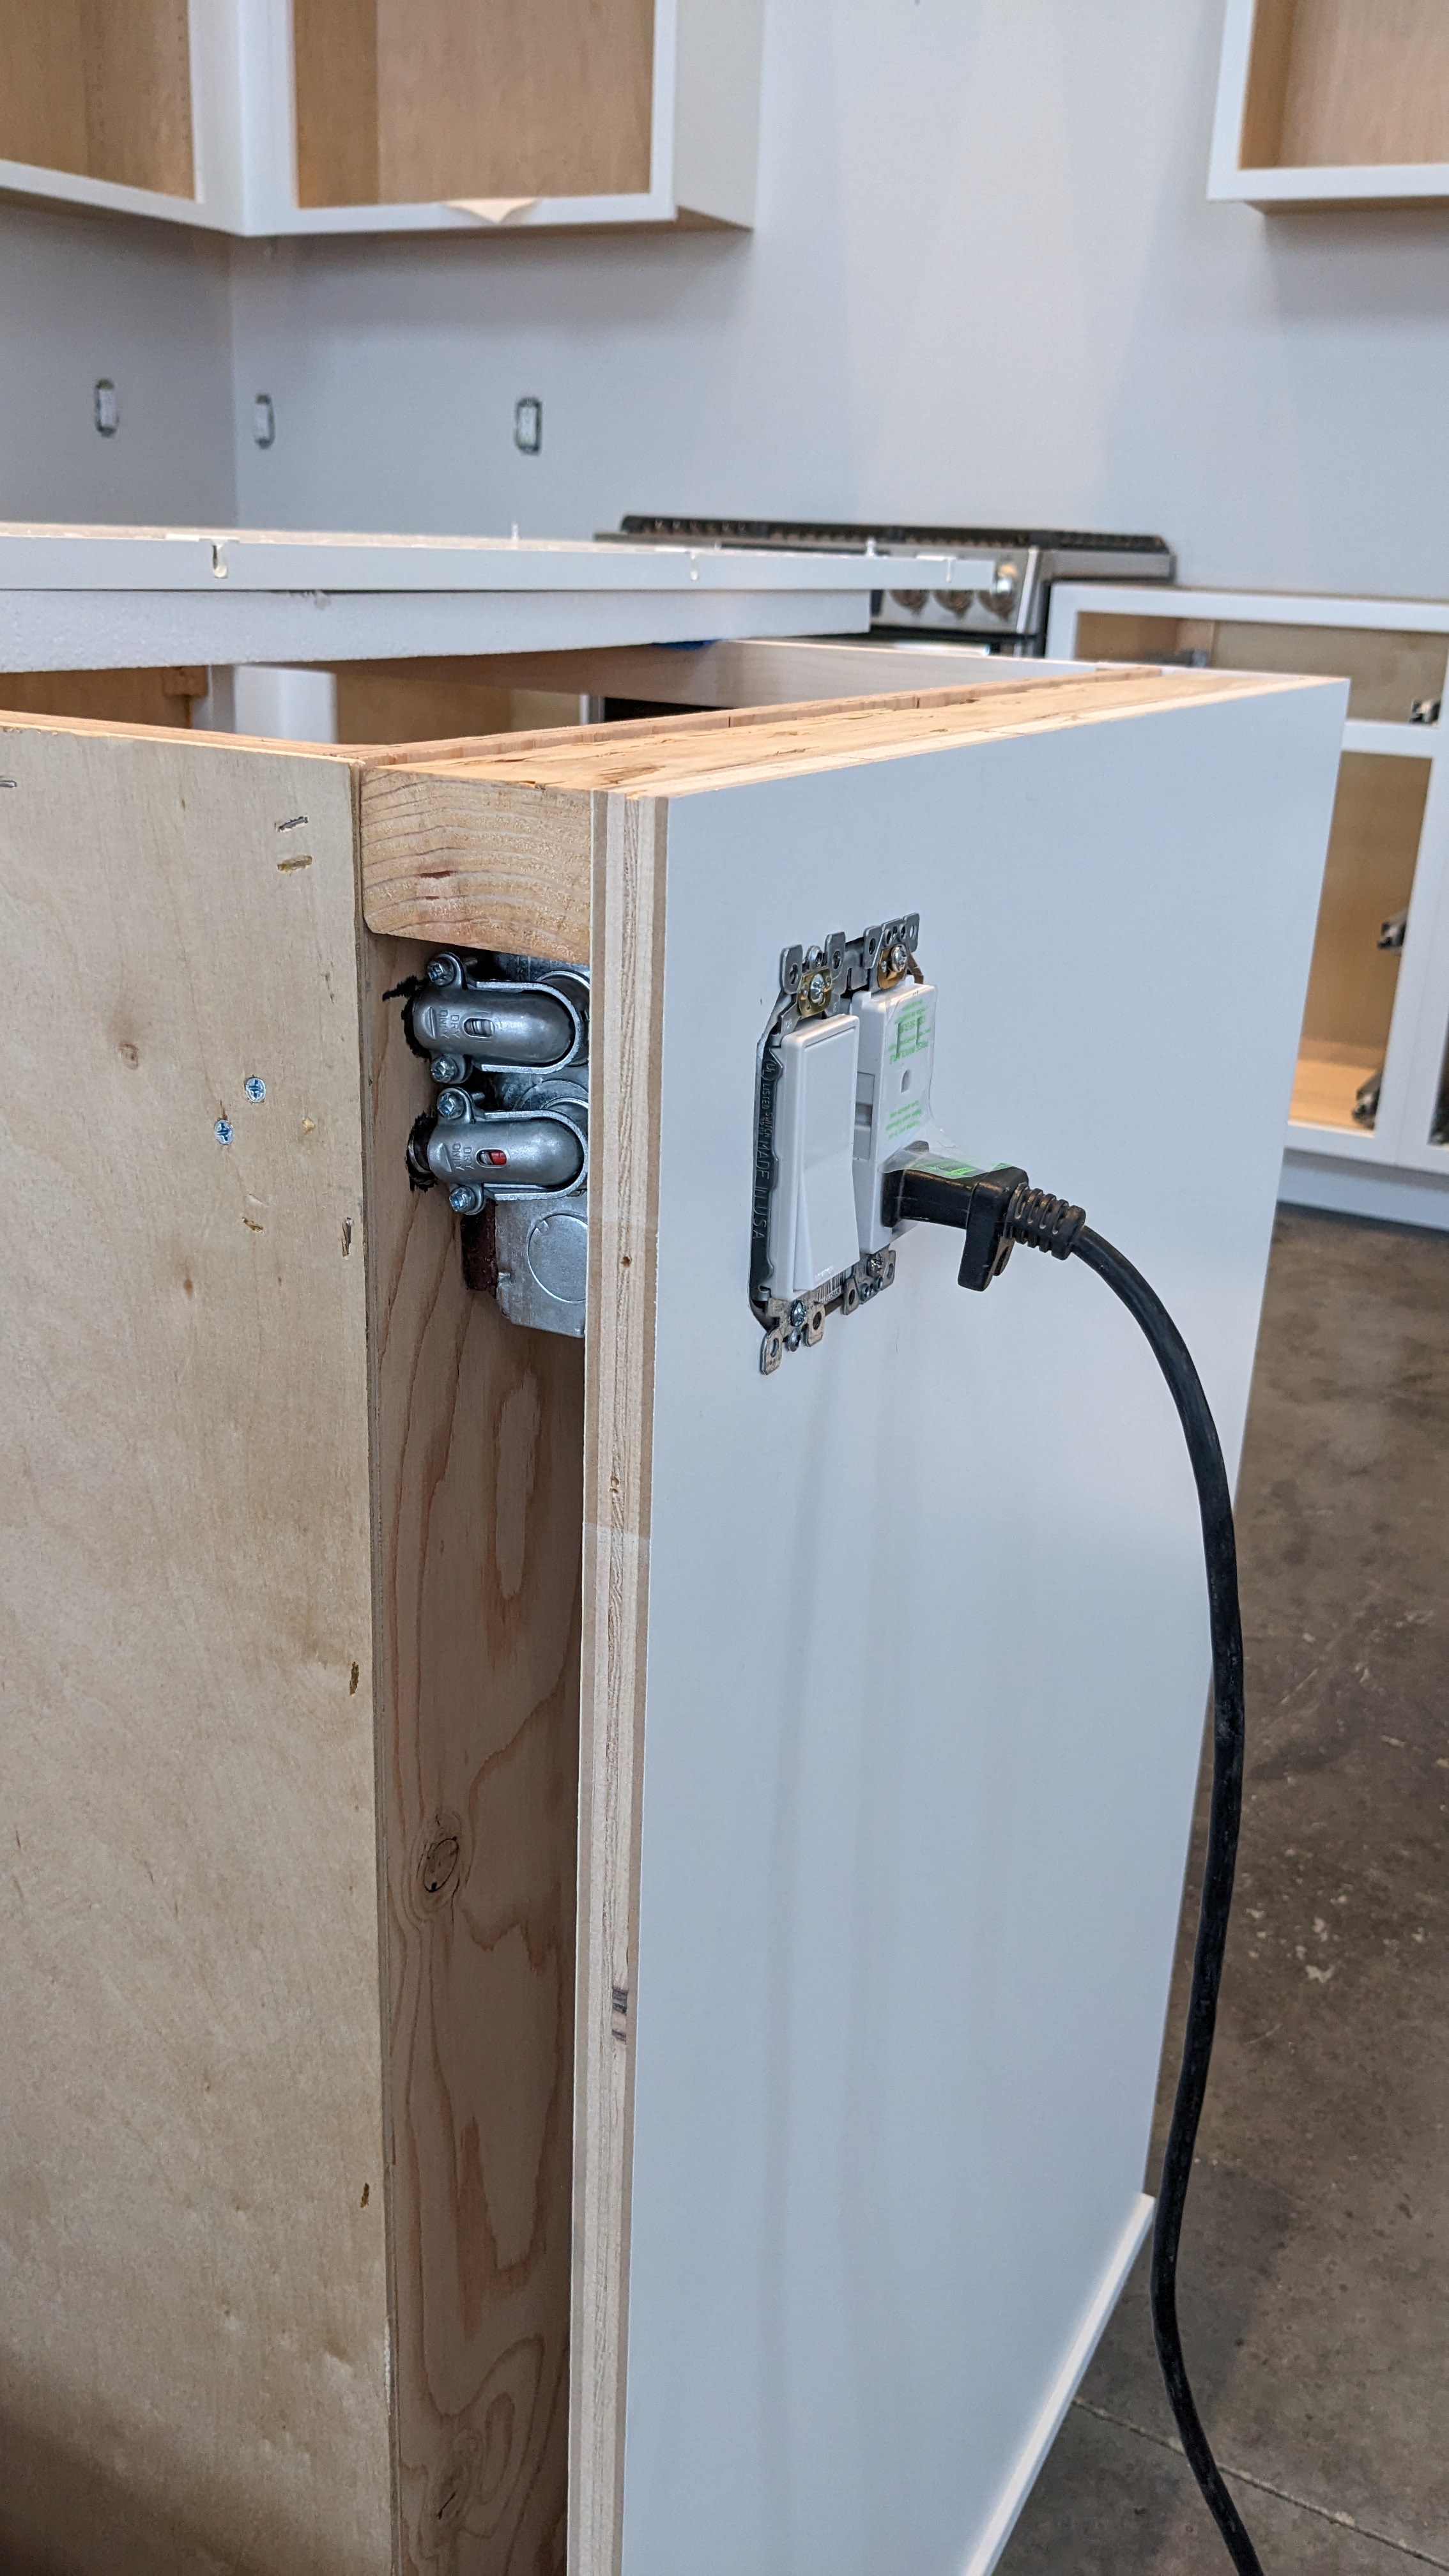
The last panel went on the end of the peninsula to hide the electrical box for an outlet and switch. But first, we had to install the electrical box which meant drilling holes through all our new cabinets. We ran the wires near the top so the drawers should hide everything.
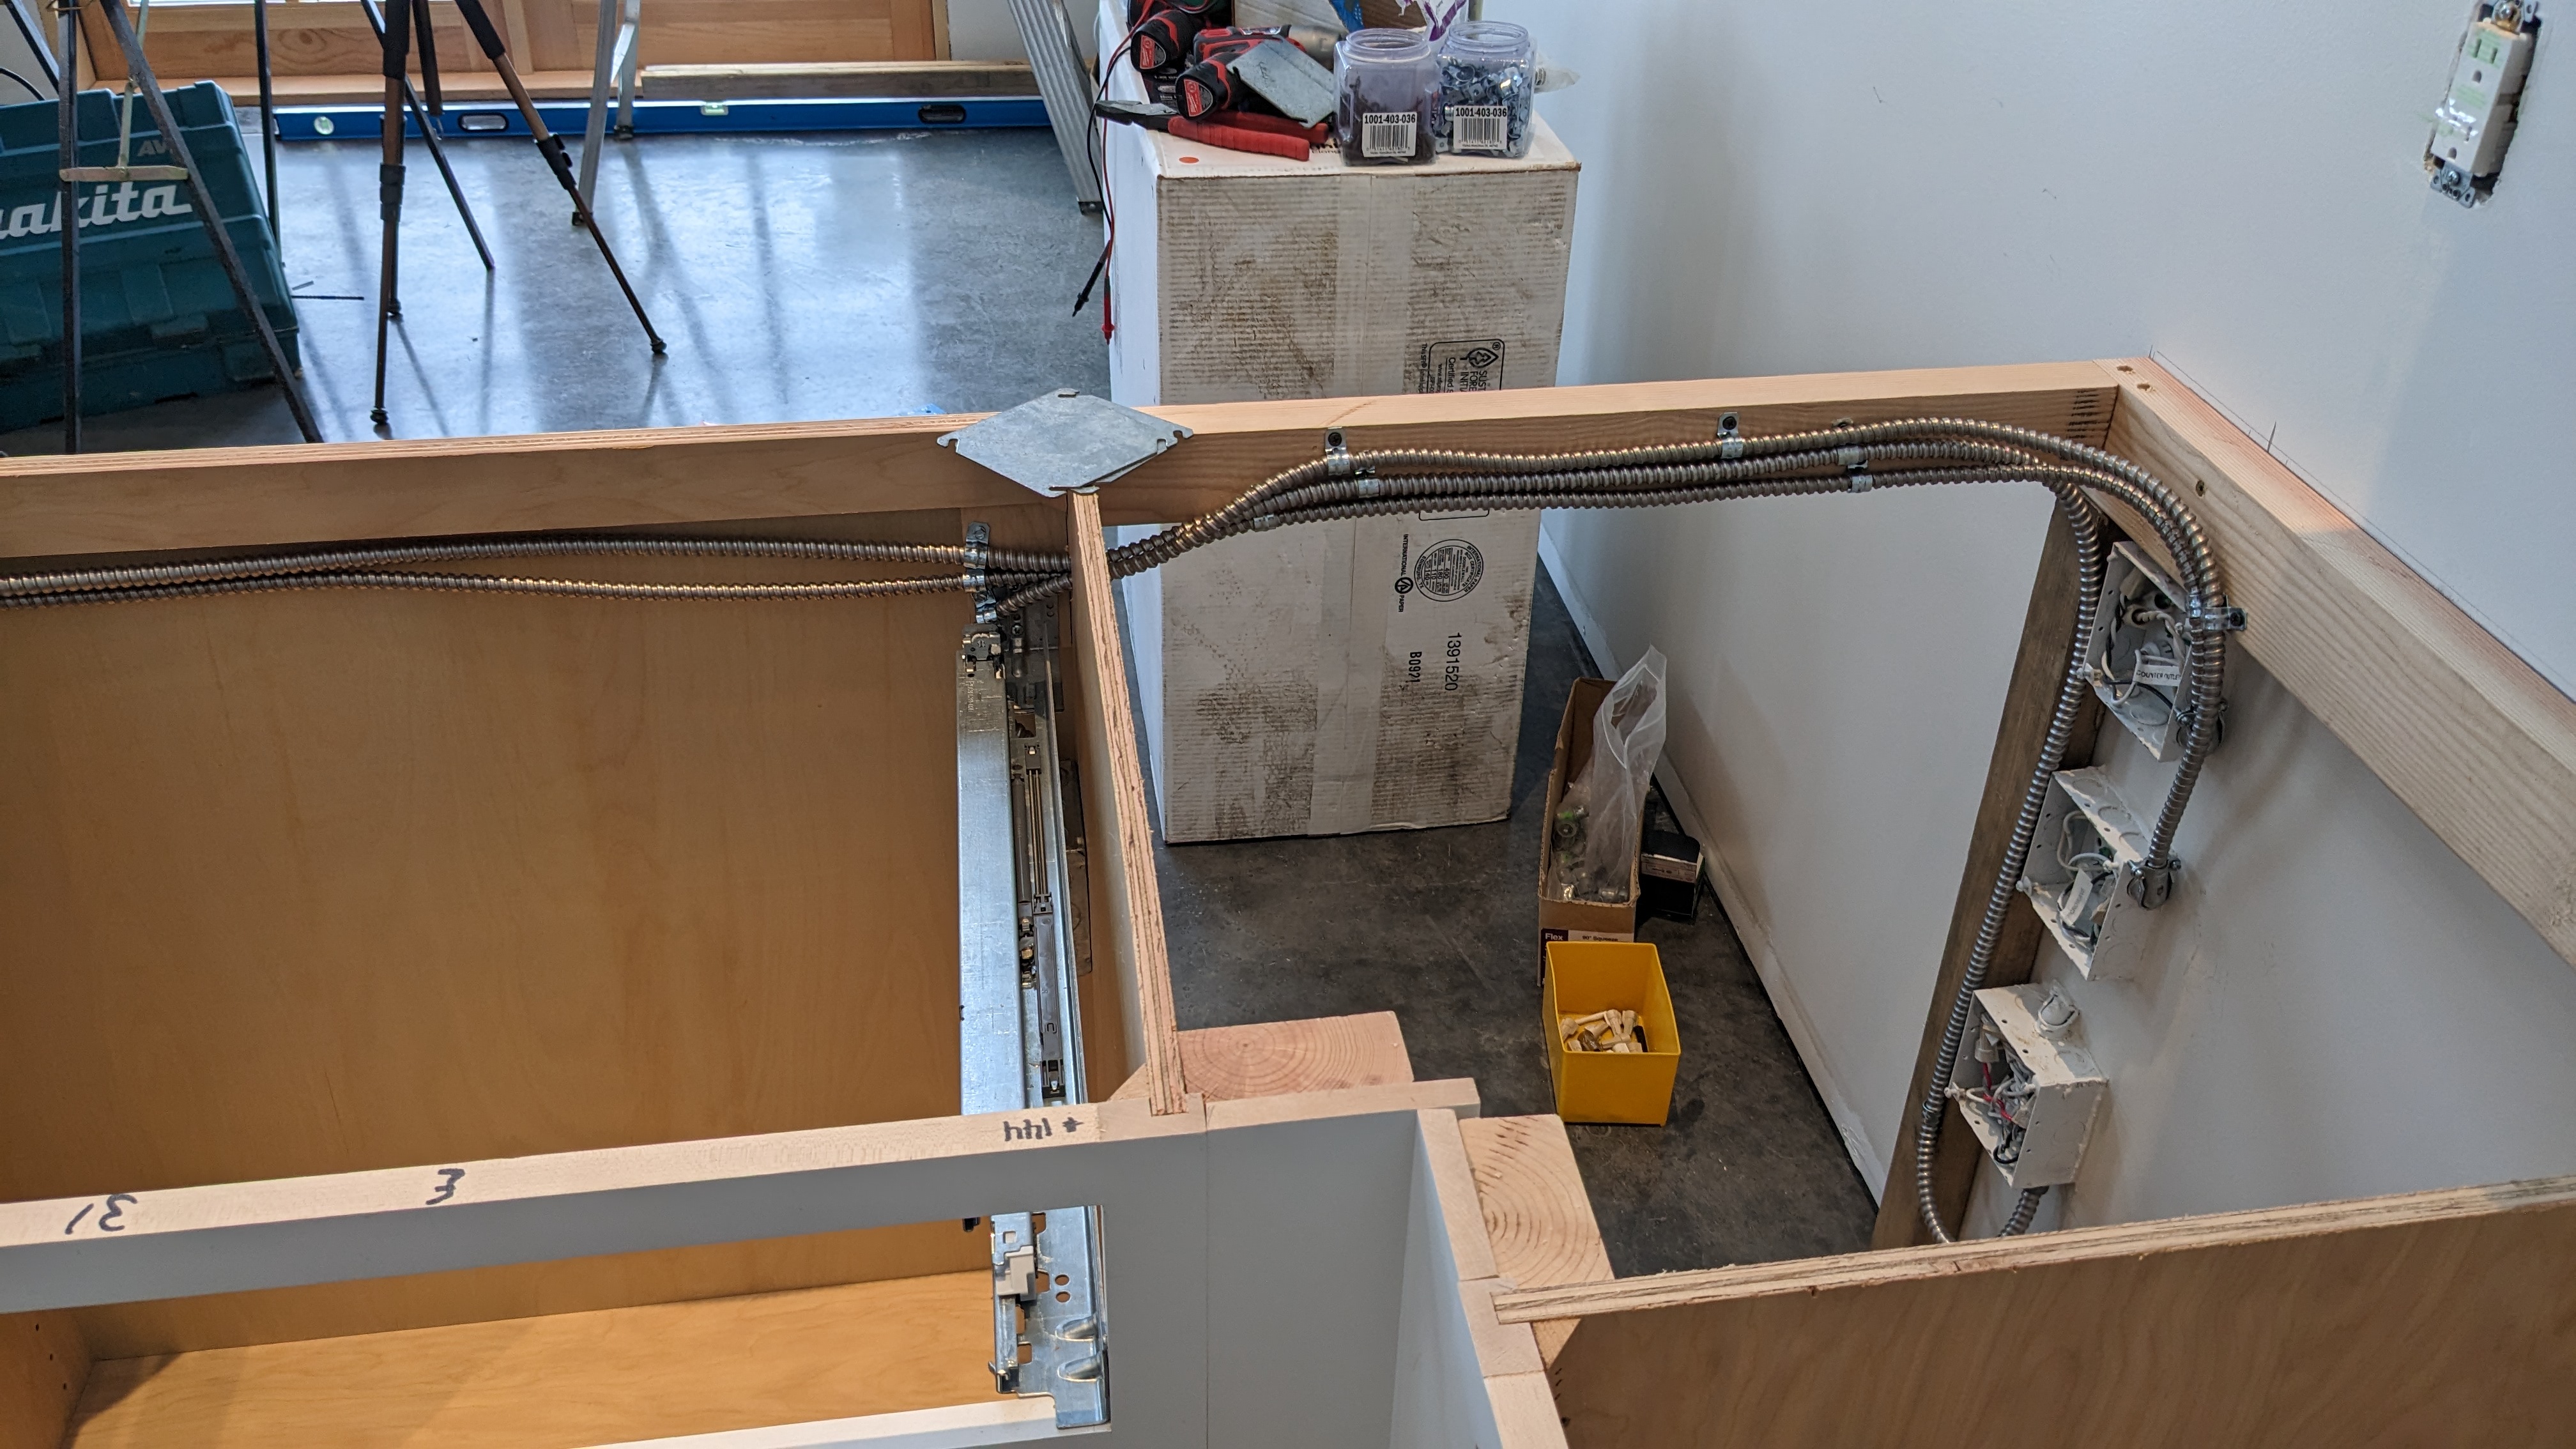
Sam did a great job aligning everything. Look at that! We won’t even need to buy an oversized cover plate.
Douglas didn’t have to leave for two more hours, so we added the toe kicks. We still need to install the crown molding and some other details, but we have a kitchen now!

My kitchen design from 2020 is finally coming to life!


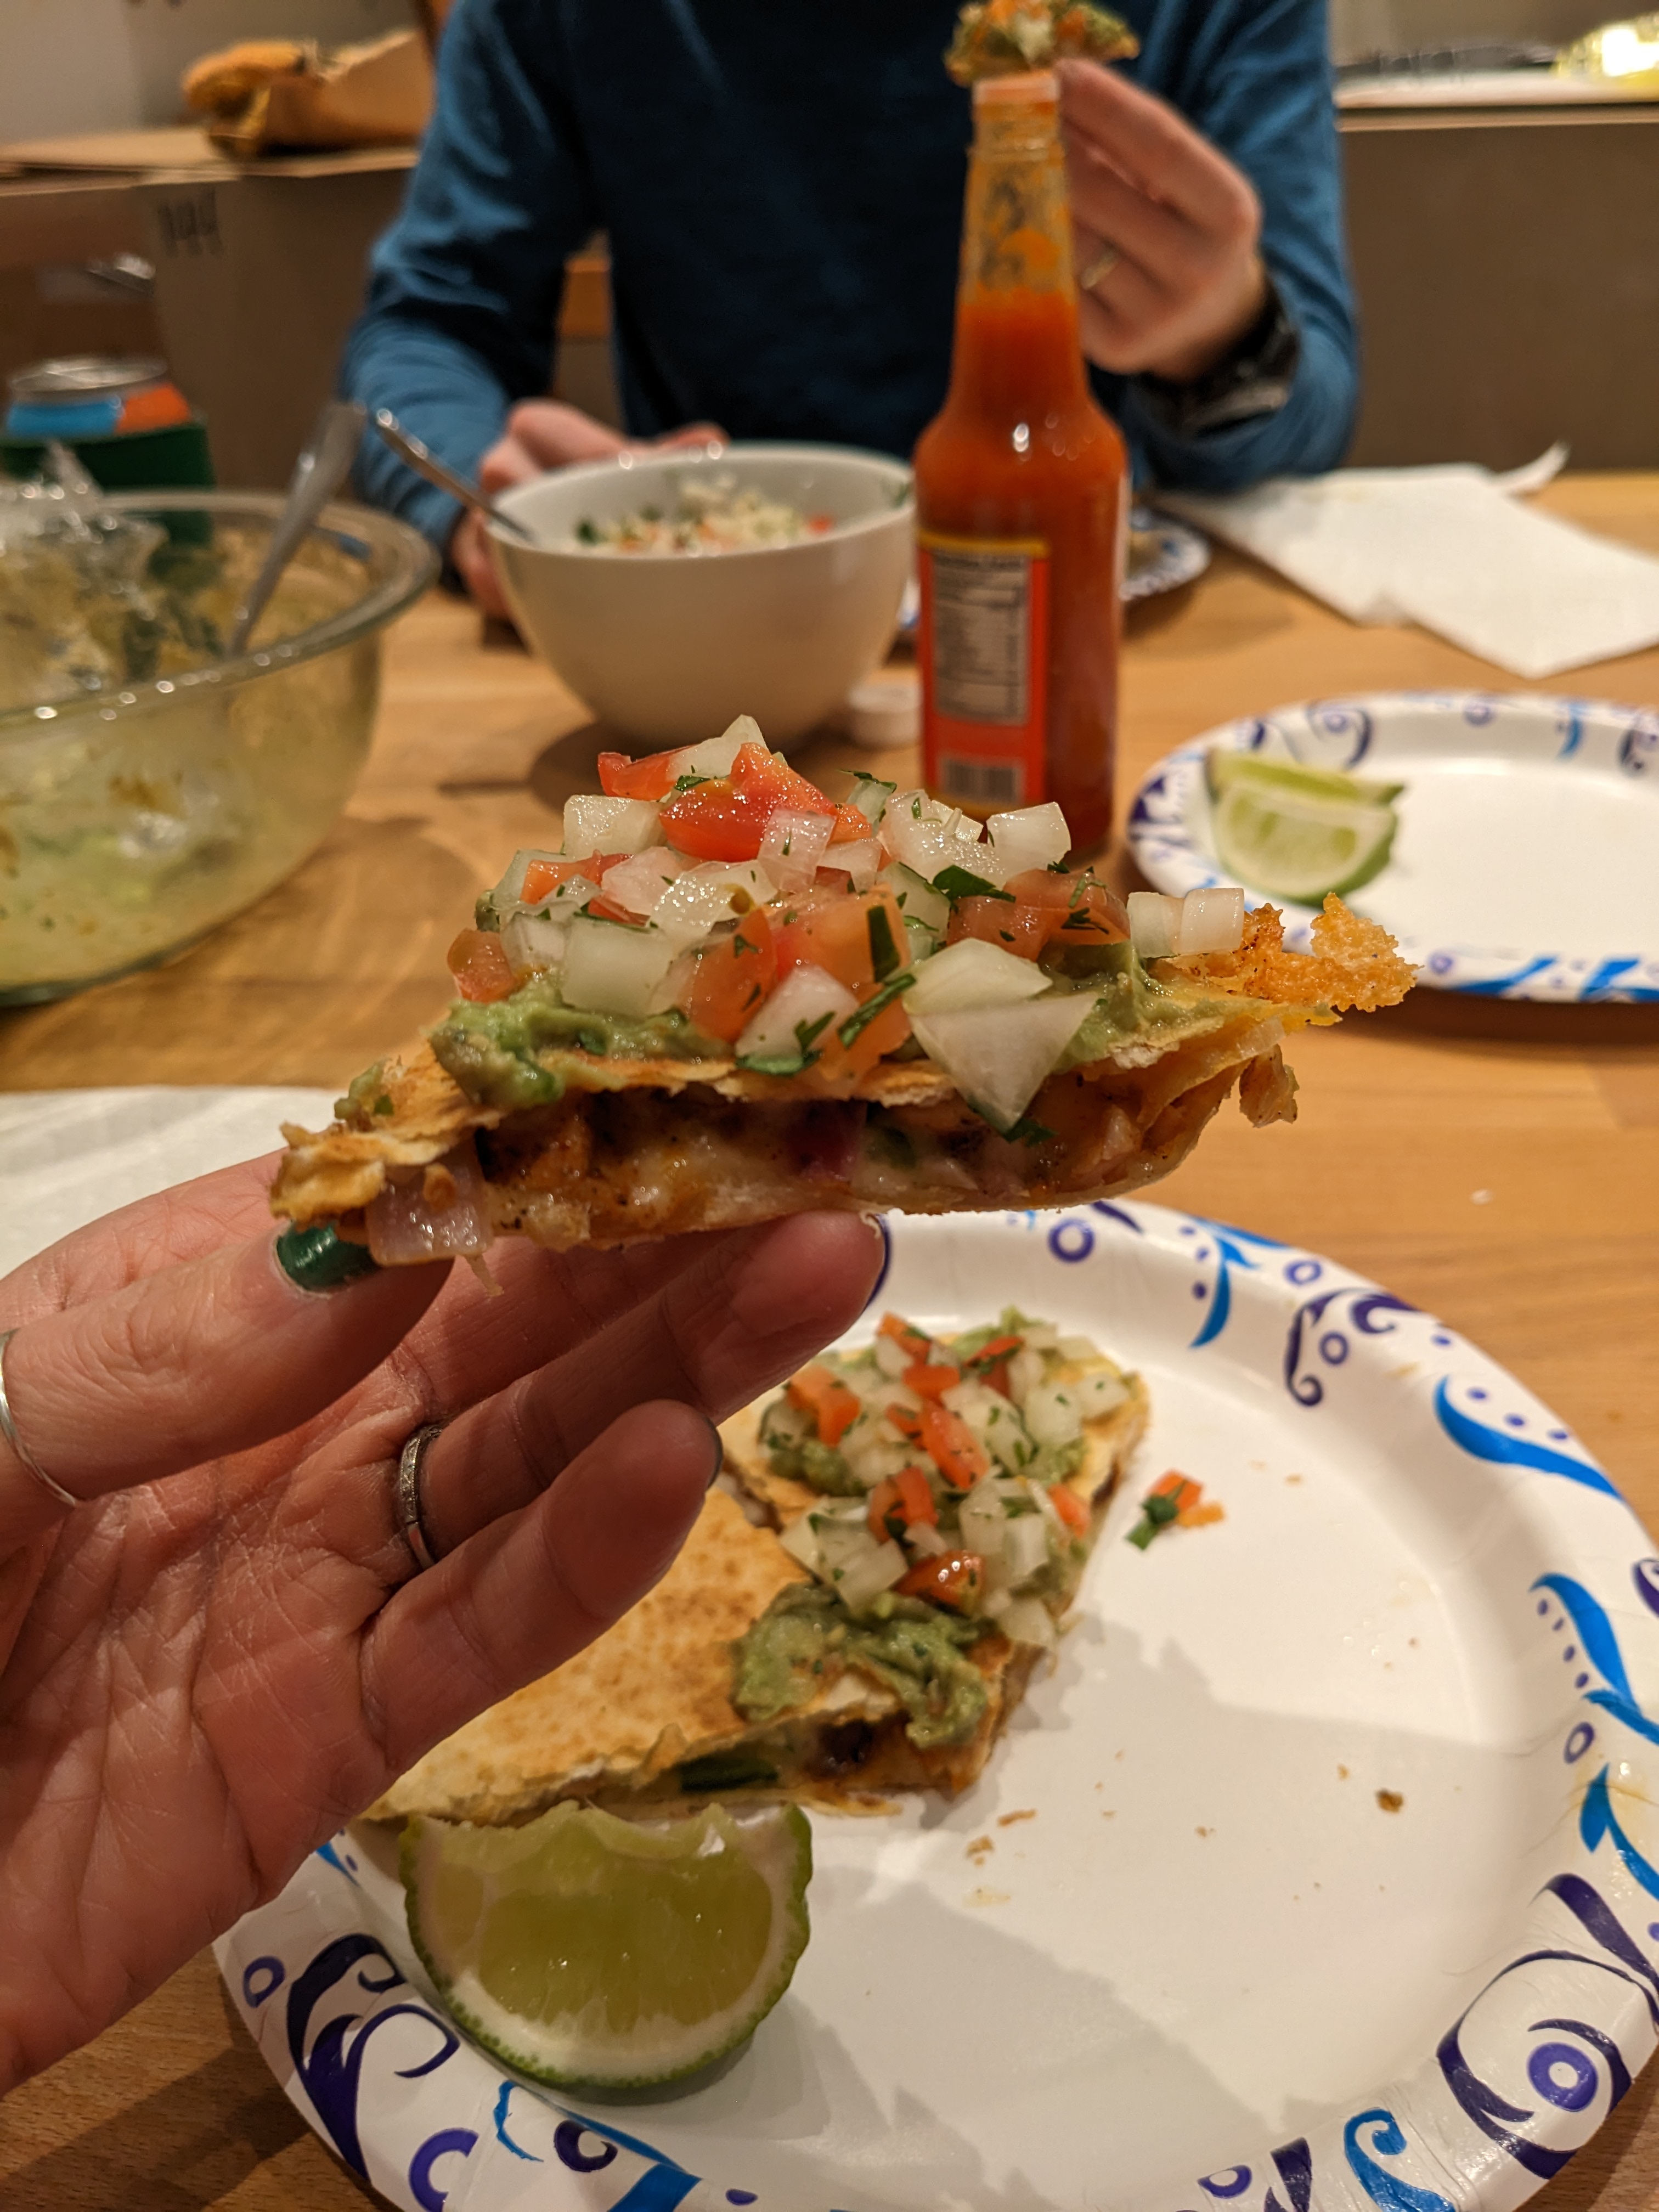
And miraculously, all of the electrical receptacles and plumbing parts were in exactly the right location. To celebrate, we made our first non-hamburger dinner at Diamond Gap- chicken quesadillas! The griddle feature on our new range was great. Cheers!


I have a new found appreciation for cabinetry after reading this
LikeLike