We changed our initial monolythic slab design to a more traditional stem wall and floor design. The footing, stem wall, and floor will be poured in 3 steps. We hired a local contractor for all of the concrete work, including setting up the forms and rebar. We did the prep work ourselves. Sam leveled out the site with the dozer and set up the laser so he could constantly check the ground height as he removed material. Then, we set up “batter boards” and string lines to mark out the perimeter of the building.

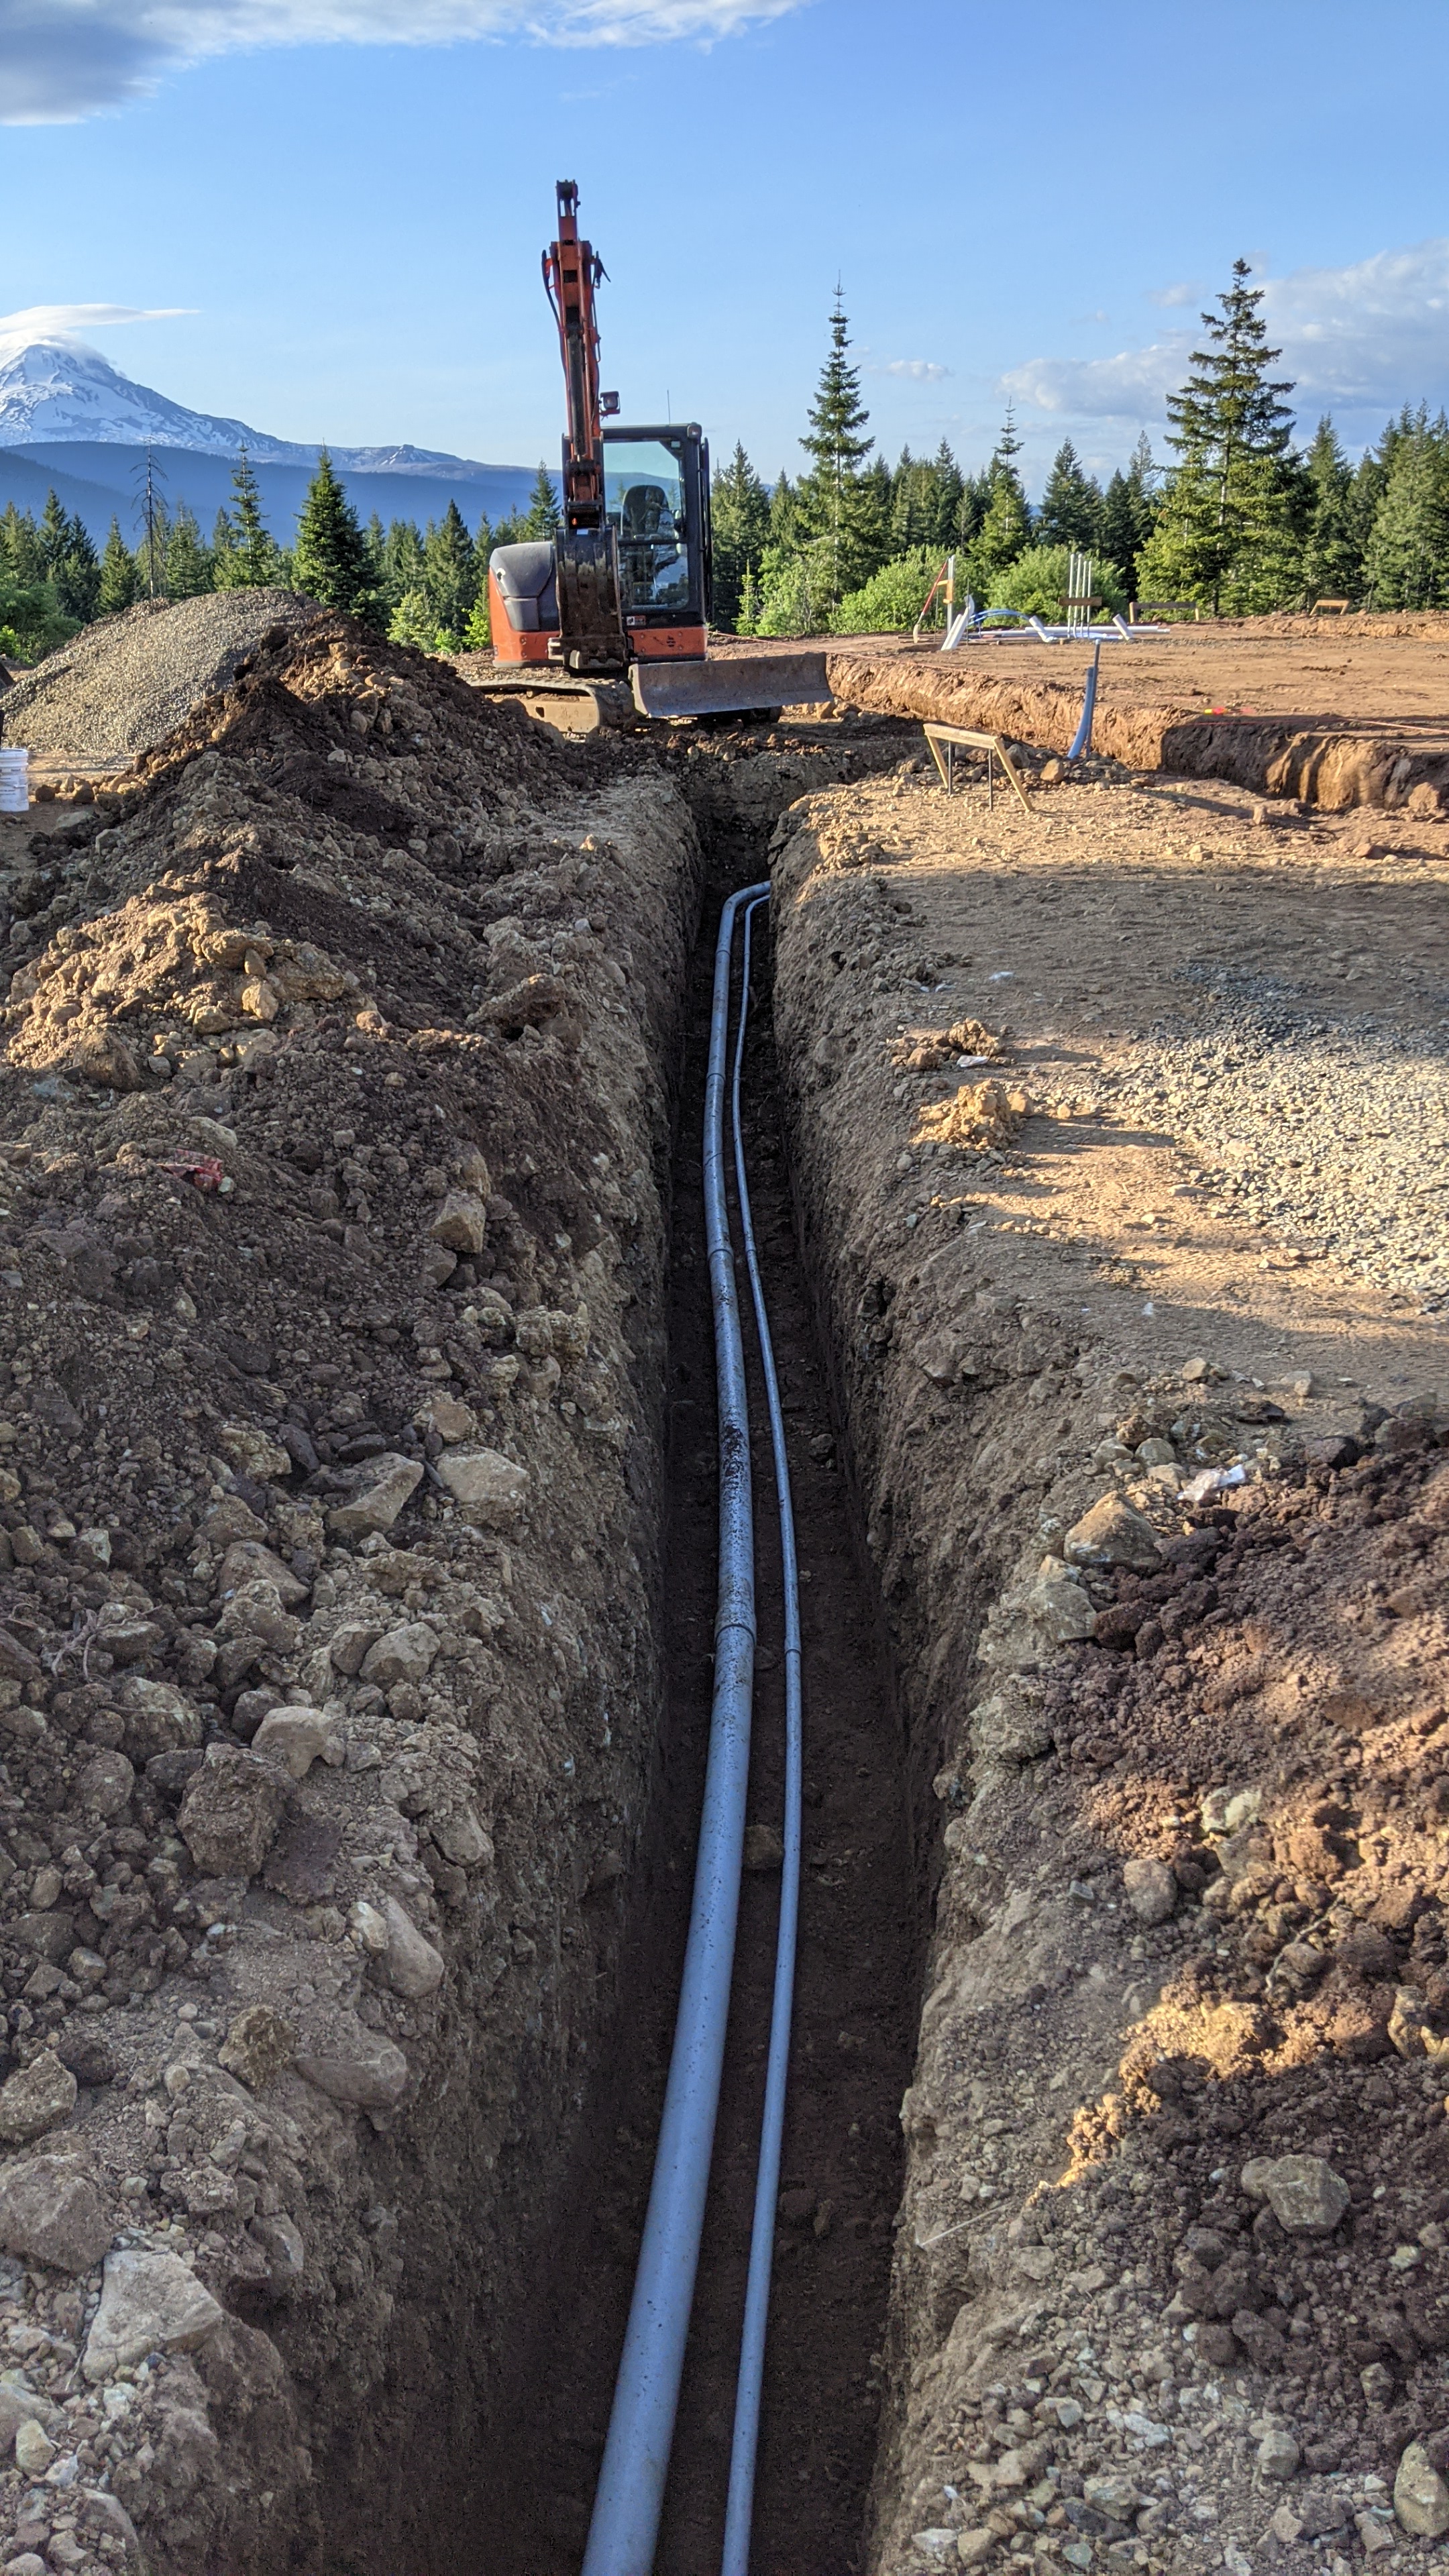
The next step was to install all of the pipes (conduit/plumbing lines) that go through the exterior walls of the building. We located the mechanical room inside of the building to determine where these pipes would surface. The mechanical room will house the water tank, boiler, and electrical panels. After mapping the lines out, Sam began trenching again, and I sat in the dust, gluing a lot of conduit together. In addition to the main water line, which runs from the well to the mechanical room inside, we set up two other water lines that run from the mechanical room to outdoor areas on the east and west side of the building (future garden, patio). This meant more trenching and more gluing. The final trench was for the main power line, running from our temporary electric panel to the building.

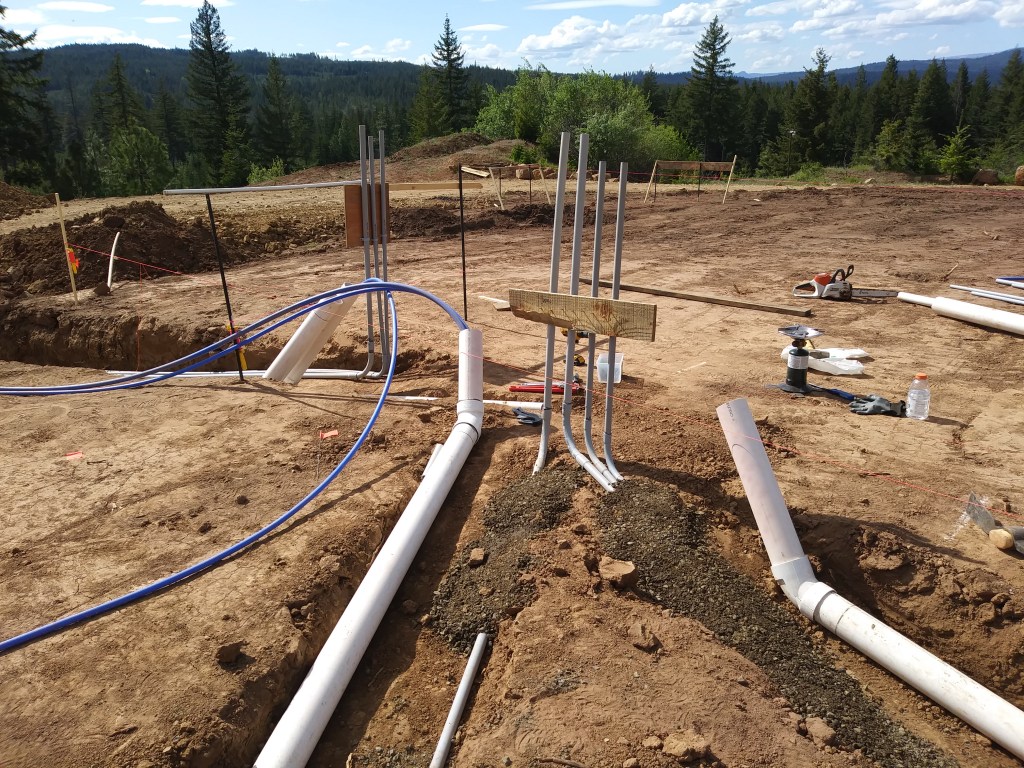
We finished installing all of the pipes and conduit. Before burying everything with gravel, we had to get a signature from the building inspector and the electrical inspector. This was our first meeting the building inspector, who will be coming back many times throughout the project. He is very nice, and we passed with flying colors. The electrical inspector approved via text. We have yet to meet him. We camped out and had some beers in the hot tub to celebrate this milestone.
The first step in covering the trenches was to “bed the pipes” so they lay nicely. Sam did this by hand with a shovel and tamper. It looked like a fun activity for an 85 degree day. Then we got the machines out. We rented a hoe pack, which is a vibrating plate that attaches to the excavator. It makes for easy compaction, and it seems to have a good isolation system so it doesn’t put too much wear on our excavator. I deposited buckets of gravel into the trenches while Sam did the compacting.
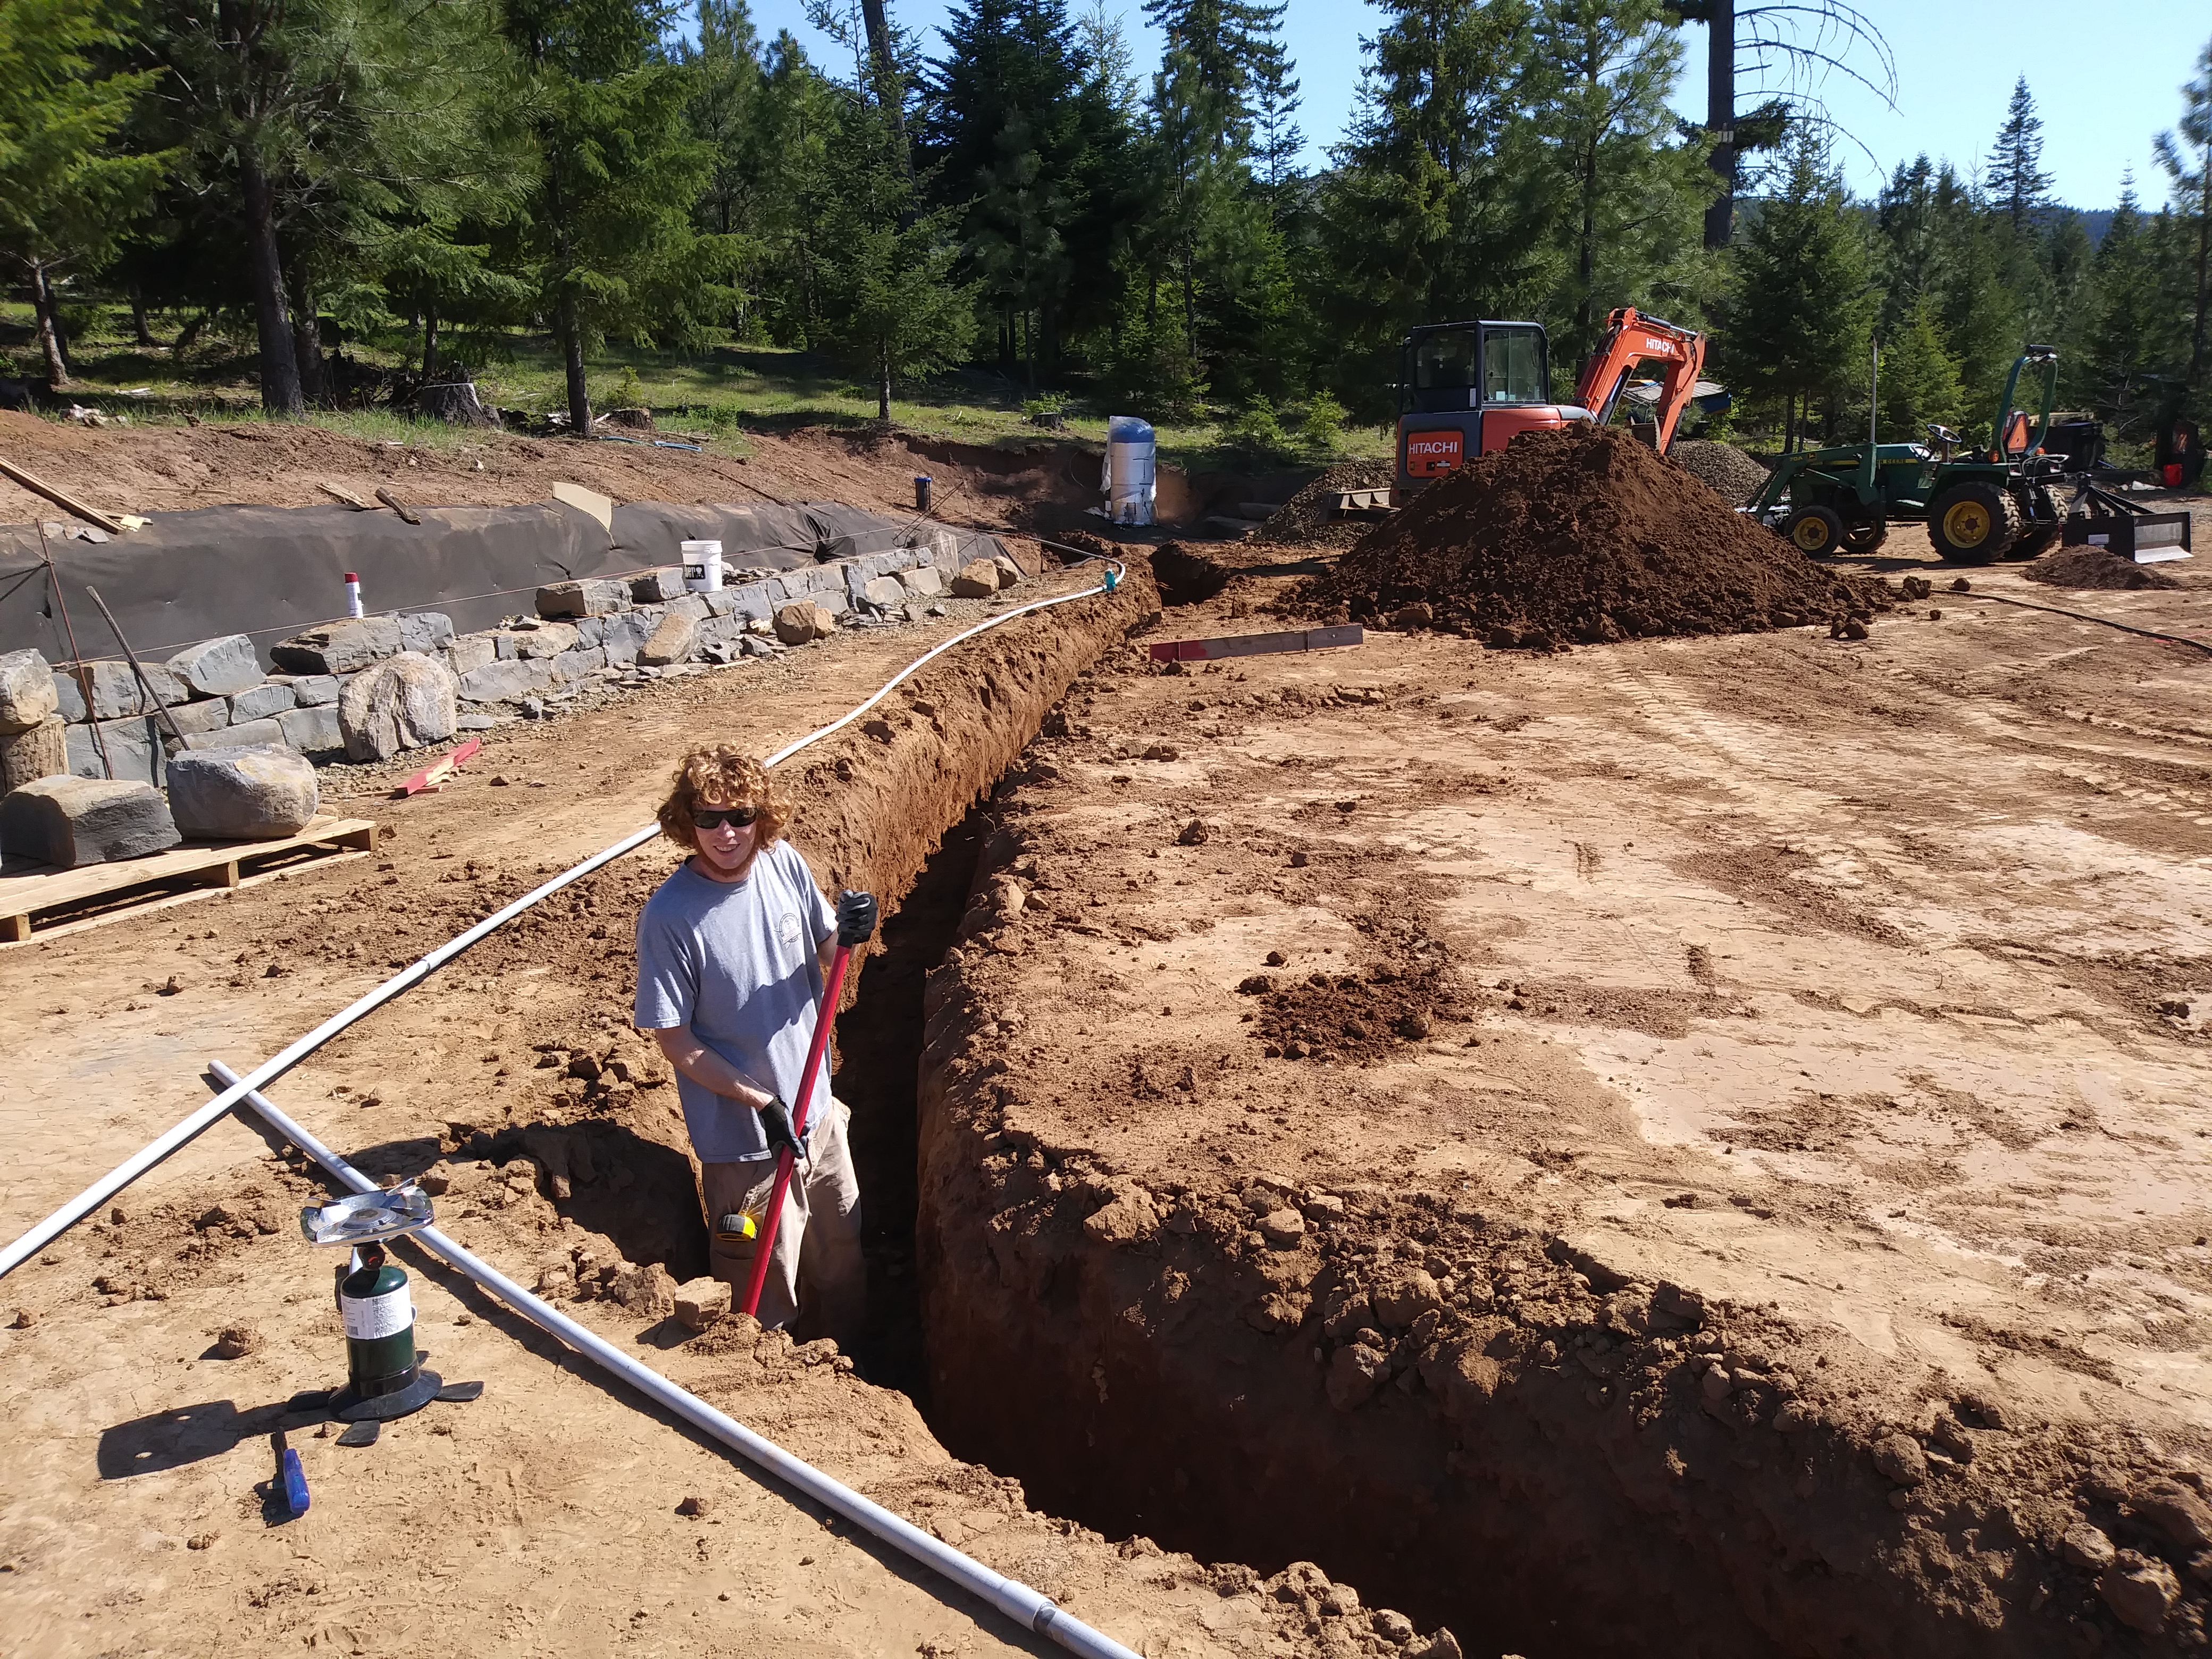


After covering everything up, we dug a trench around the perimeter of the building for the concrete footing. Sam did all of the excavation work while I stood in the trench with the measuring equipment.


Now it’s time to turn the work over to the contractor!

great first post. the technical explanations are cool – they lead to lots of fun googling and learning for me. i want to see the hot tub in action! how’s it powered?
LikeLike