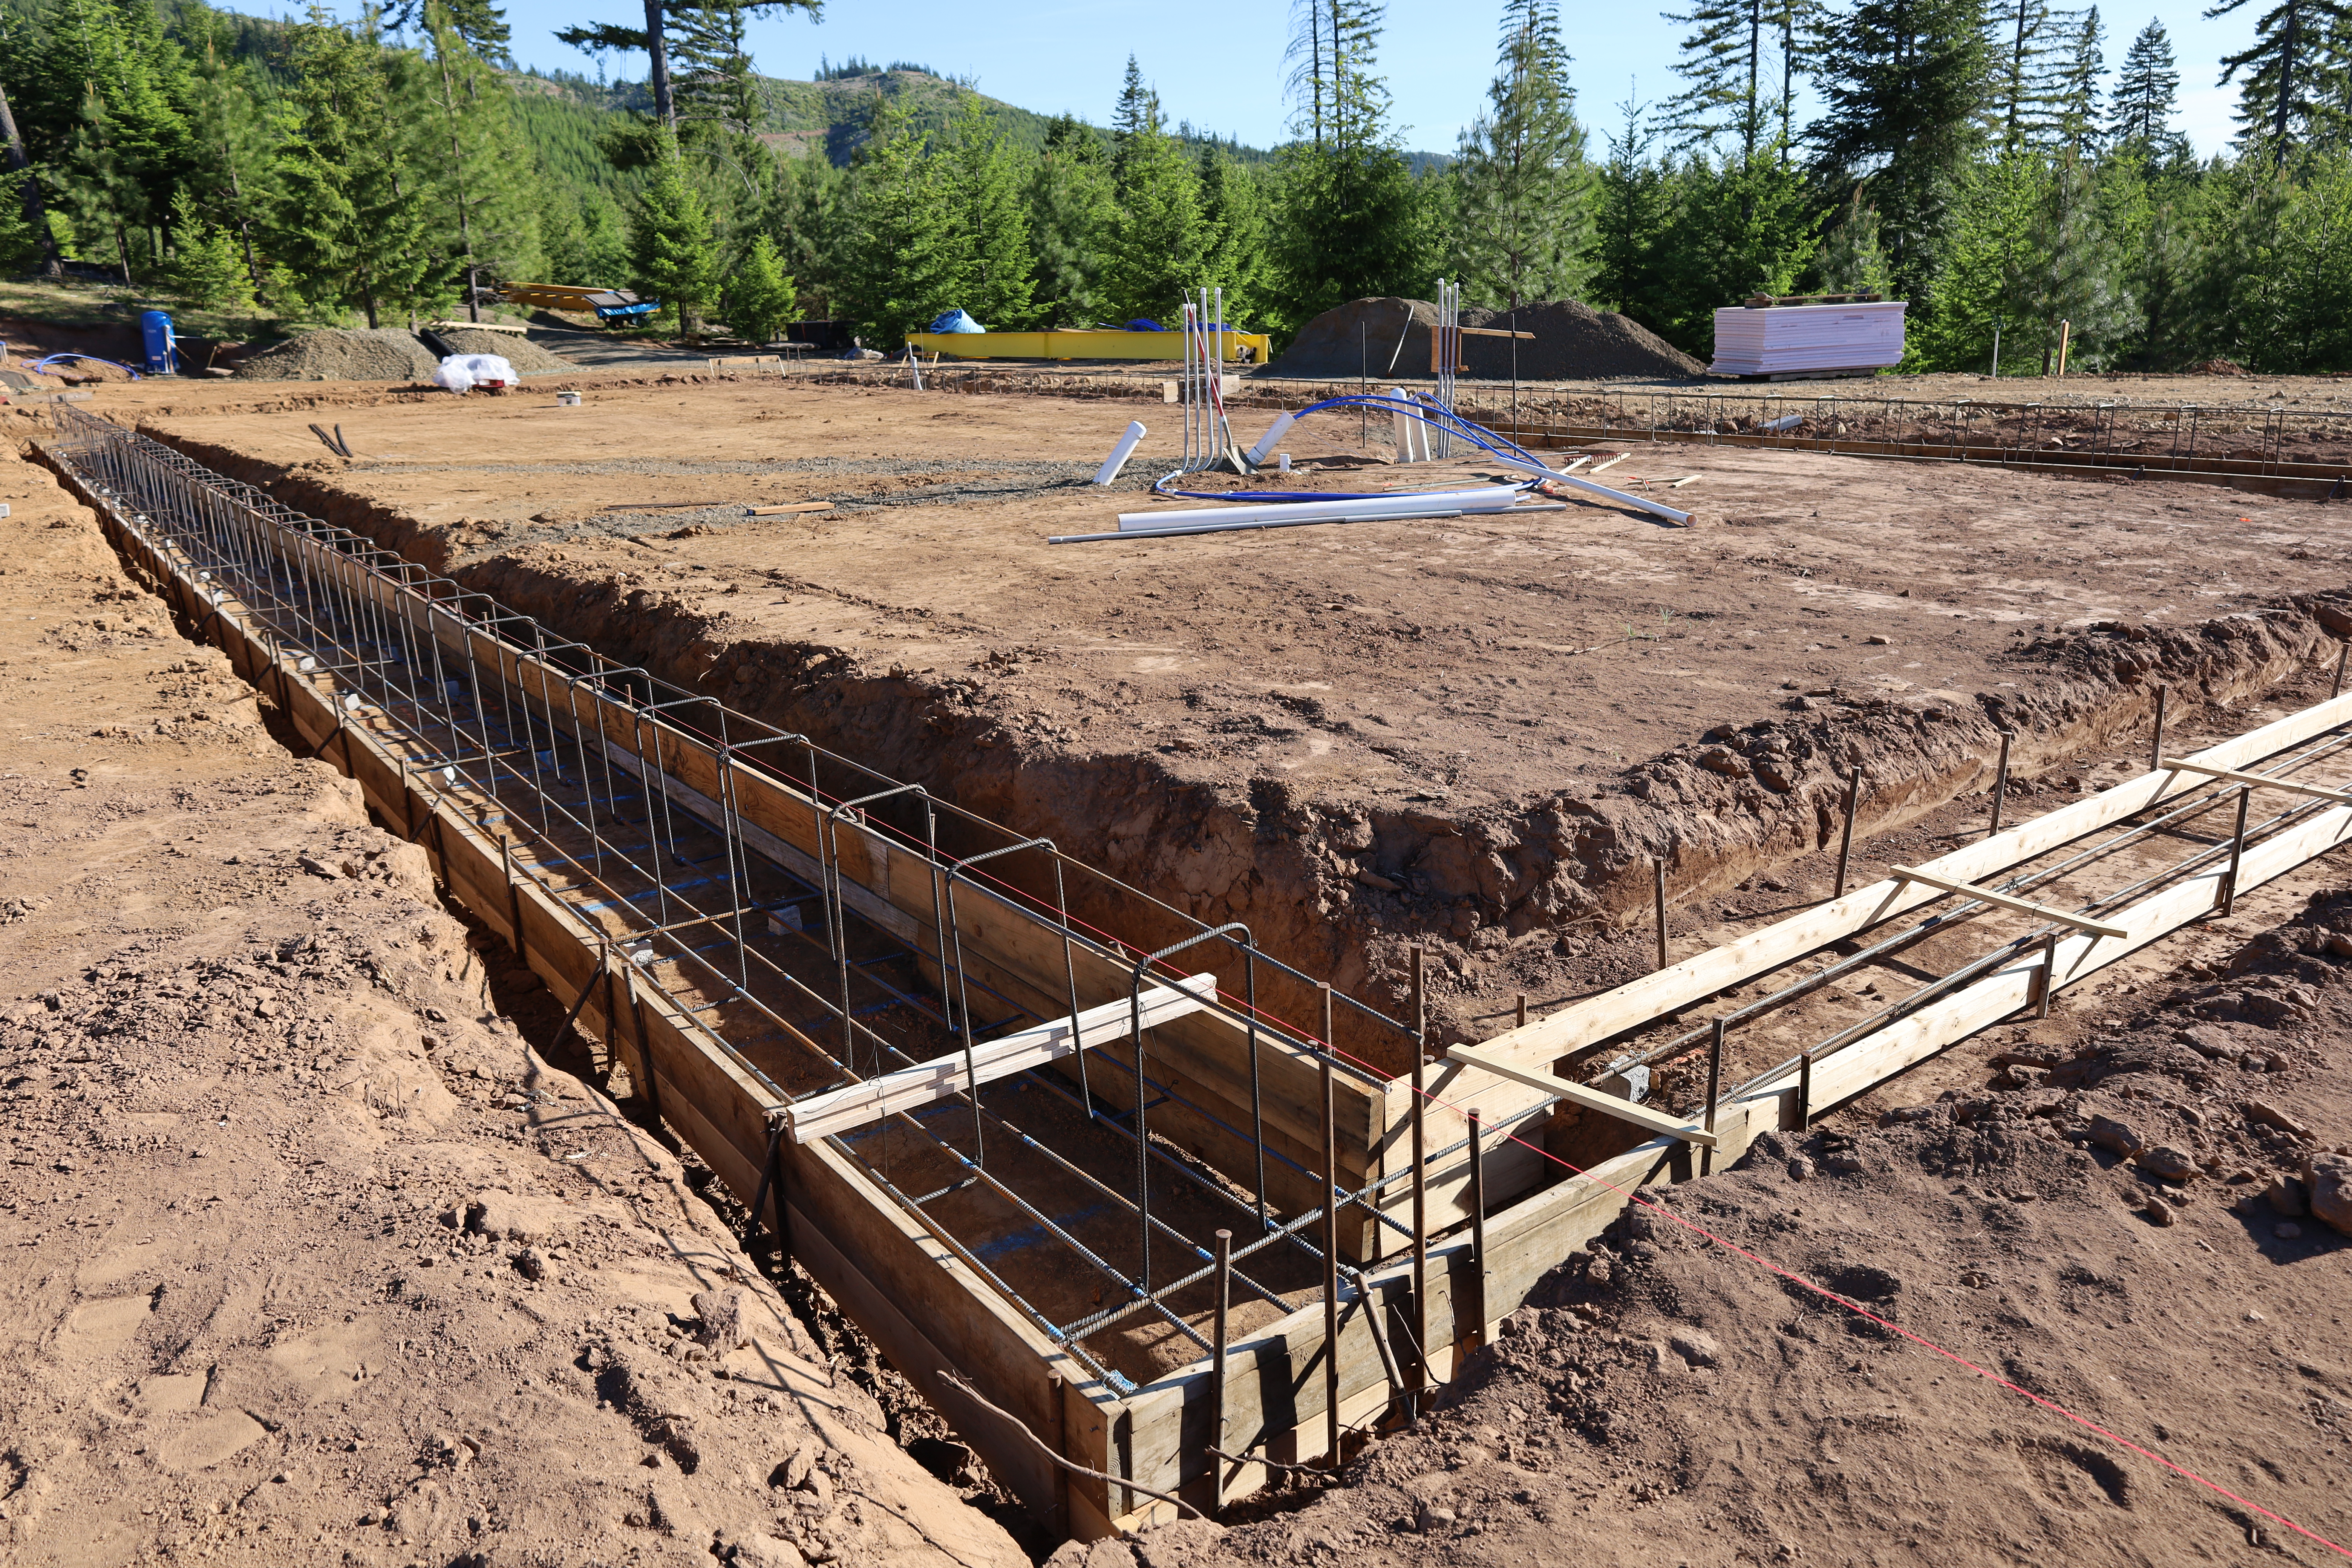
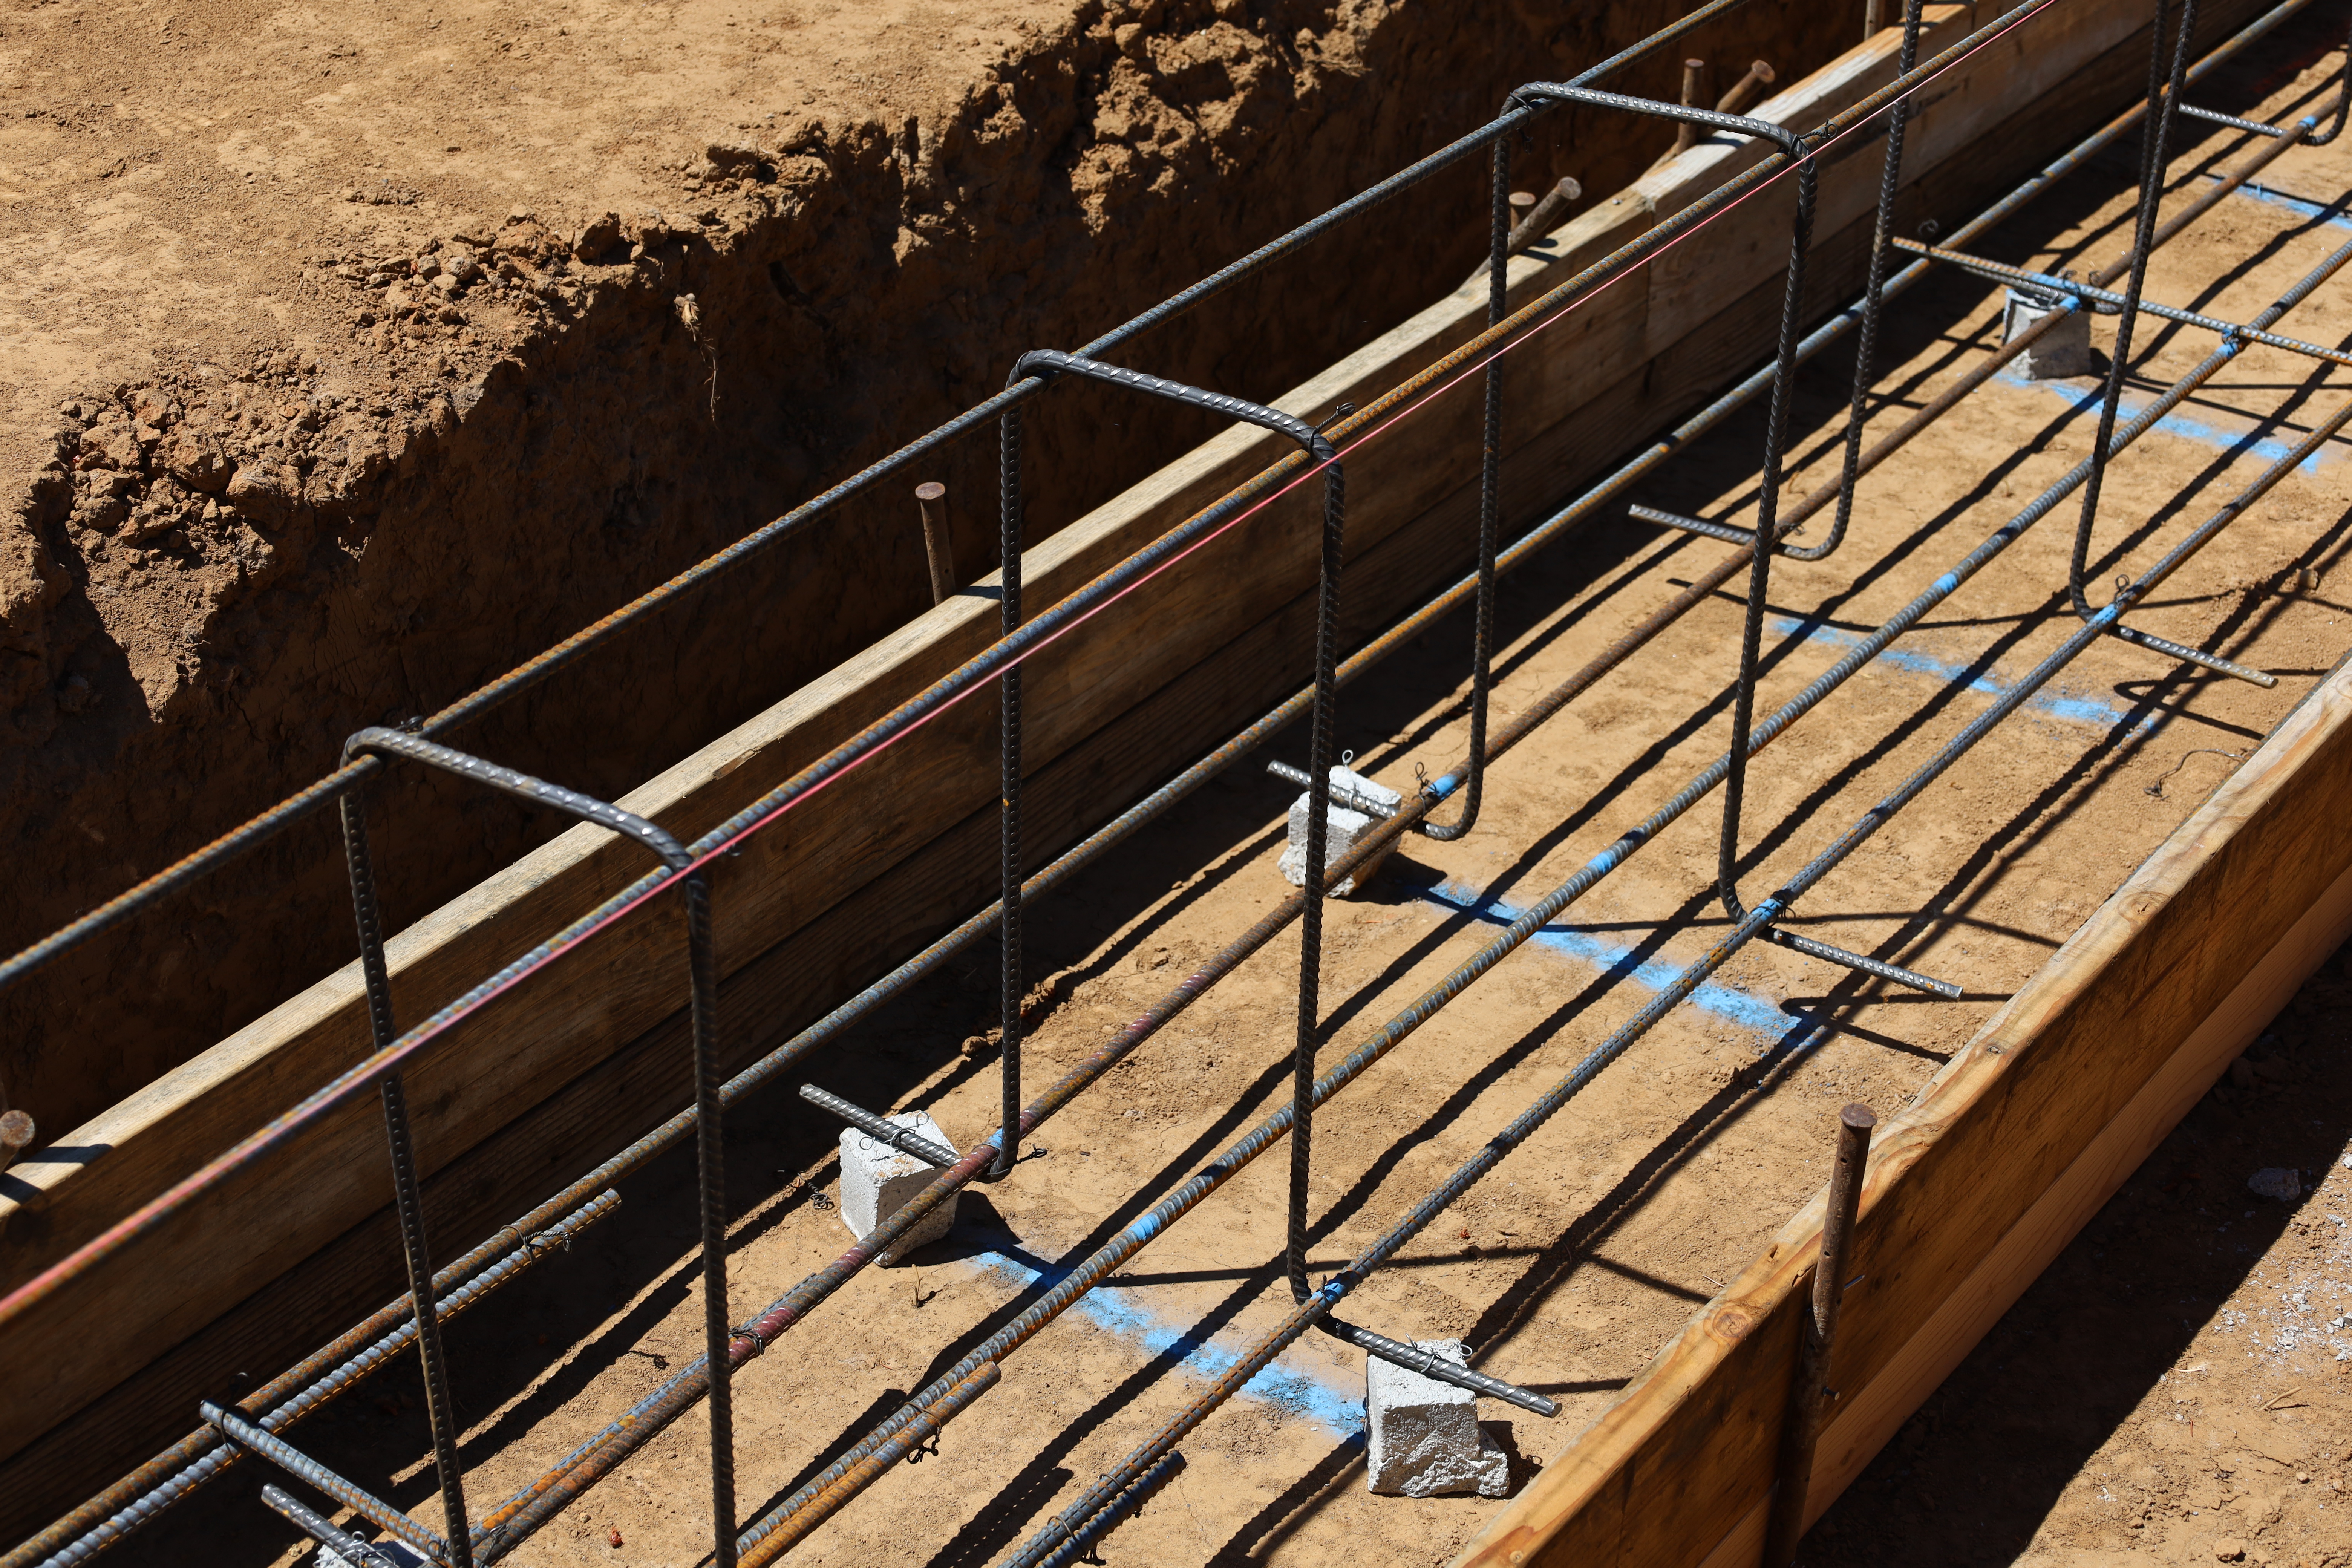
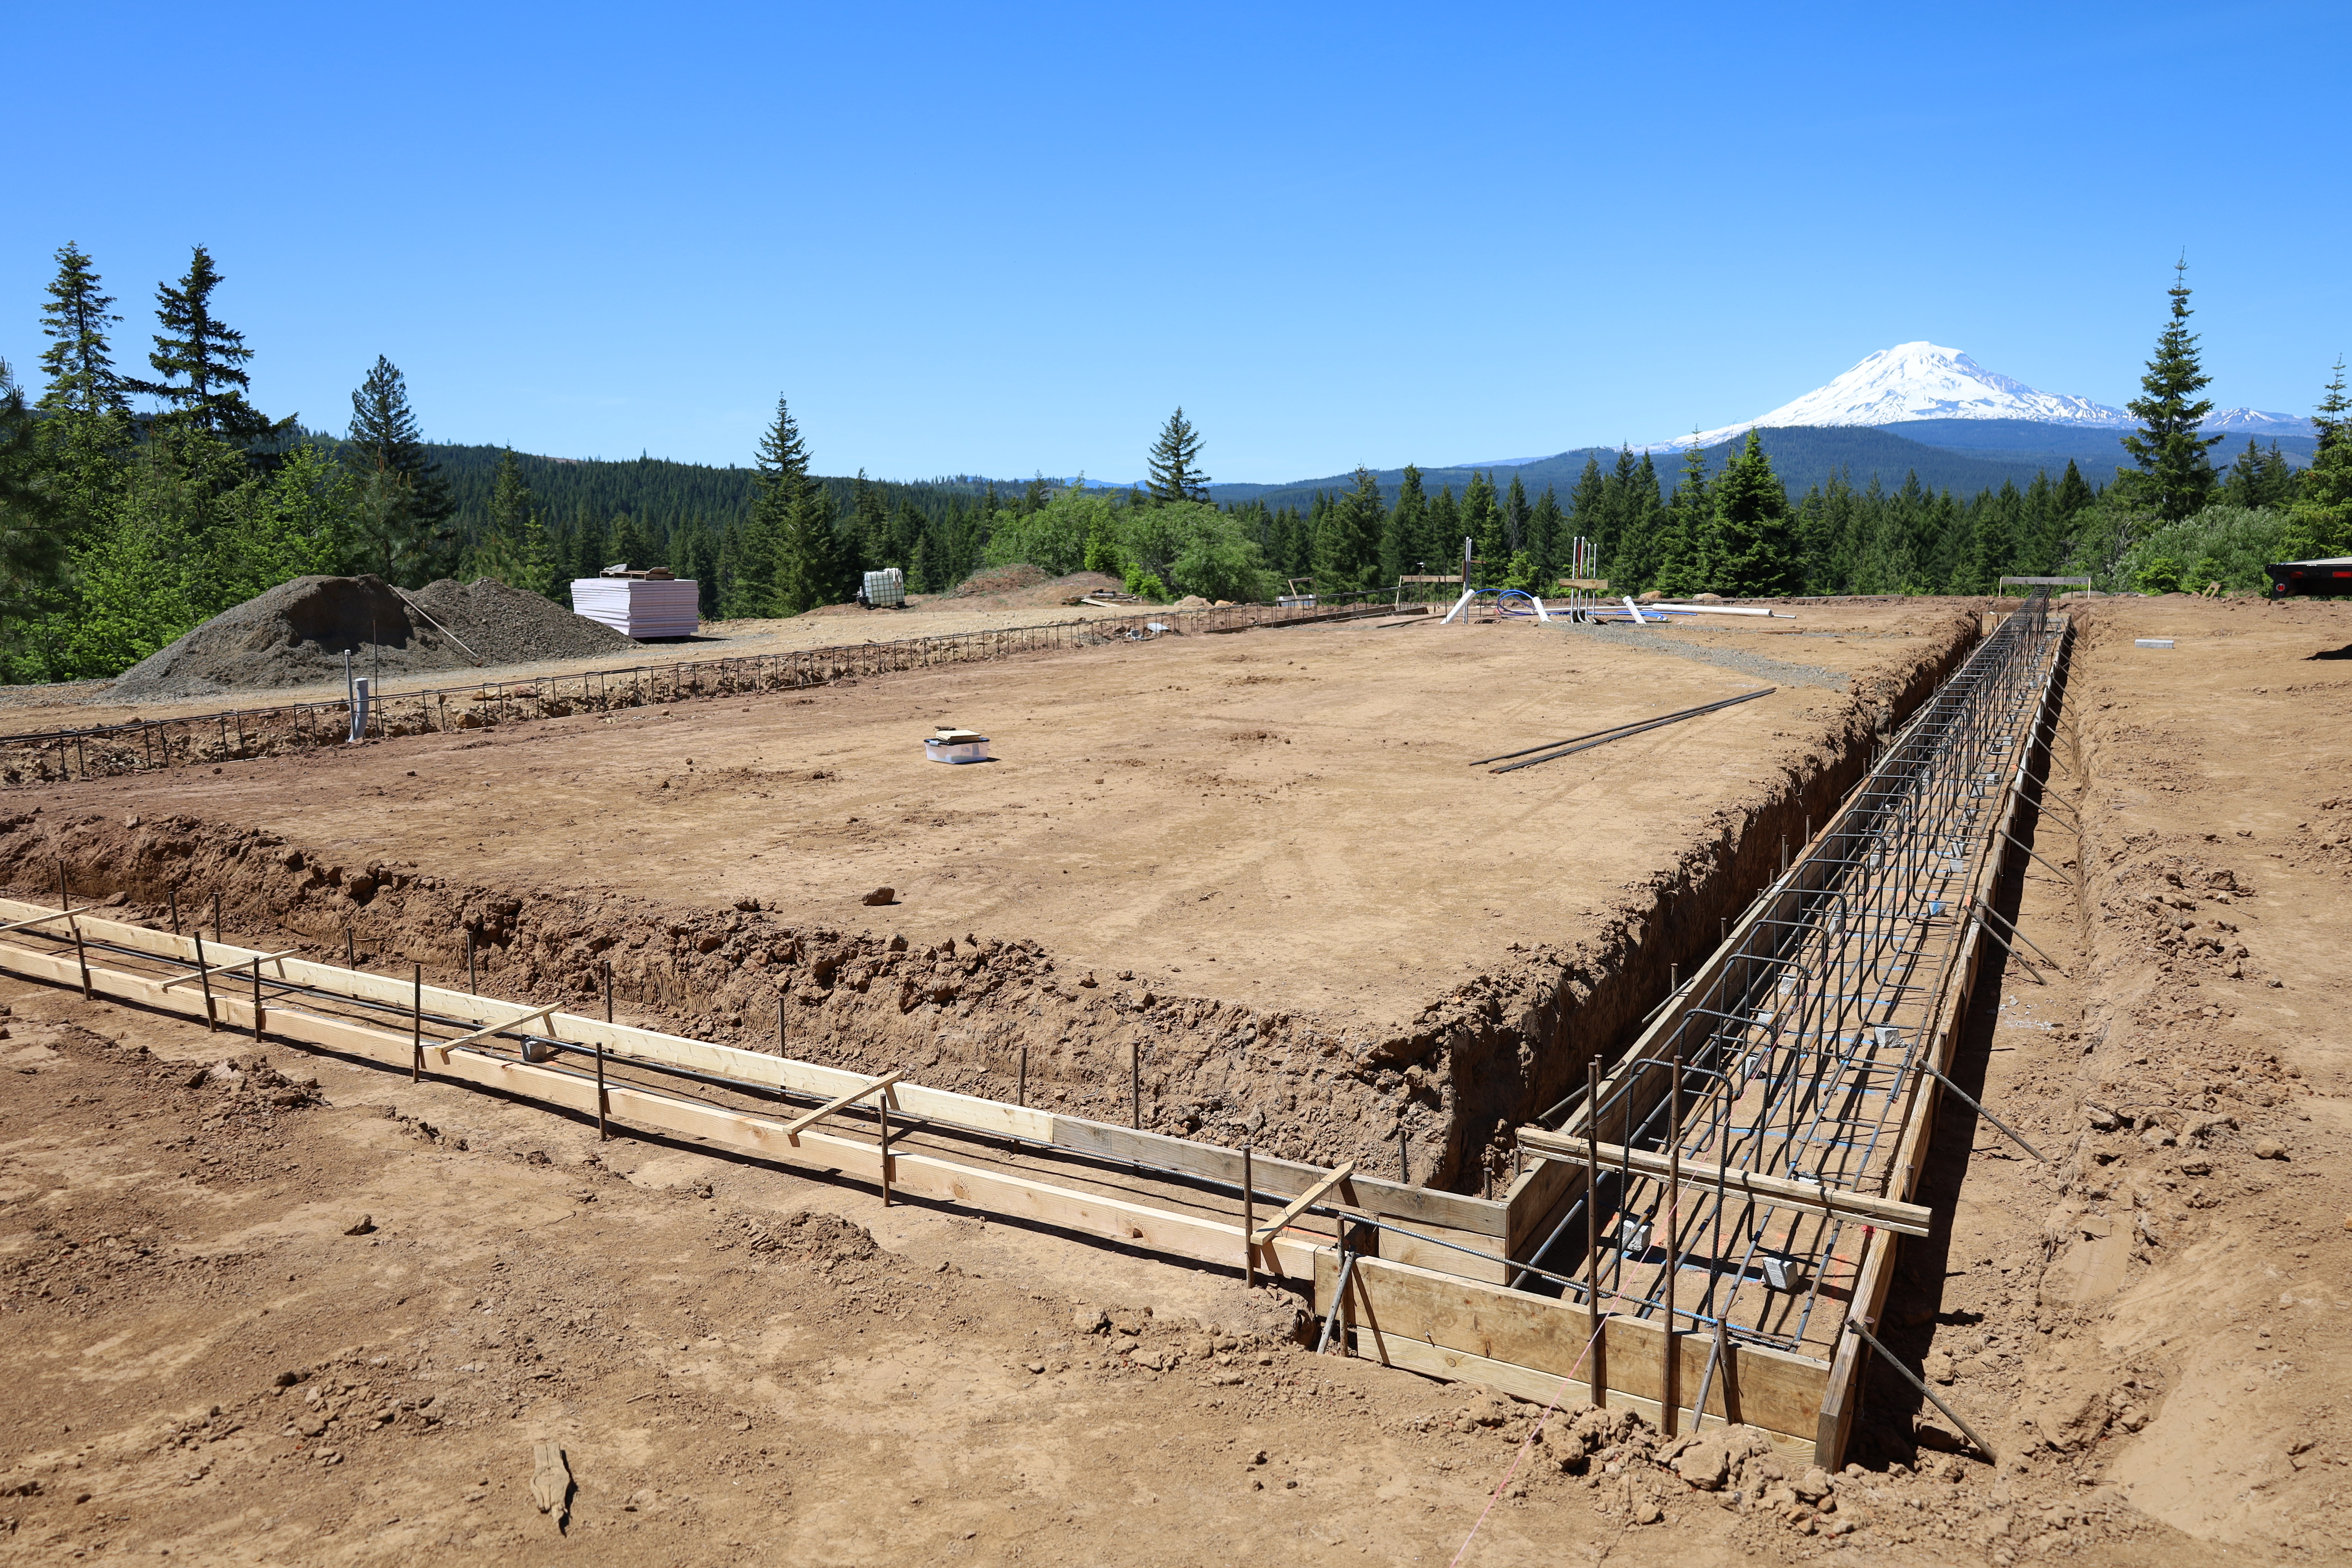
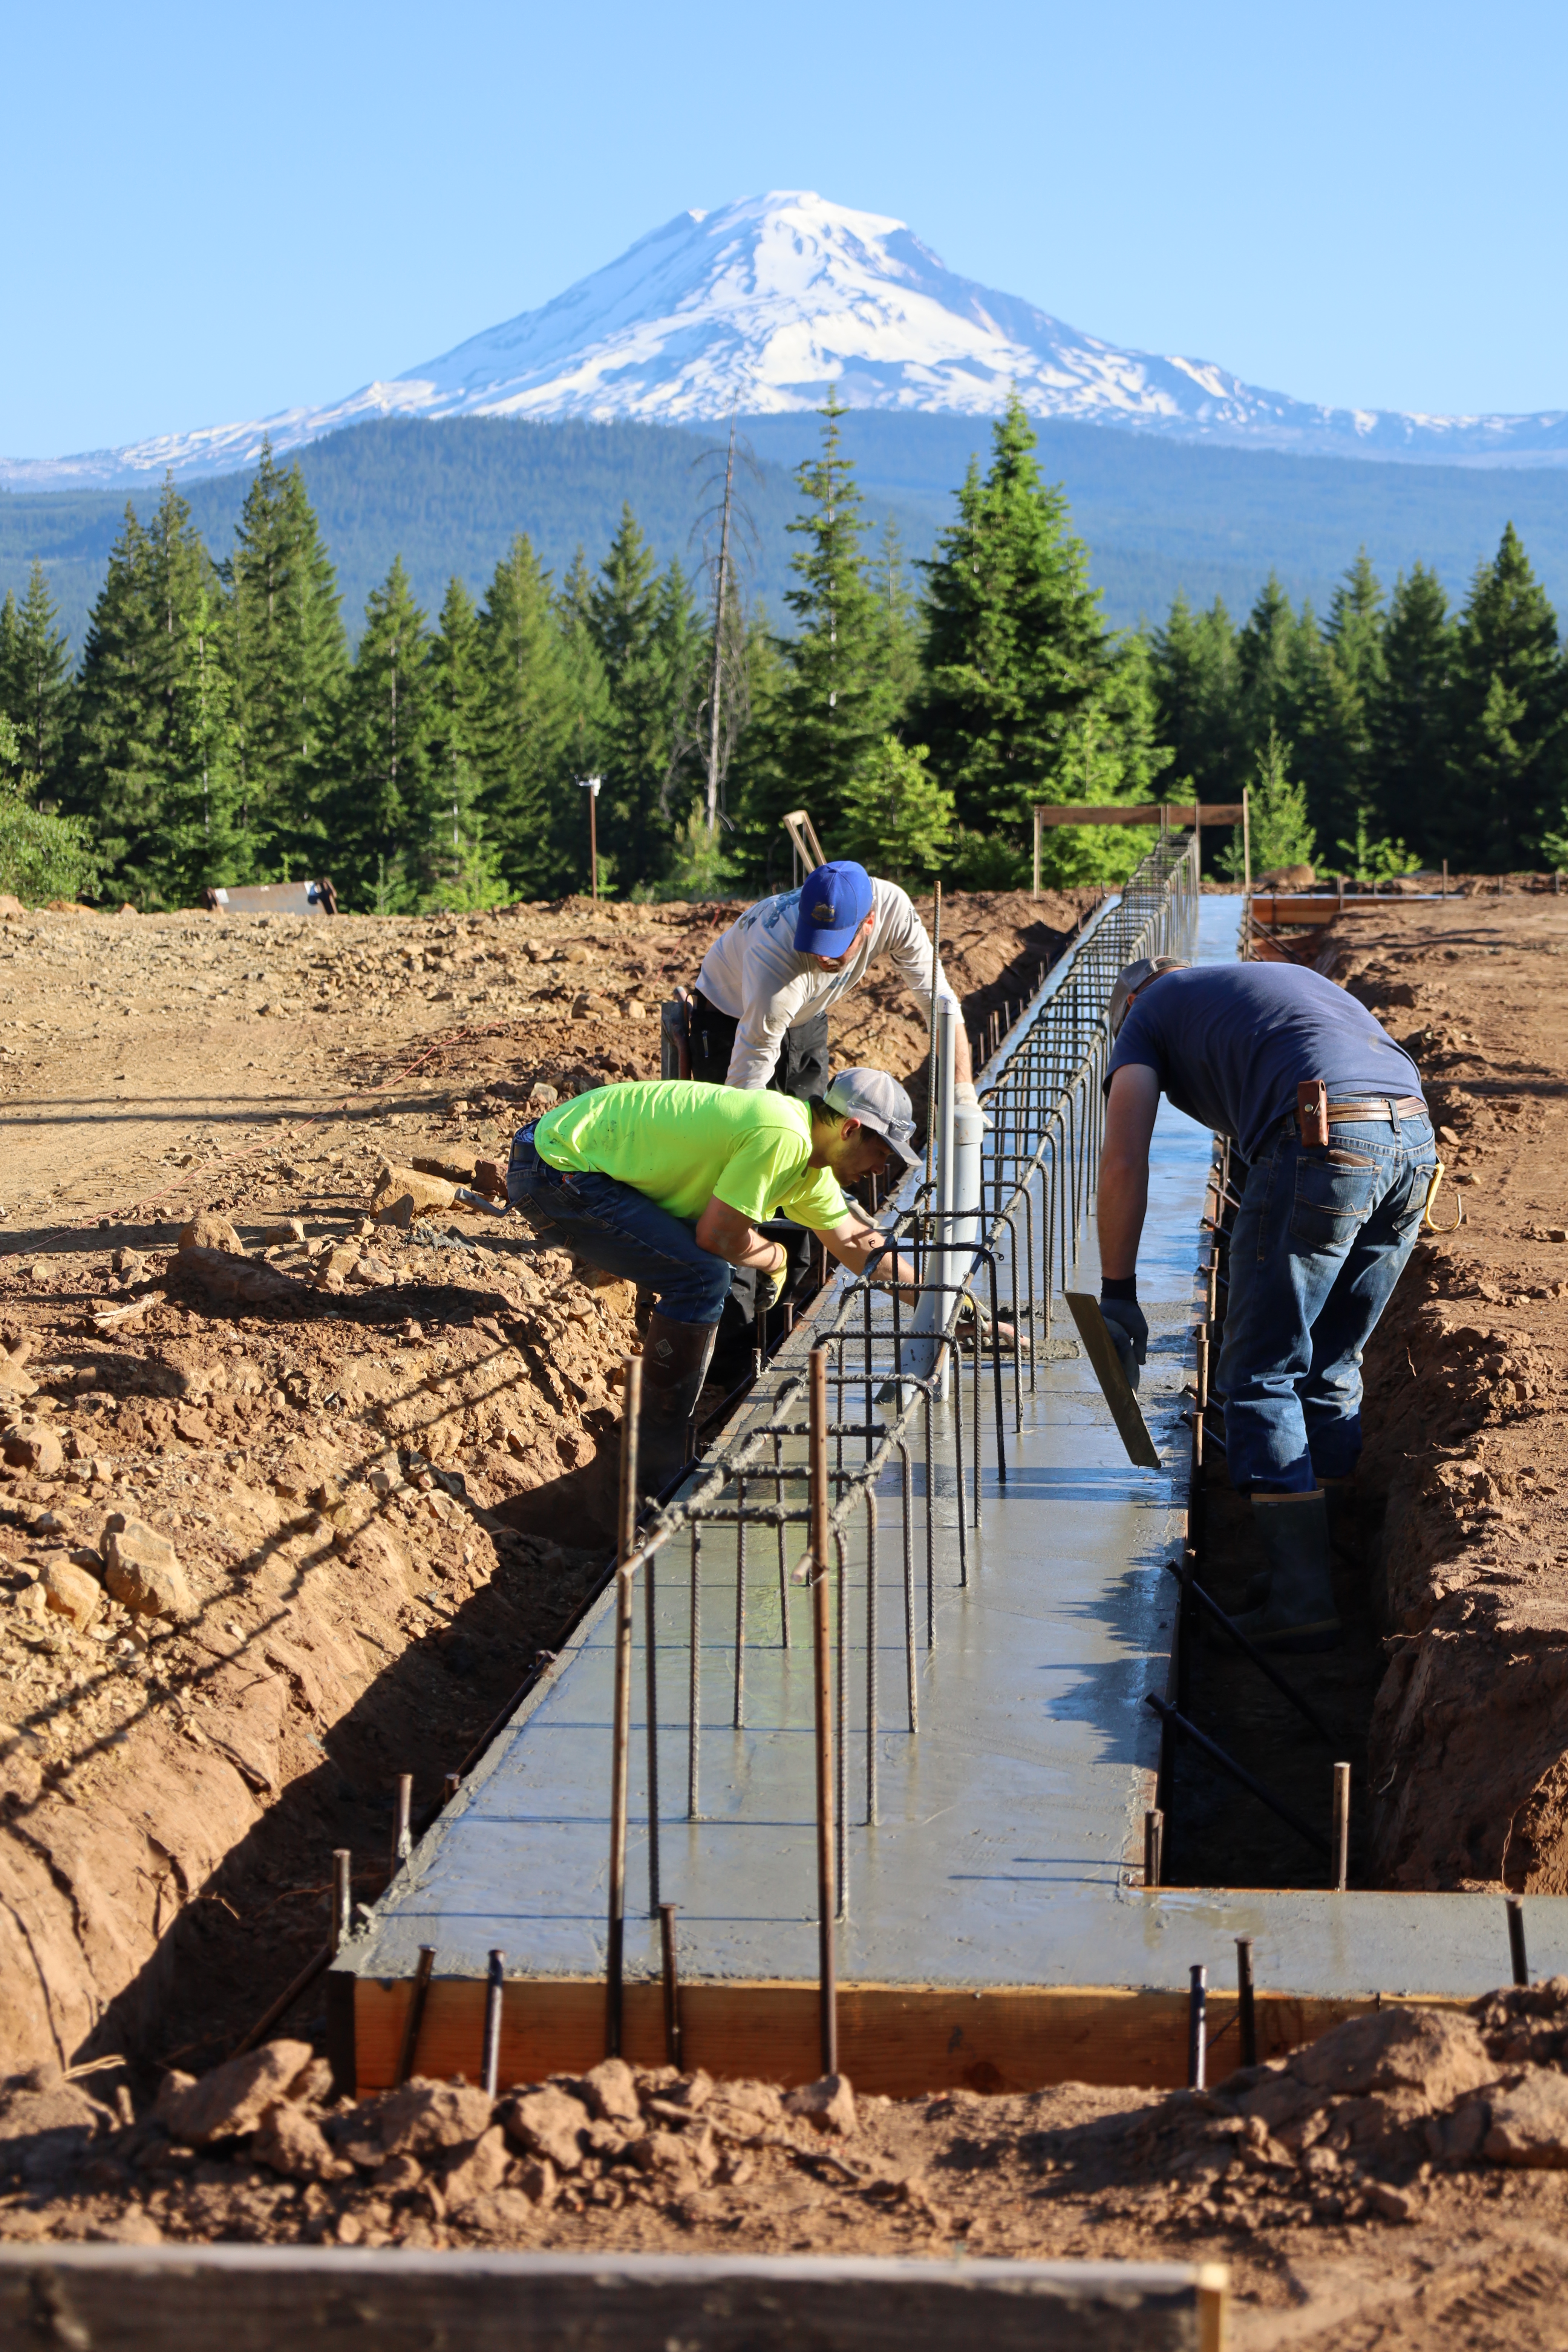
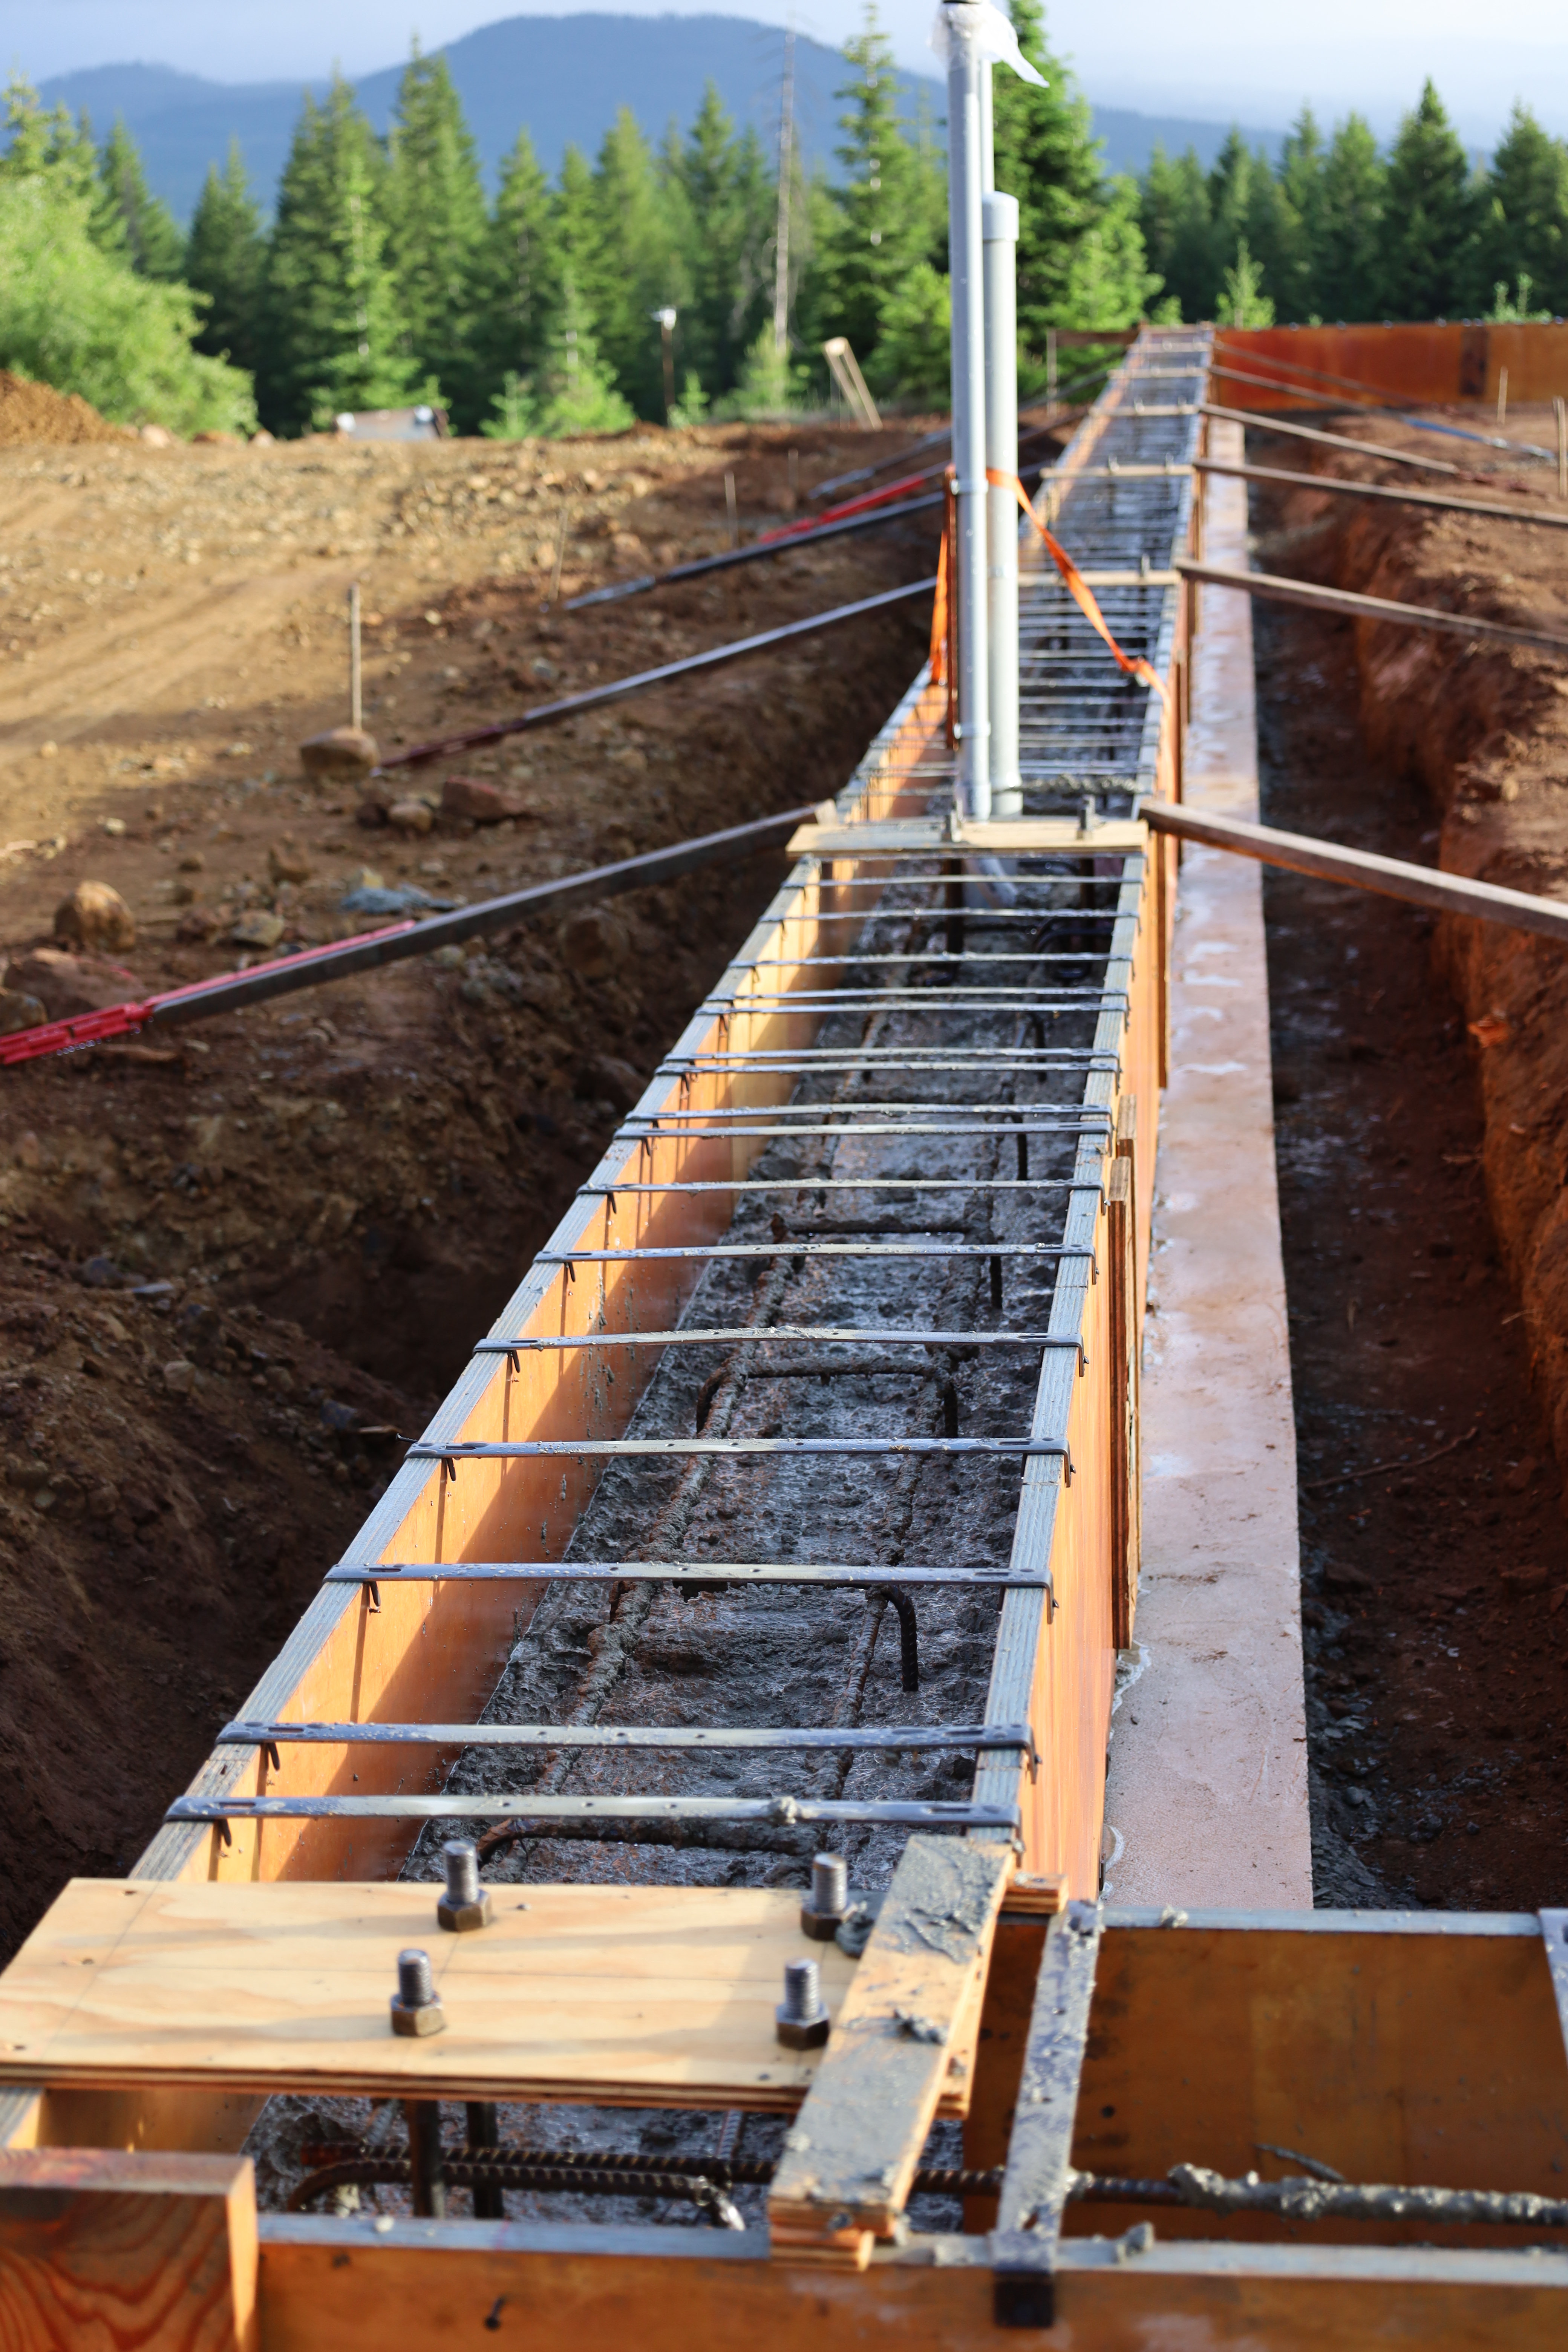
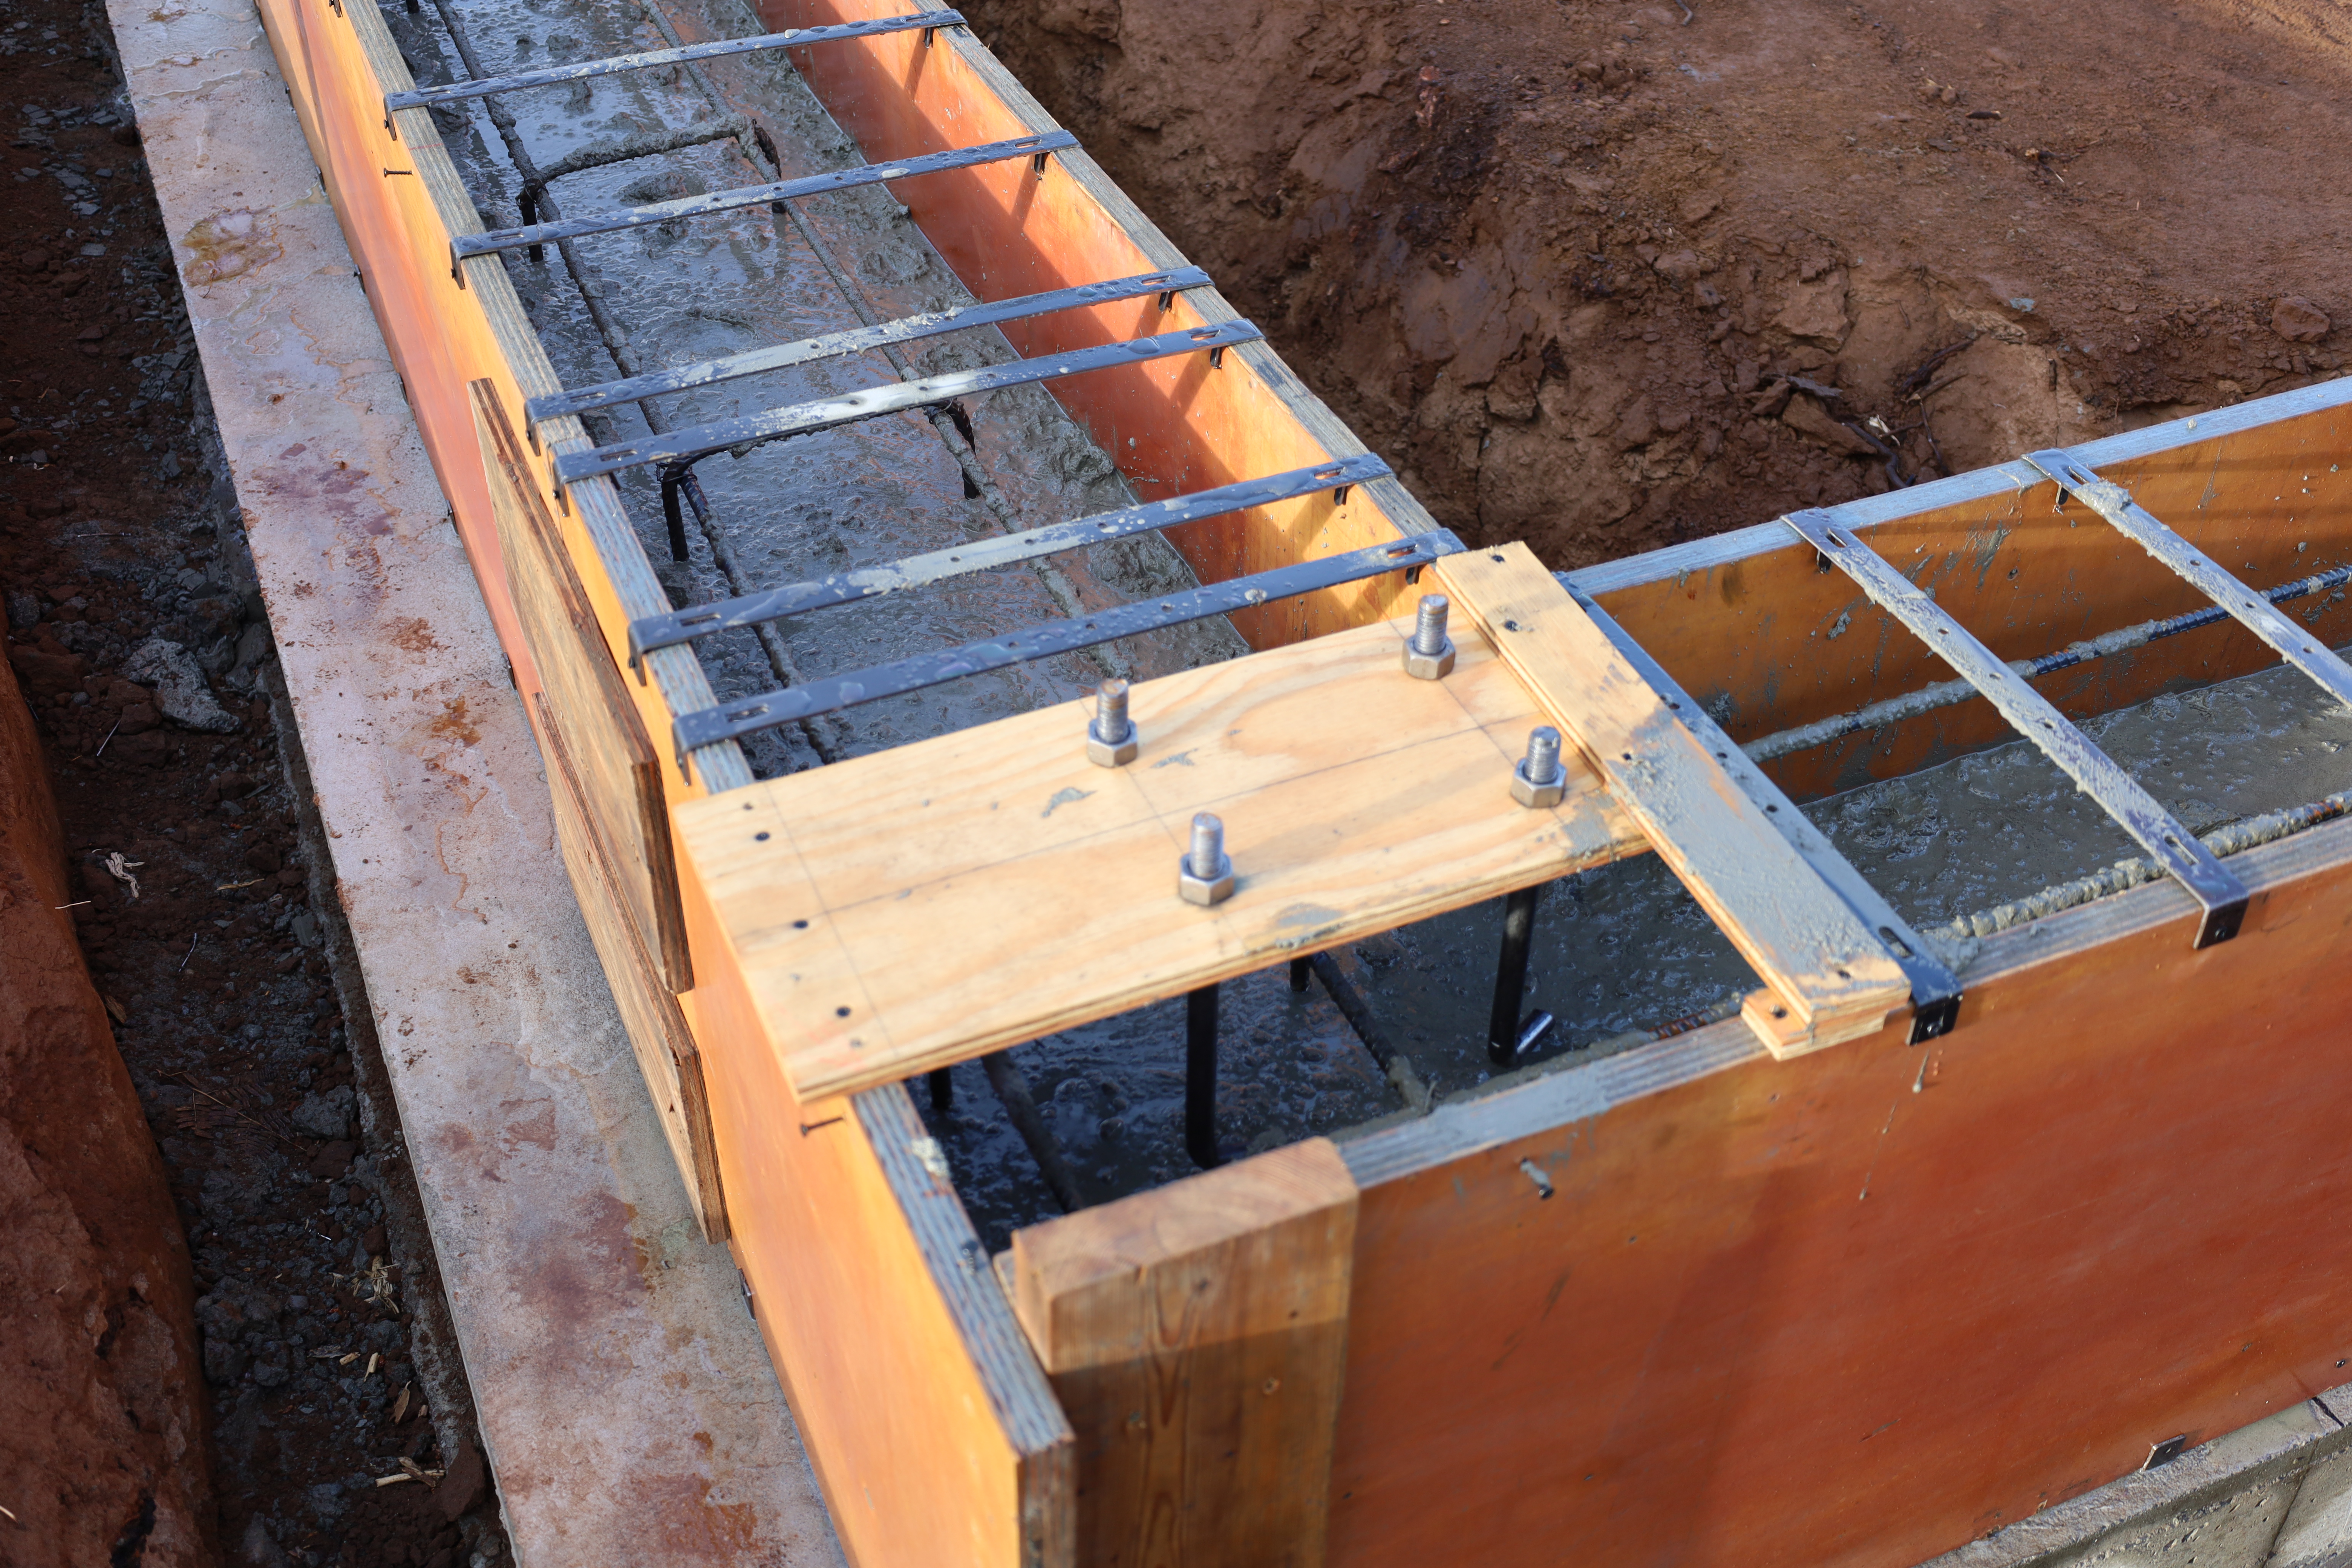
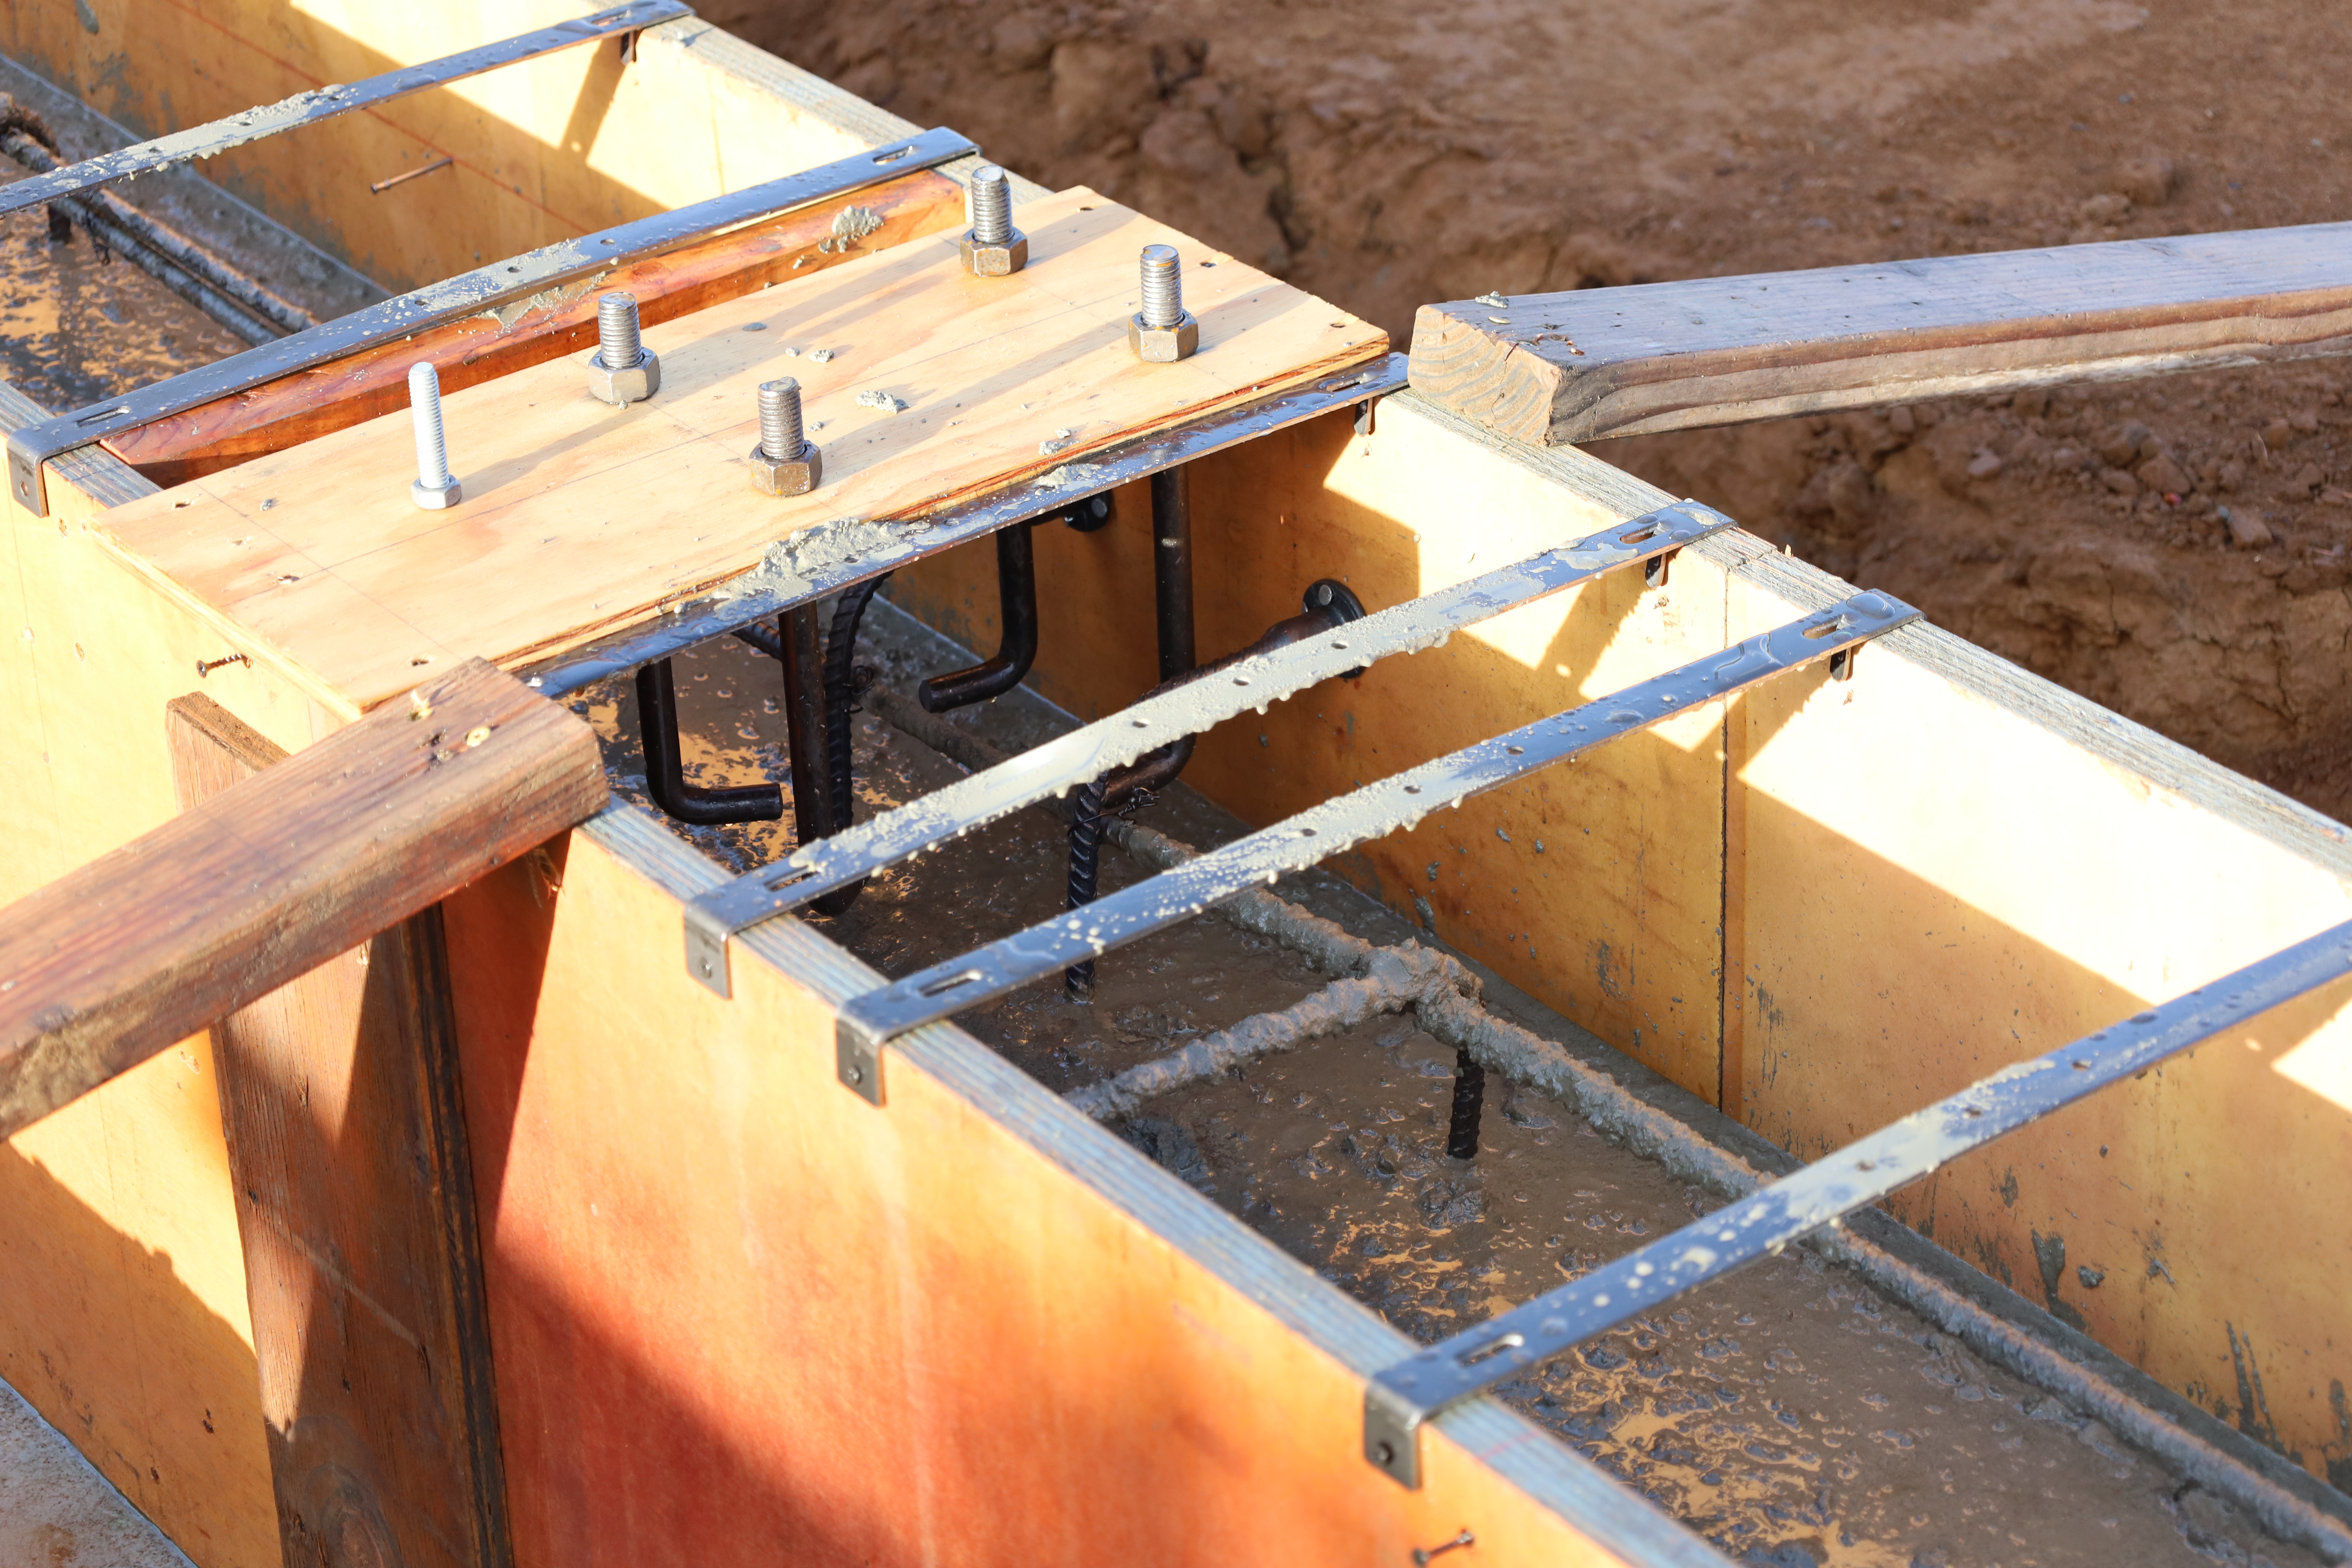
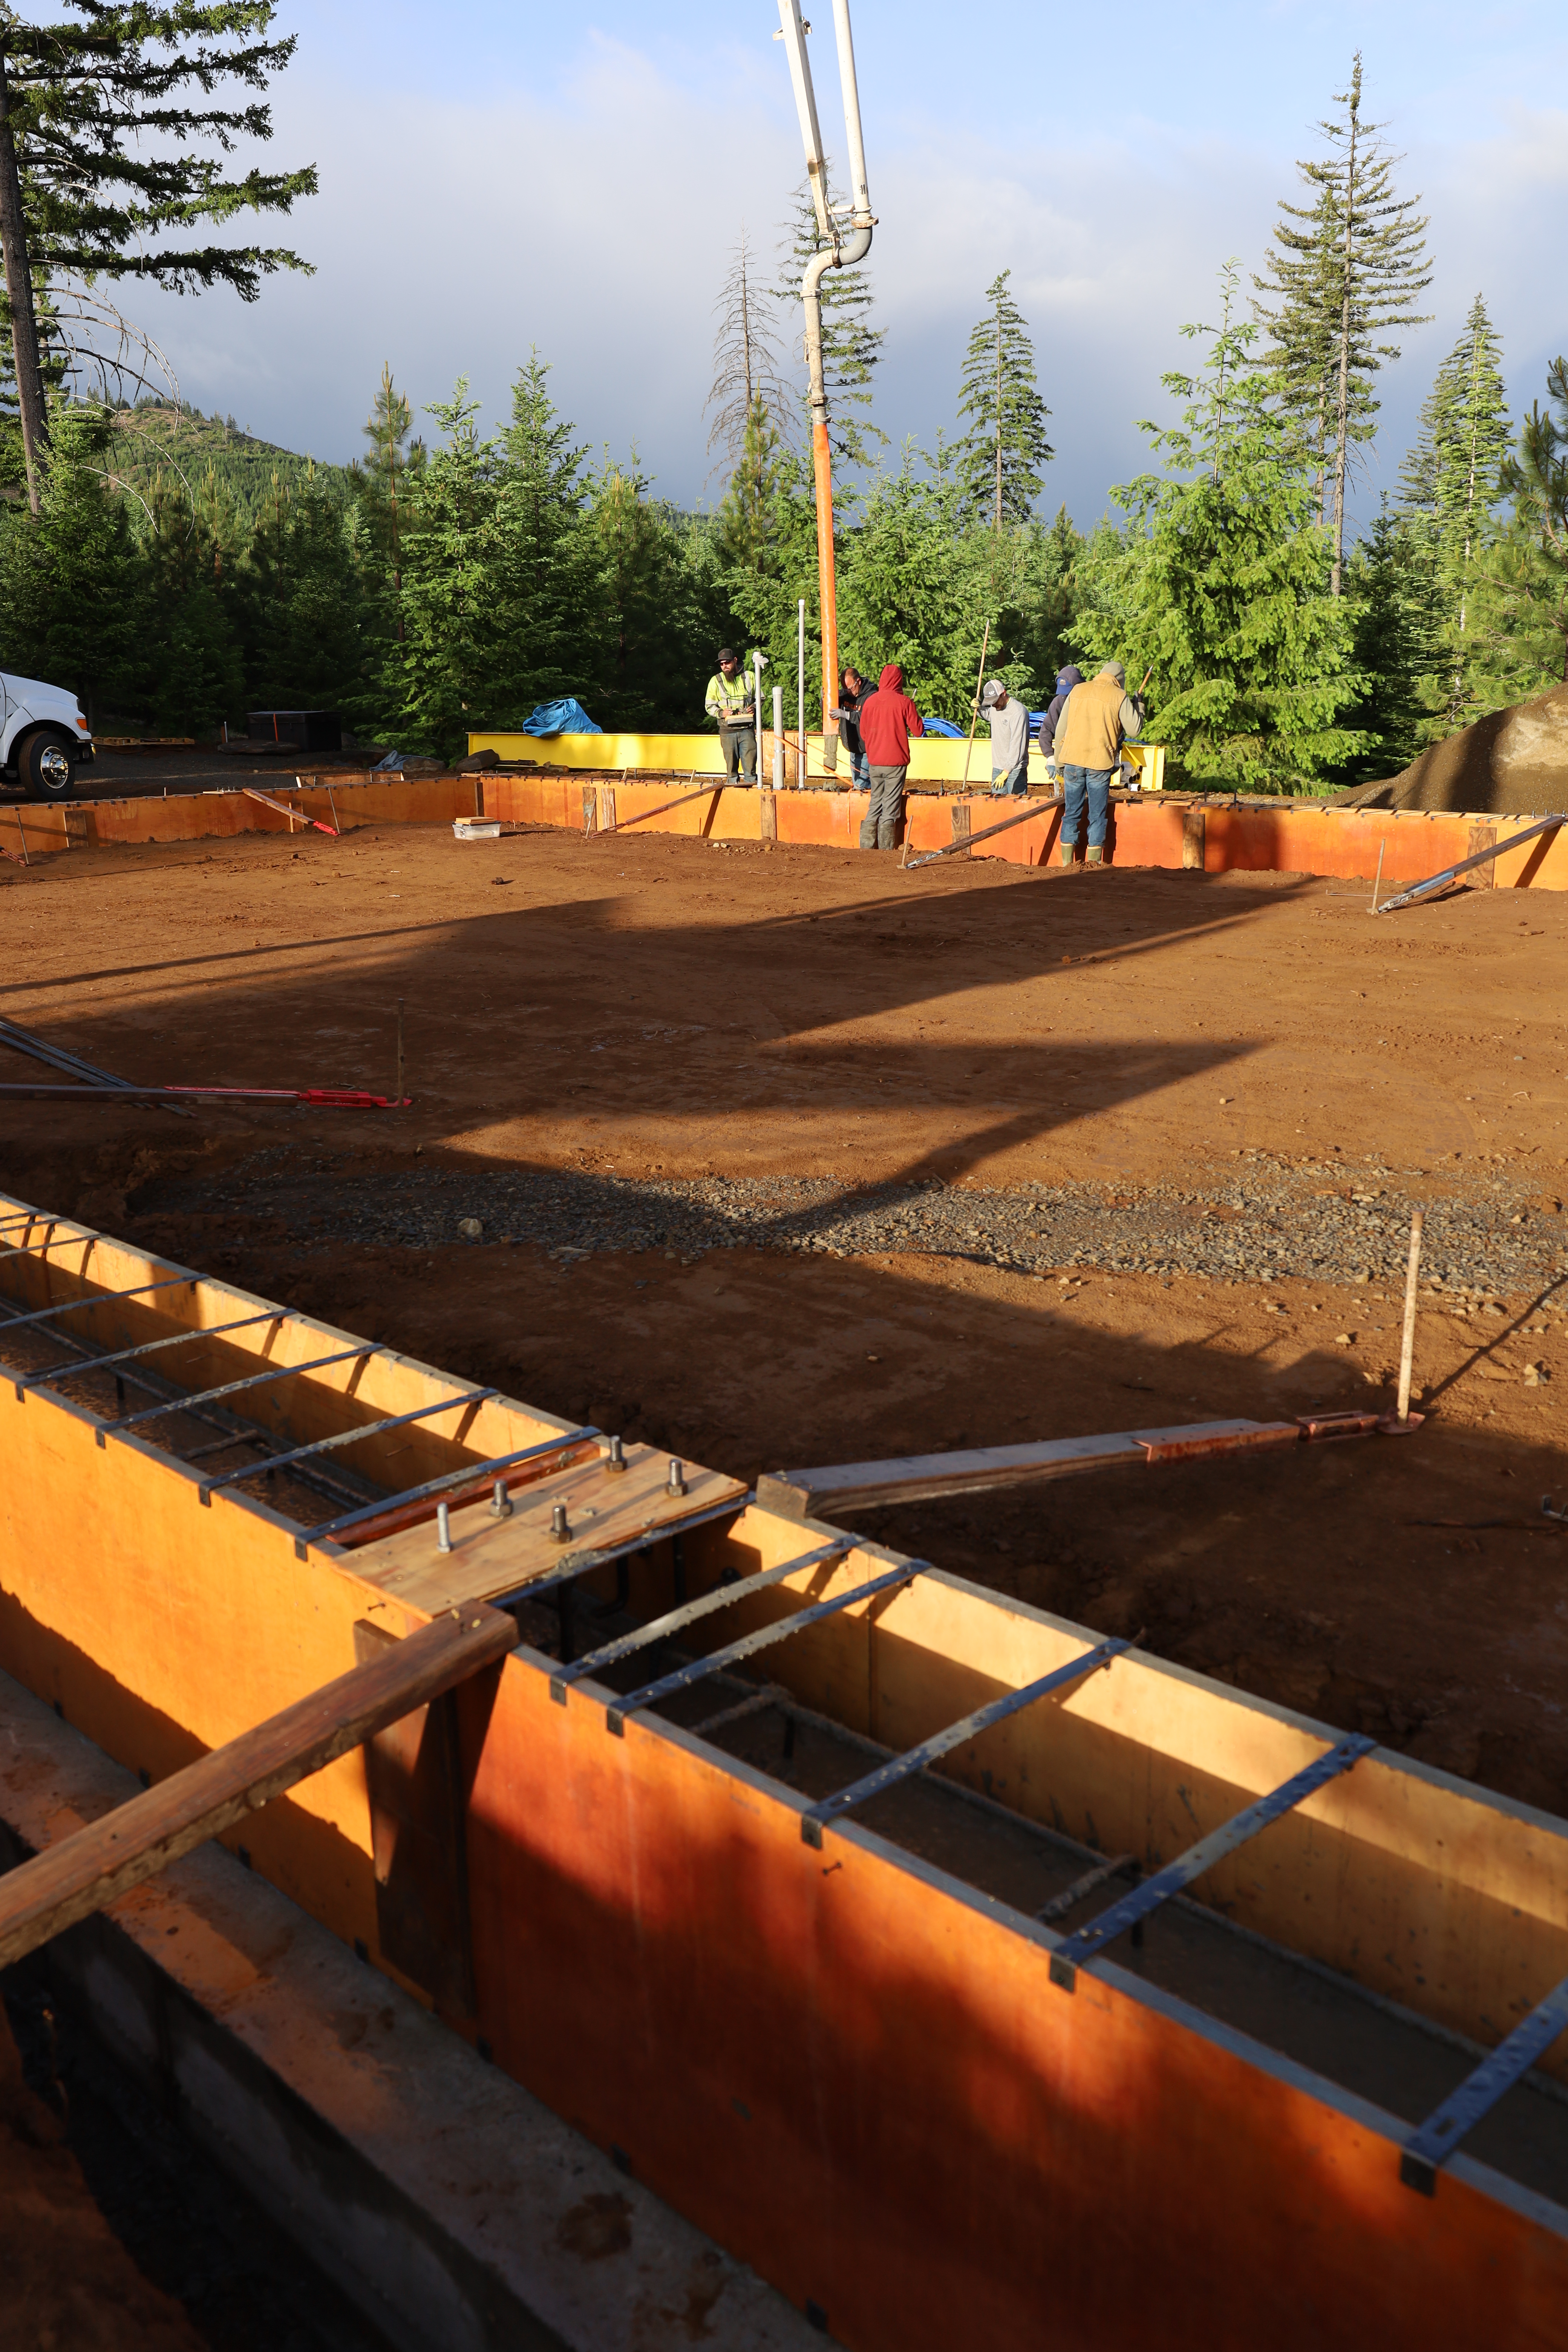
The excitement continues! Our concrete contractor, Matt, and his crew set up forms and a ton of rebar for the footing. There are rebar reinforcements running lengthwise around the perimeter, plus a ton of hoops (the things shaped like top hats). The lower halves of the hoops will be in the footing. The upper halves will be in the wall. The footing is 3 feet wide and about a foot deep.
We got another signature from the building inspector once the setup was complete. Then we had some downtime and spent a fun weekend with our friends Ian and Rebecca, who were visiting from Austin.

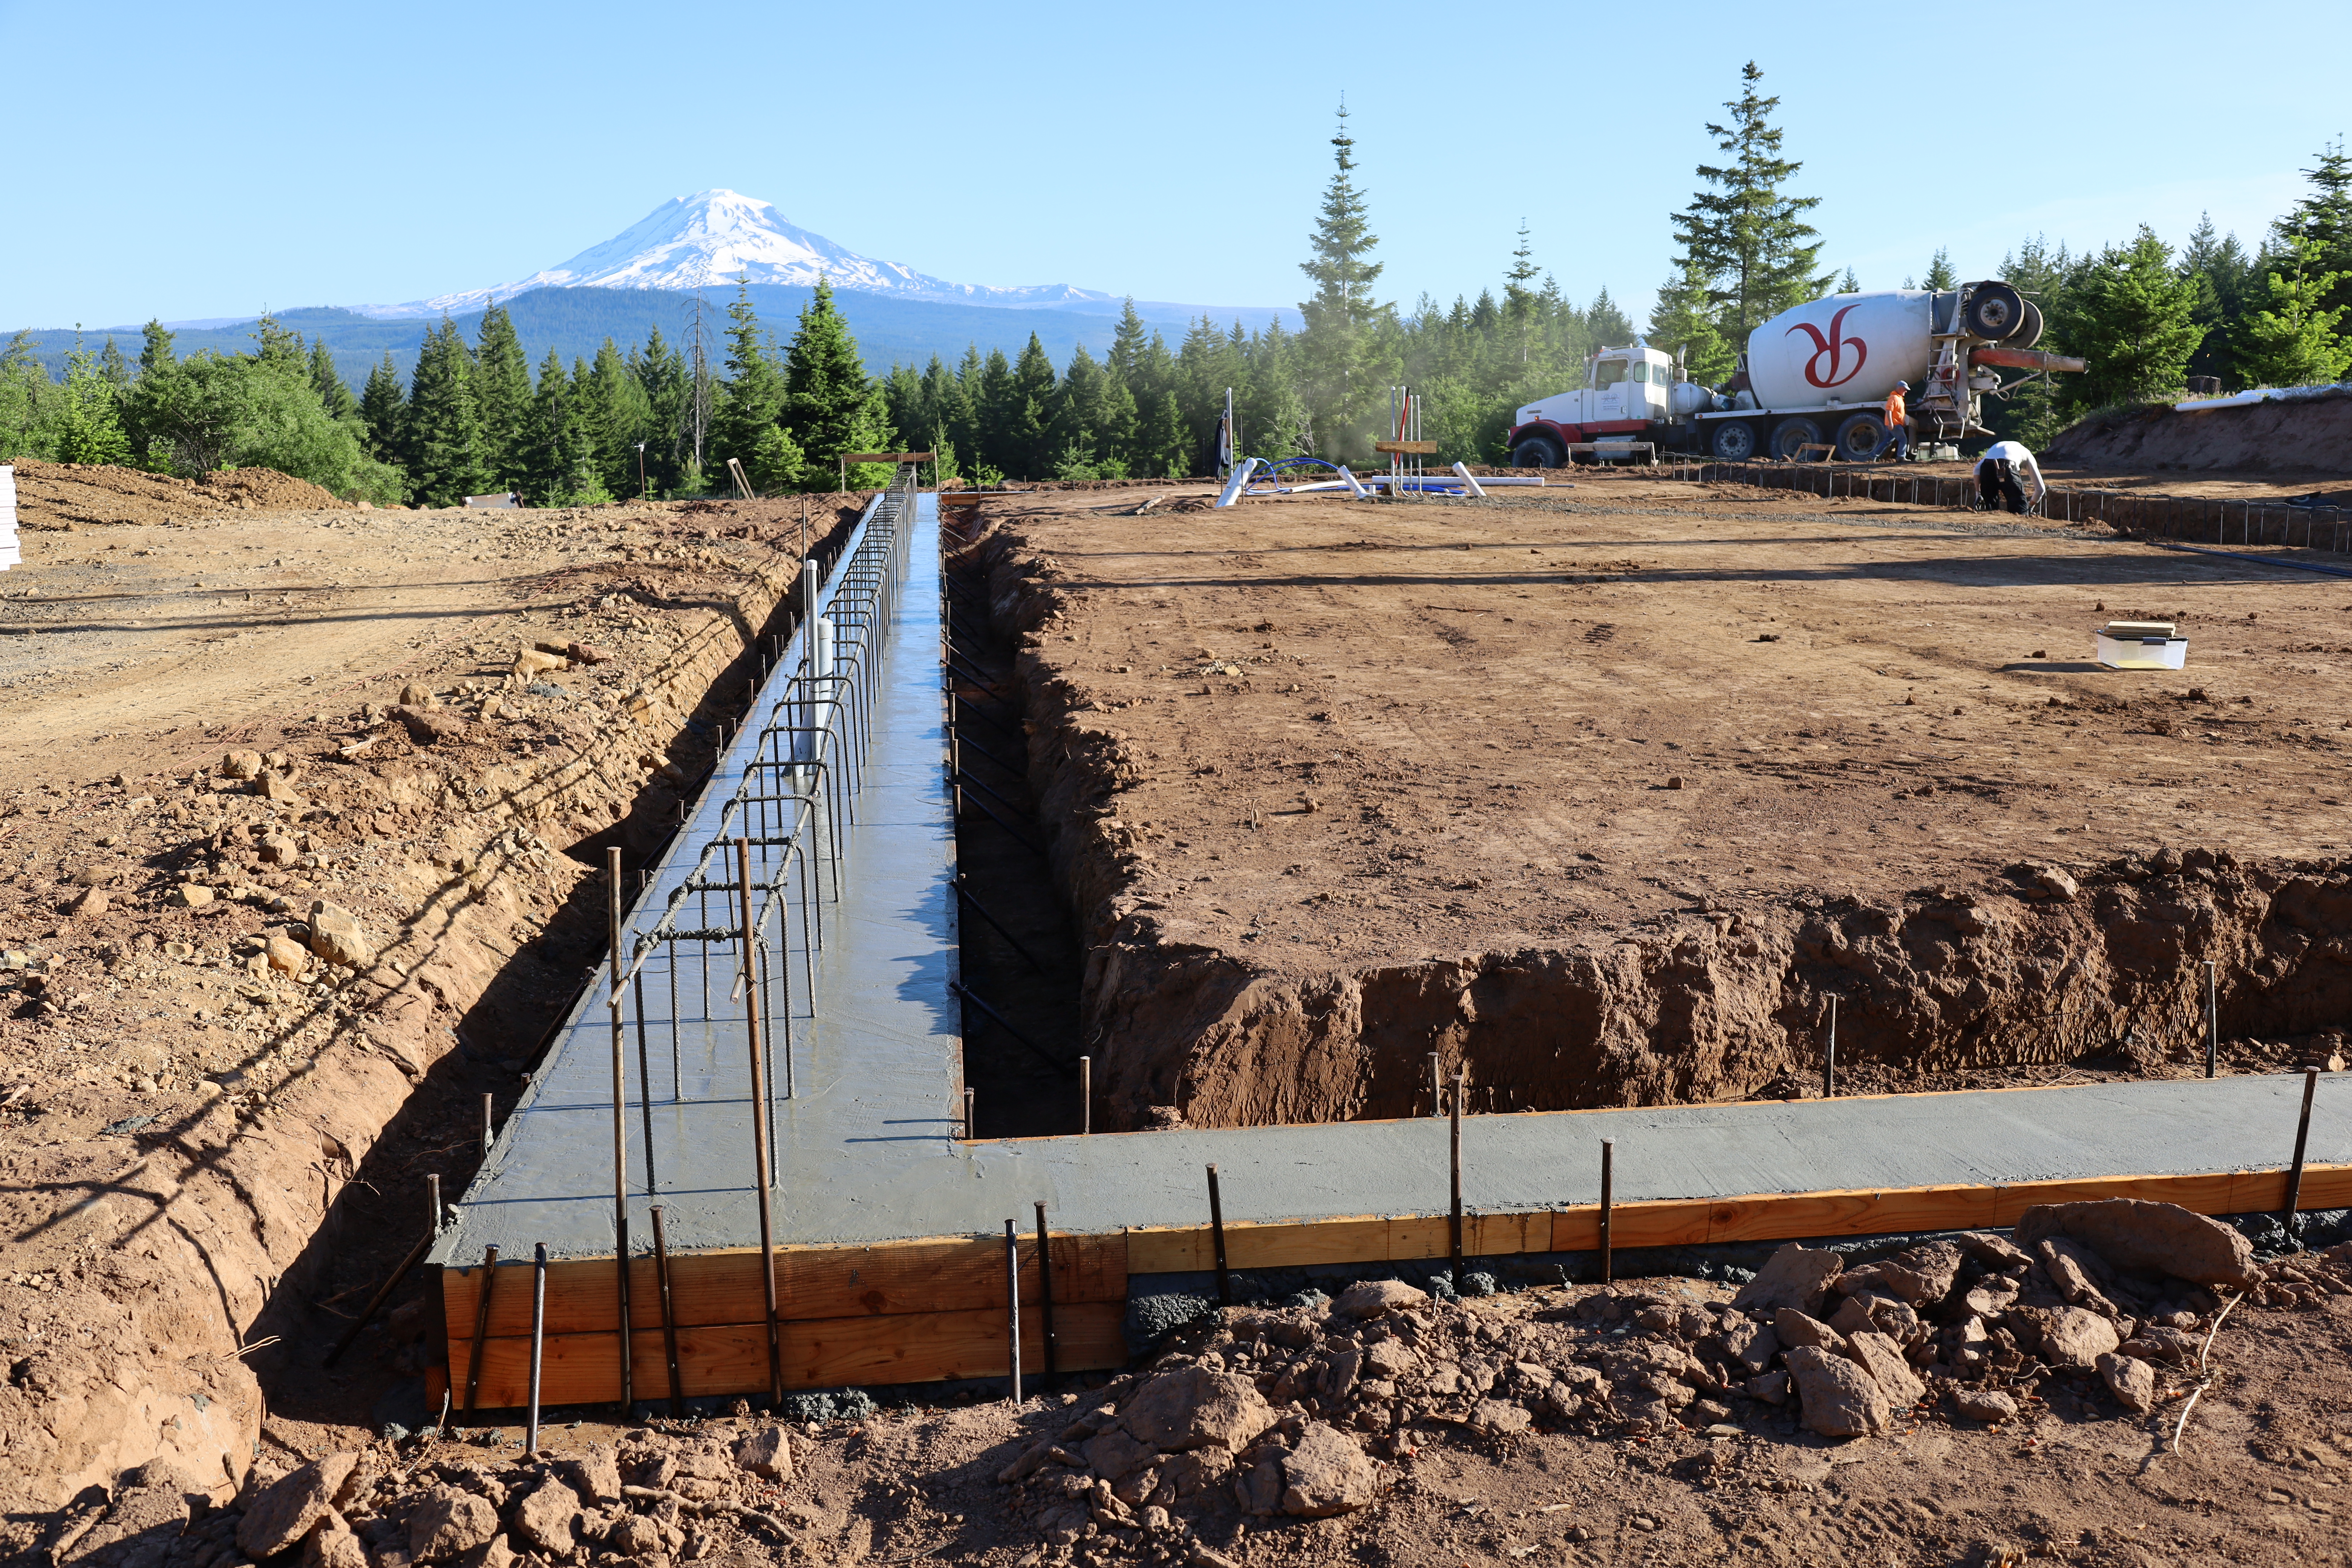
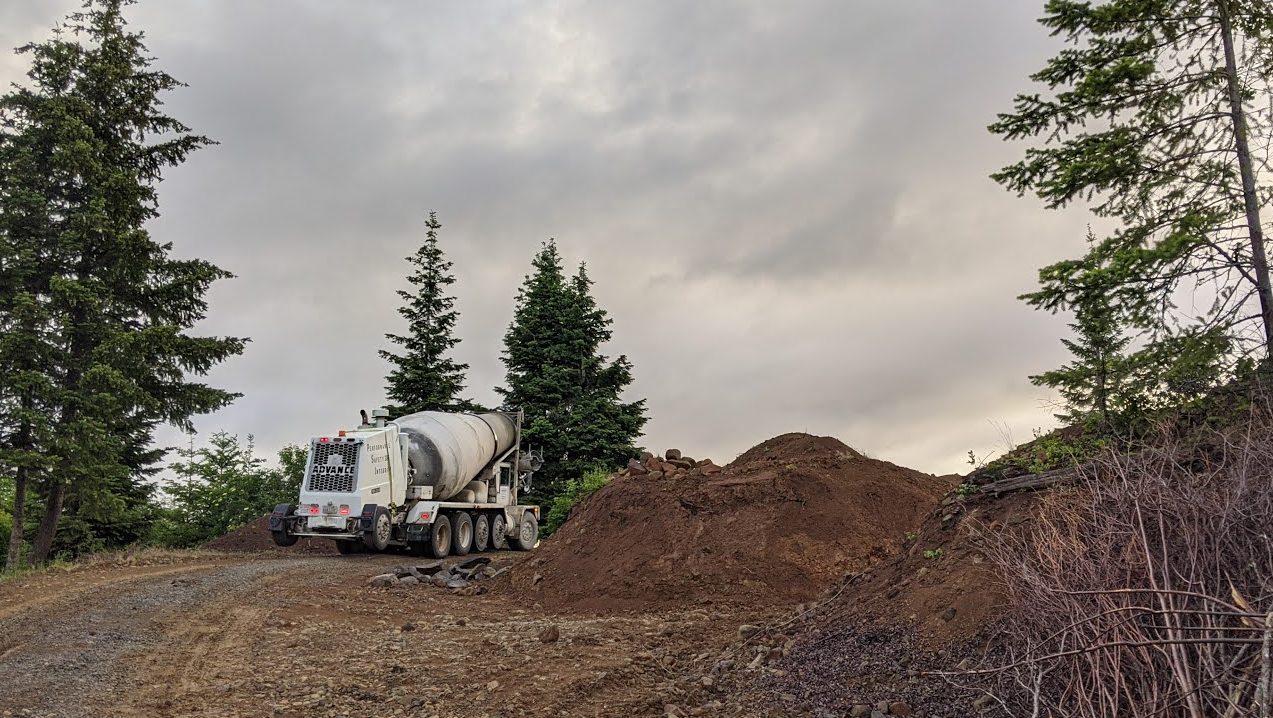
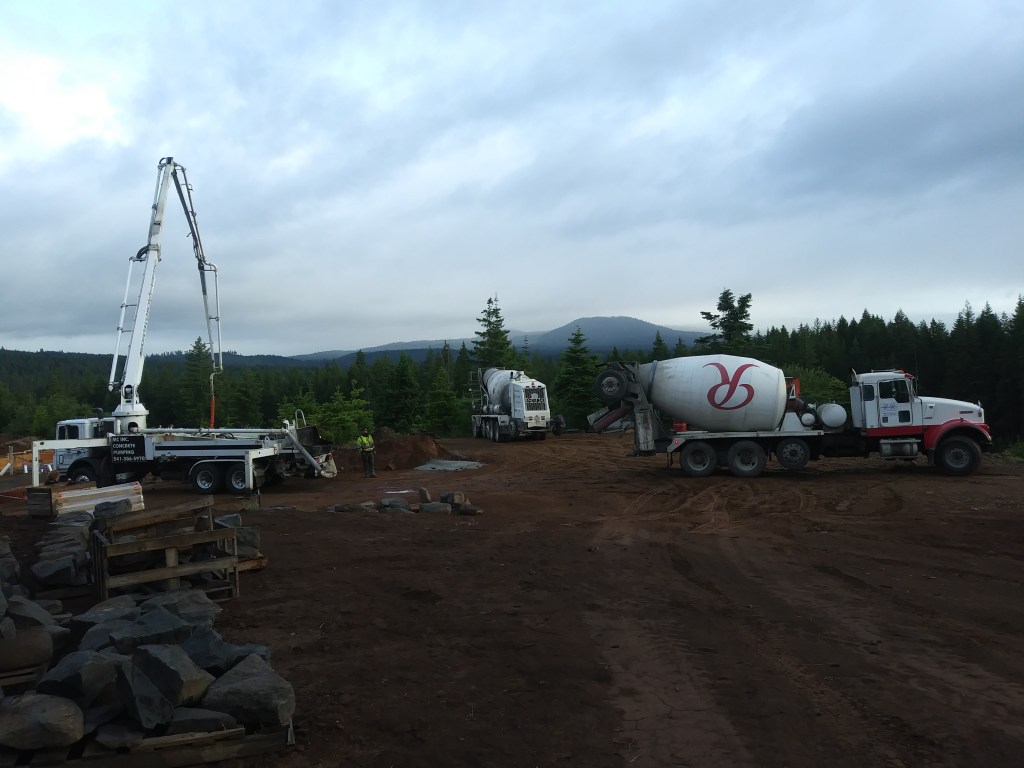
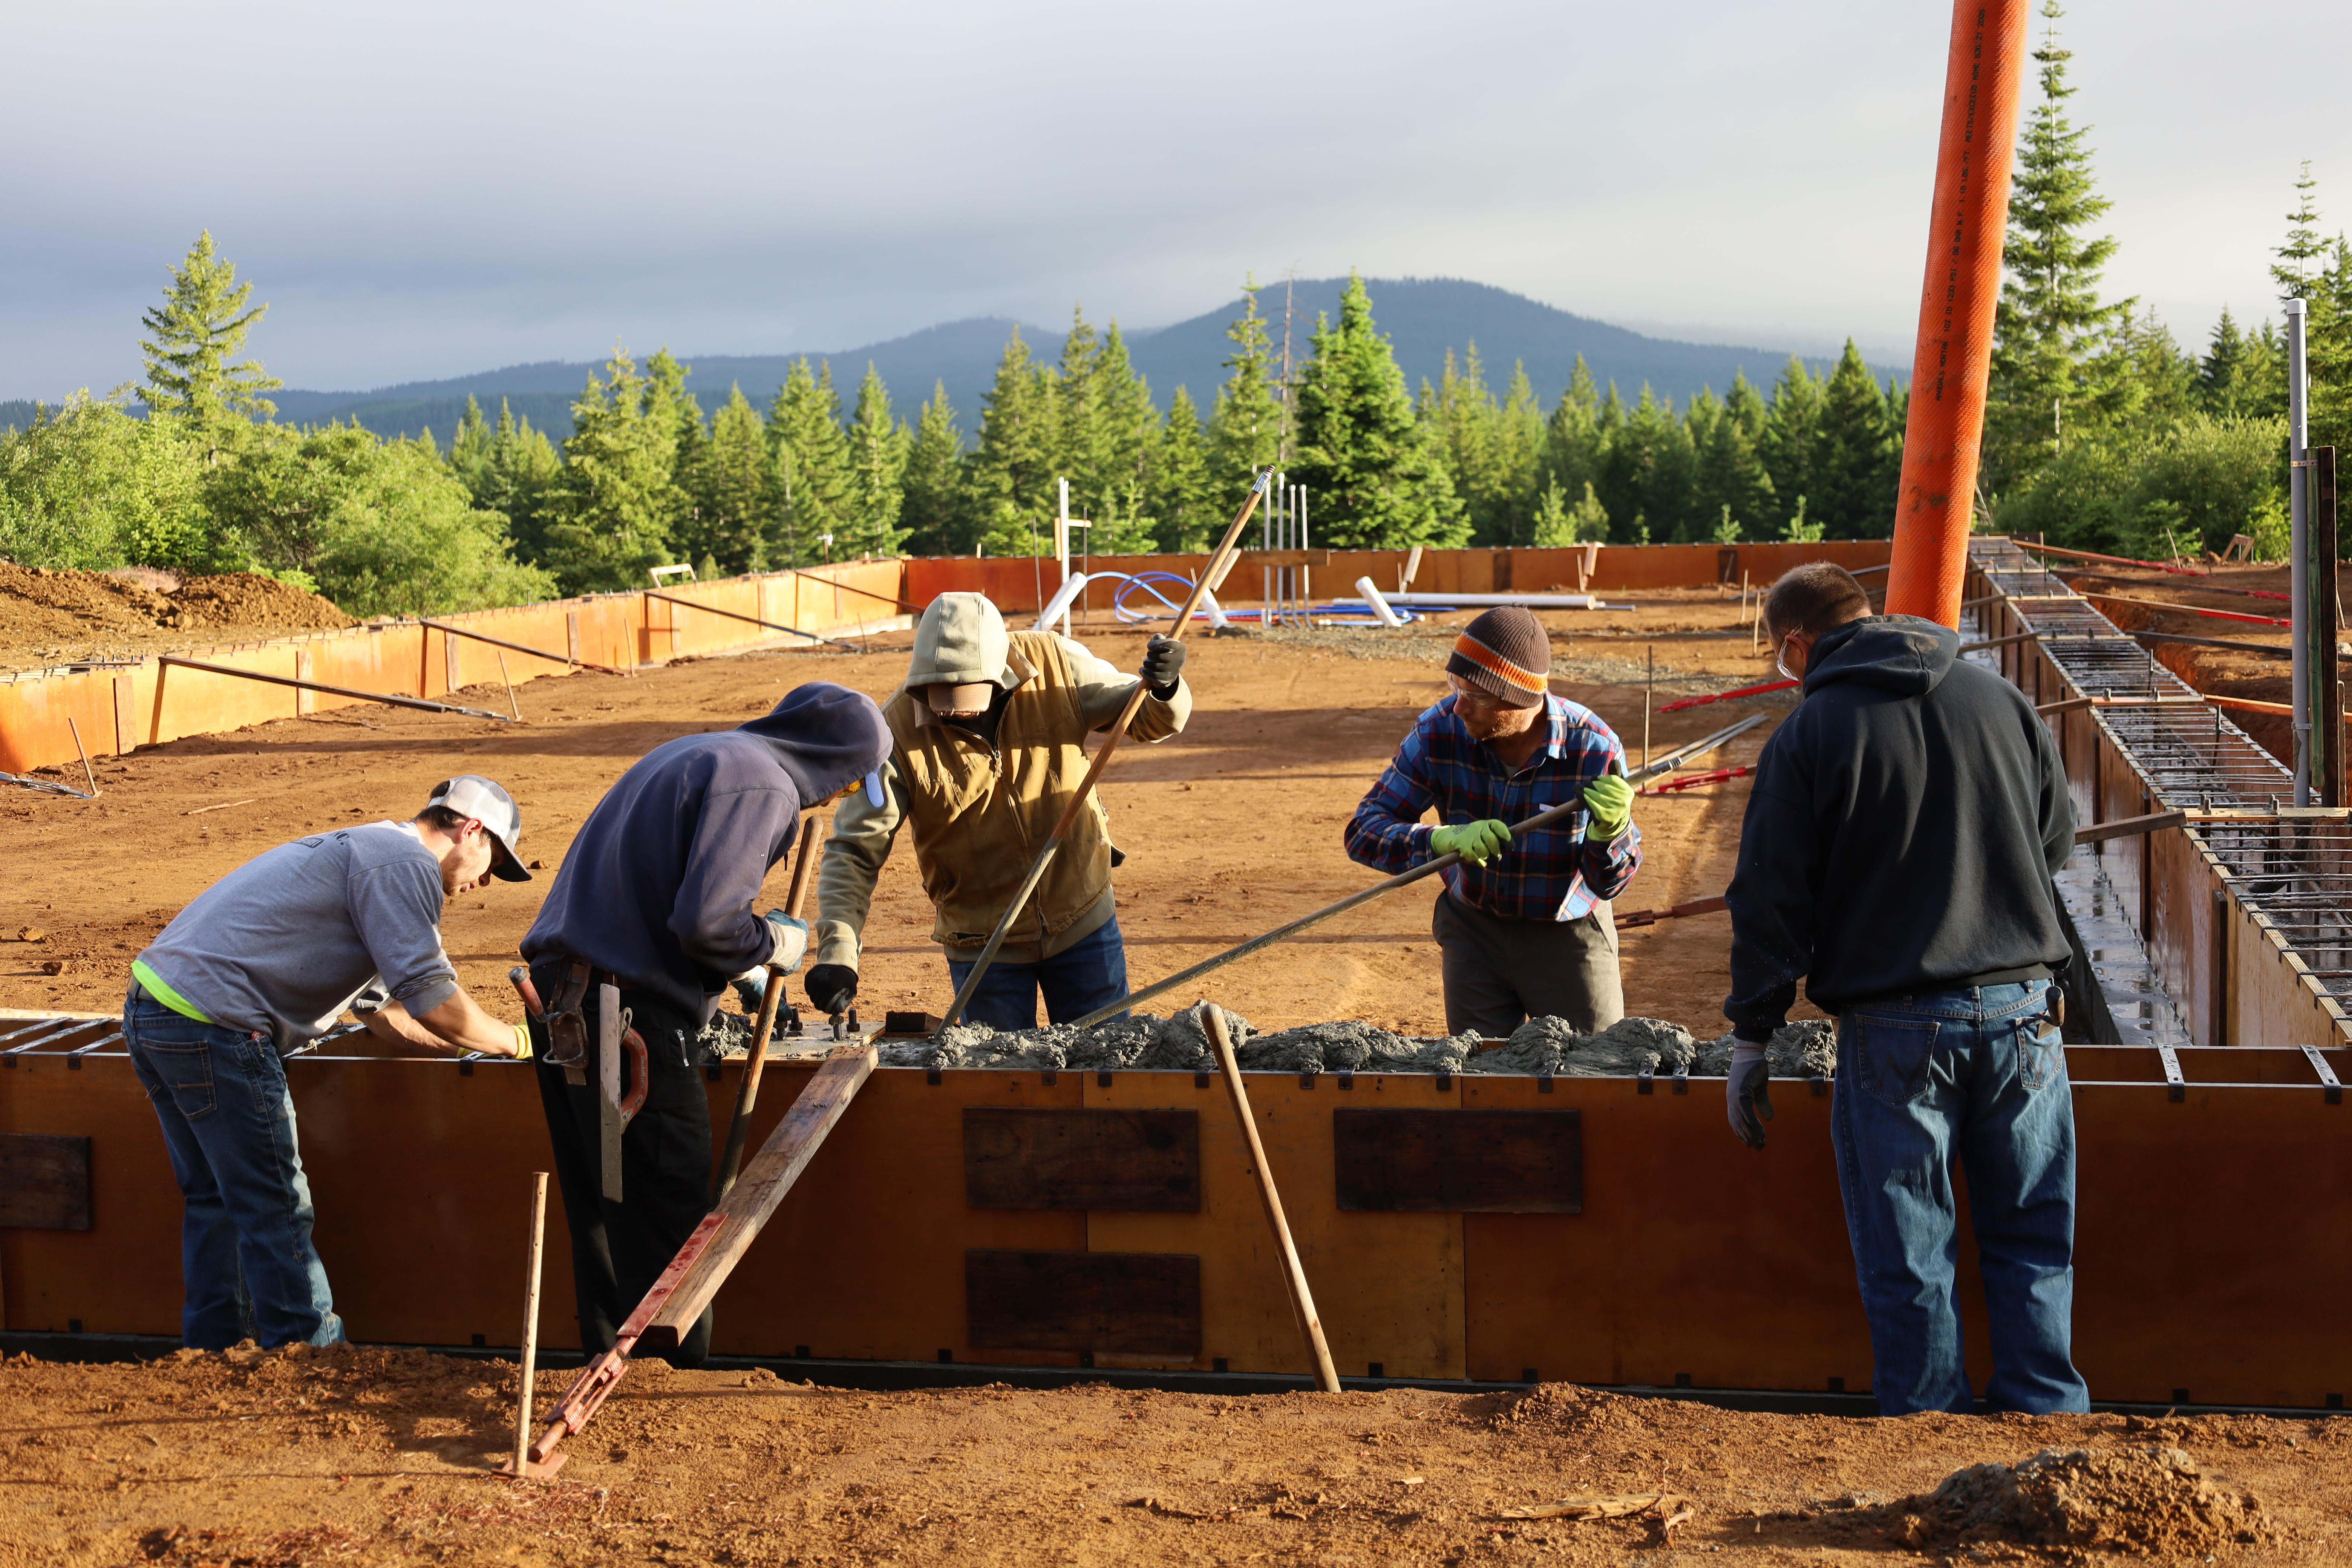
Then, at 5:00 am on June 1st, Matt and his crew returned. The first concrete truck showed up at 6:00 am, and shortly after that, Sam and I arrived for the show. There were two trucks on the job. The second truck arrived just before the first truck ran out of material. Then, truck #1 went back to the plant in Bingen for another load (about an hour round trip) and arrived just before truck #2 was out of material. It seemed like perfect choreography between the two trucks, and it all happened so fast!
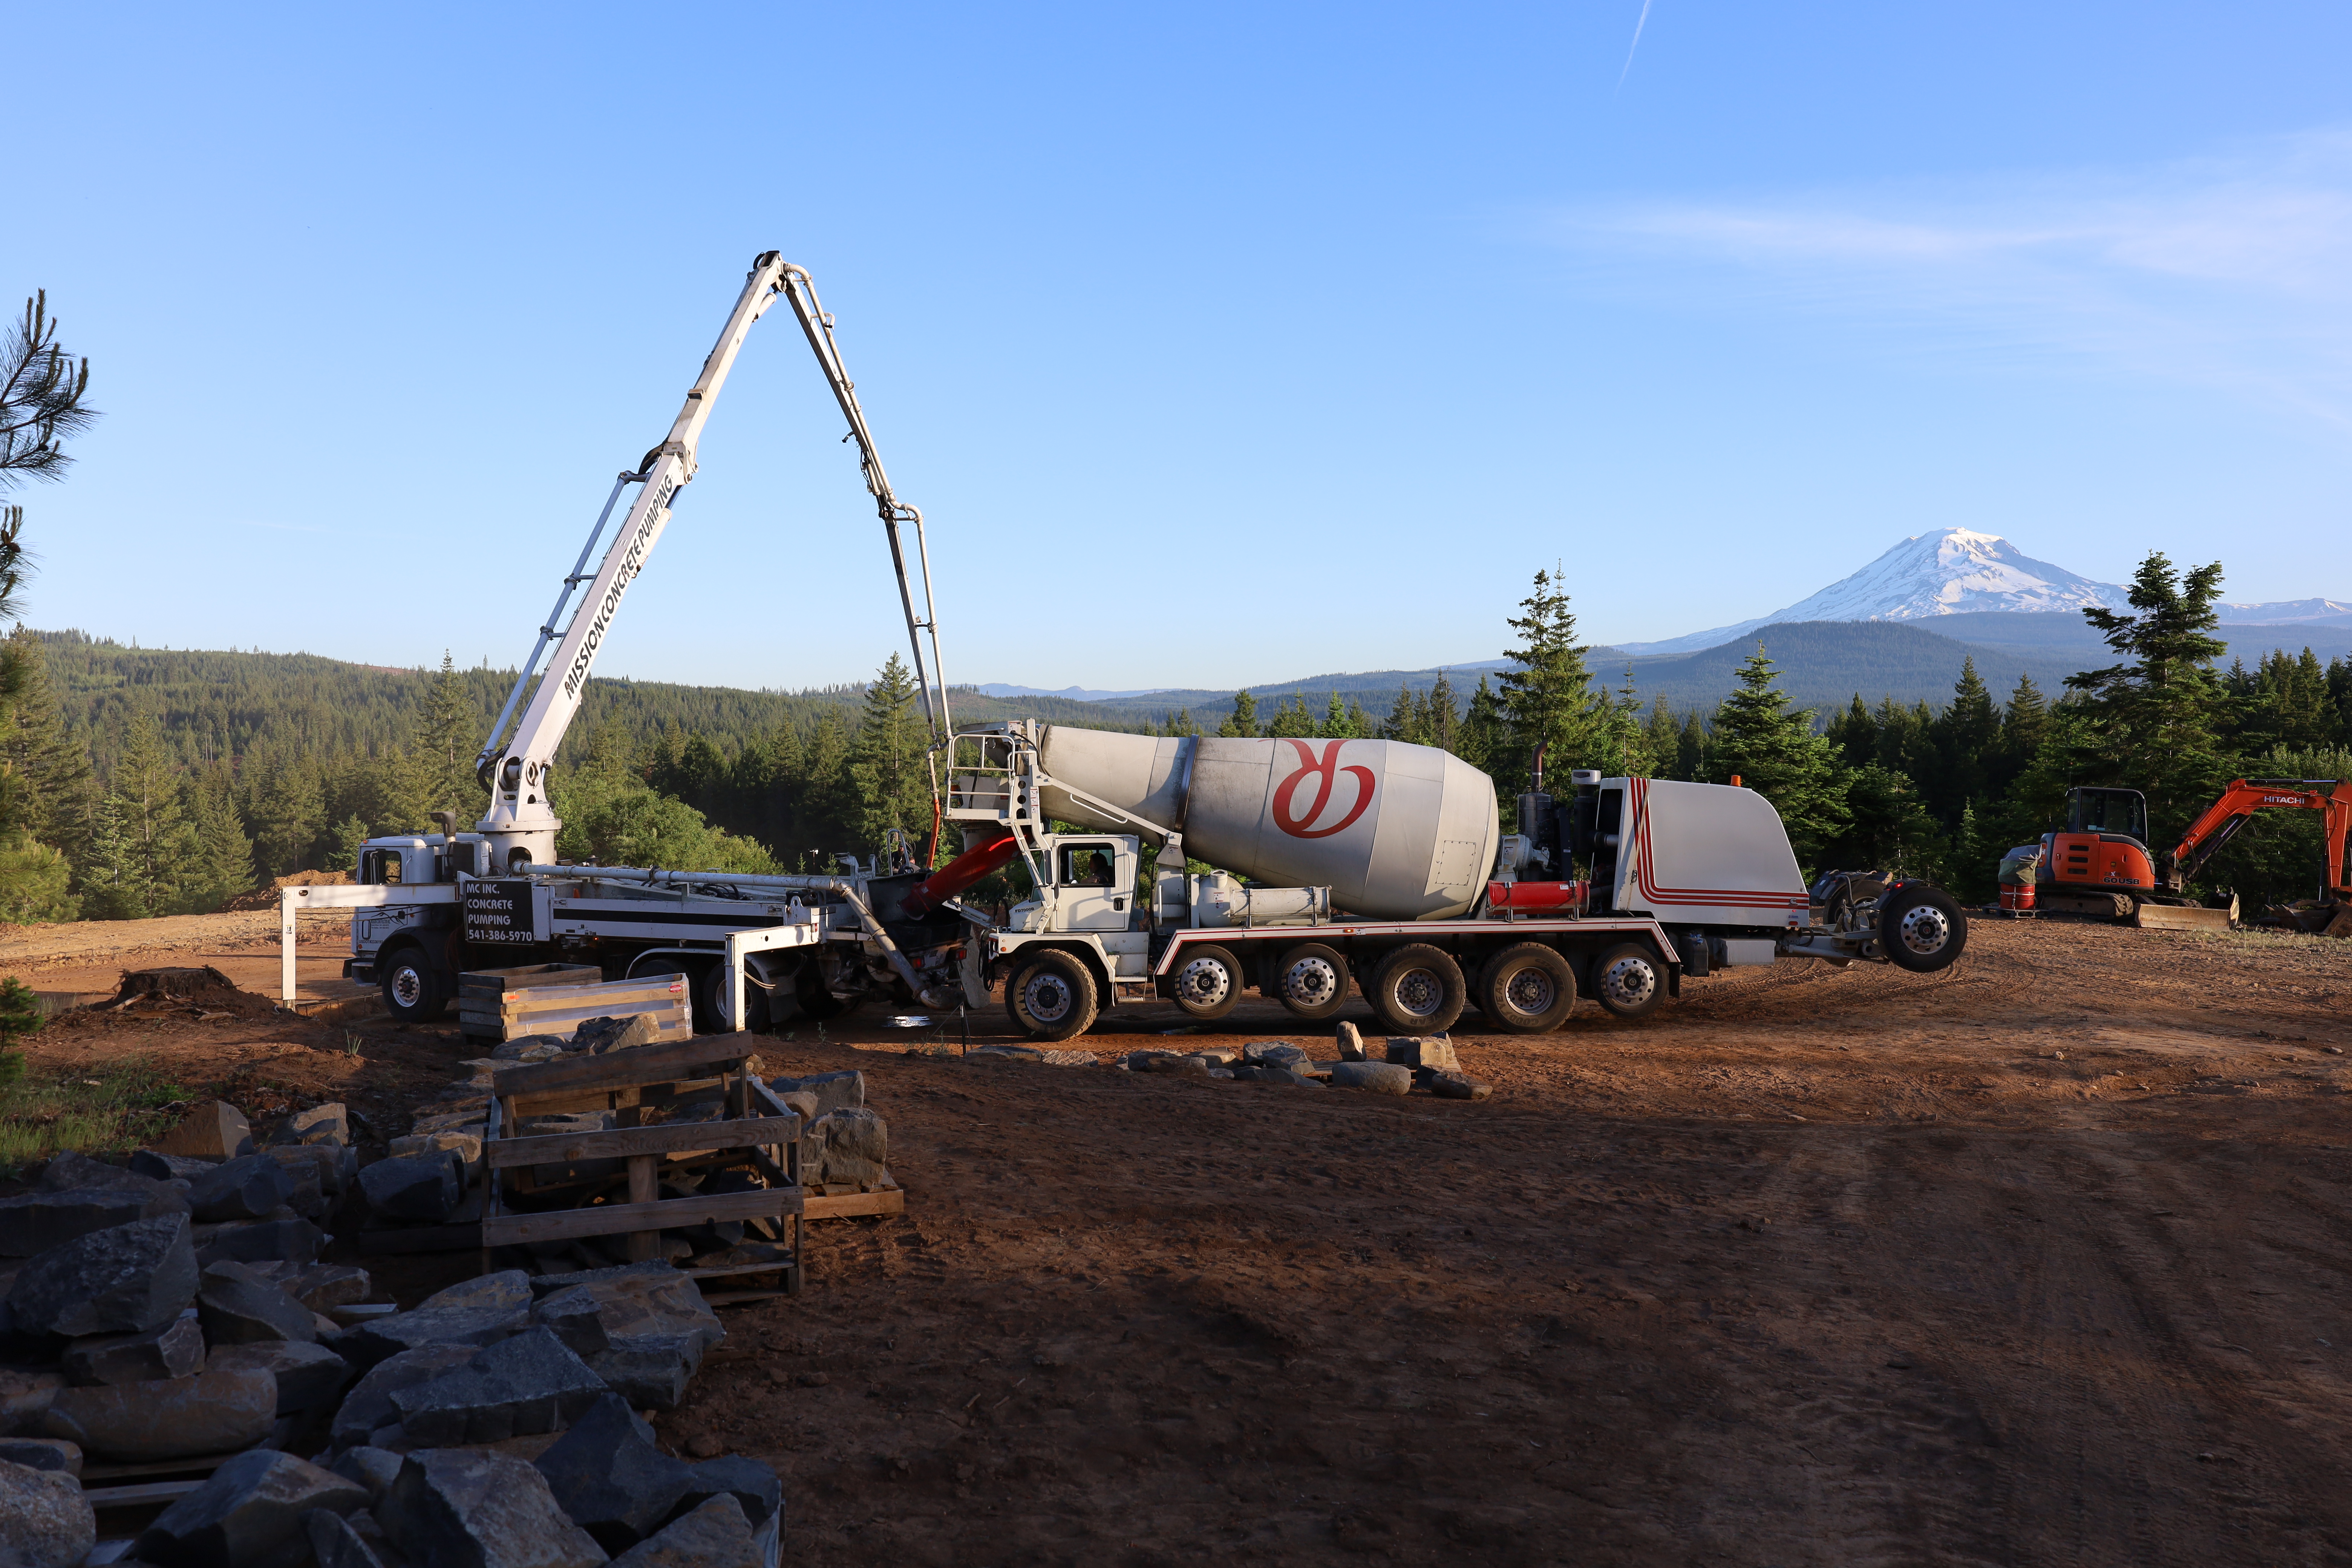
It was exciting to see the boom pump in action. The guy in the black shirt held the controls, guiding the boom. Matt held the end of the flexible hose for precise concrete distribution.


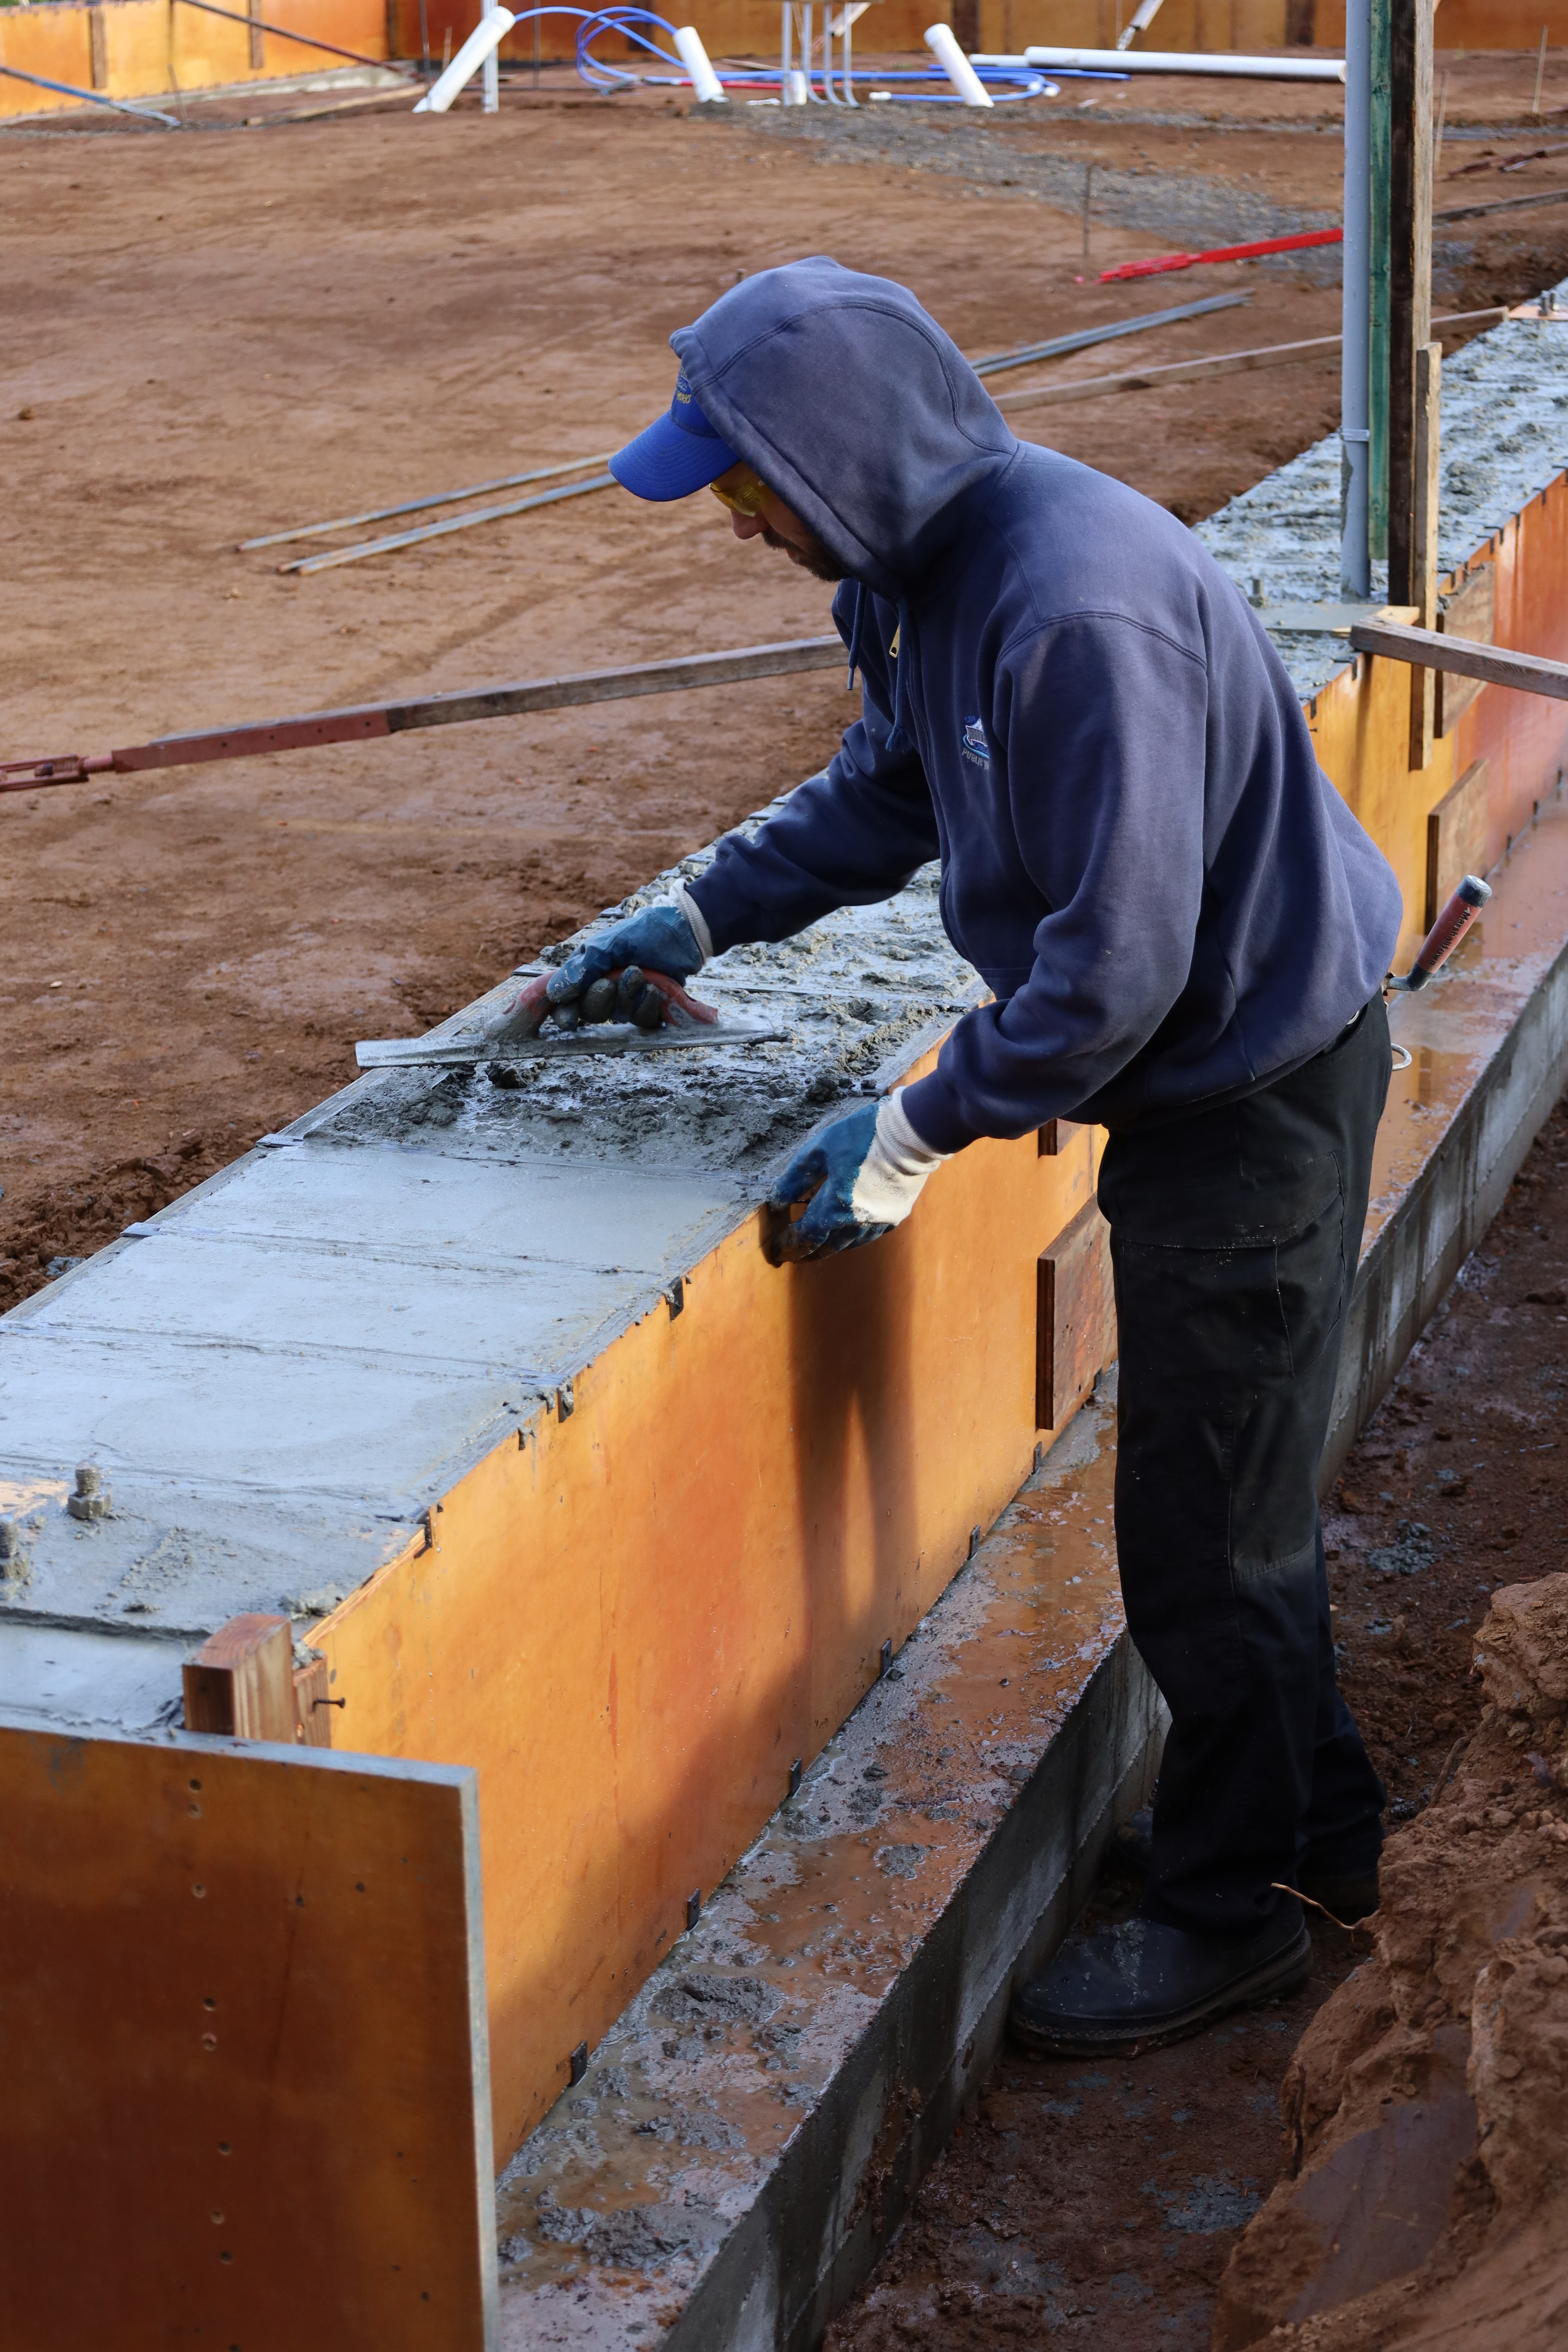
They were done pumping concrete by 9:30, but the crew was there a bit longer to screed the top surface. The crew worked quickly and did a great job working around all of the rebar to smooth out the top surface.
It looked really nice!
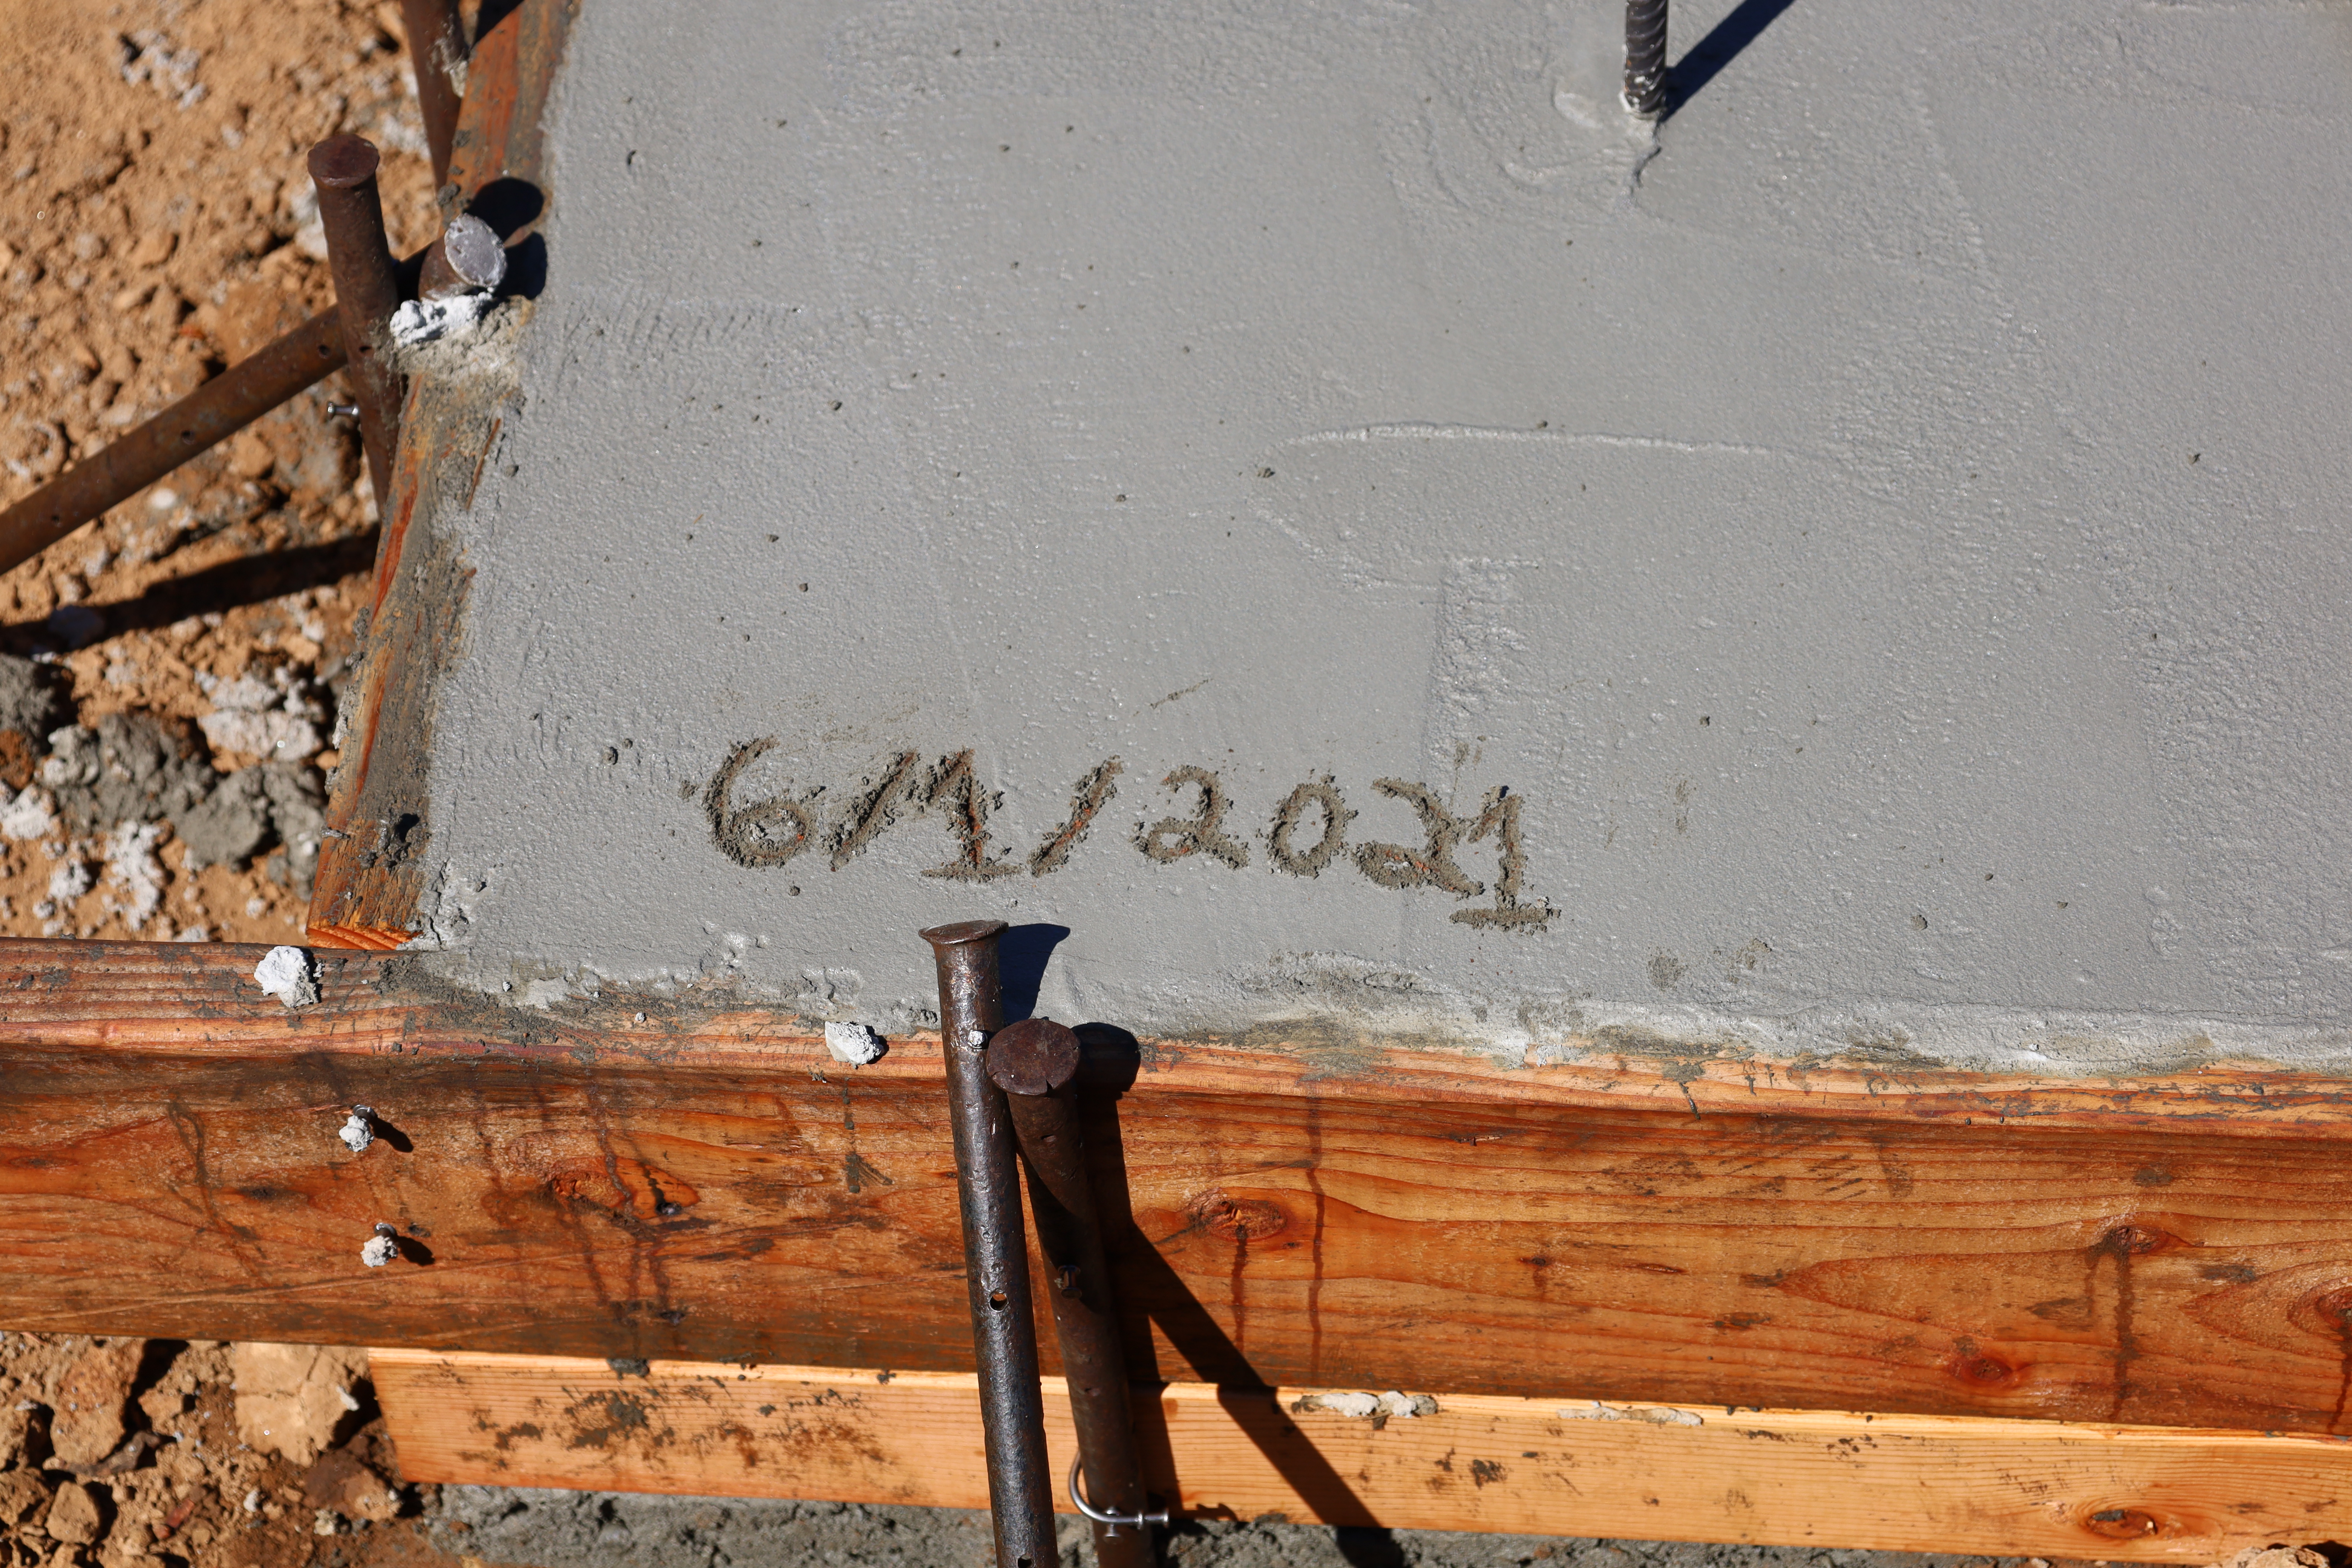
Sam wrote the date in the footing after they left.
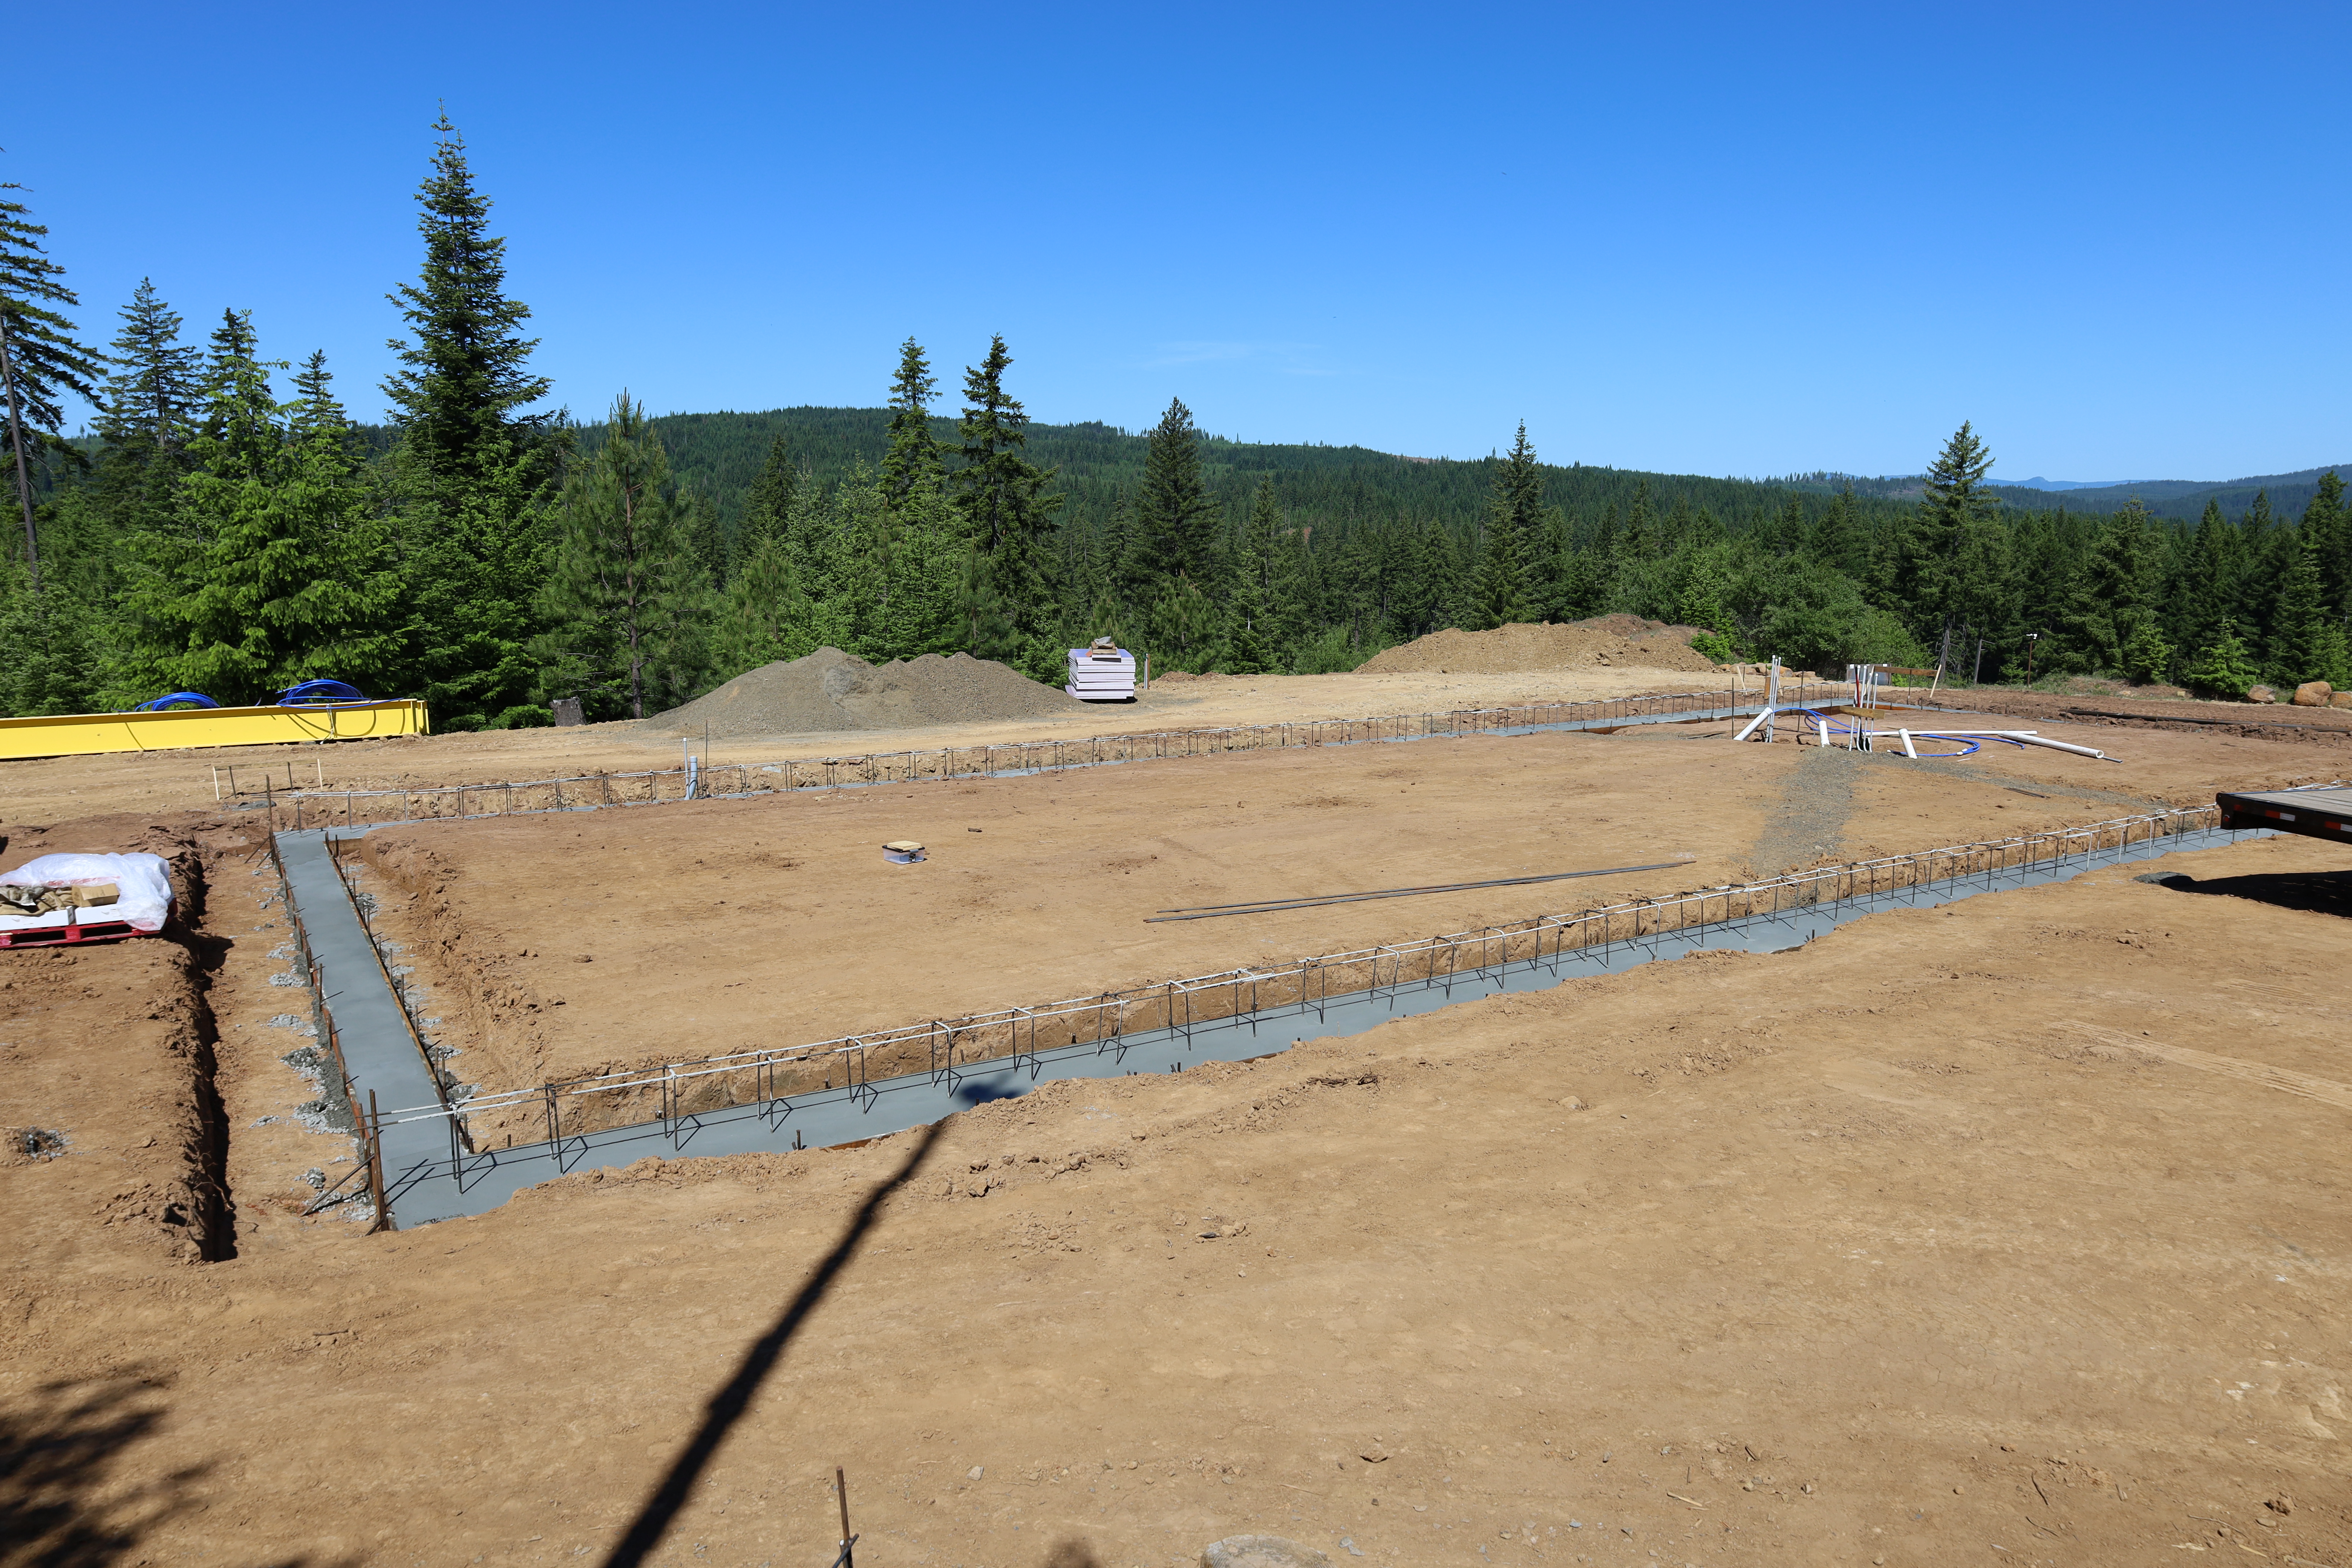
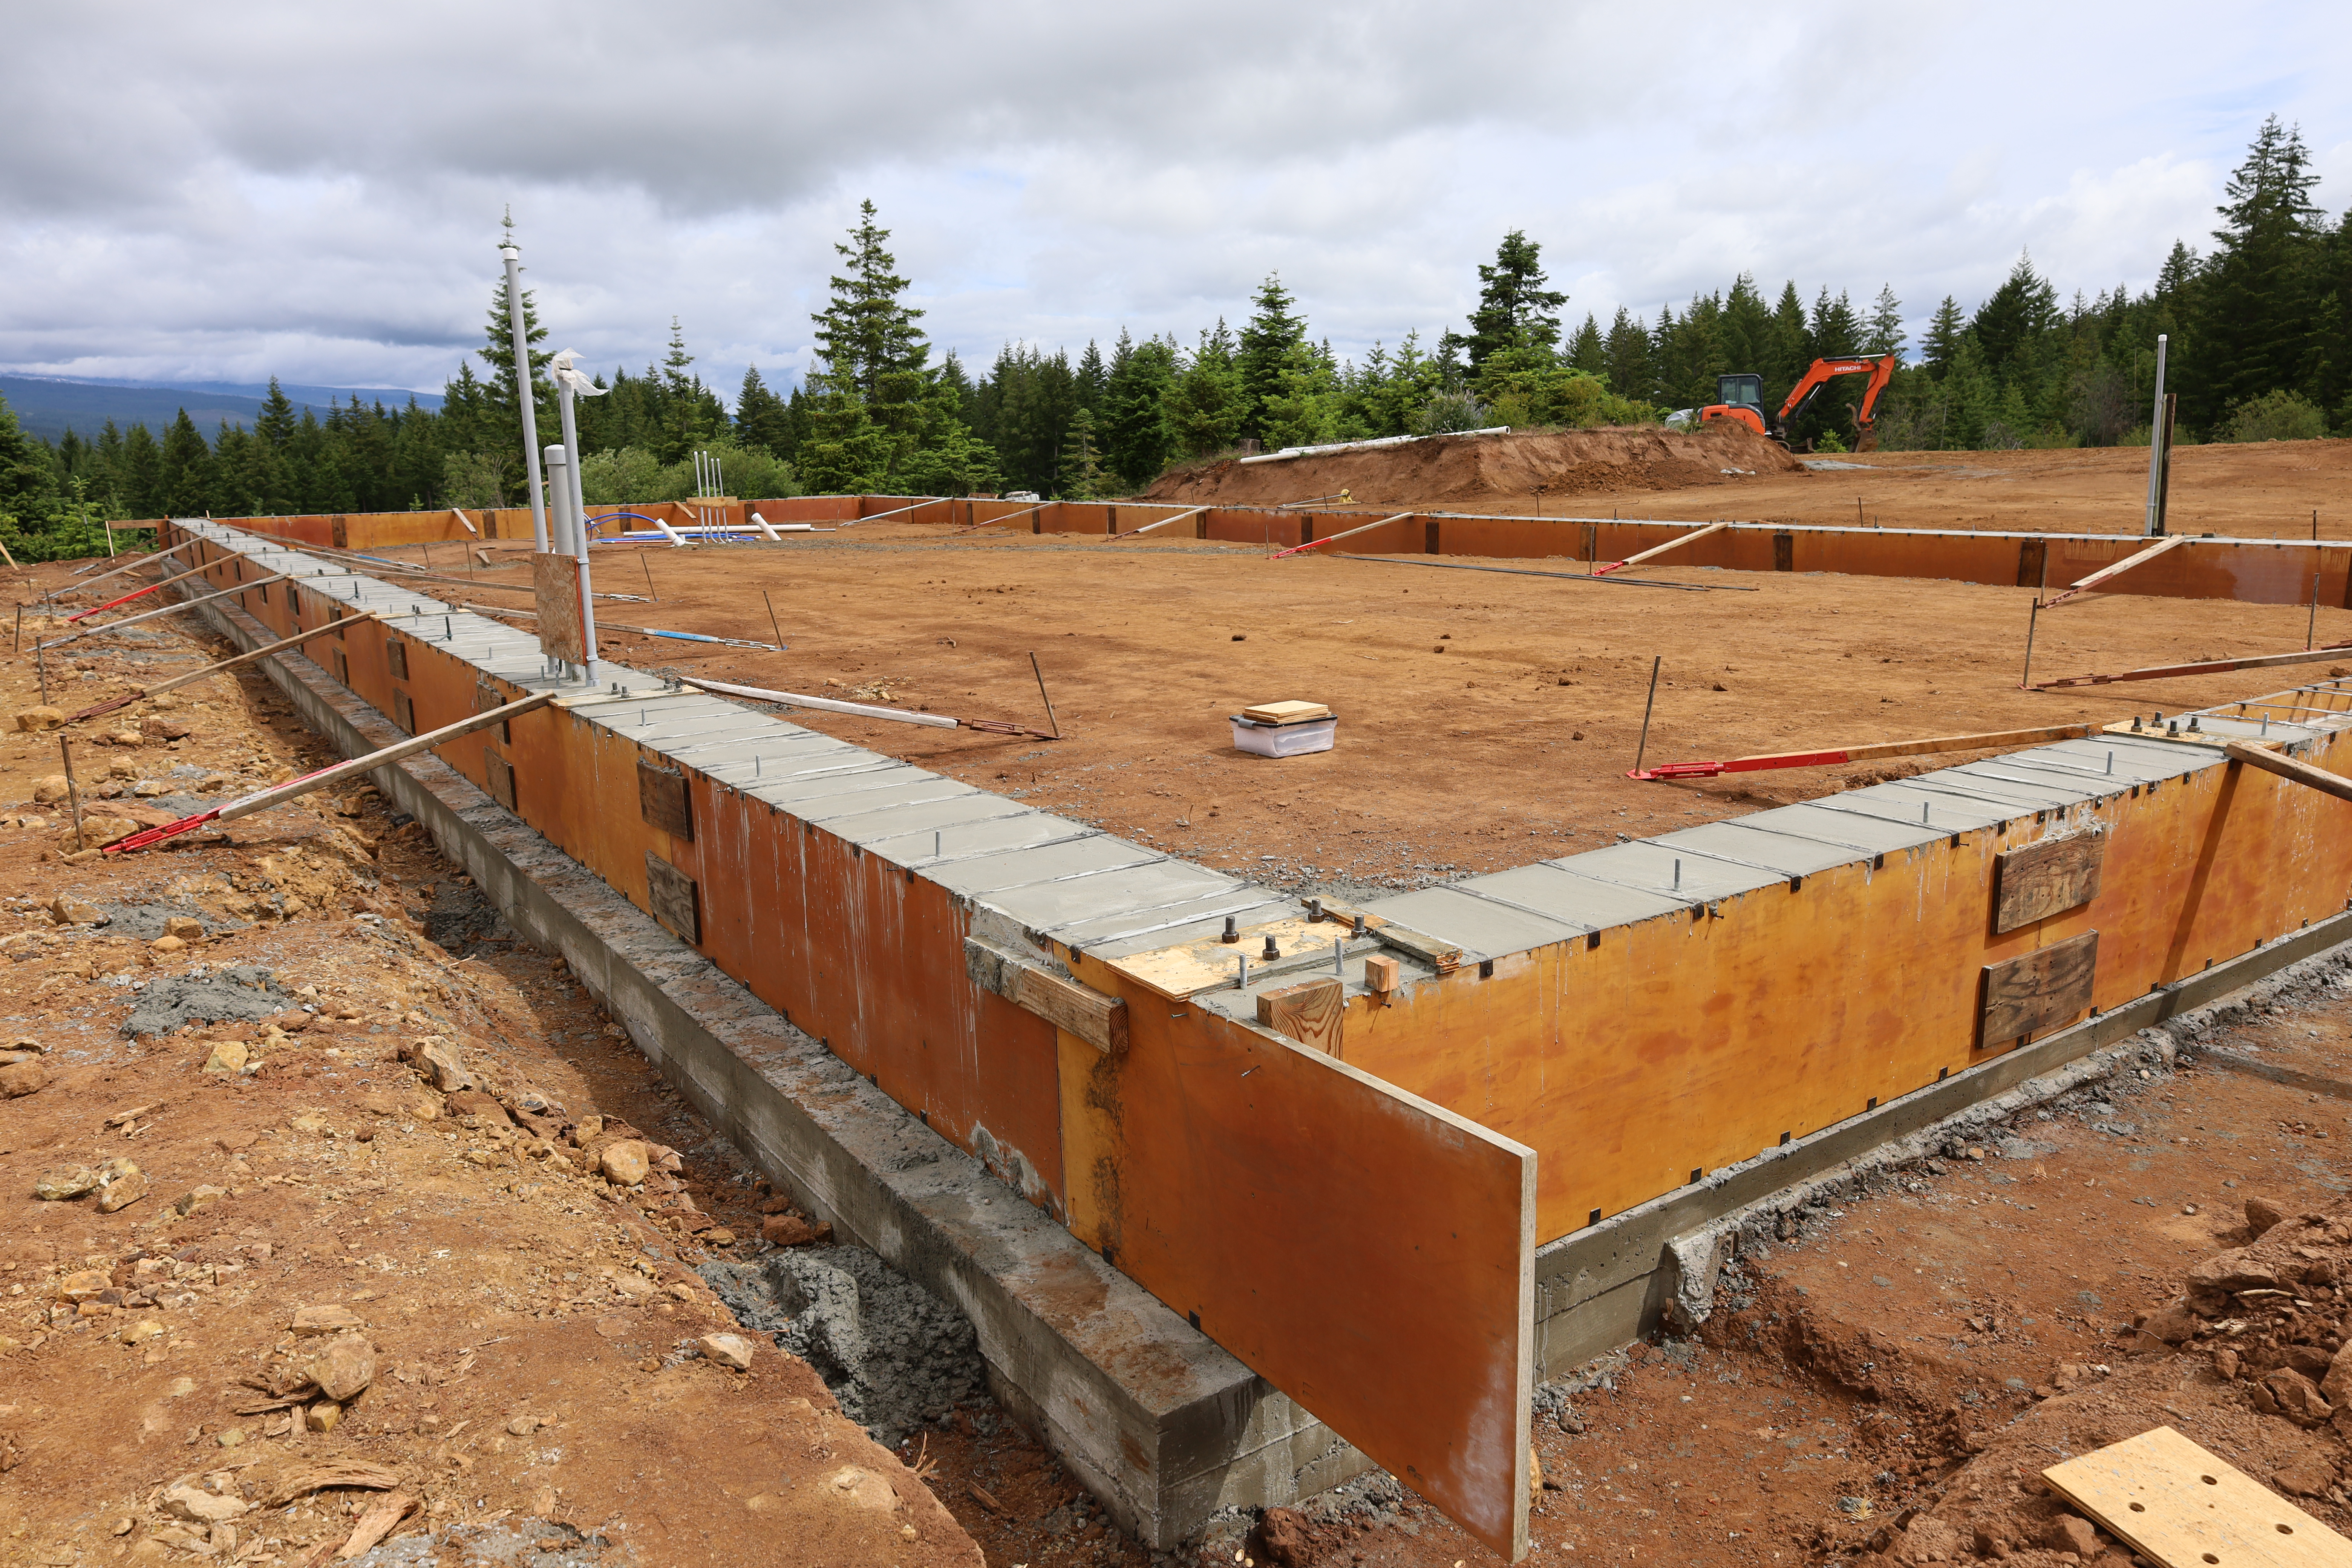
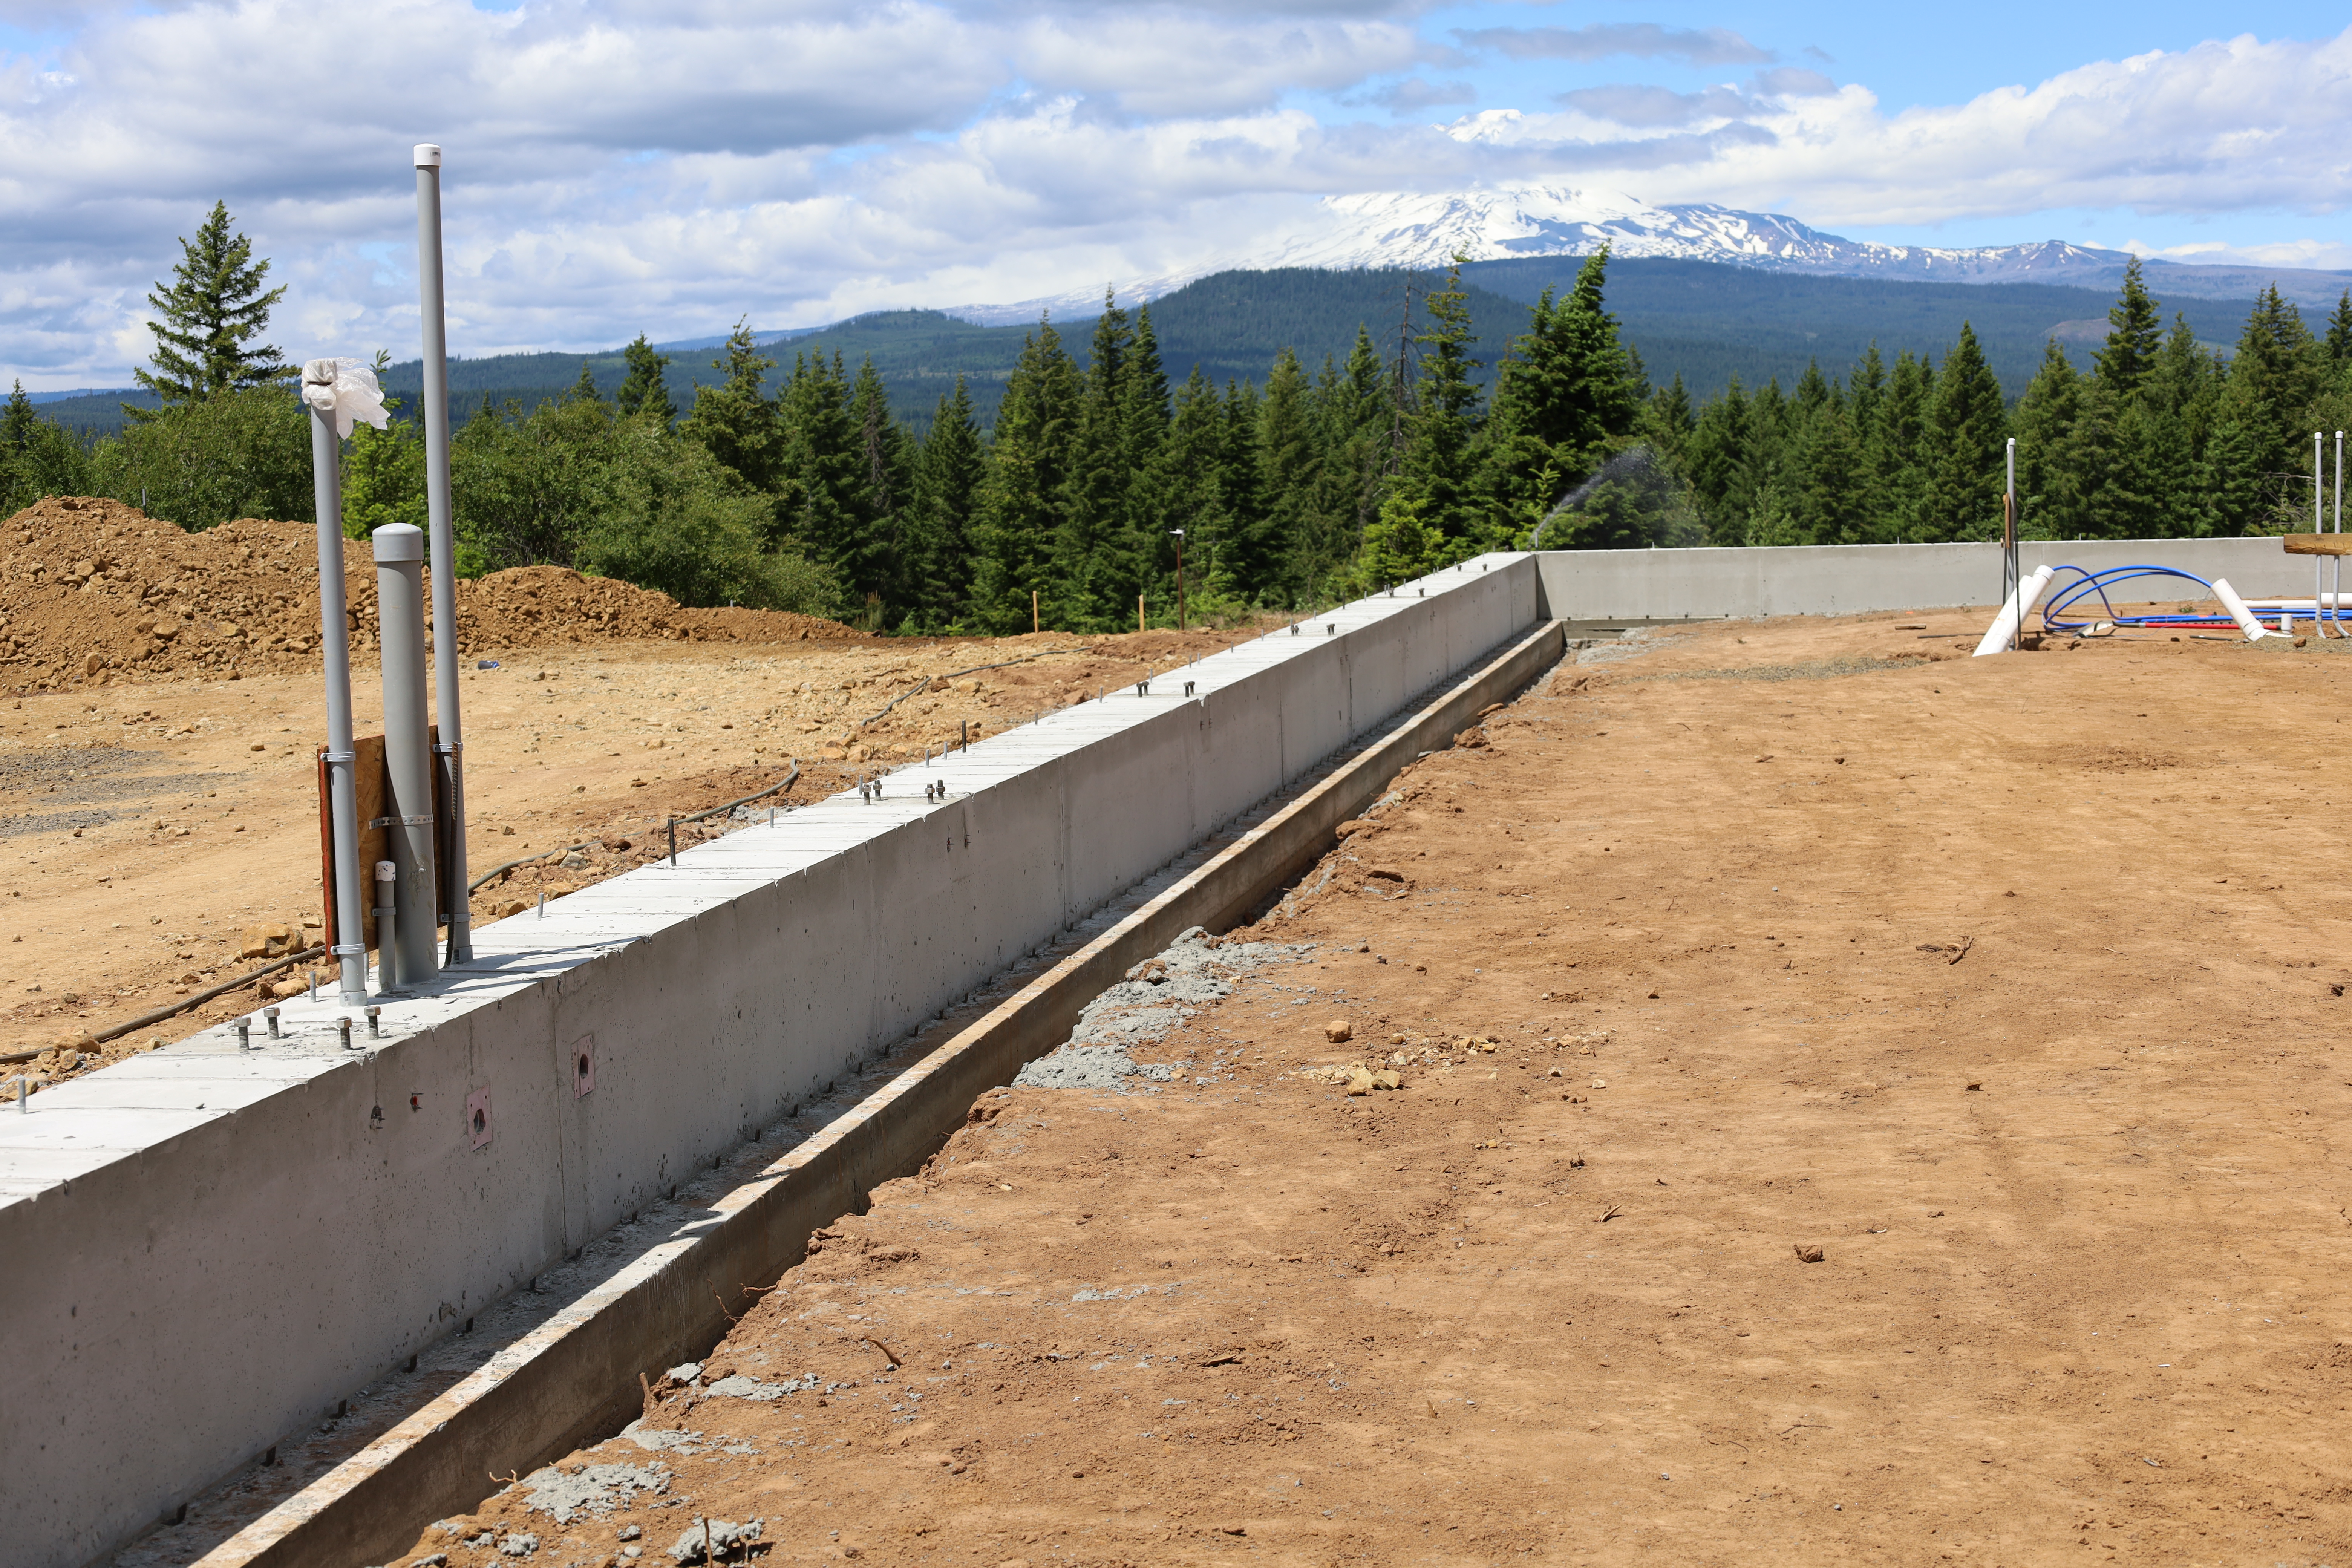
The crew returned the following day to remove the wood forms and to start preparing for the next pour – the stem wall. The stem wall sits on the footing and is tied to it with the hoops (those top hat things). It is 2 feet tall, 18 inches wide along the long sides, and 12 inches wide along the short sides. Spacers along the top and bottom edges of the forms help to hold the forms parallel.
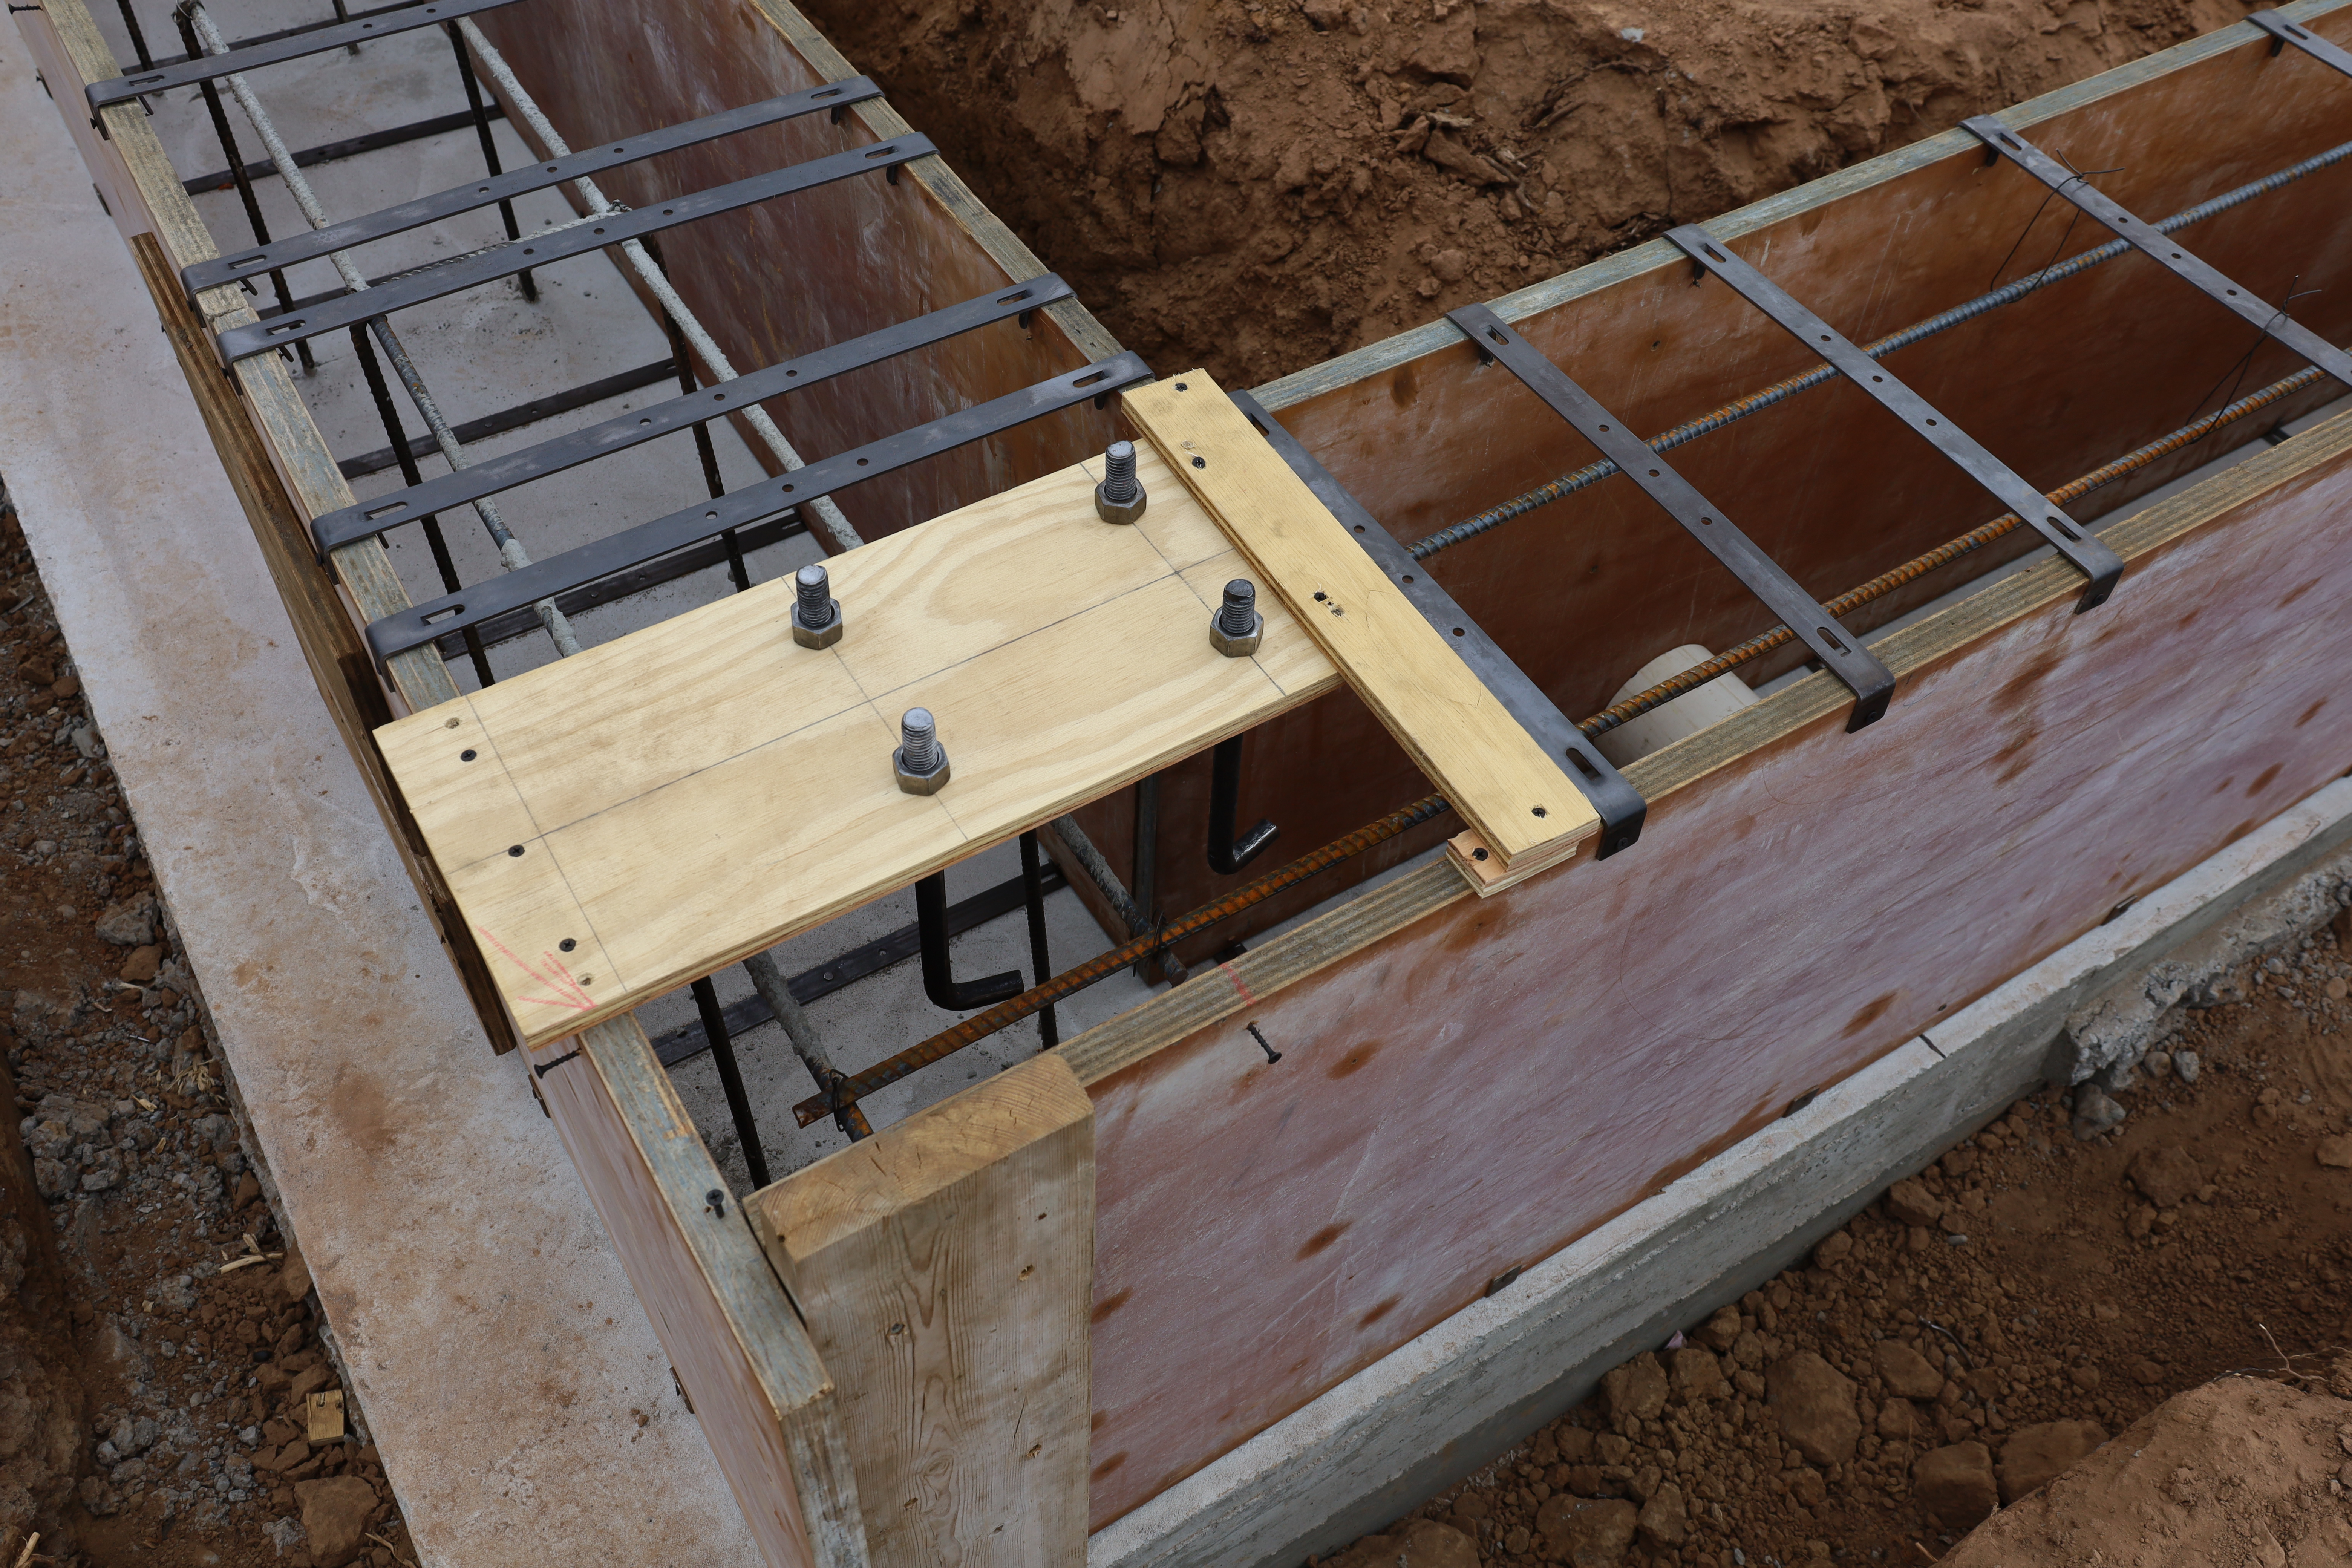
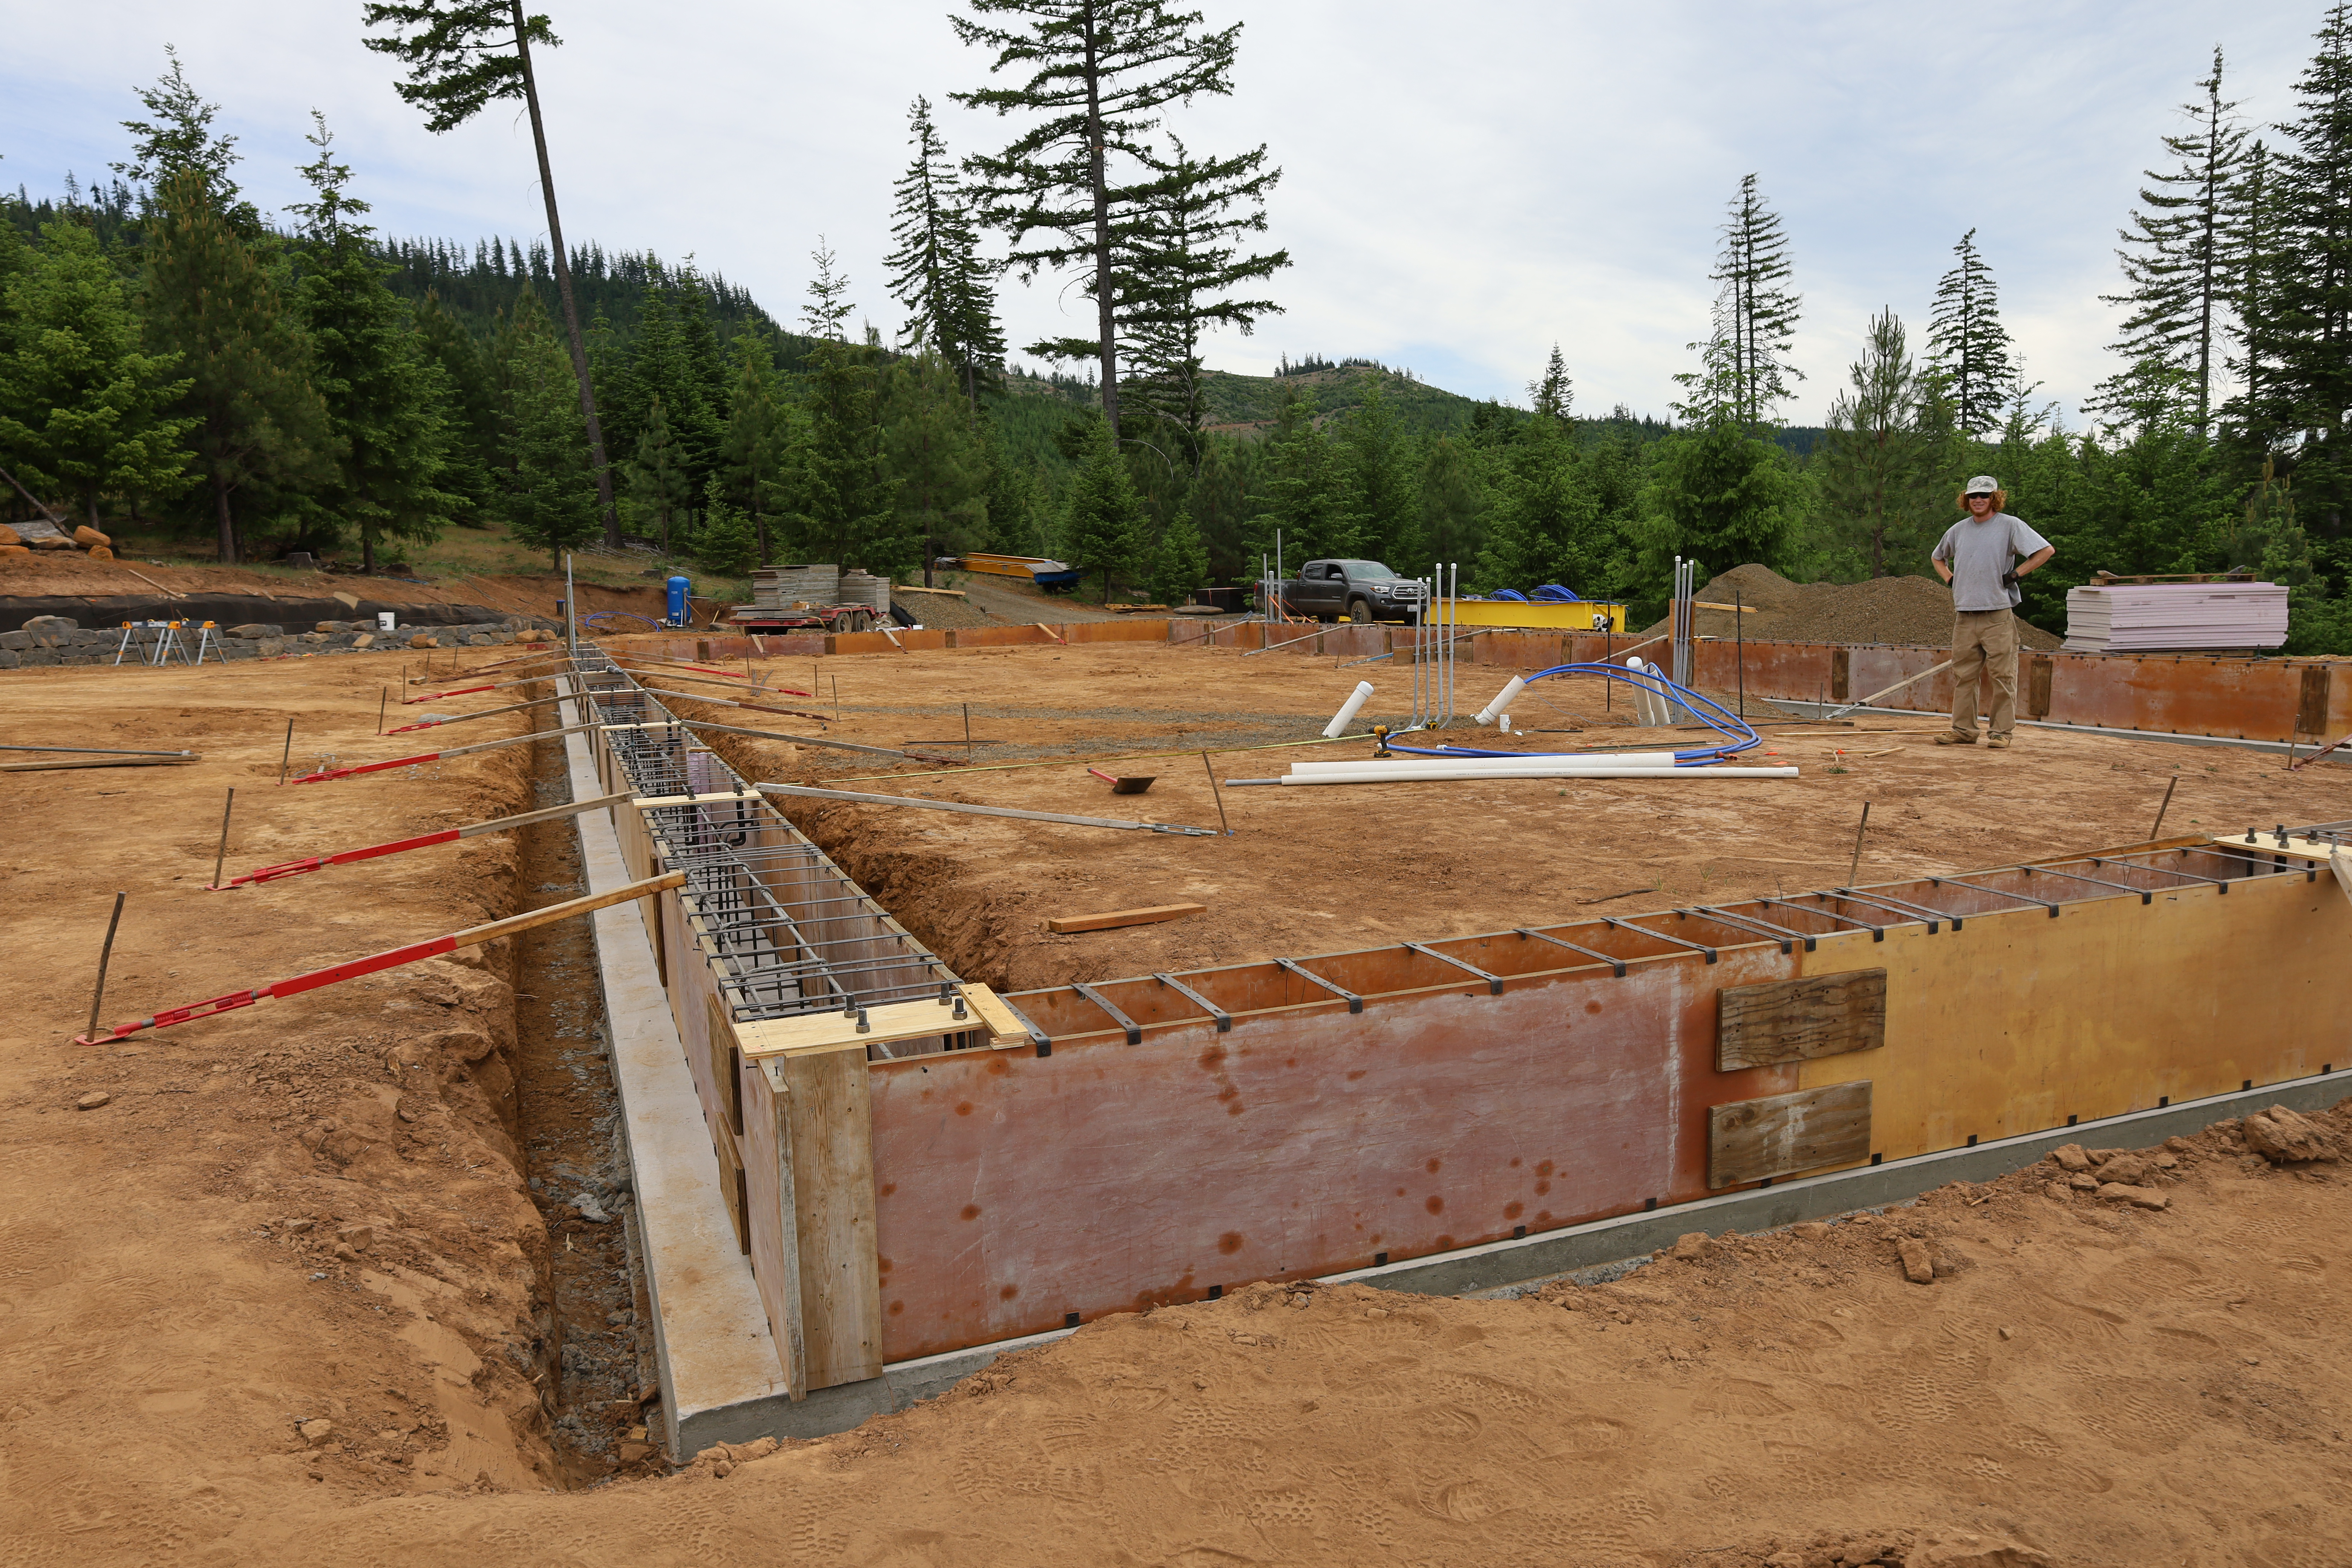


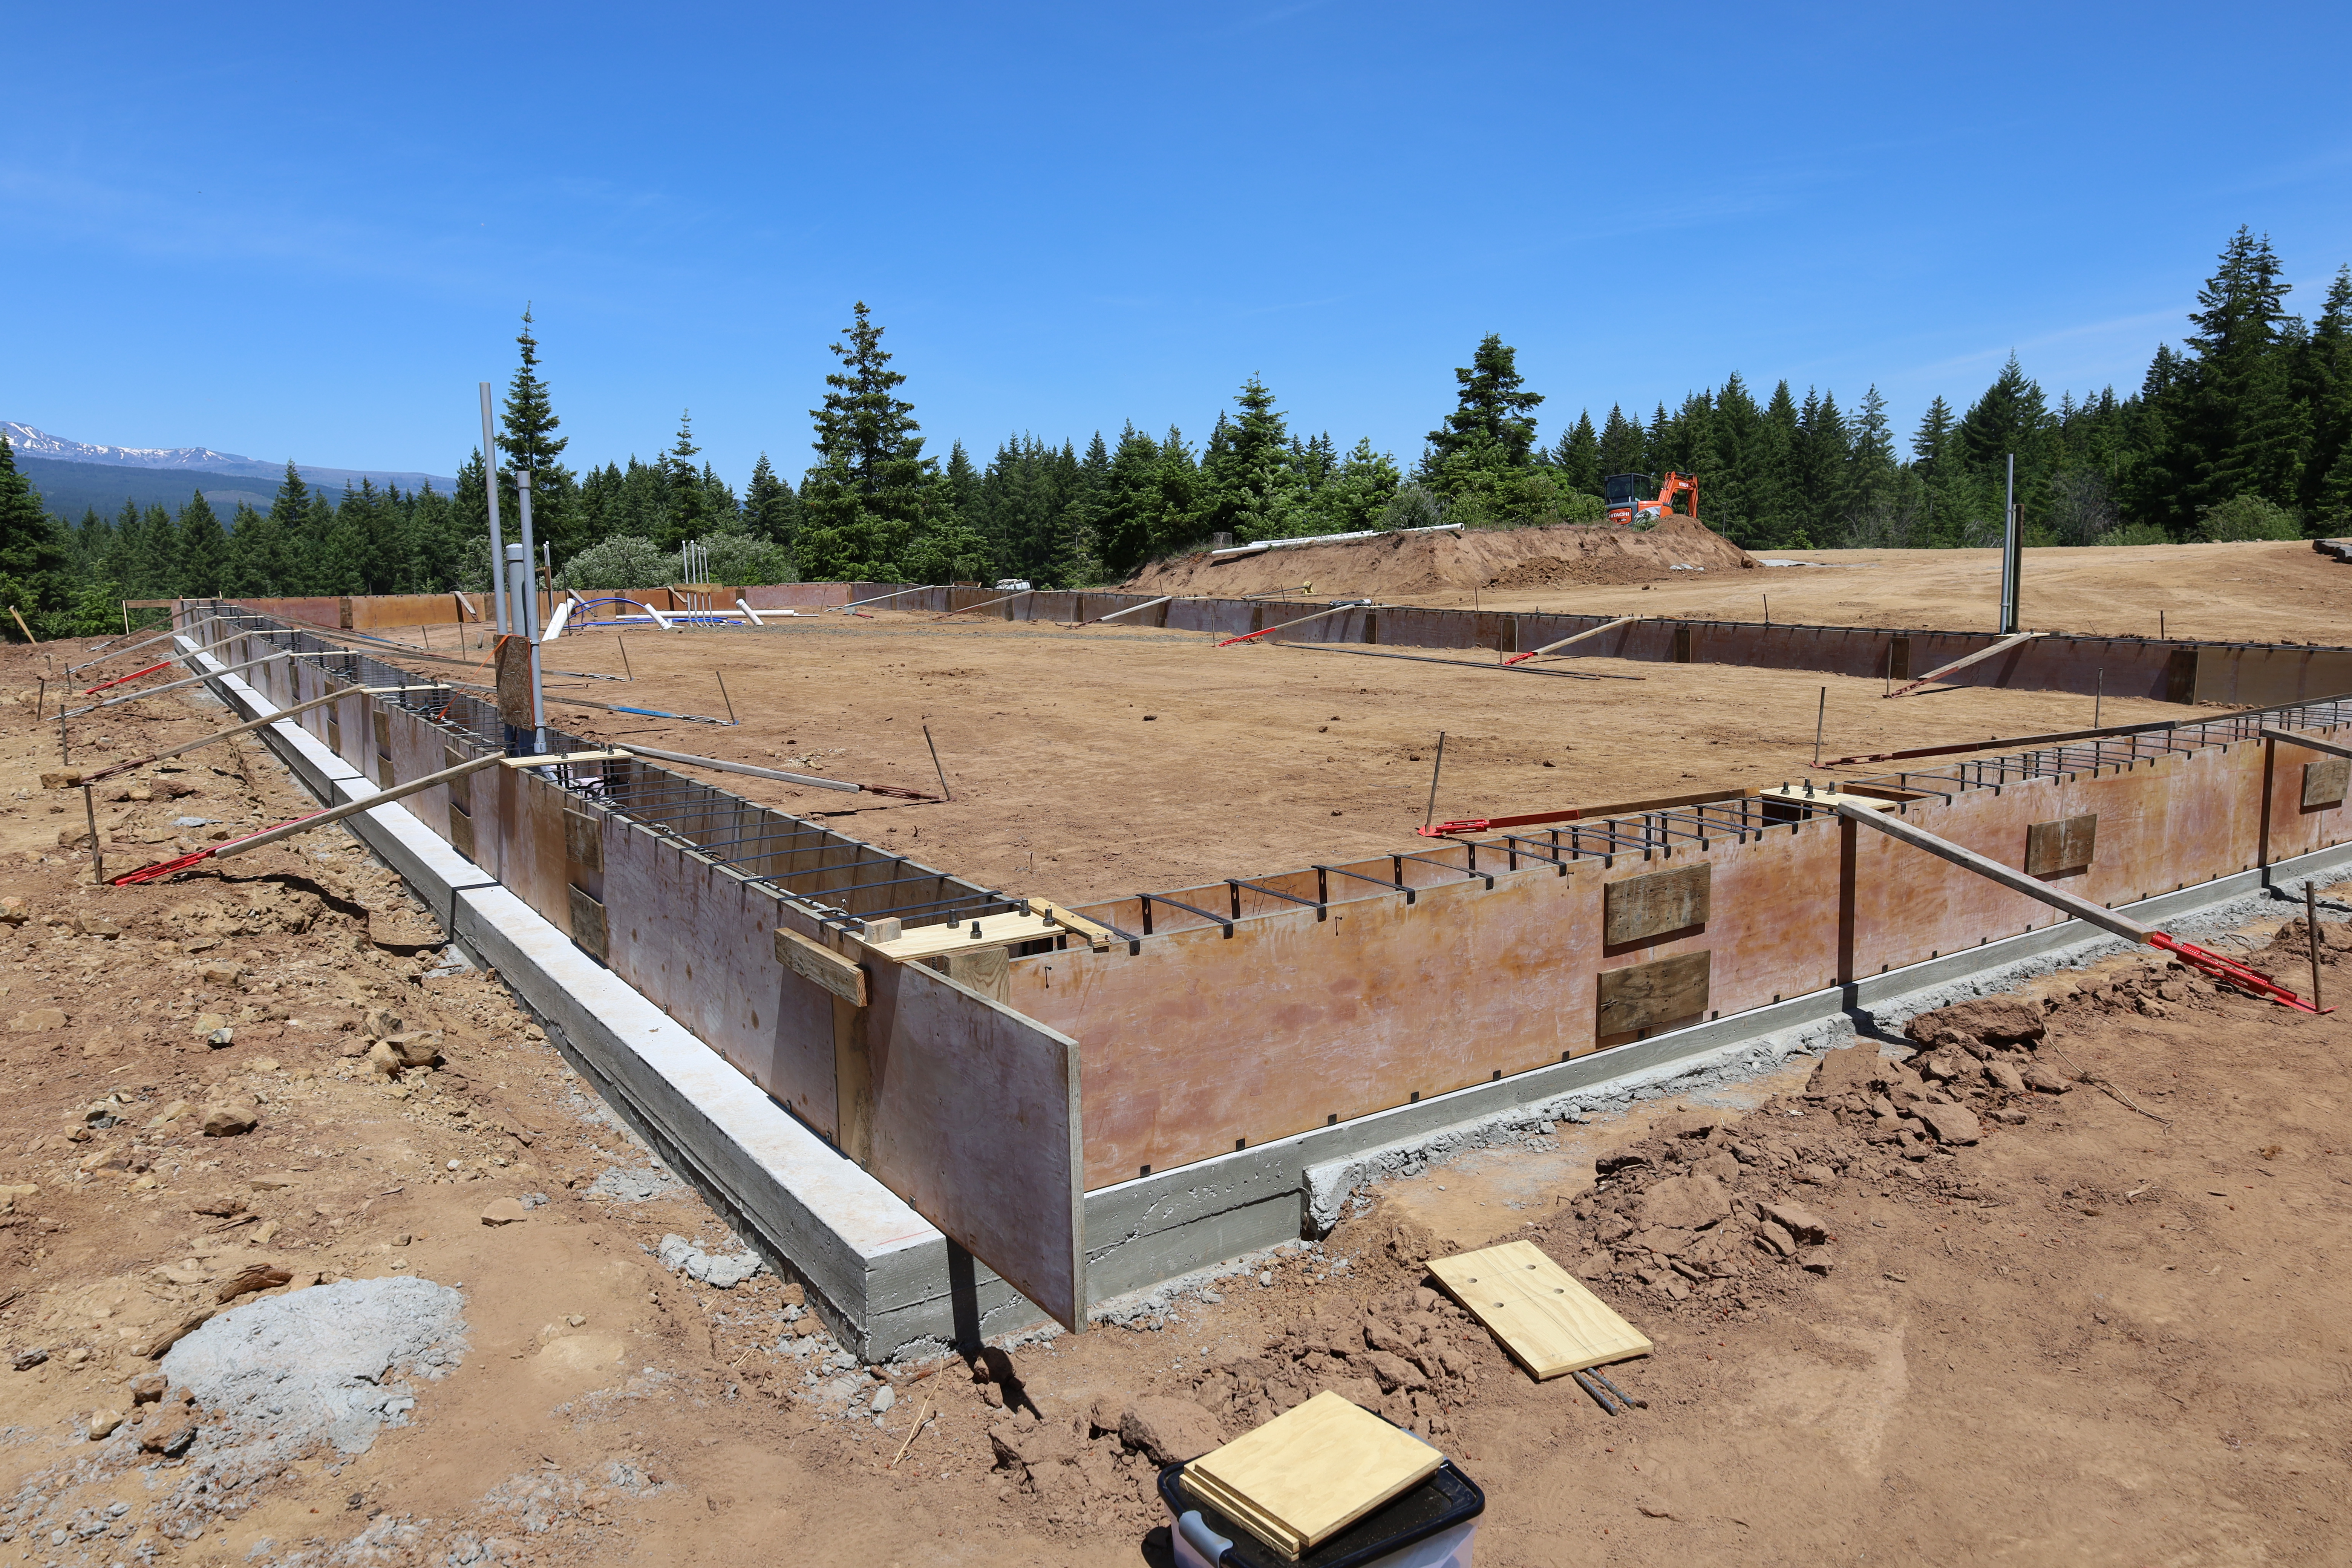
Because the long sides are so long and tall, additional supports with turnbuckles were set up to help shape the walls. The turnbuckles can also be adjusted to straighten out the walls while they are pouring concrete, as the pressure tends to push the walls outwards.

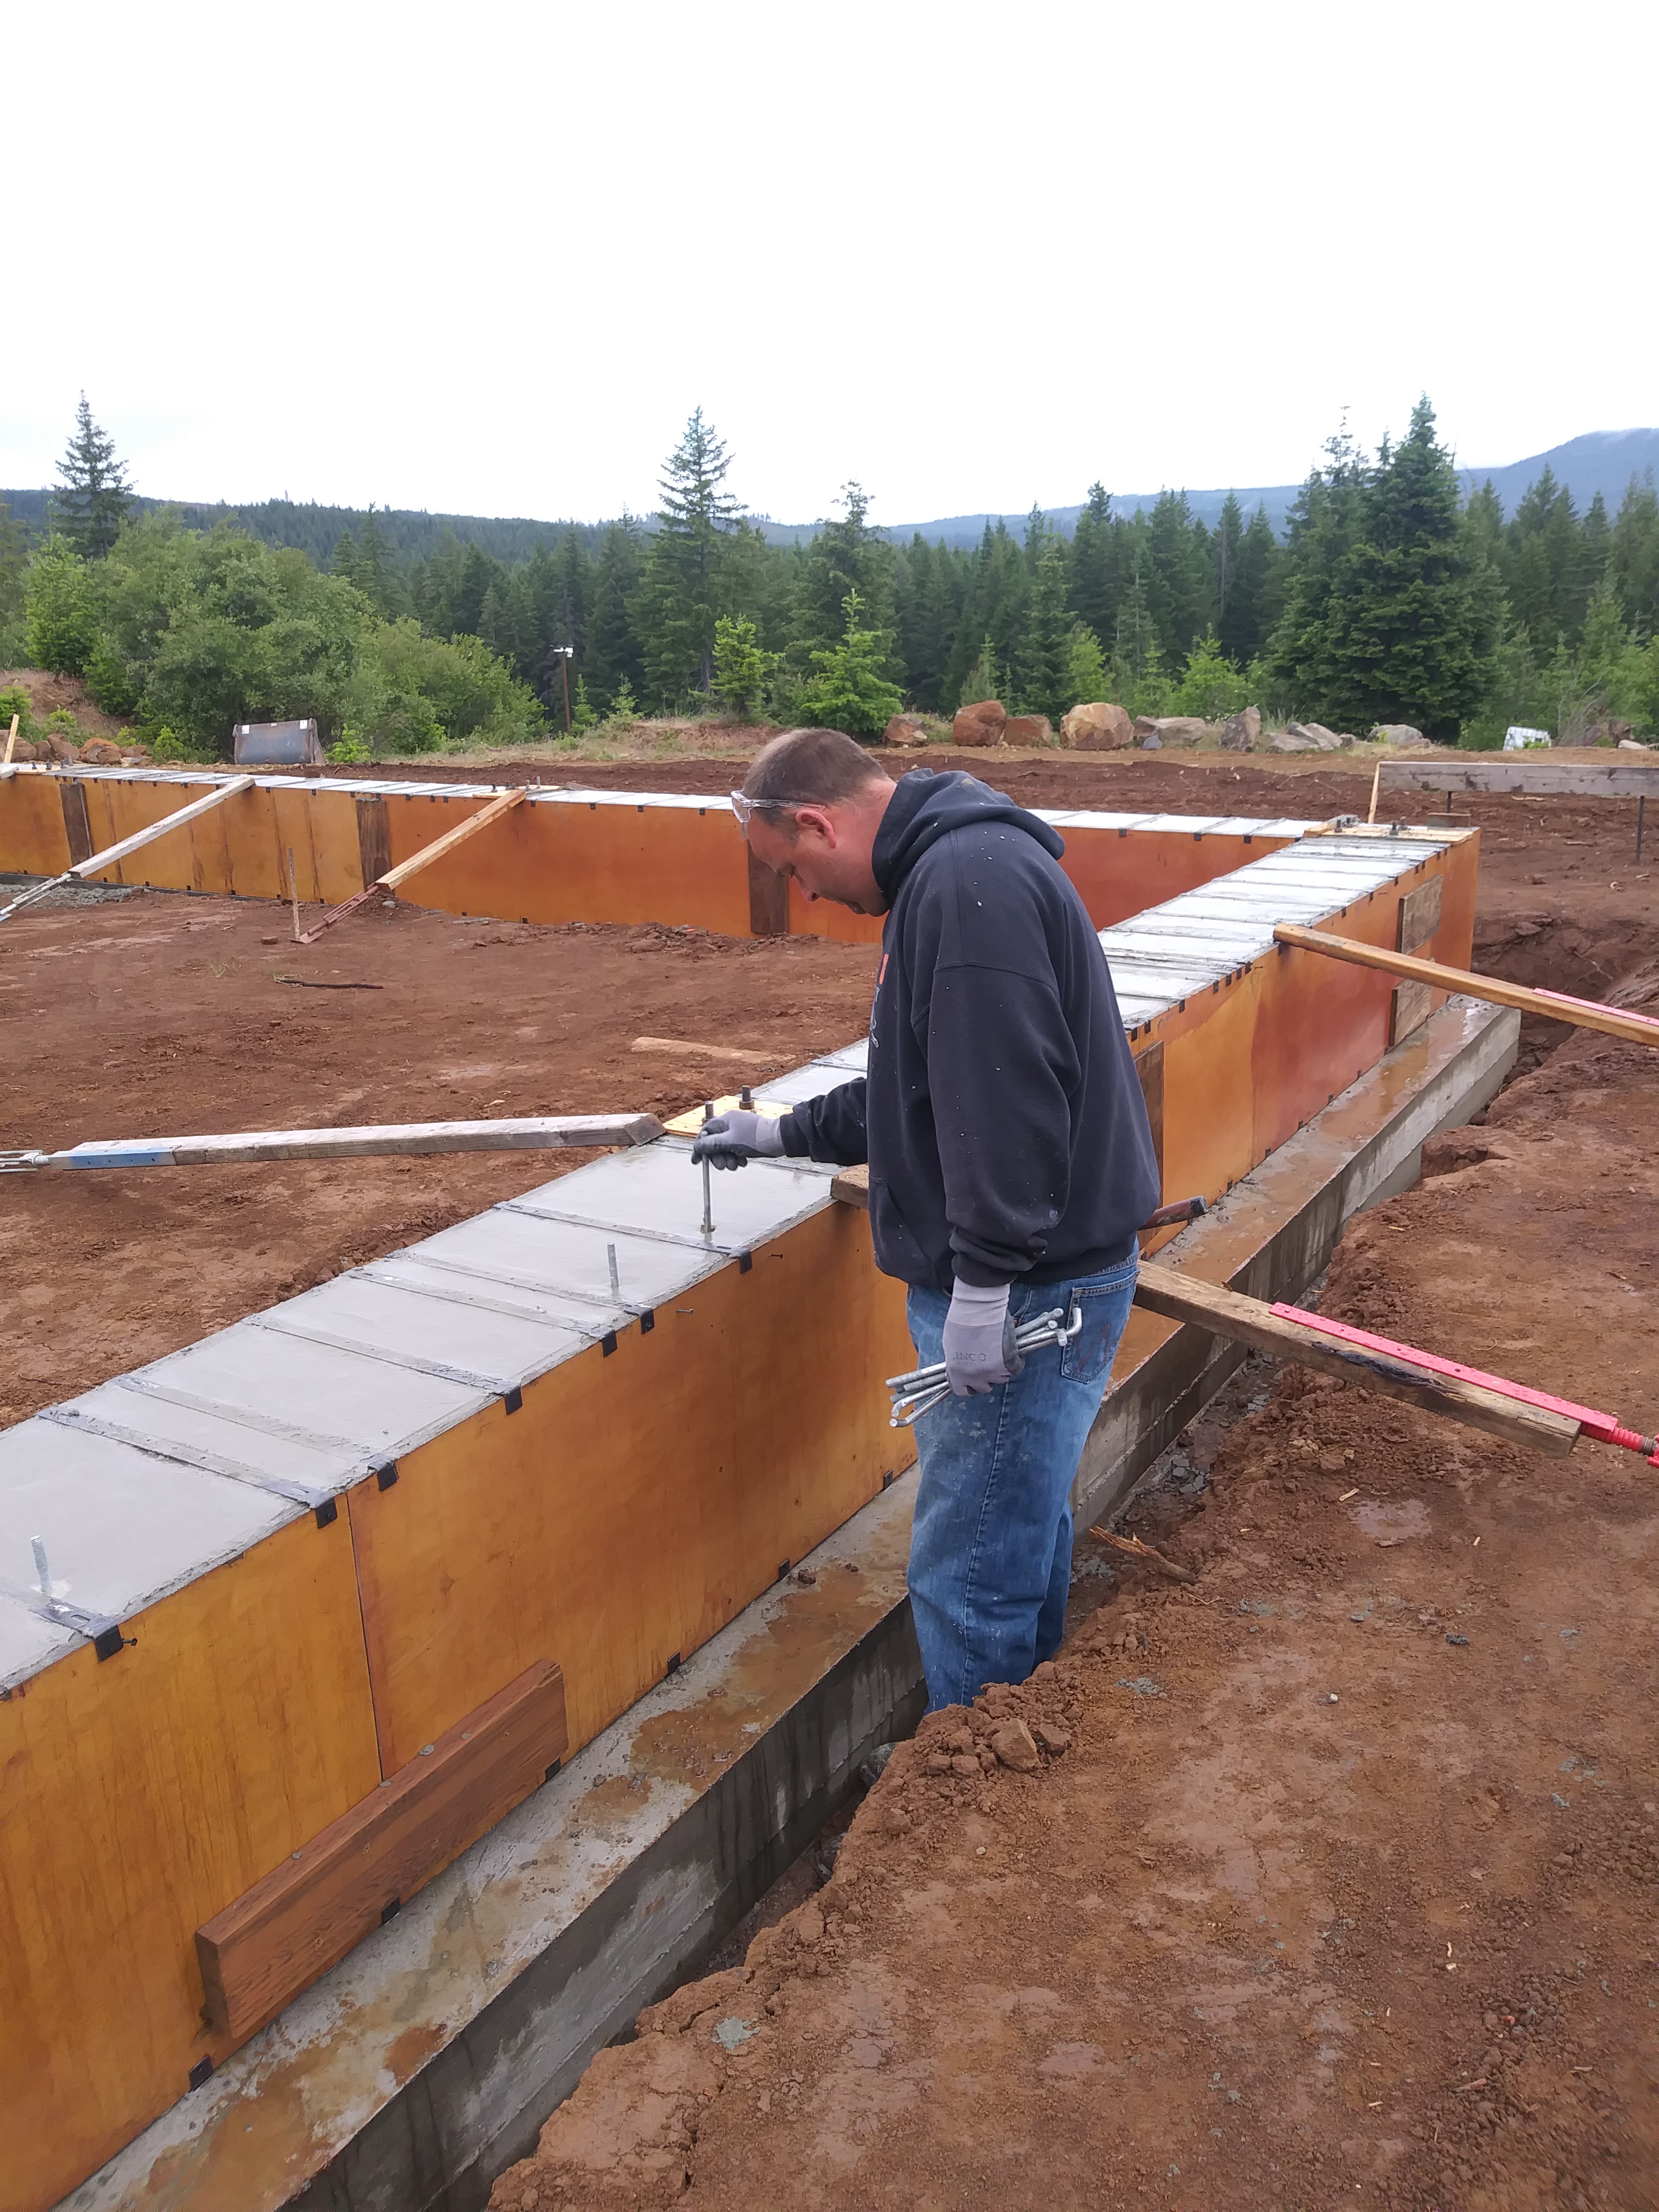
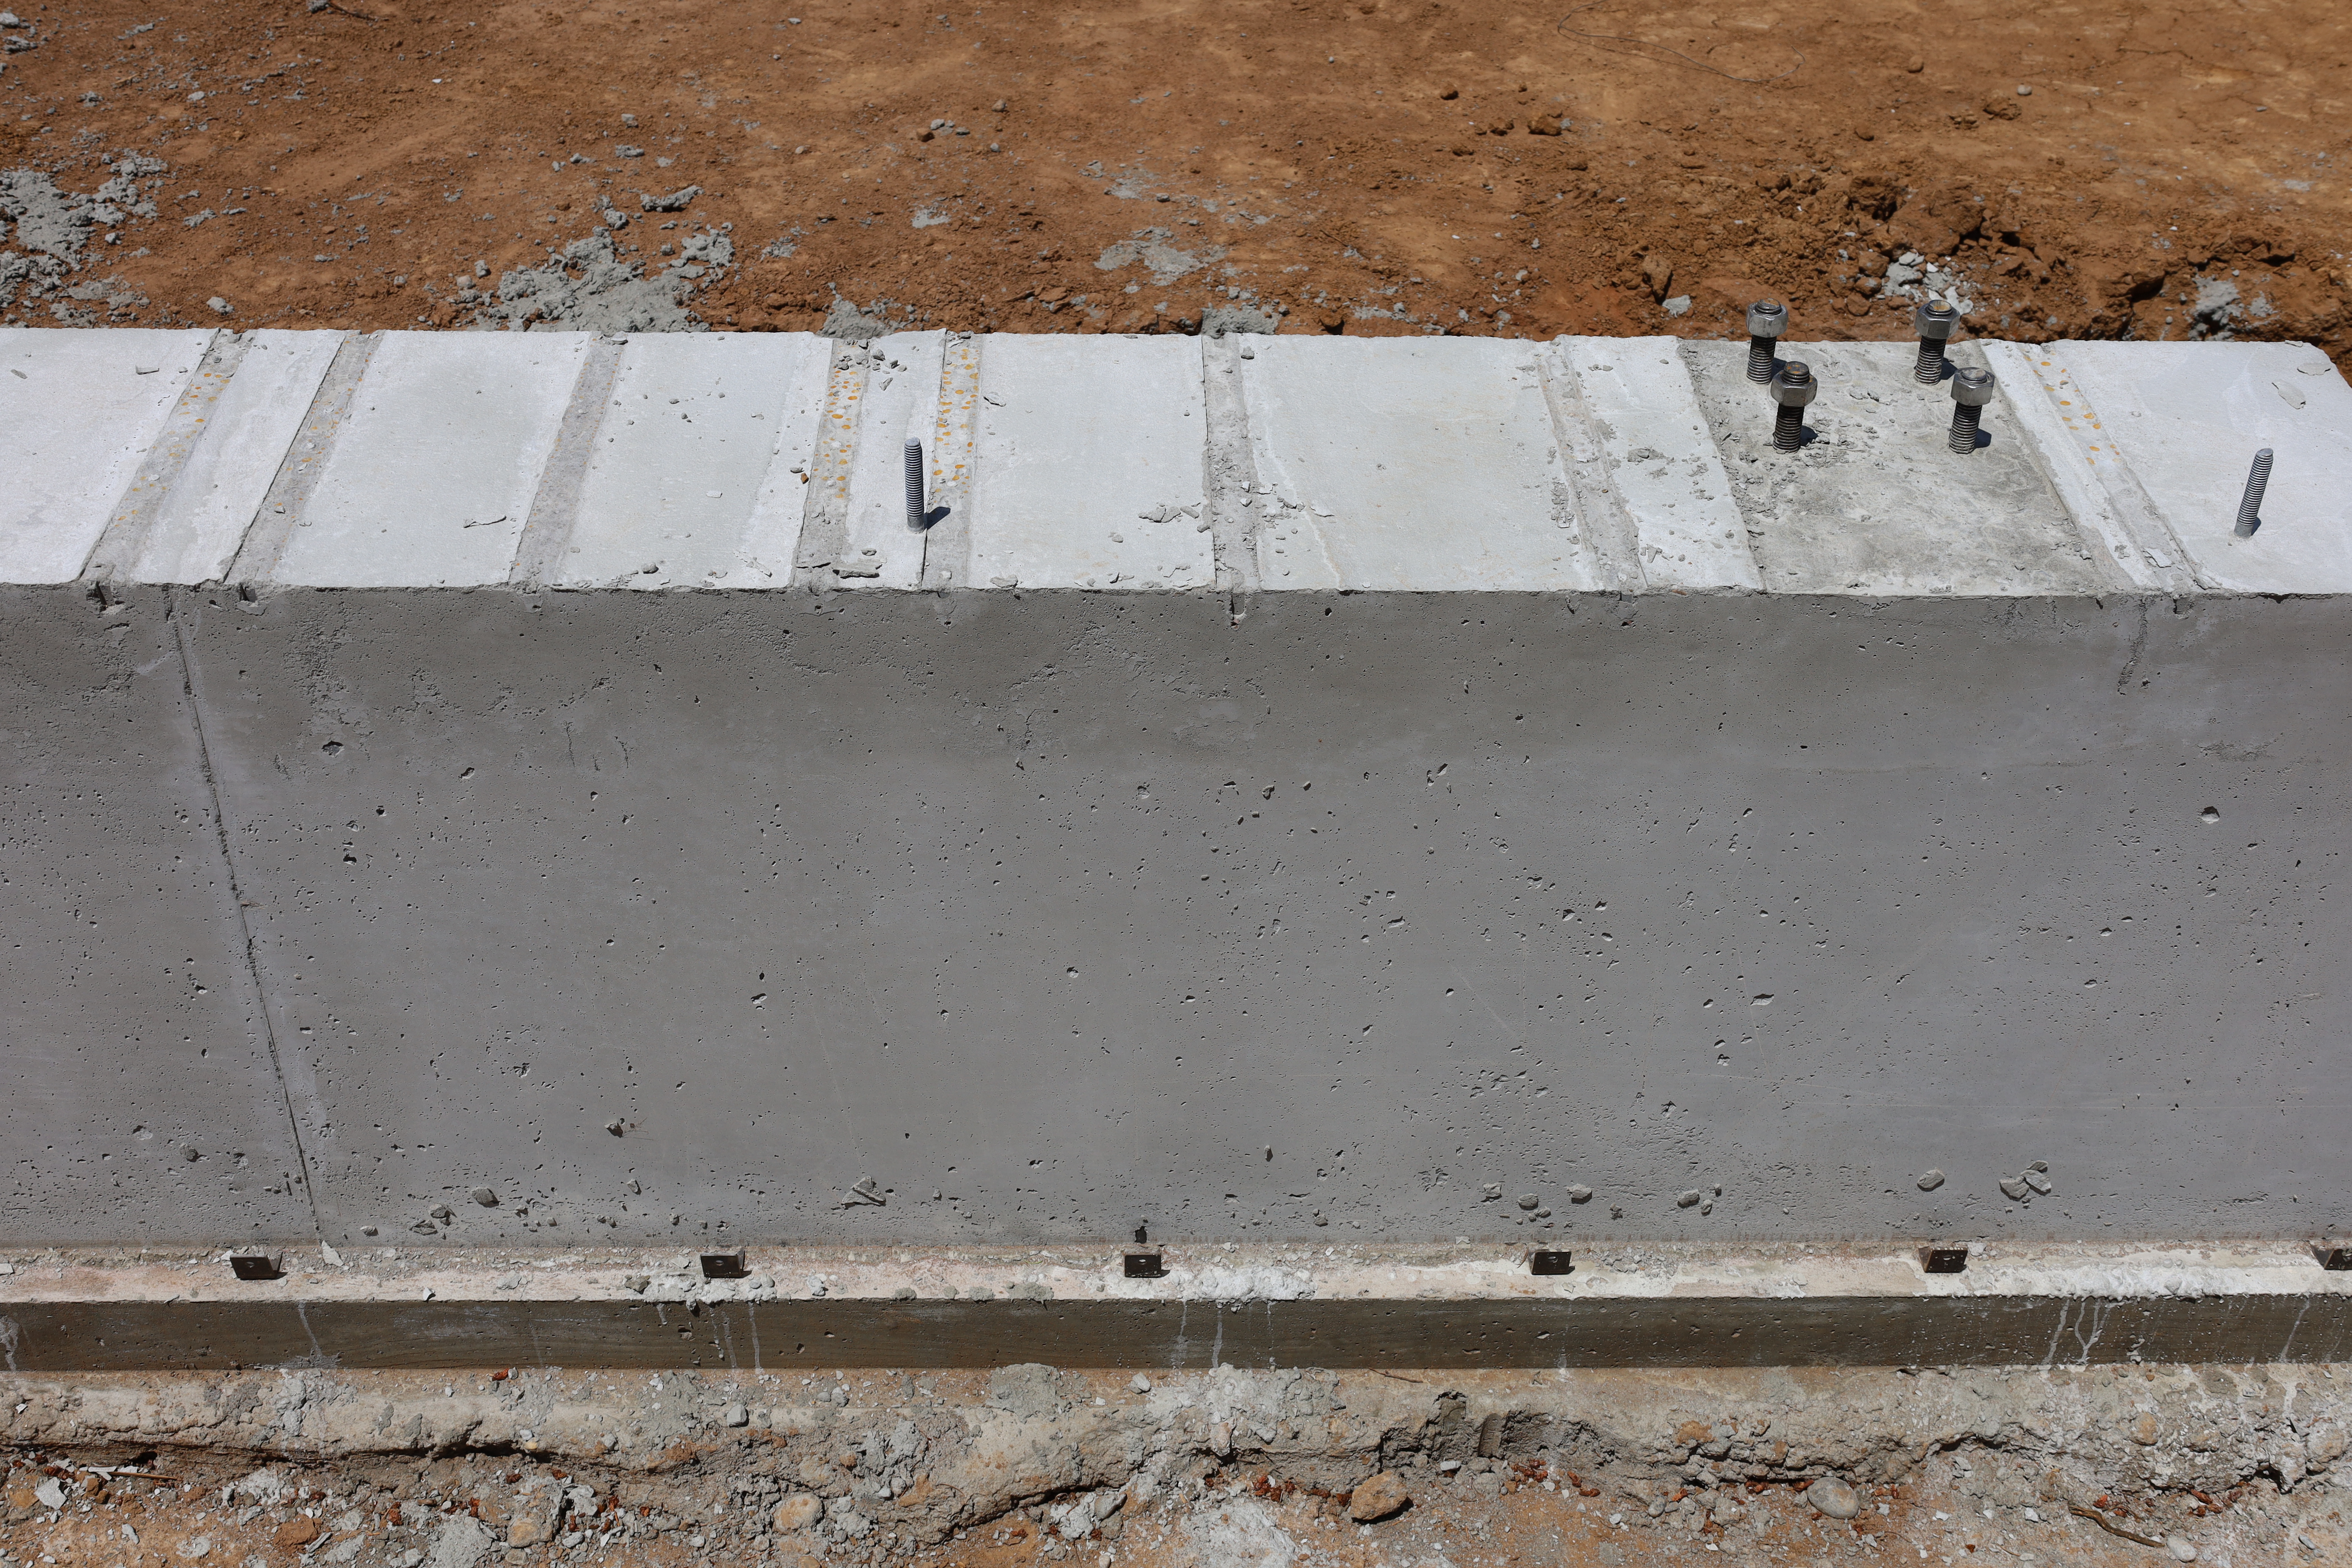
One important detail about the stem wall is that it holds the anchor bolts that the steel beams and wooden sill plates attach to. As the name implies, the anchor bolts anchor the structure to the concrete. There are large anchor bolts for the steel columns every 14 feet. 84 smaller bolts get pushed into the concrete wall as it is curing, so we had to mark out all of these locations ahead of time. Sam came up with these precise 84 locations, and we triple checked the setup.
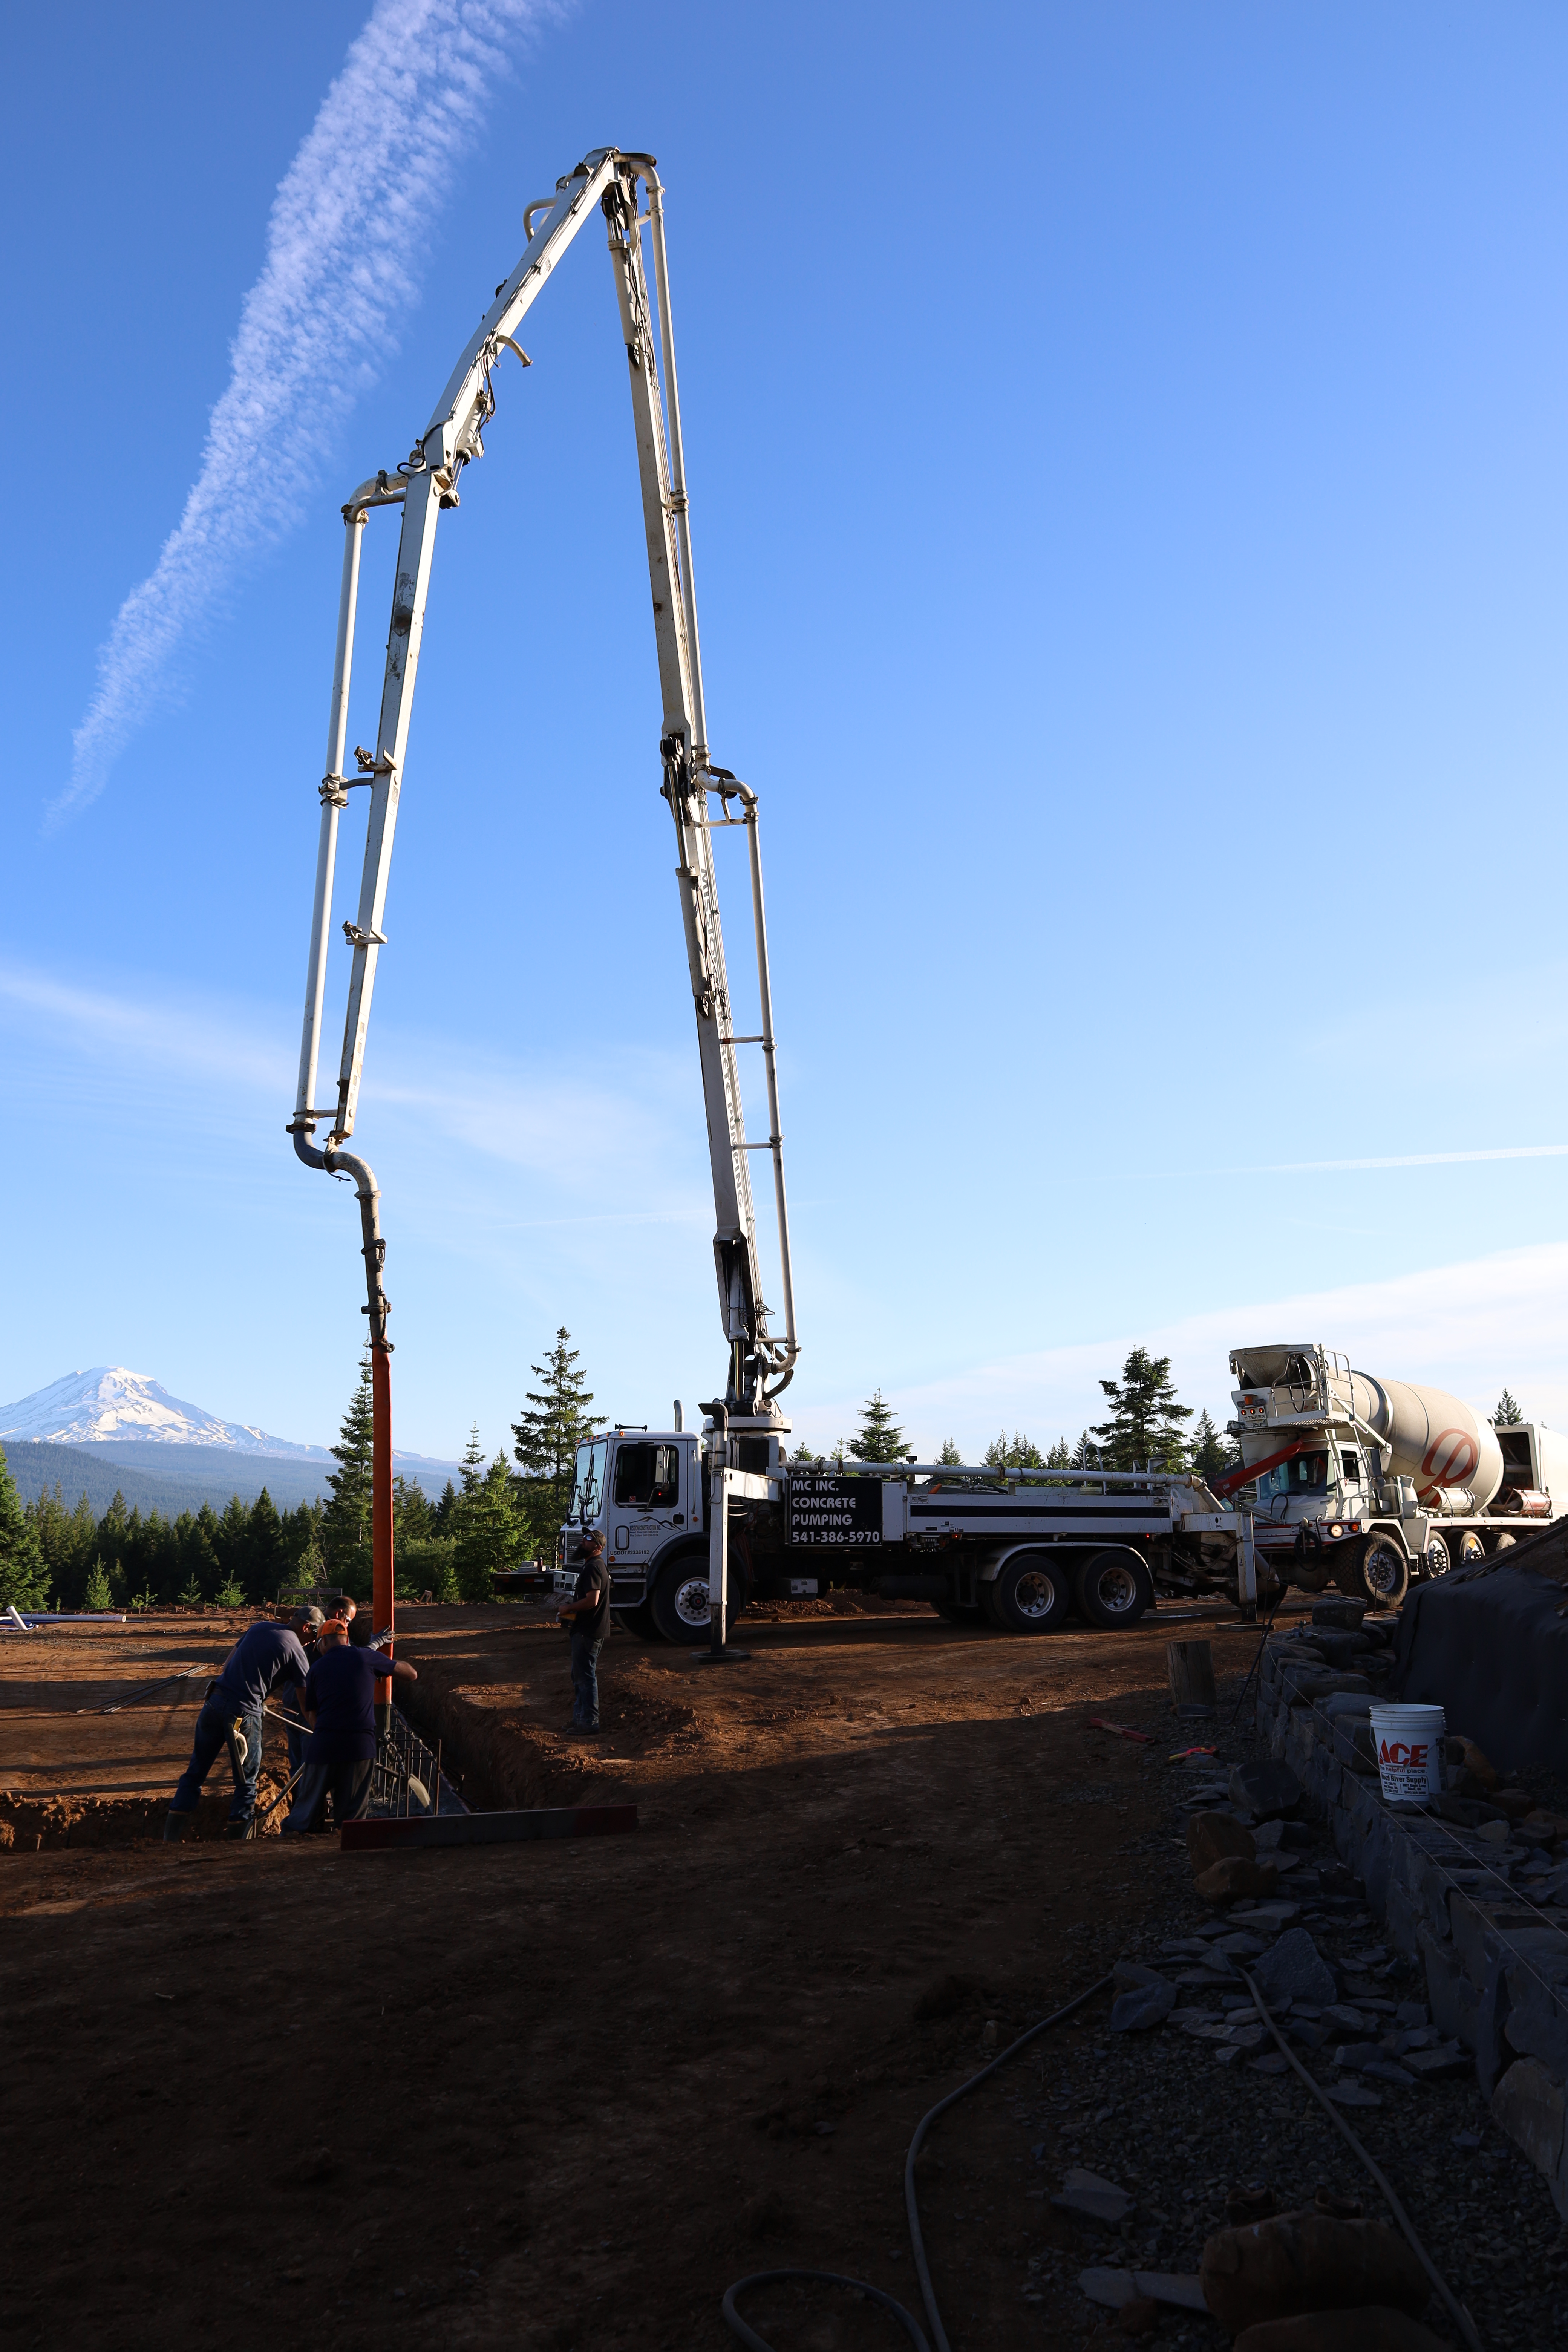
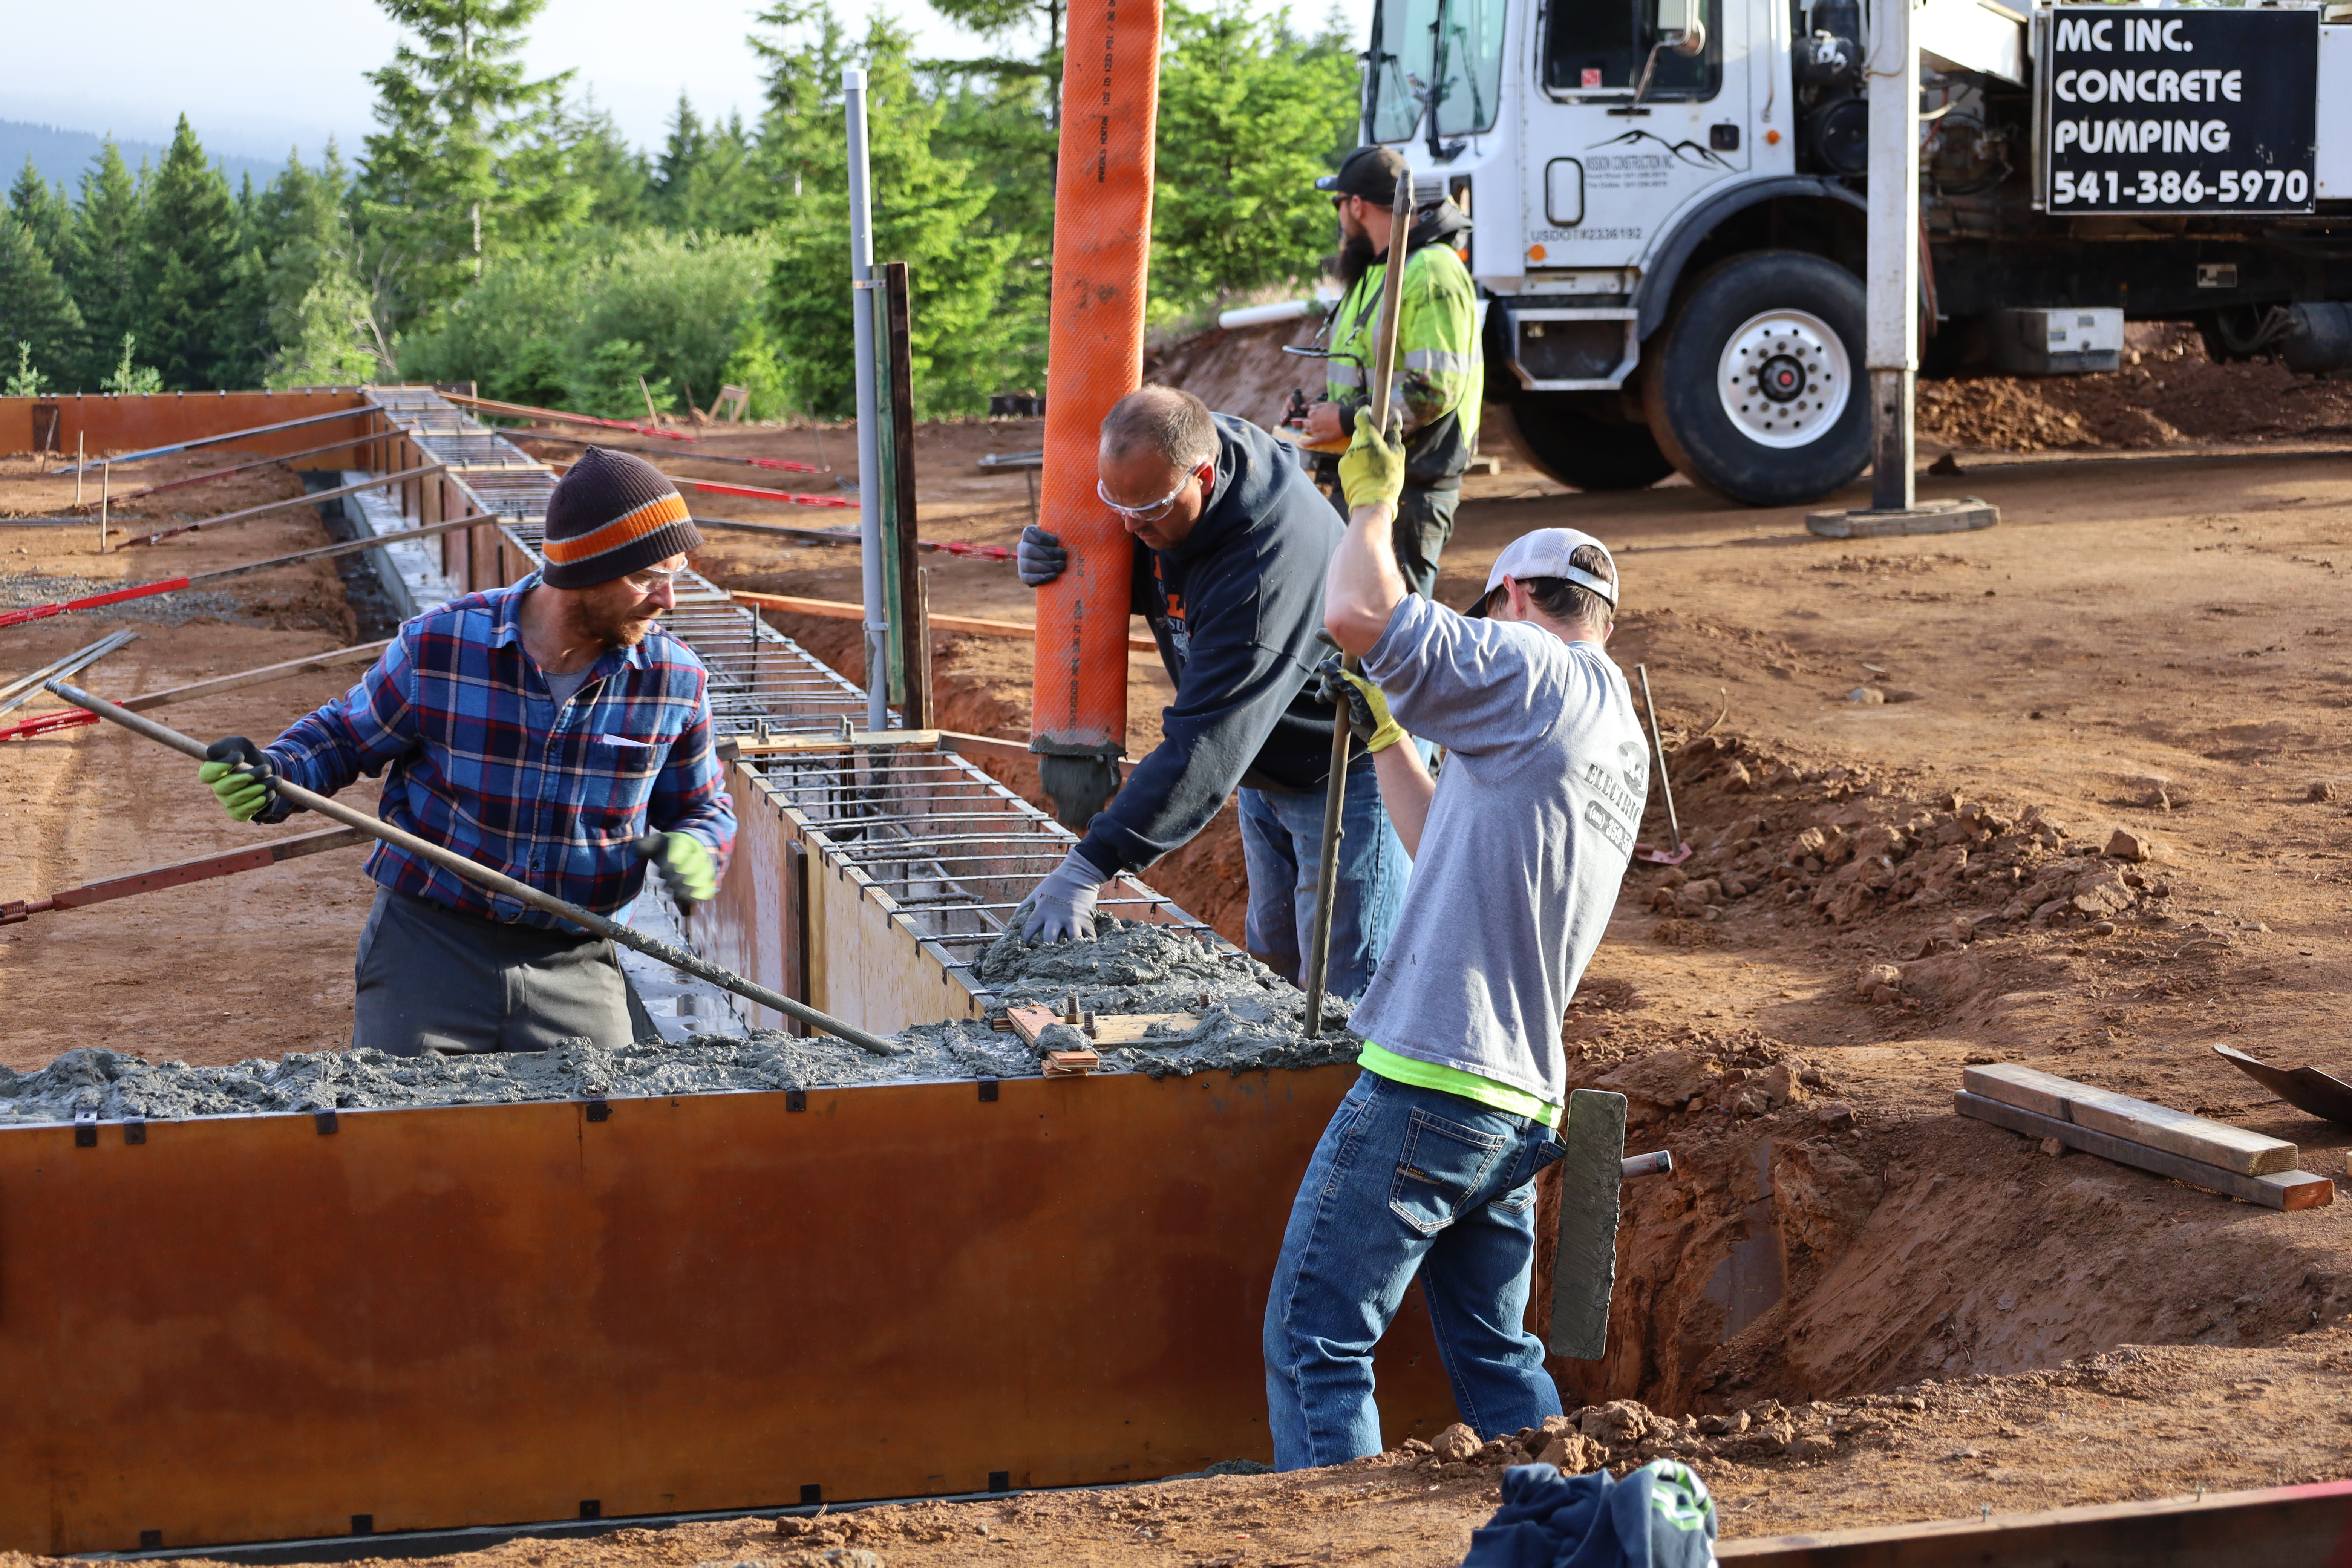
We got another signature from the building inspector, and at 5:00 am the following Monday, Matt and crew were back.
Just like the previous time, there were 3 truck loads of concrete. The concrete trucks back up to the boom truck and dump concrete onto a big grate before it gets pumped up the boom.

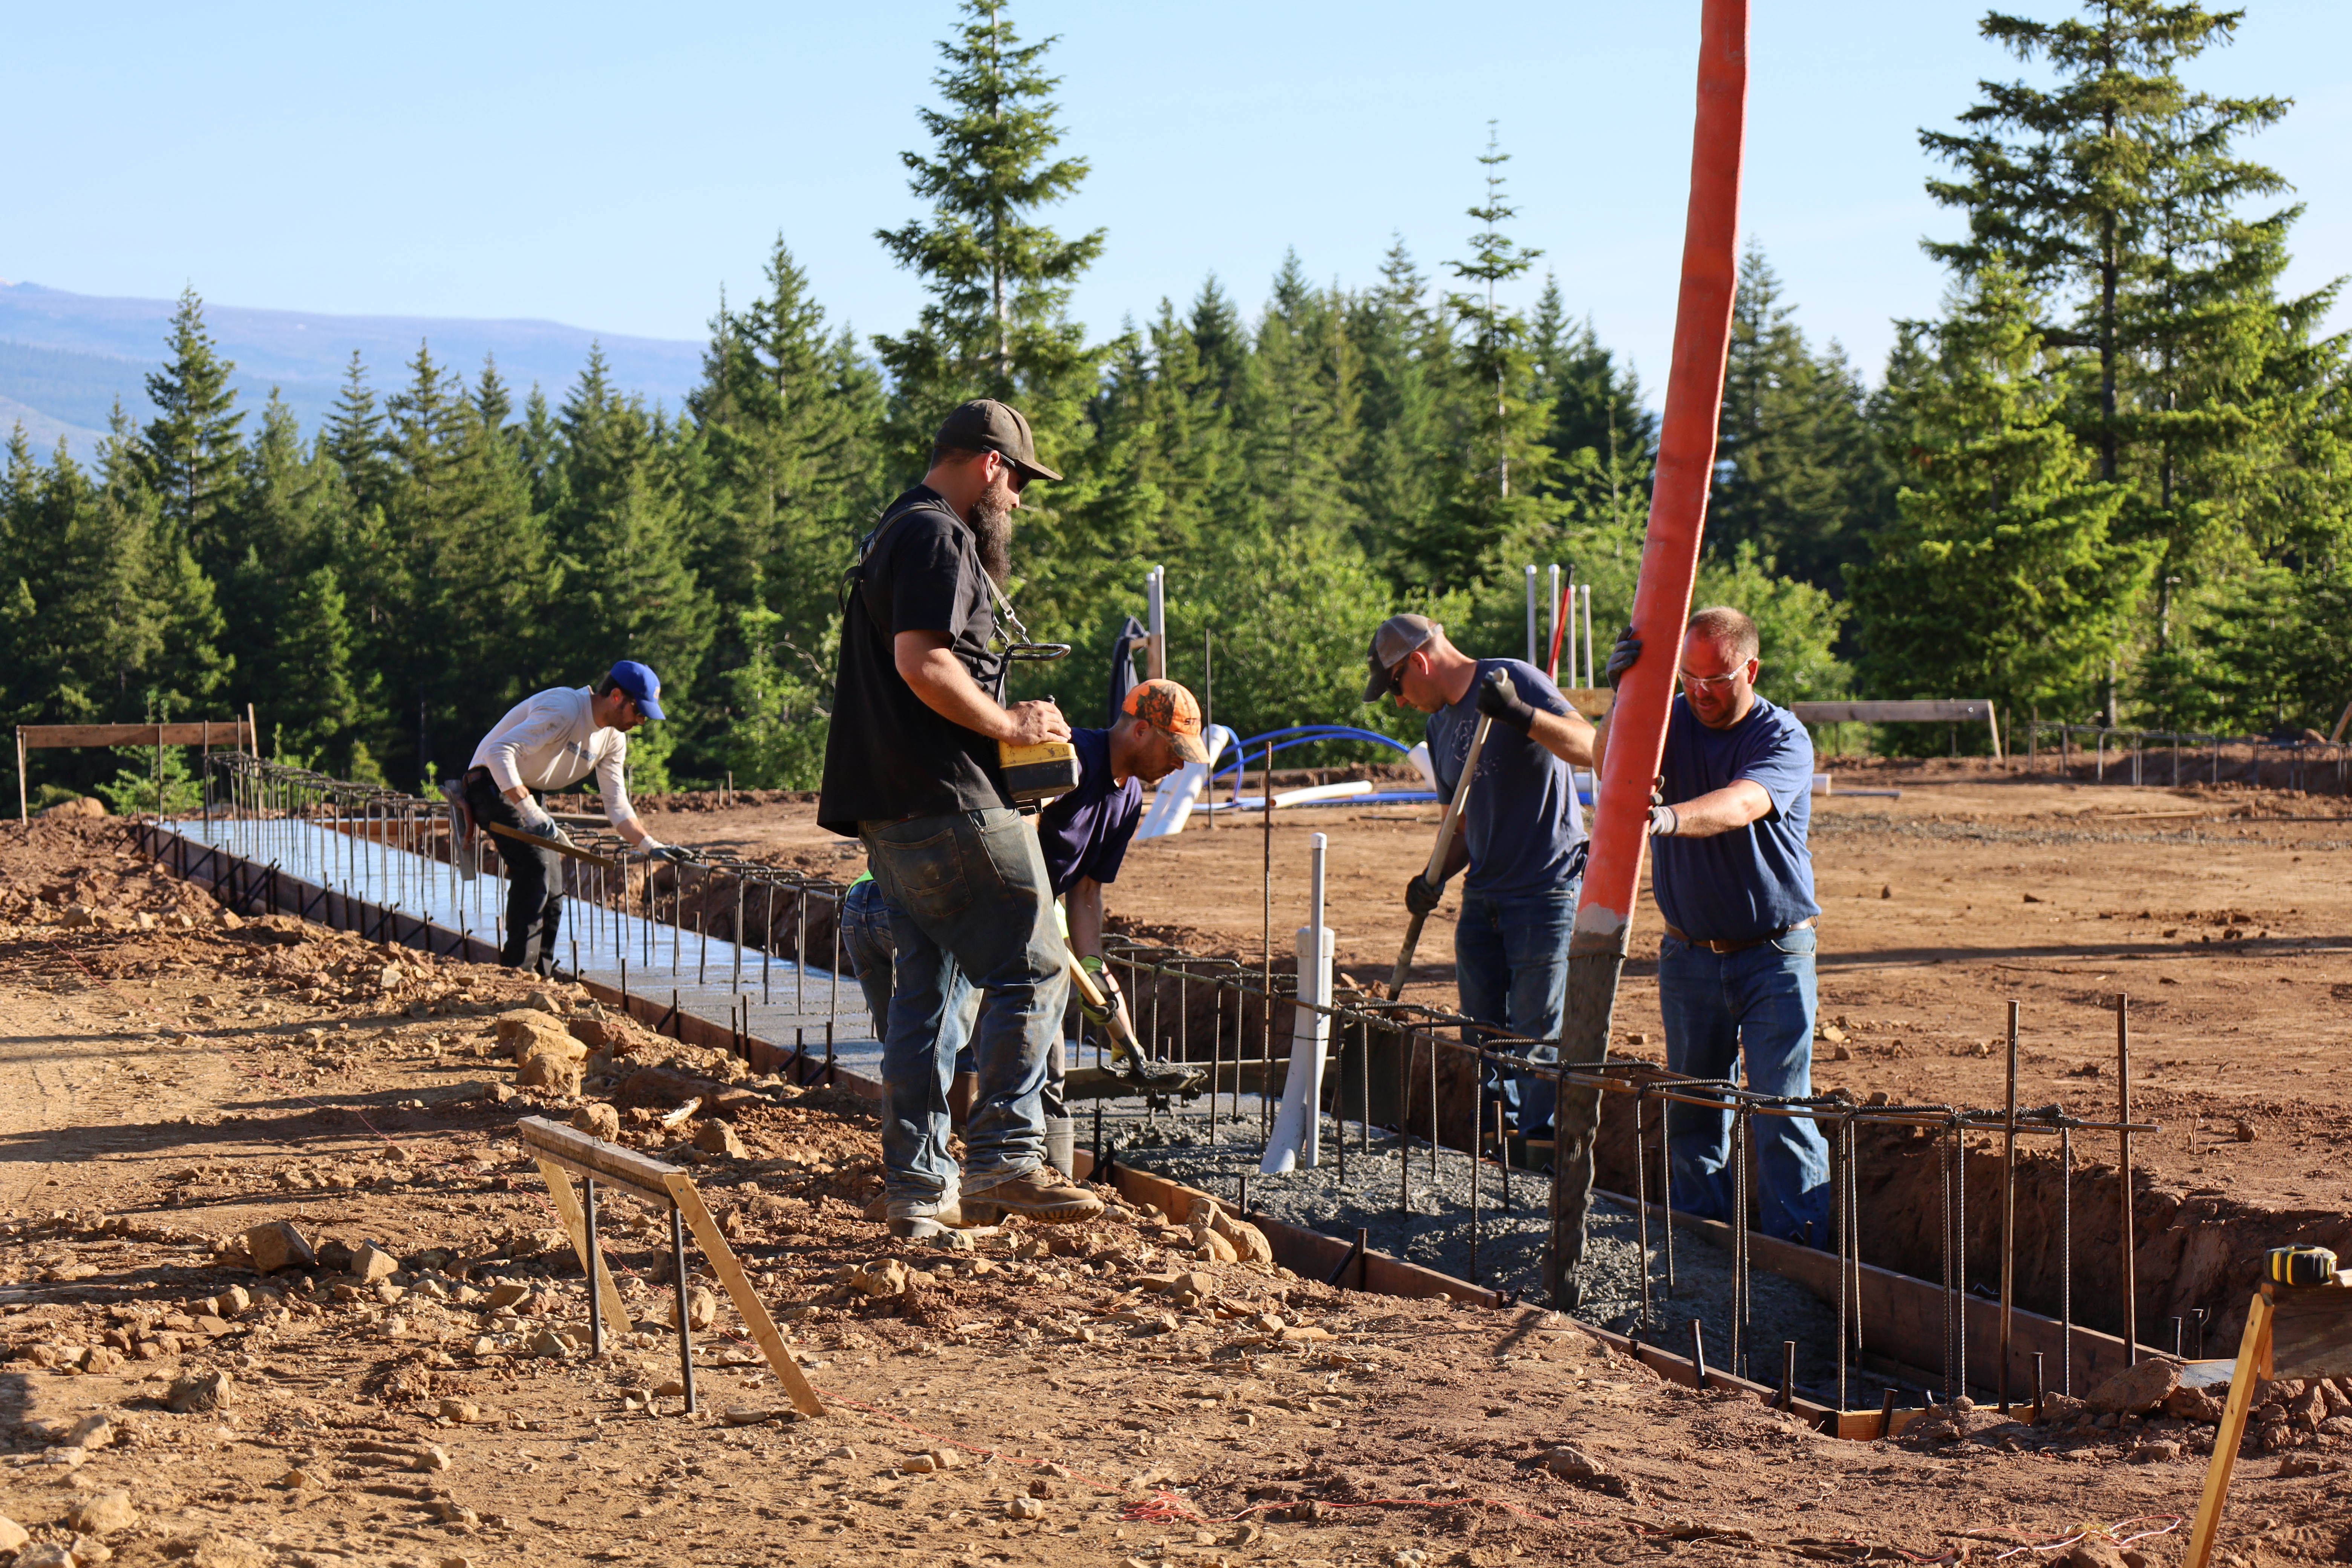
They went around the perimeter twice, filling the forms only halfway up the first time.

The crew pushed the concrete down with broom handles as they poured it, making sure not to leave any voids around the rebar and bolts. There were a lot of things they had to work around.

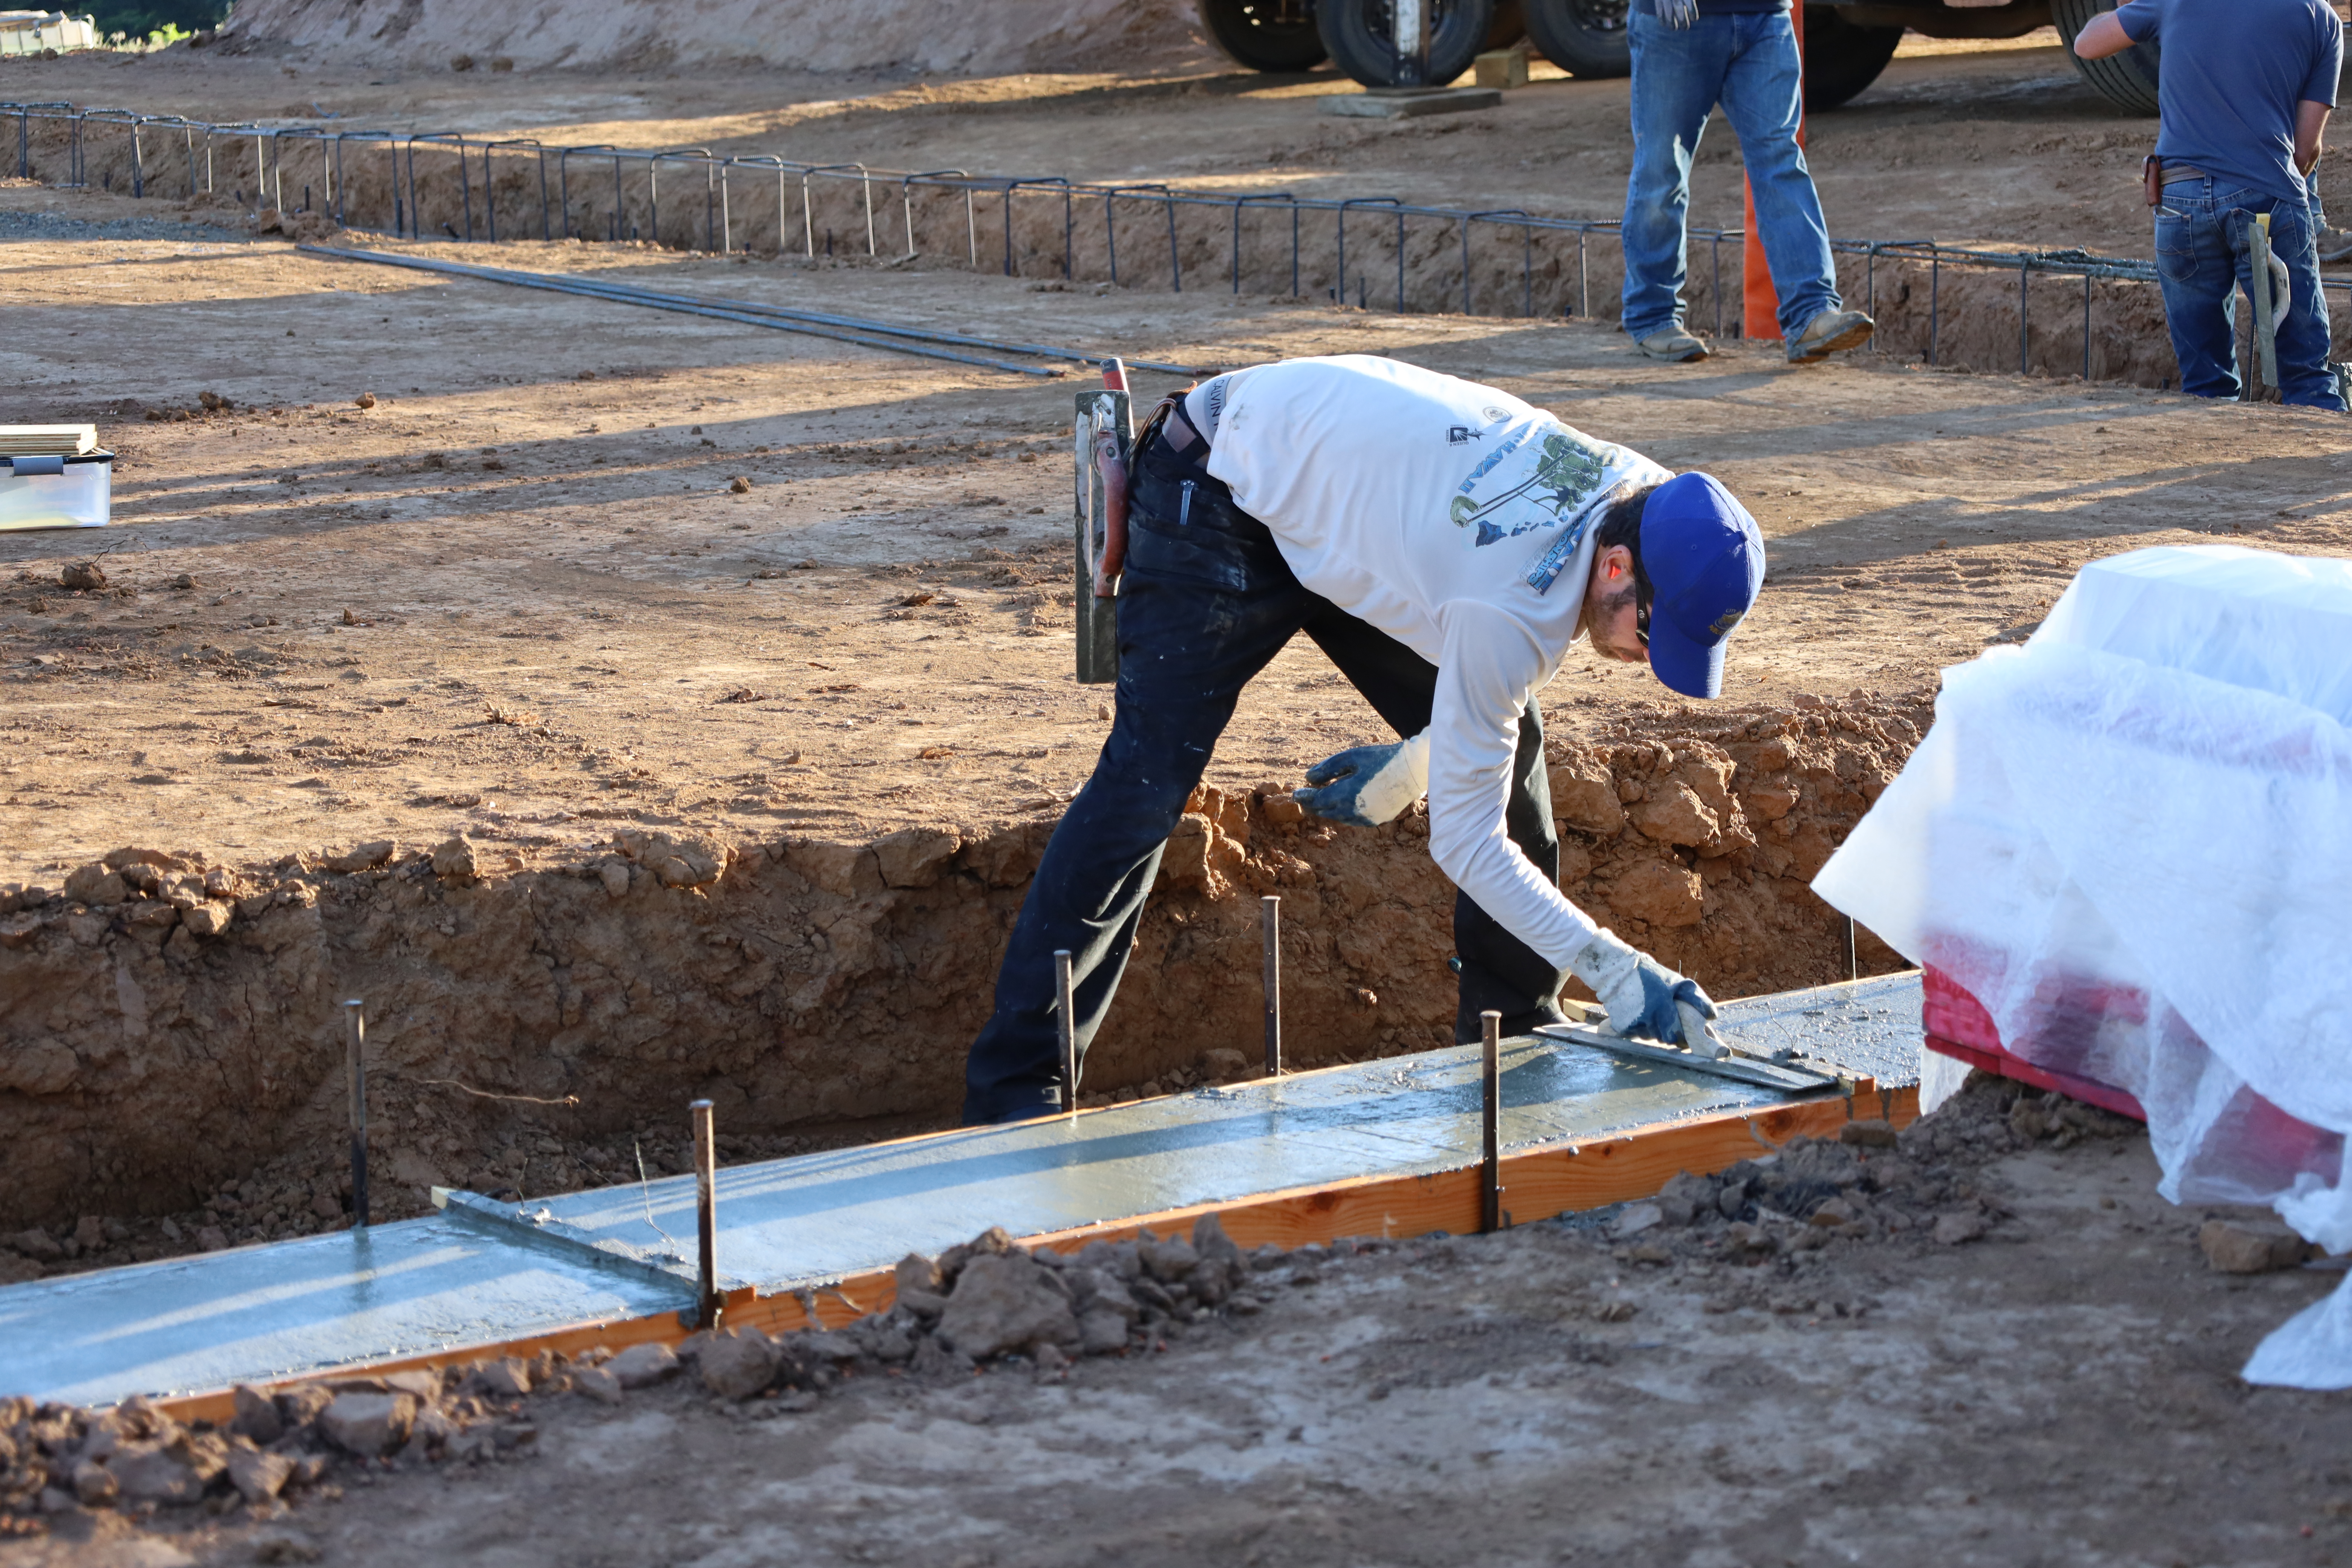
Smoothing out the top surface also looked like a tedious process.

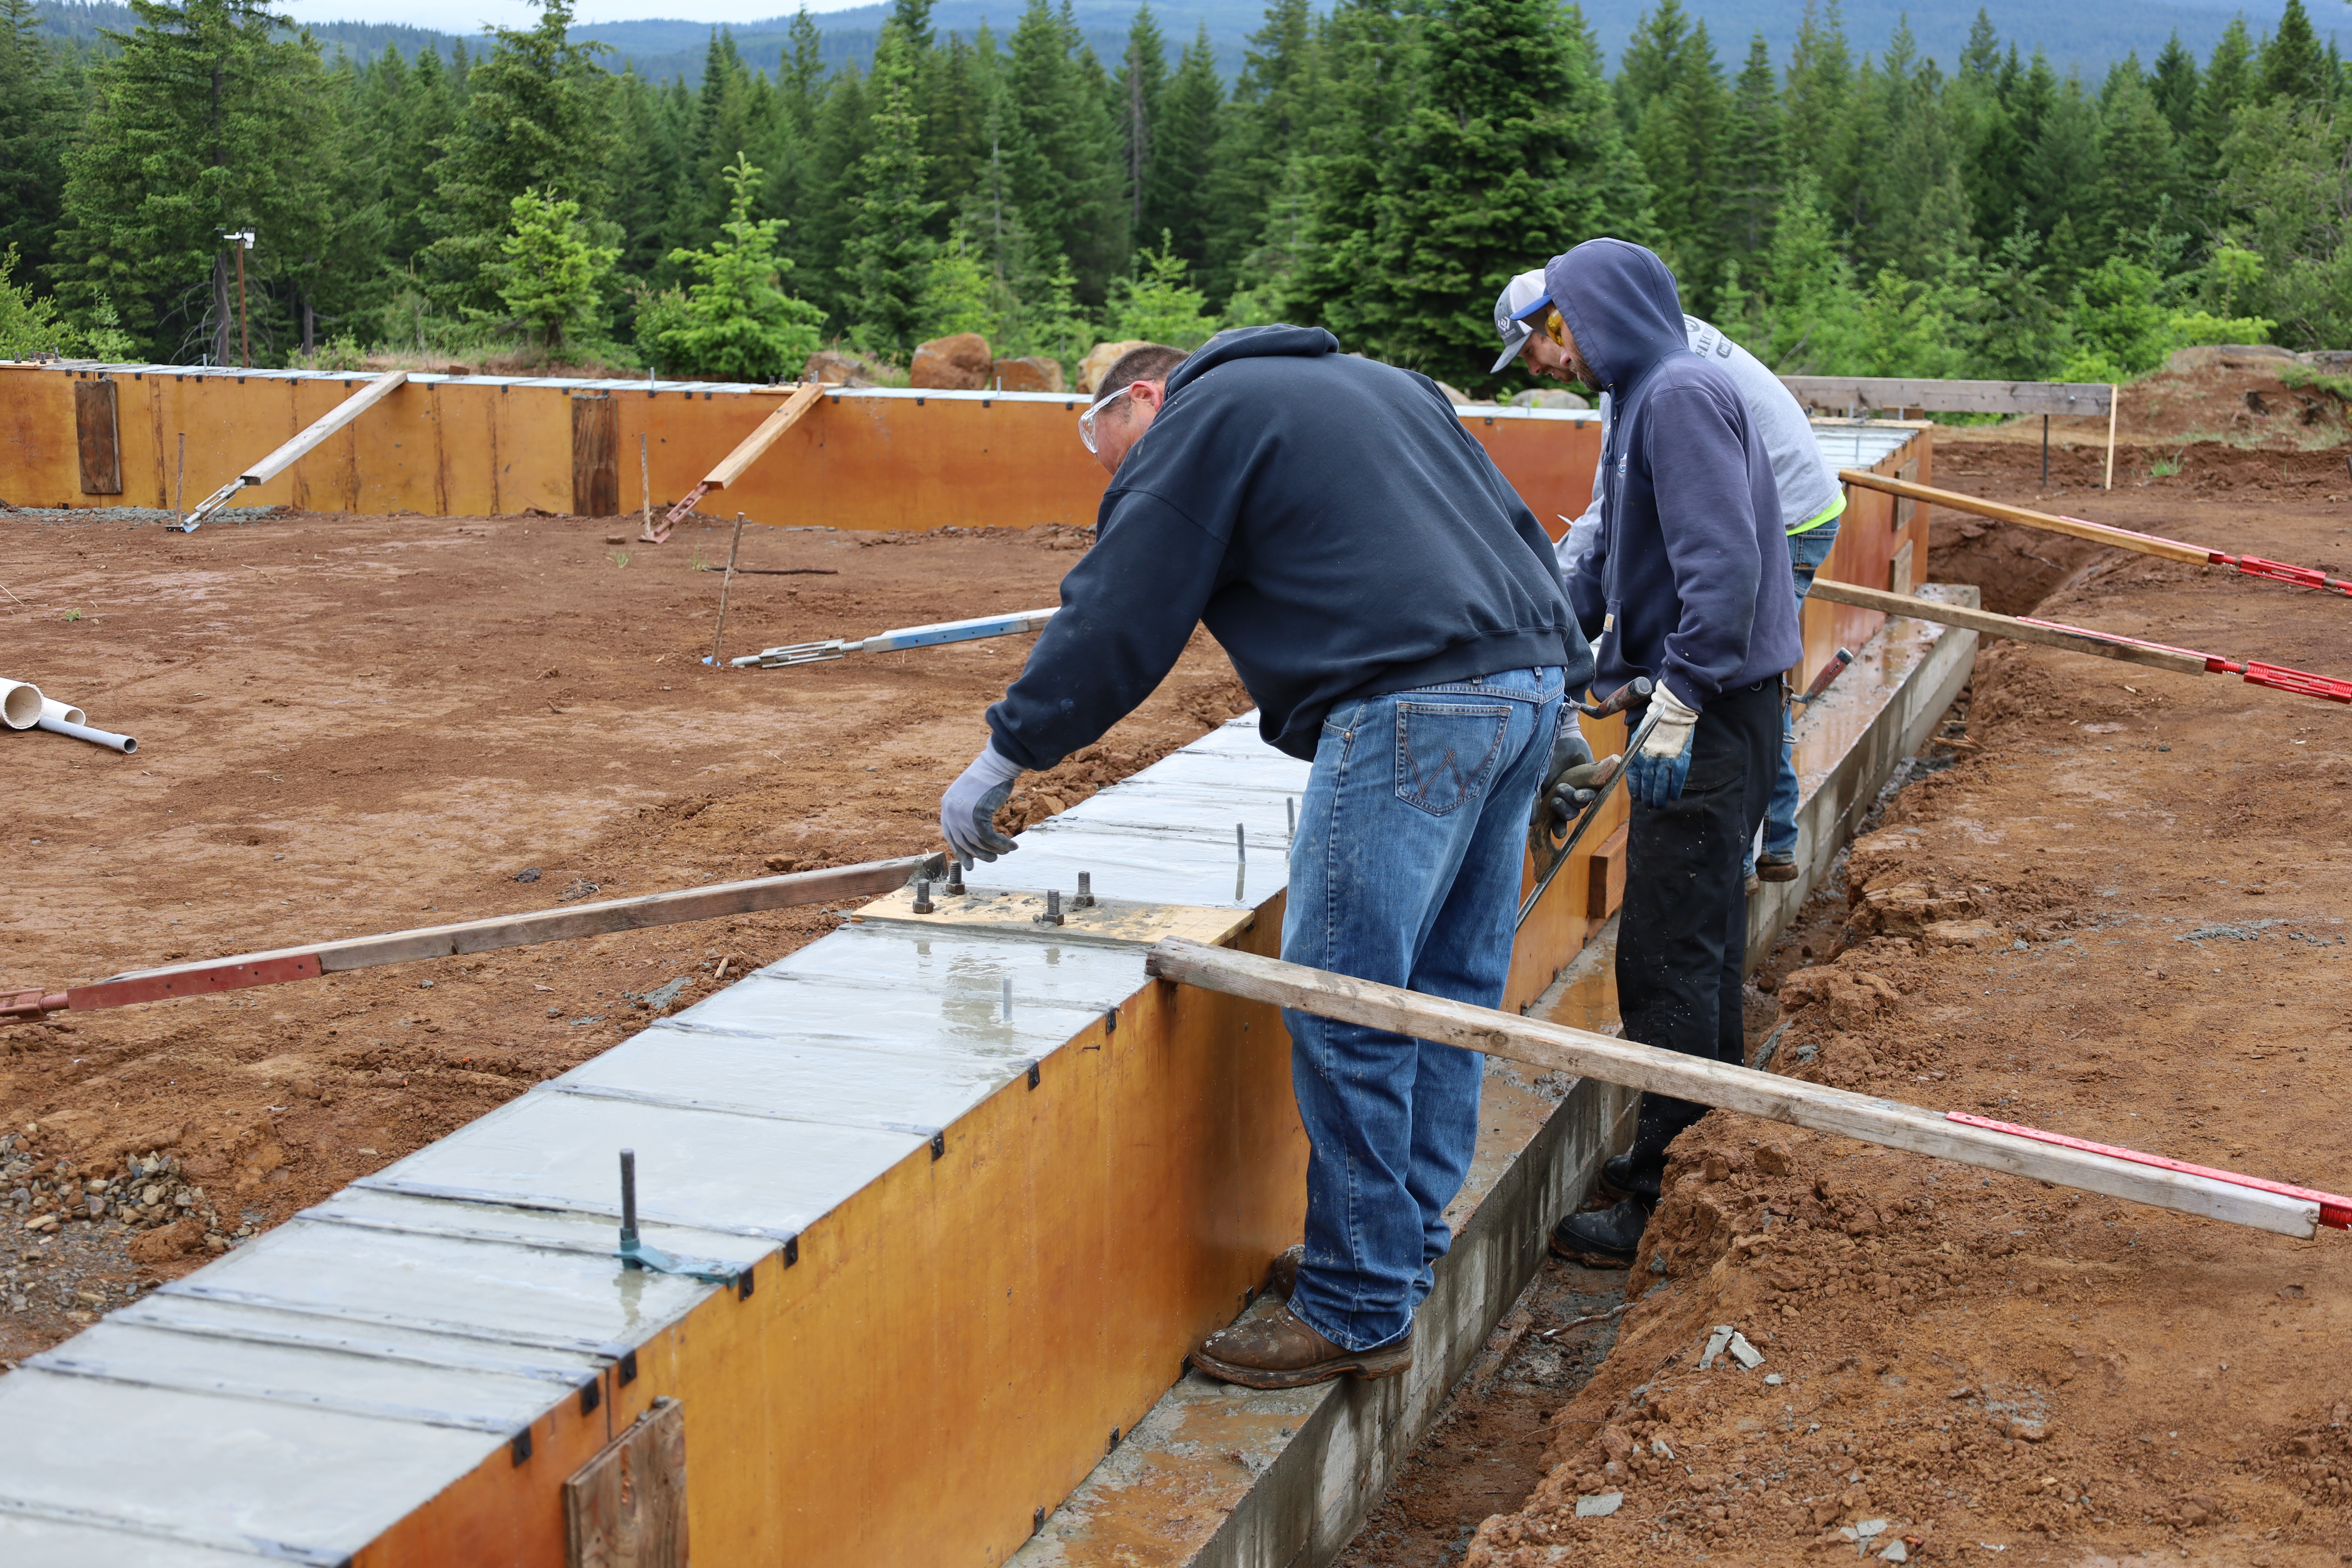
After screeding, Matt placed all of the anchor bolts into the concrete. It was interesting how they stayed in place when the concrete was still wet. Sam and I walked around checking these locations again.
Then we all checked the straightness of the walls. One wall was perfect. The other wall needed a little adjusting. We looked down the wall as they adjusted the turnbuckles.

The crew was gone before lunch. I wrote the date this time.


We had a picnic and admired our new wall from the hot tub.
The crew returned the next day to take off the forms.
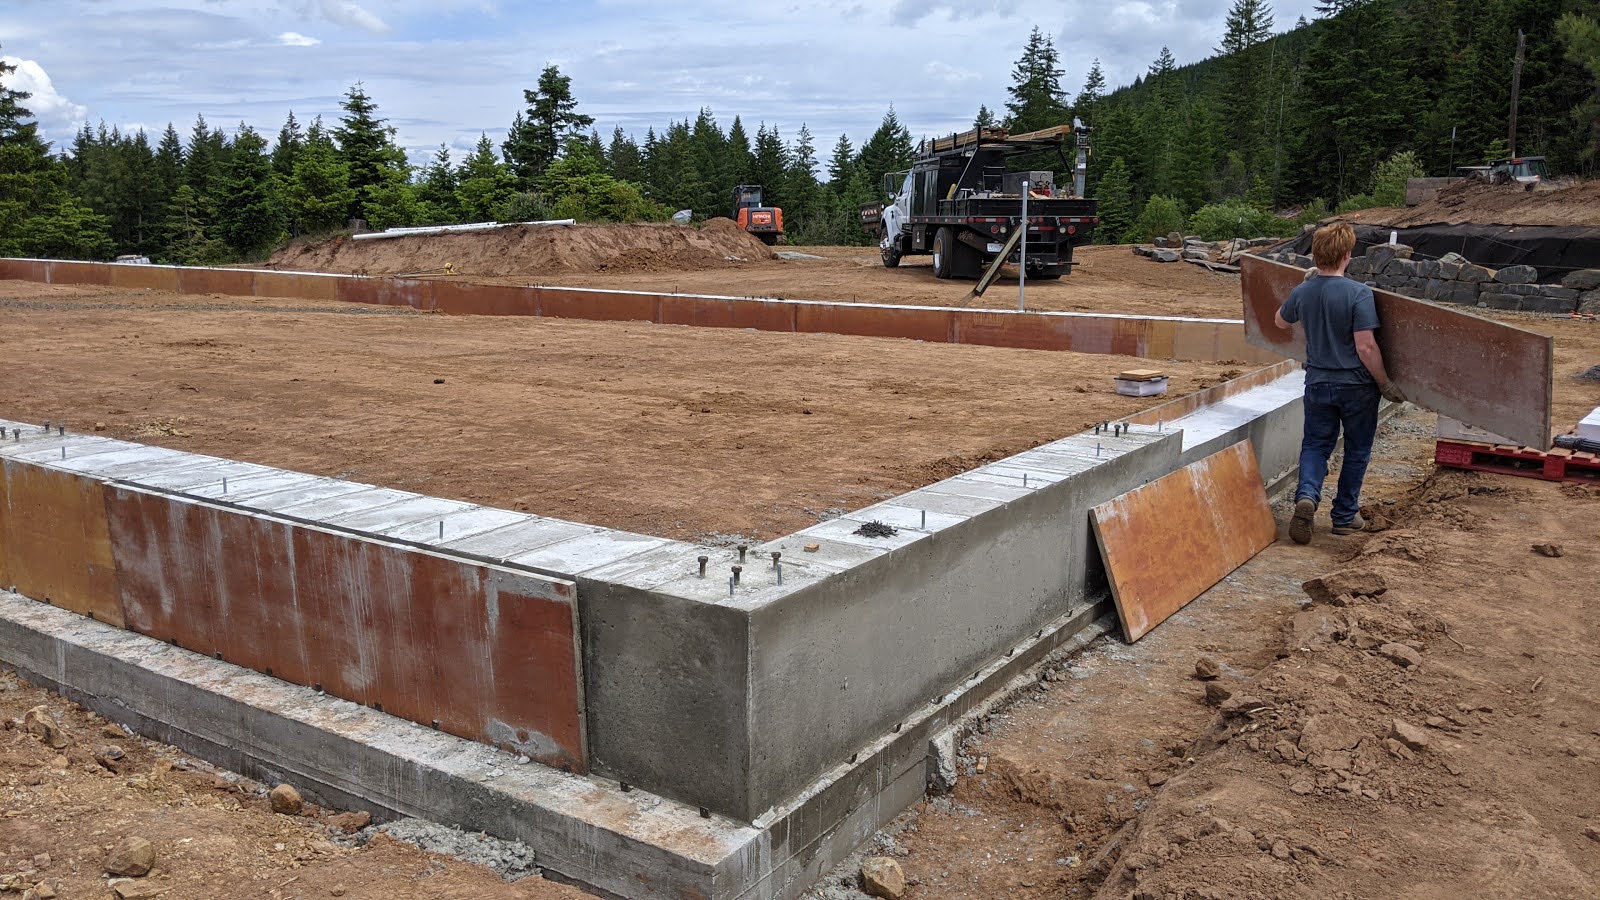

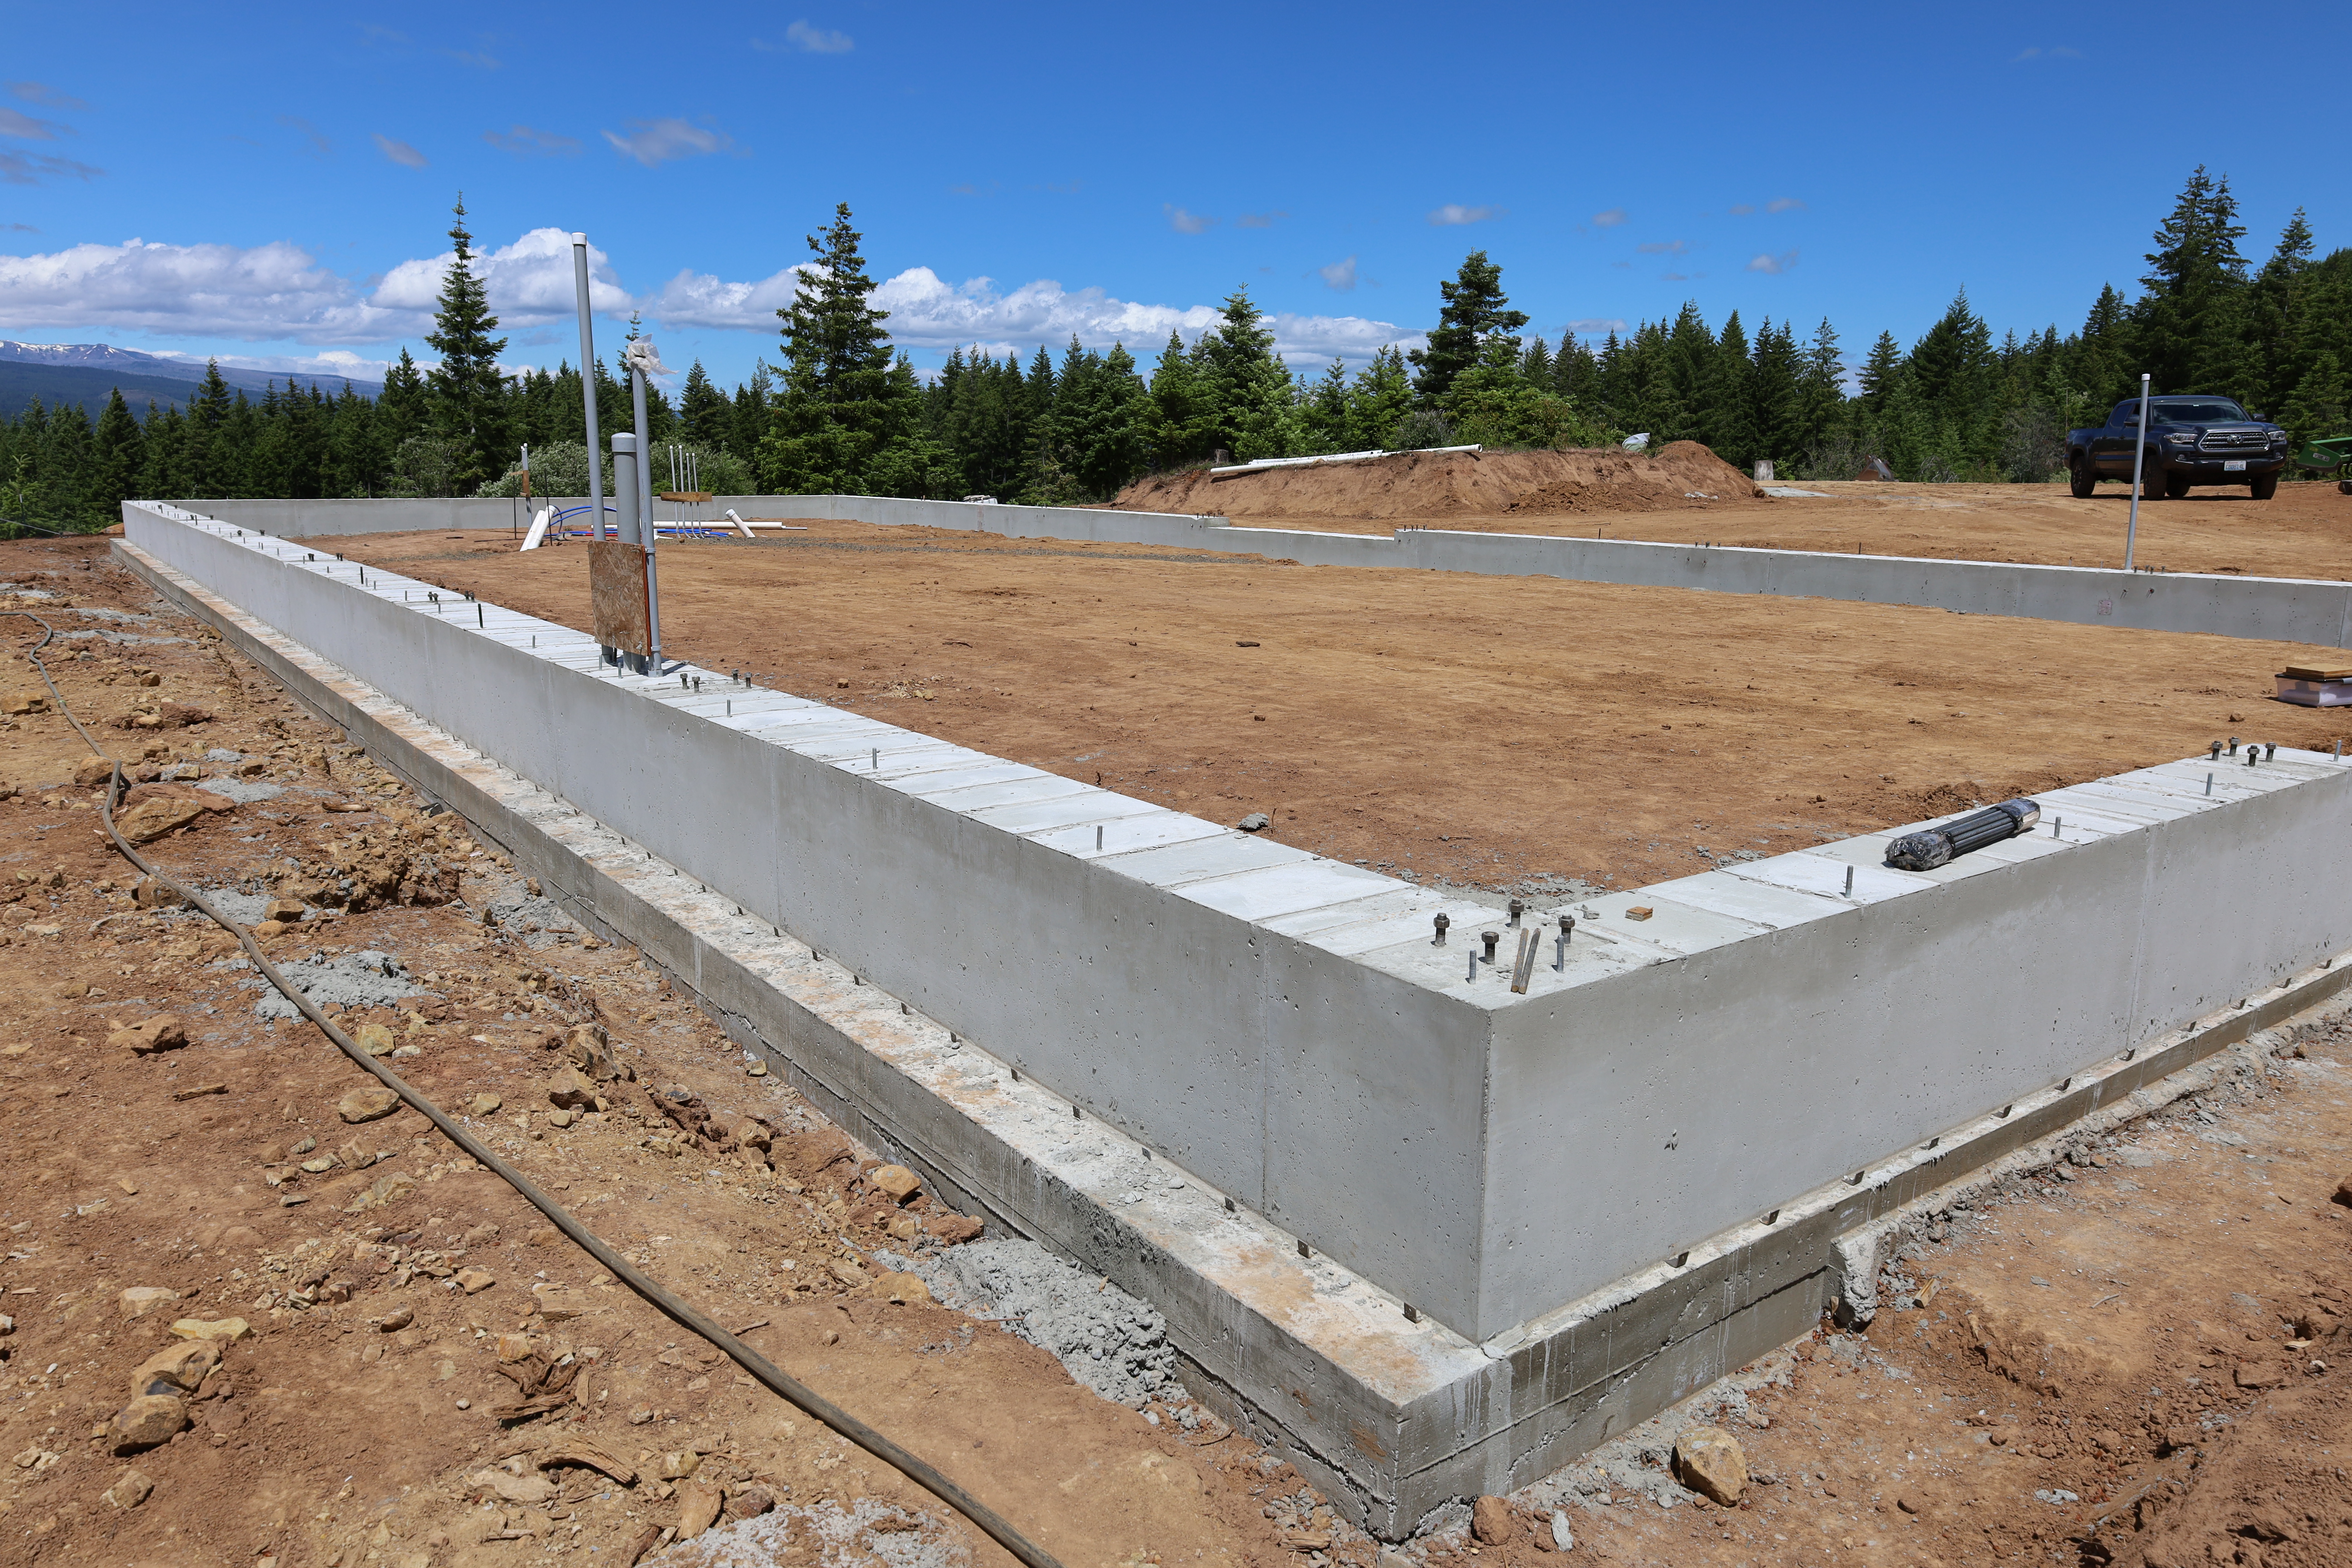
We were very happy with the results. Now we wait for it to cure!

Casey, you are doing a terrific job of making this whole process come alive for all your readers. This is much more thrilling than the building of my own house! I just got back from North and South Dakota so I will have to catch up slowly. Love to you both!
LikeLike
Loved reading this. Very cool to see the steps involved with making the foundation. Can’t wait to keep reading!
LikeLike
I’m looking into a Web Steel building. Why did you decide on a footing and stemwall vs a monolithic pour? Did you have to hire an engineer for this change? Did it eliminate the thicker footing and rebar that normally ties the opposite sides of the steel frame together? Great job on your blog. It’s very helpful!
LikeLike
The main reason we poured a footing and stemwall was for the hydronic heat system. We couldn’t figure out a good way to insulate the exterior of the concrete with a monolithic pour and were concerned with heat loss. We put rigid foam on the inside of the stemwall to help with this. The guy who installed our radiant heat highly recommended that, and we would too. We recently looked at the floor with a thermal camera, and the stemwall surface (the part inside the living room) was 20 degrees colder than the rest of the floor. The guy who poured the concrete was also more experienced with this method. If you are not doing in-floor heating, then I would go with the monolithic pour. The total volume of concrete was about the same. The thick footing between columns was only about an inch less for us. Overall, the footing/stemwall was more expensive. The county needed the Web Steel engineer who made the initial drawings to approve this change. Hope this helps. Thanks for reading!
LikeLike