After much anticipation, we have windows! We purchased casement style windows from Sierra Pacific last year. We actually went “window shopping” back in 2020 when we started designing the building. I think it was our only outing for months, making it a memorable occasion.


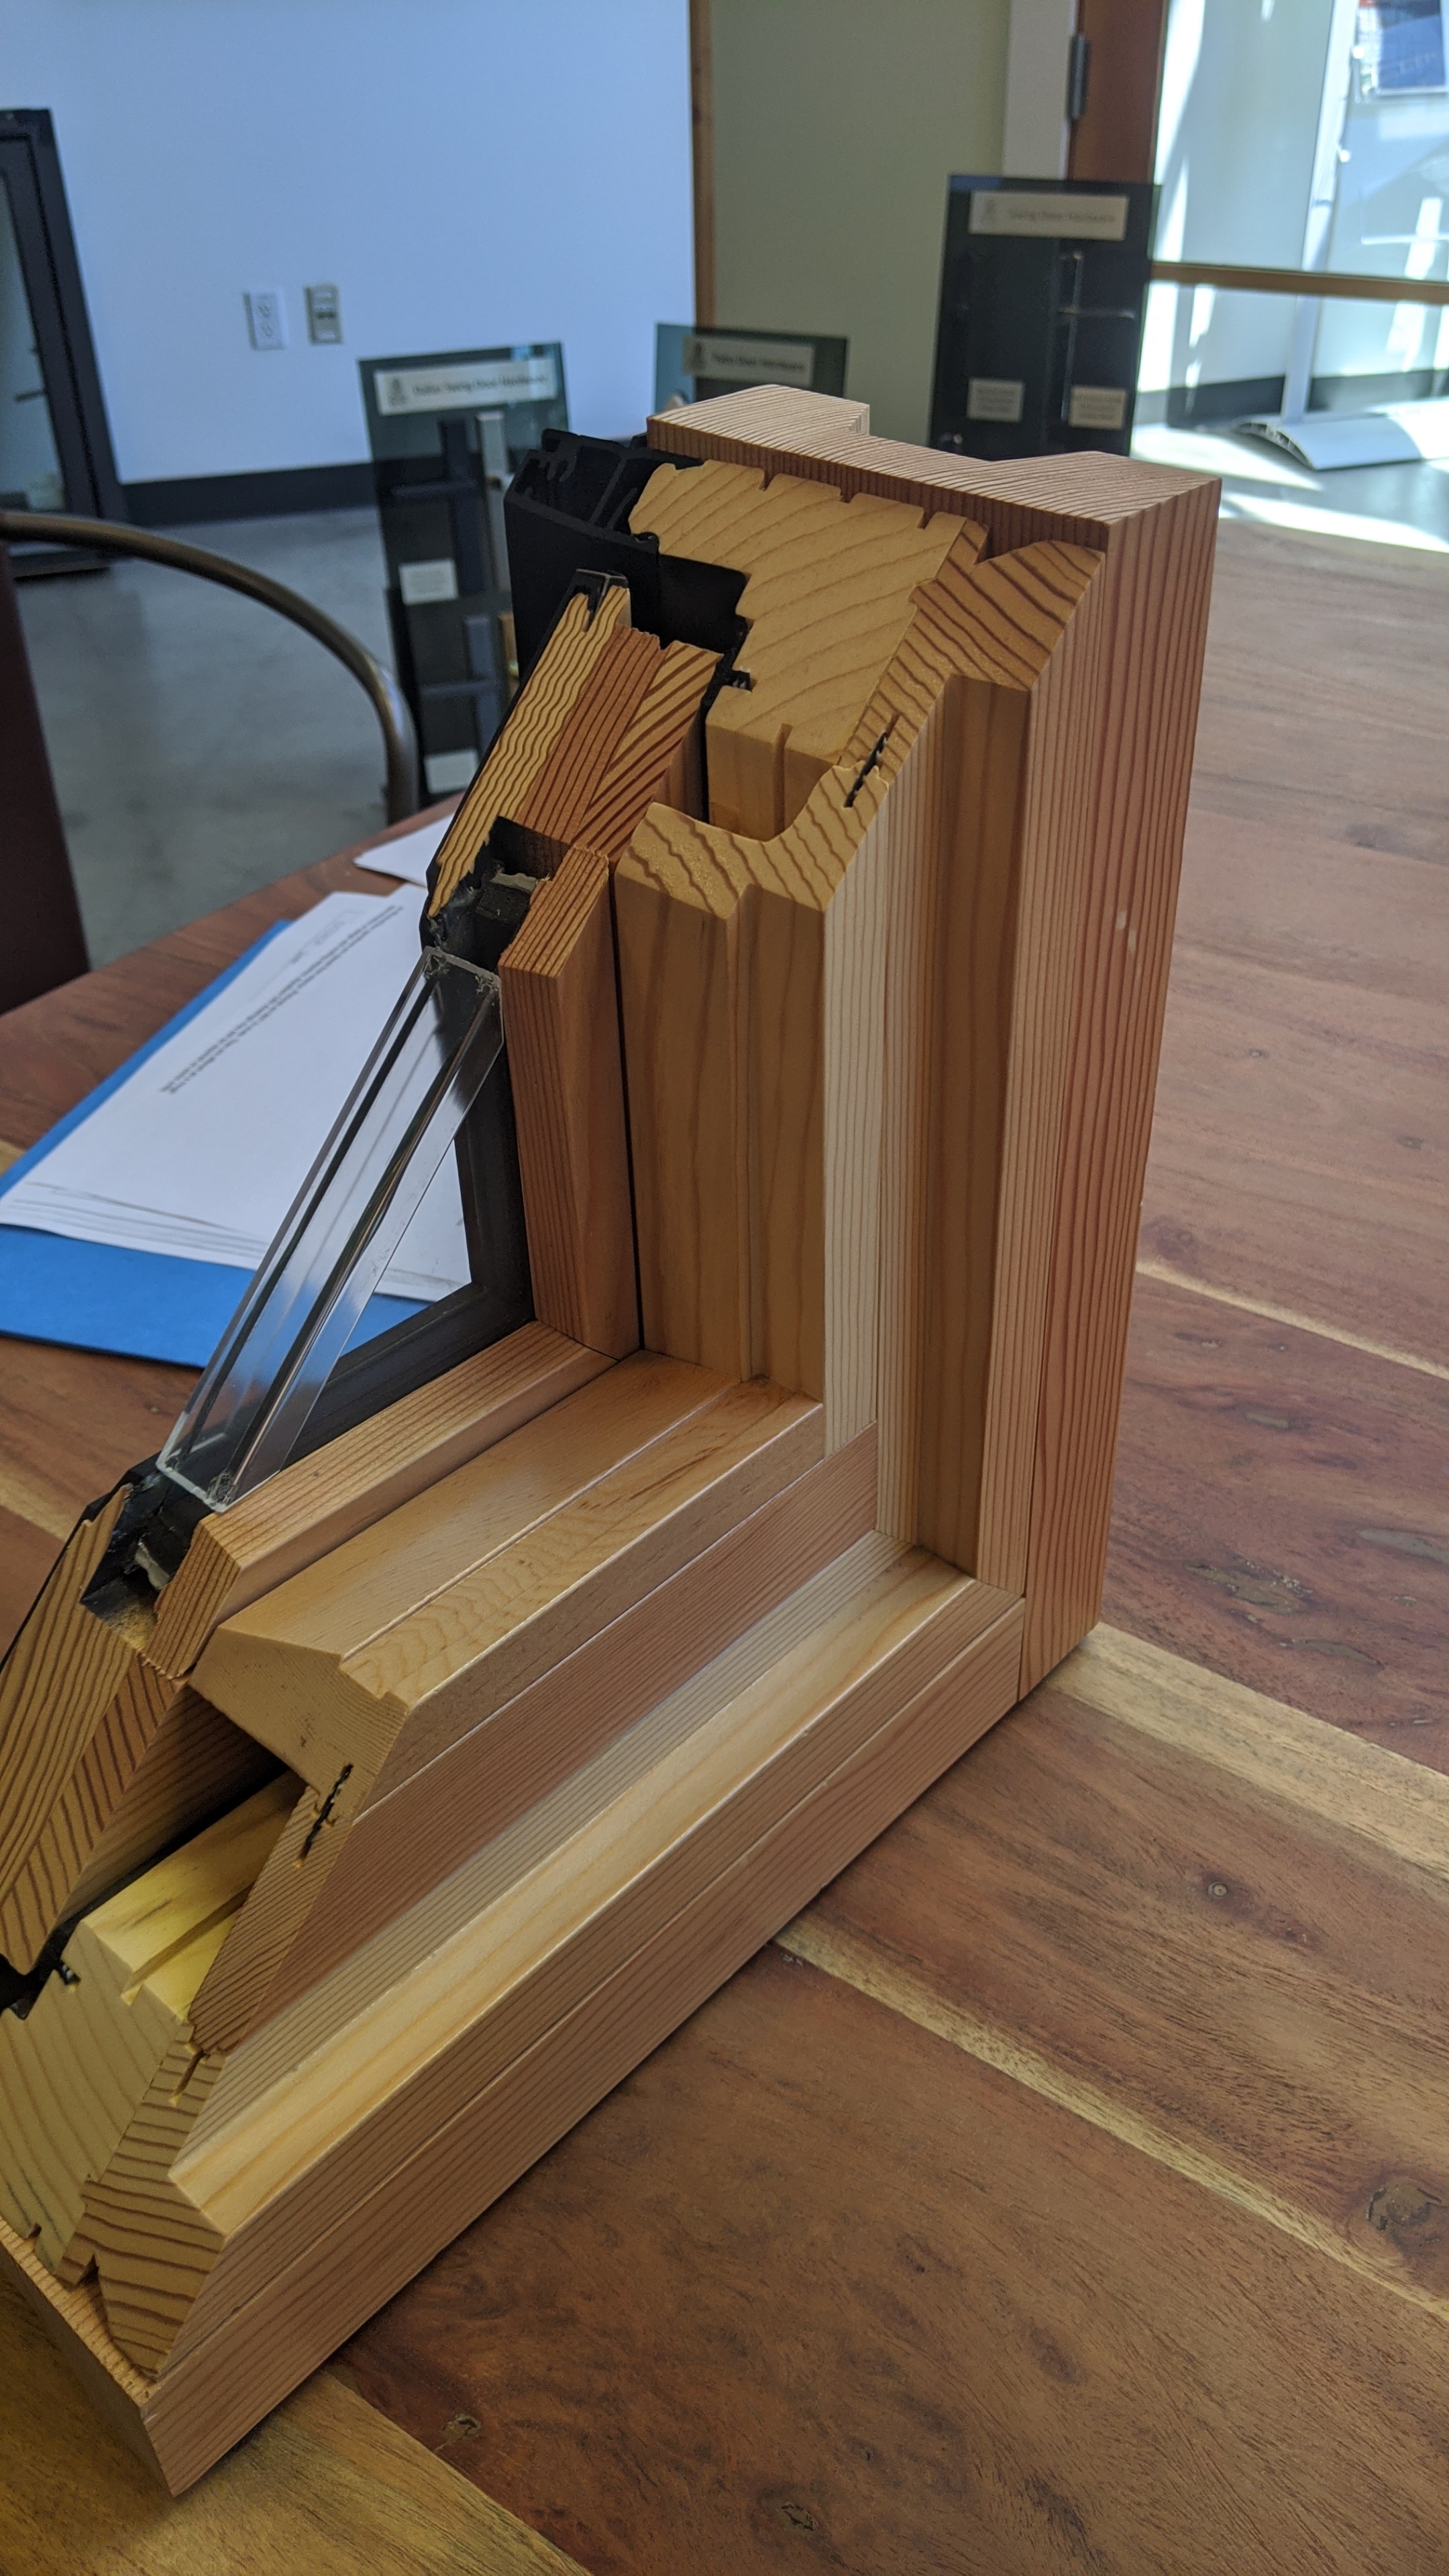
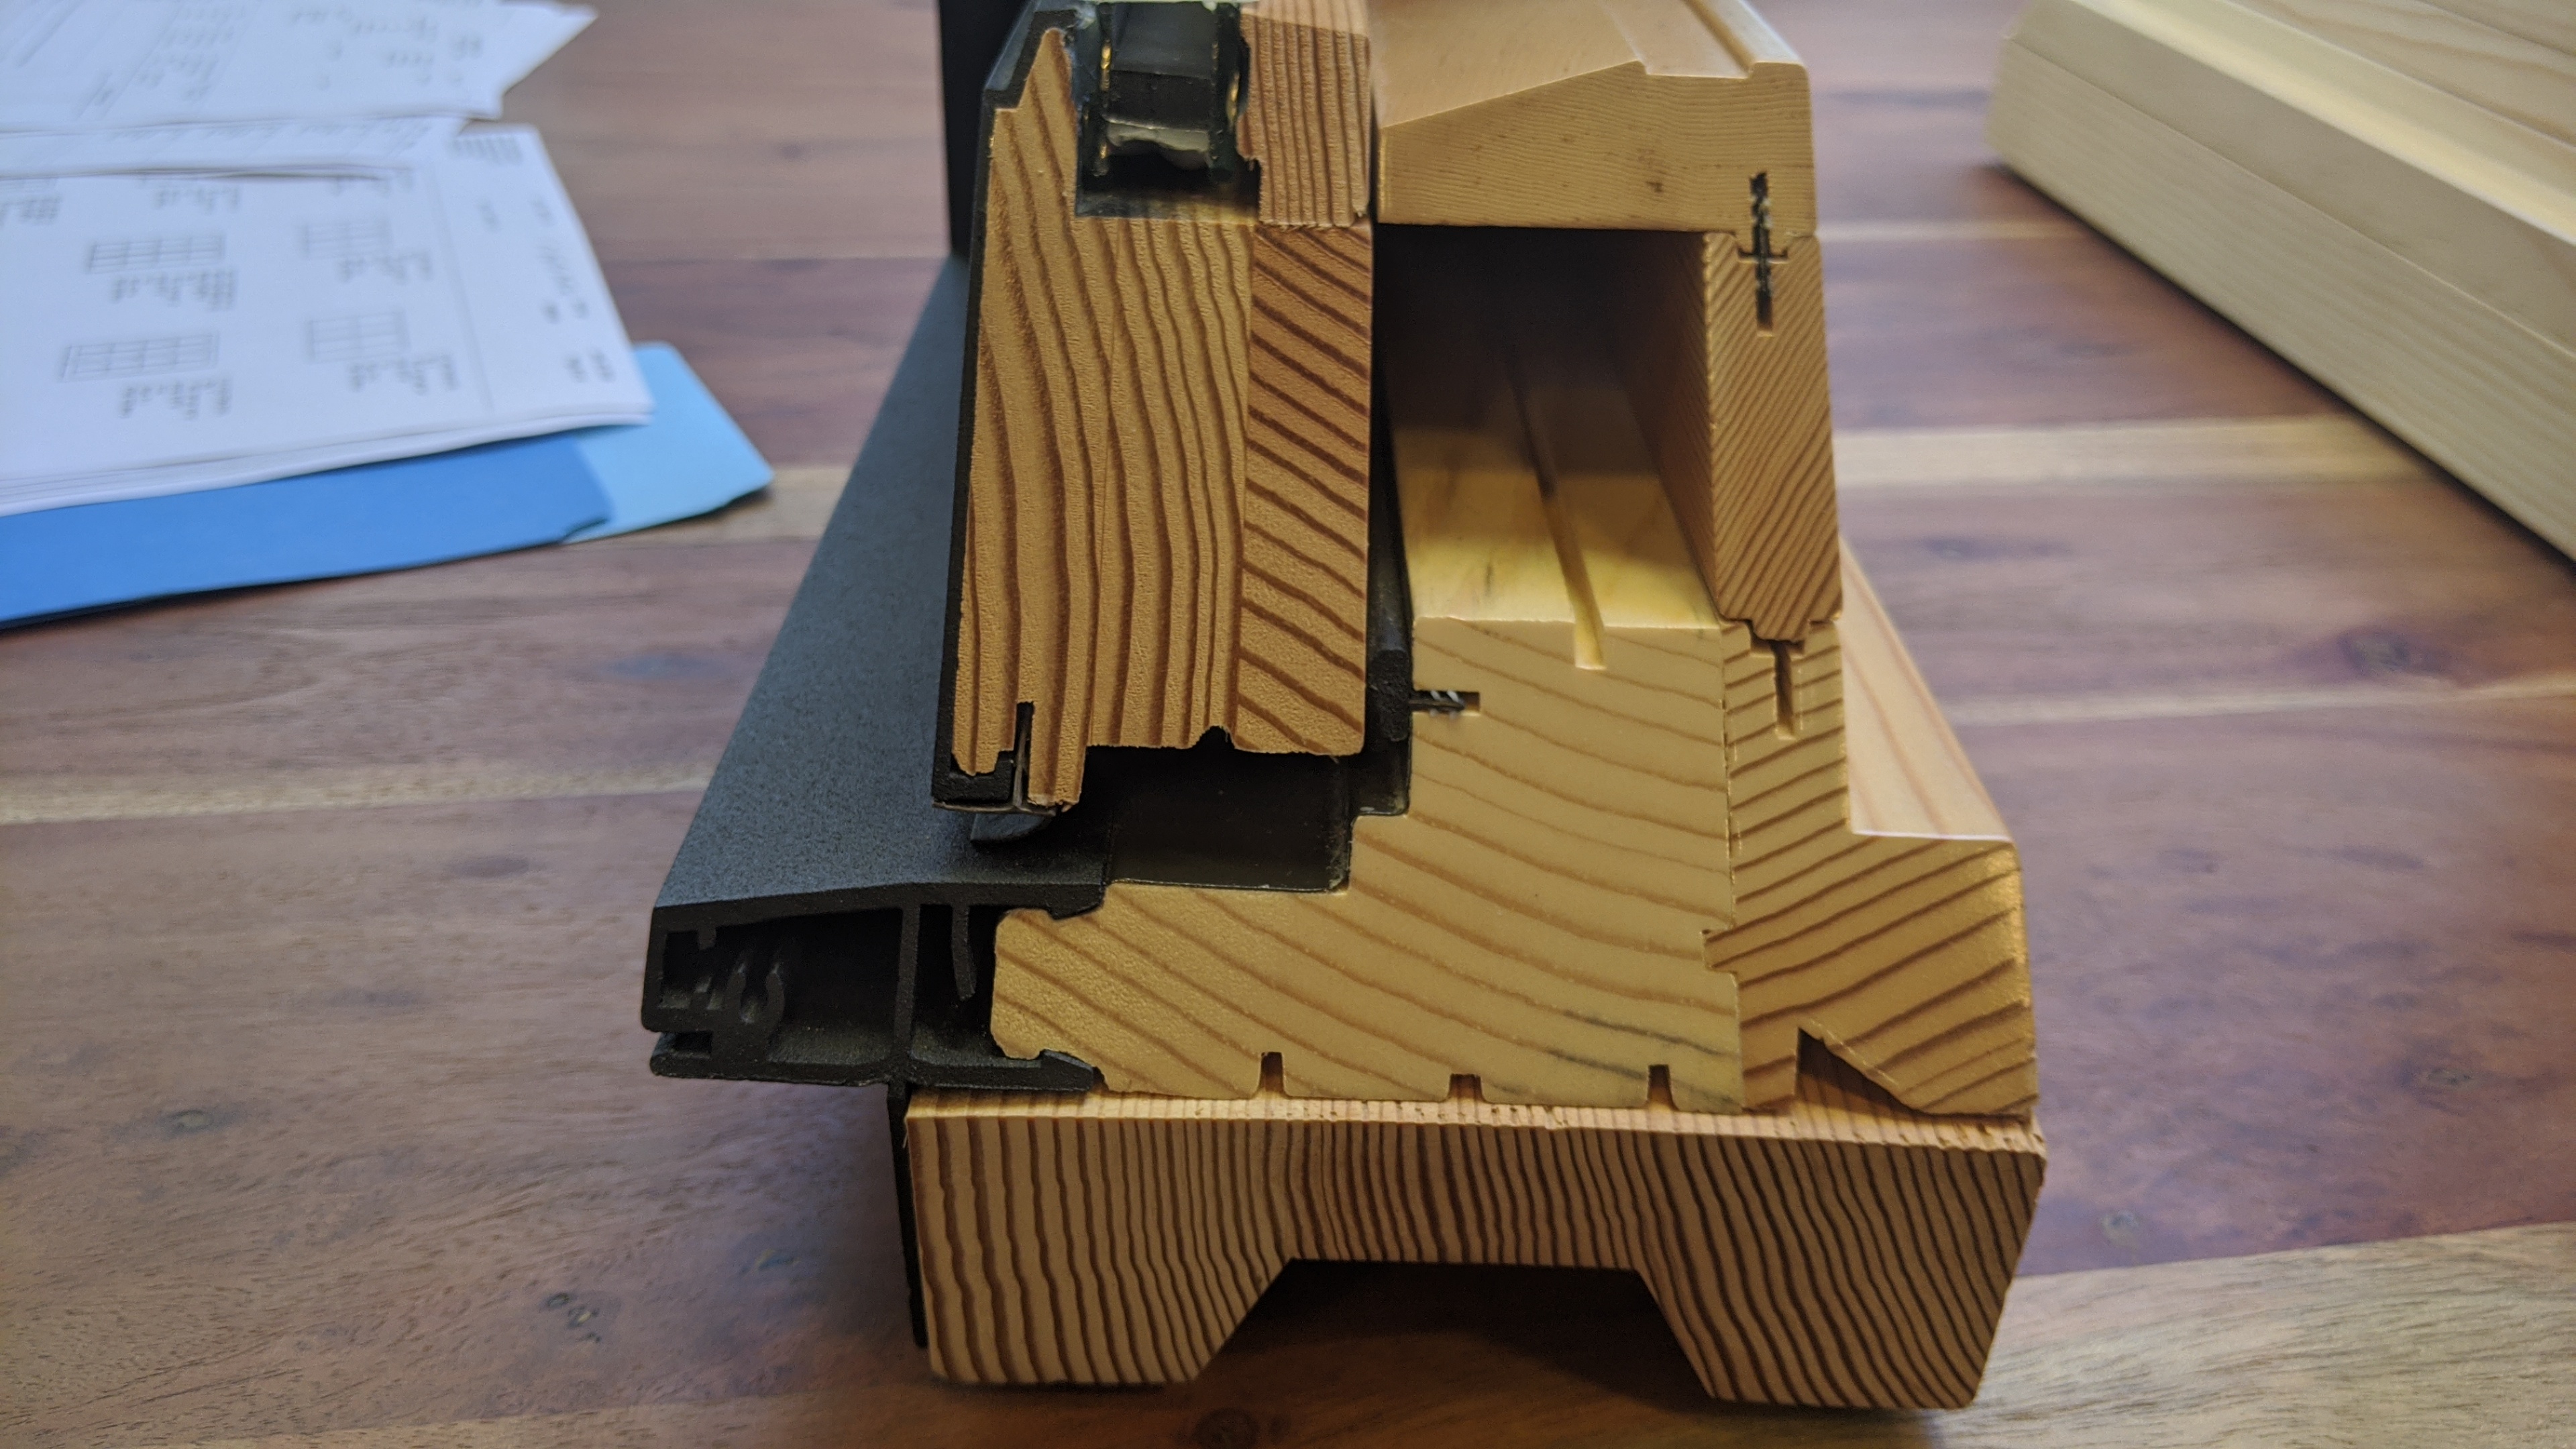
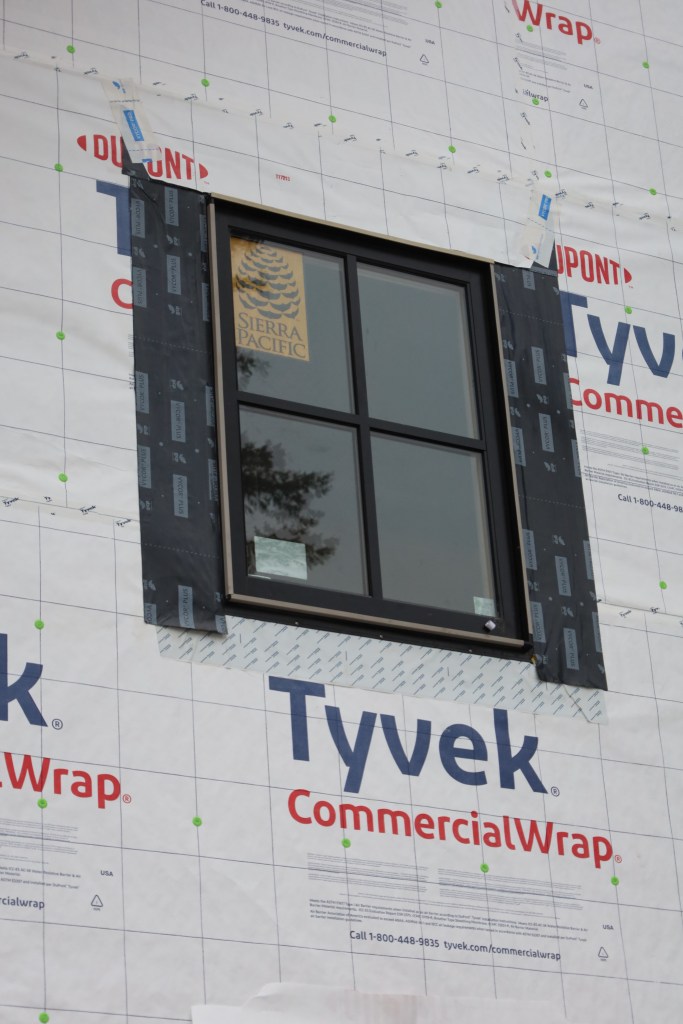
Our windows are all pine with a black aluminum exterior. I had no idea how complicated the construction of a window is. We got to see the cross sections in the show room.
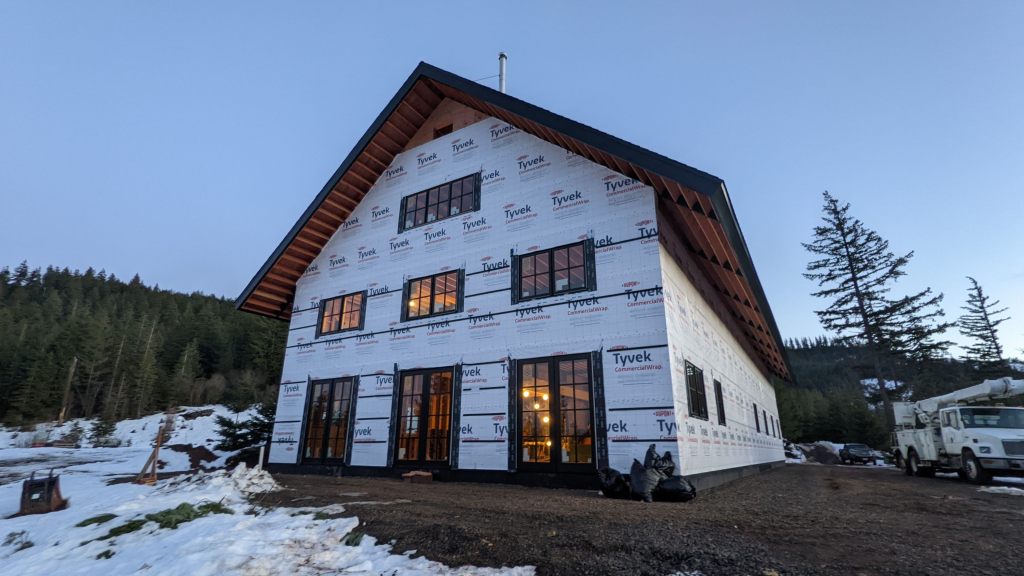
Fast forward to December 2021 when our windows came in! We had to reschedule the delivery three times due to snow, but the truck finally made it here mid-January. Not only that, but the installation was complete the following day!
How did we put the windows in so quickly?
We hired someone. I’d say it was a good decision. Sam and I probably could have installed 2-3 windows per day, whereas the small crew we hired averaged 12 per day. That’s right – they installed all 24 windows and doors in just two short days!
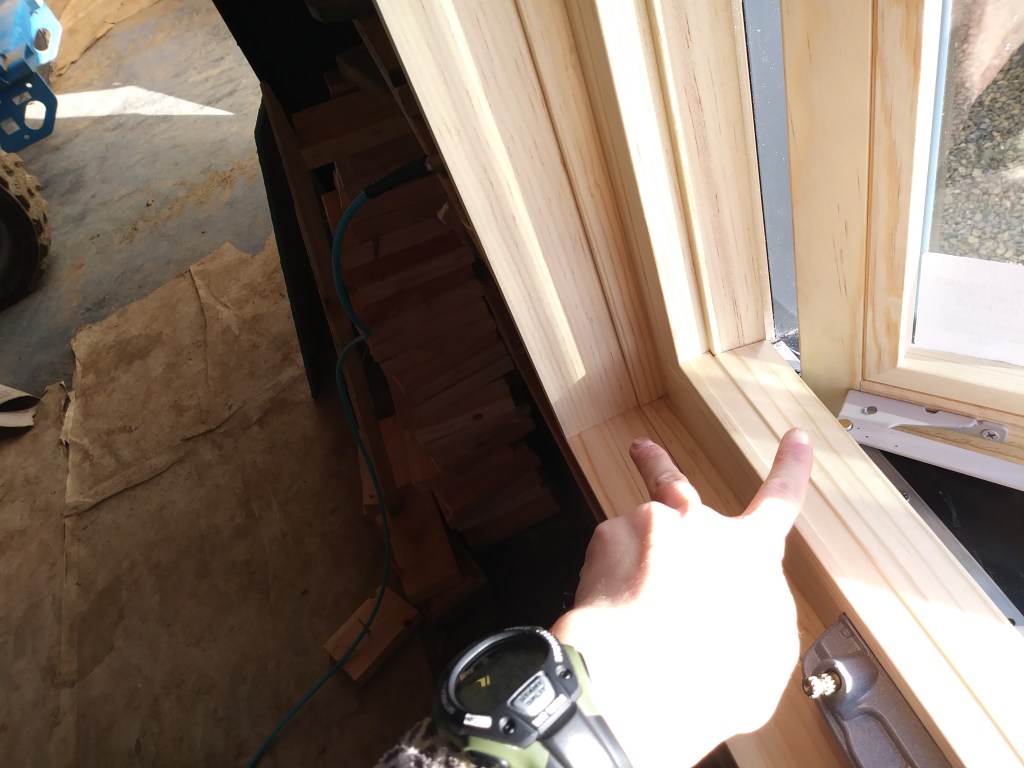
On the day of the delivery, Lanny and his crew arrived early and started cutting the Tyvek around the windows to work on the sill flashing. There are different ways to seal a window sill, but we chose a flexible Vycor tape and “Vycorners”. First, the plastic “Vycorners” were stapled in the lower corners, and then a 12″ wide strip of tape was applied over the window sill (covering the wood and the “Vycorners”). This system should keep any moisture from getting inside the windows.


This task alone would have taken us days. Lanny and his two helpers were nearly done taping all of the window sills by 11:00 am when the delivery truck showed up.

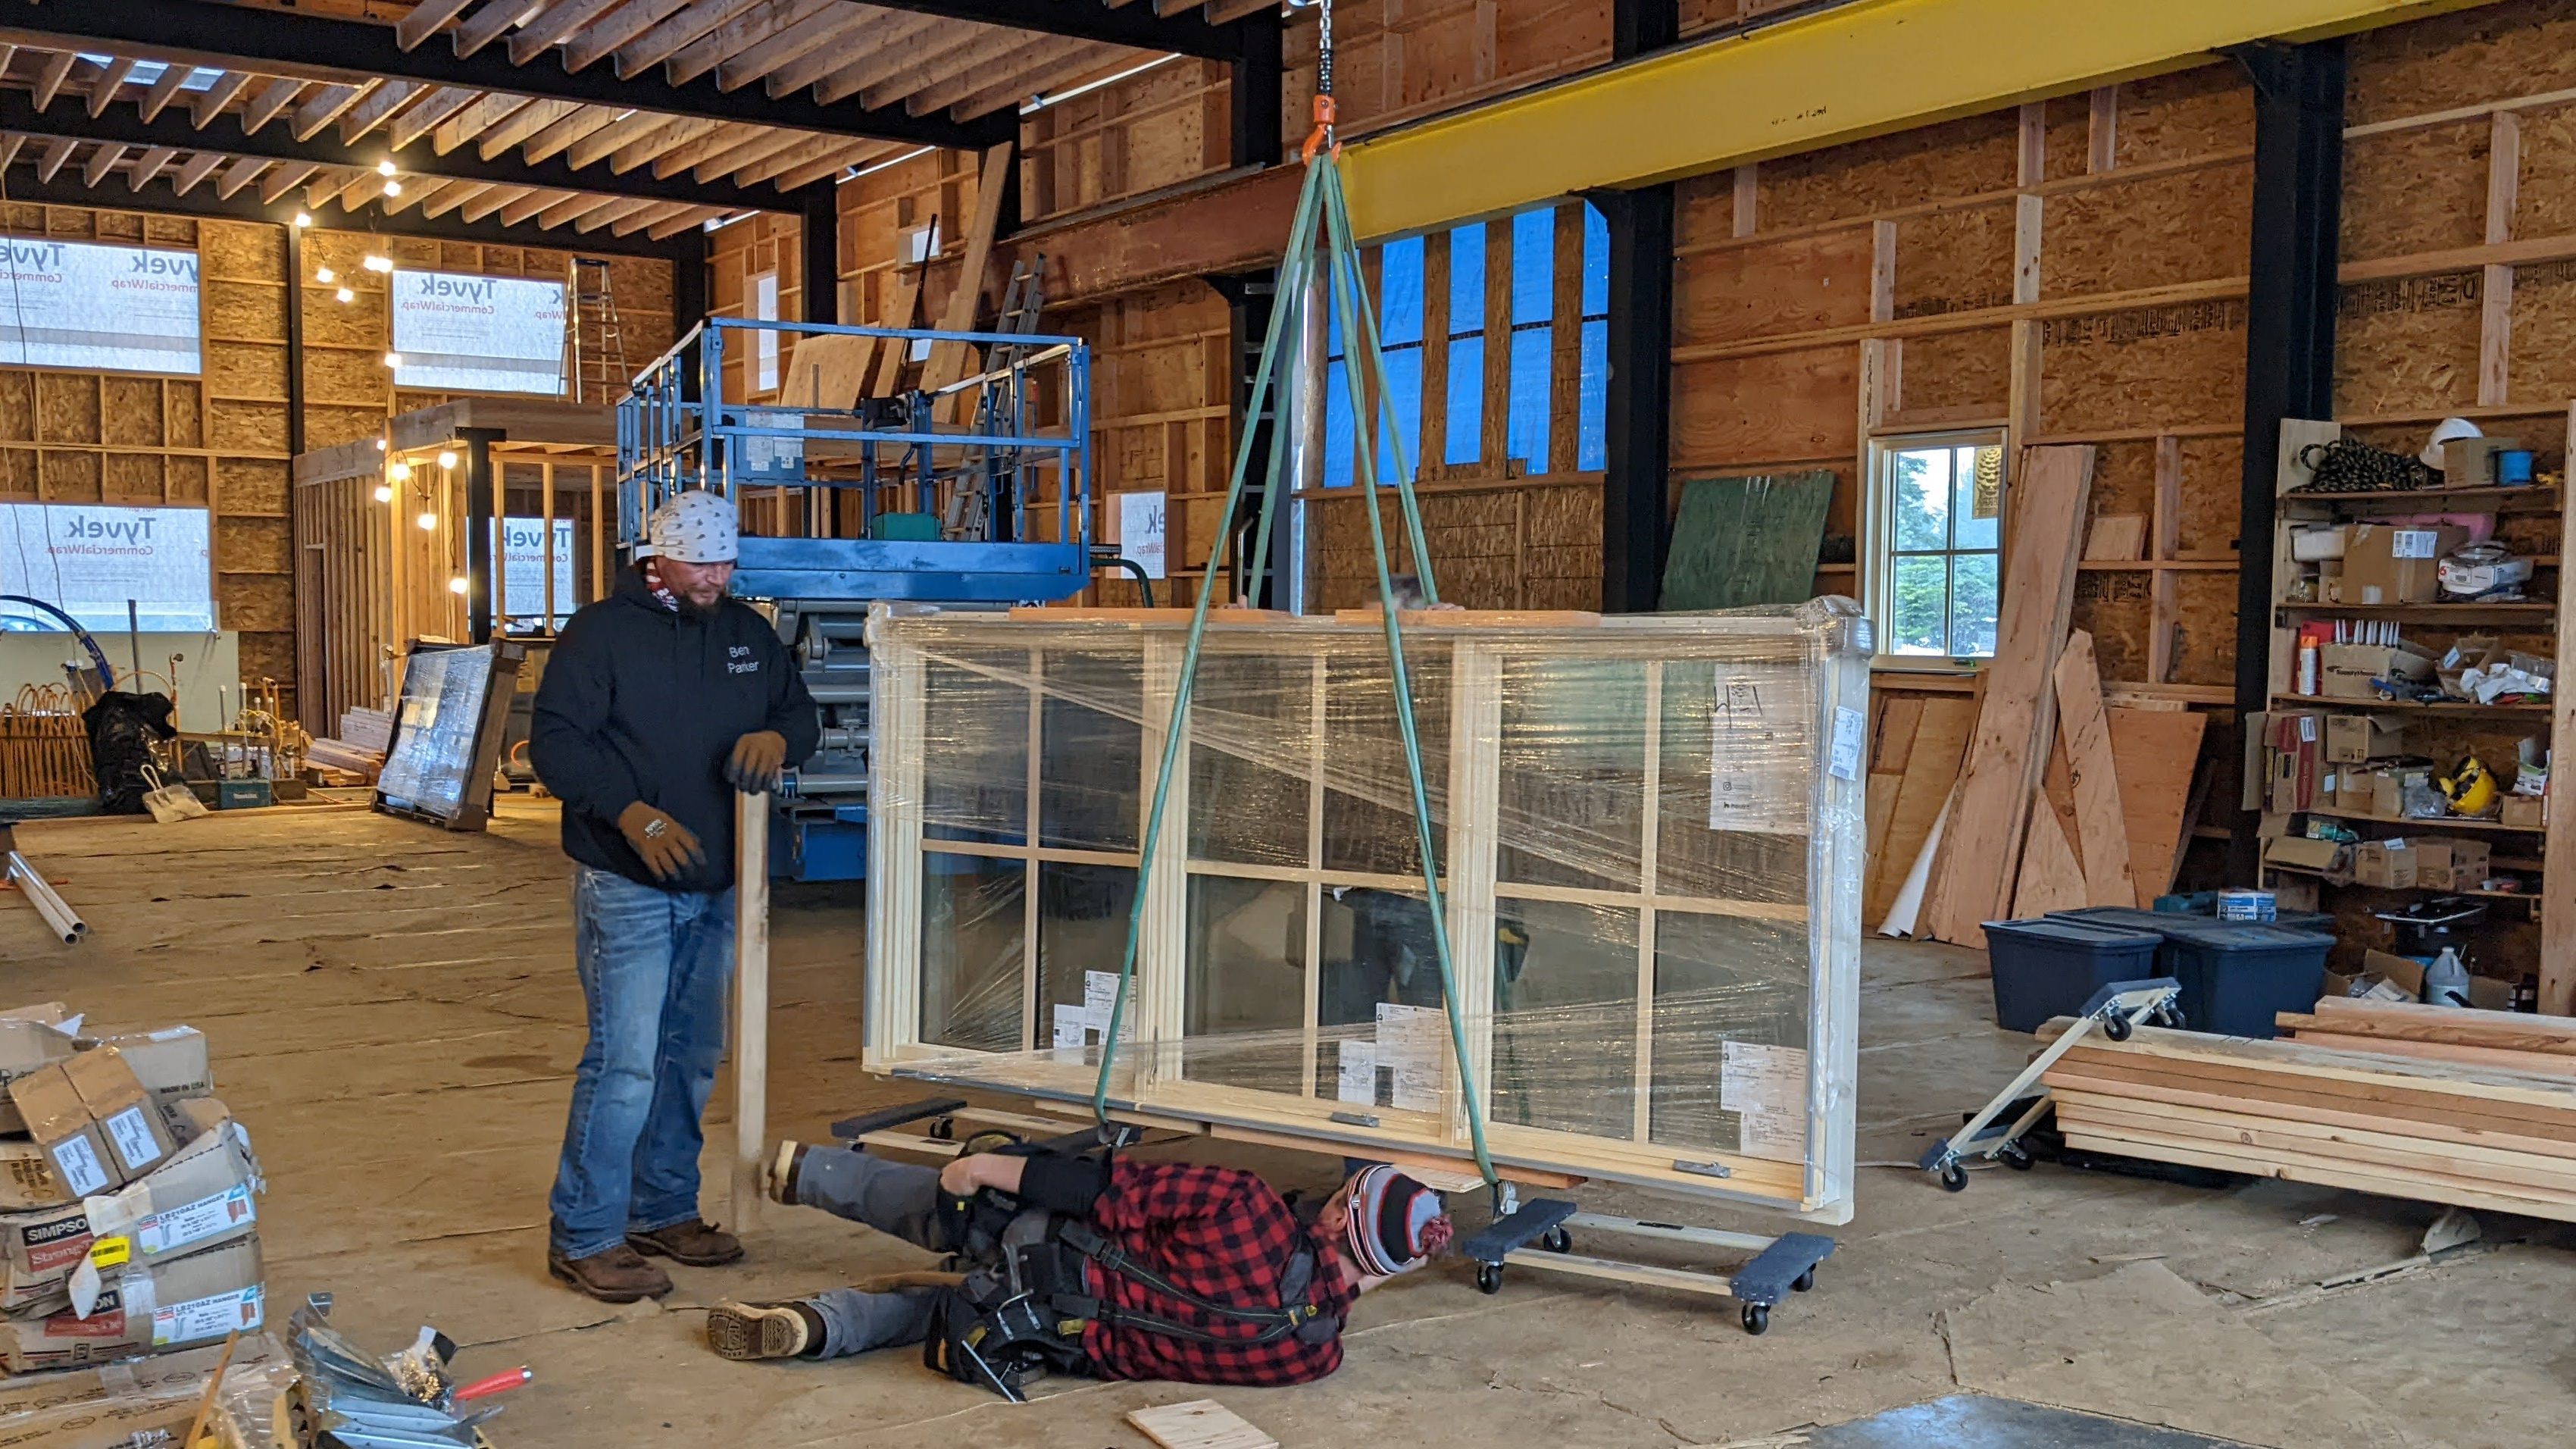
It was our responsibility to unload the truck (another reason we hired help). Most of our windows are small (3 ft x 4 ft), but we have a few triple the size, plus some French patio doors (which come as one heavy single unit).
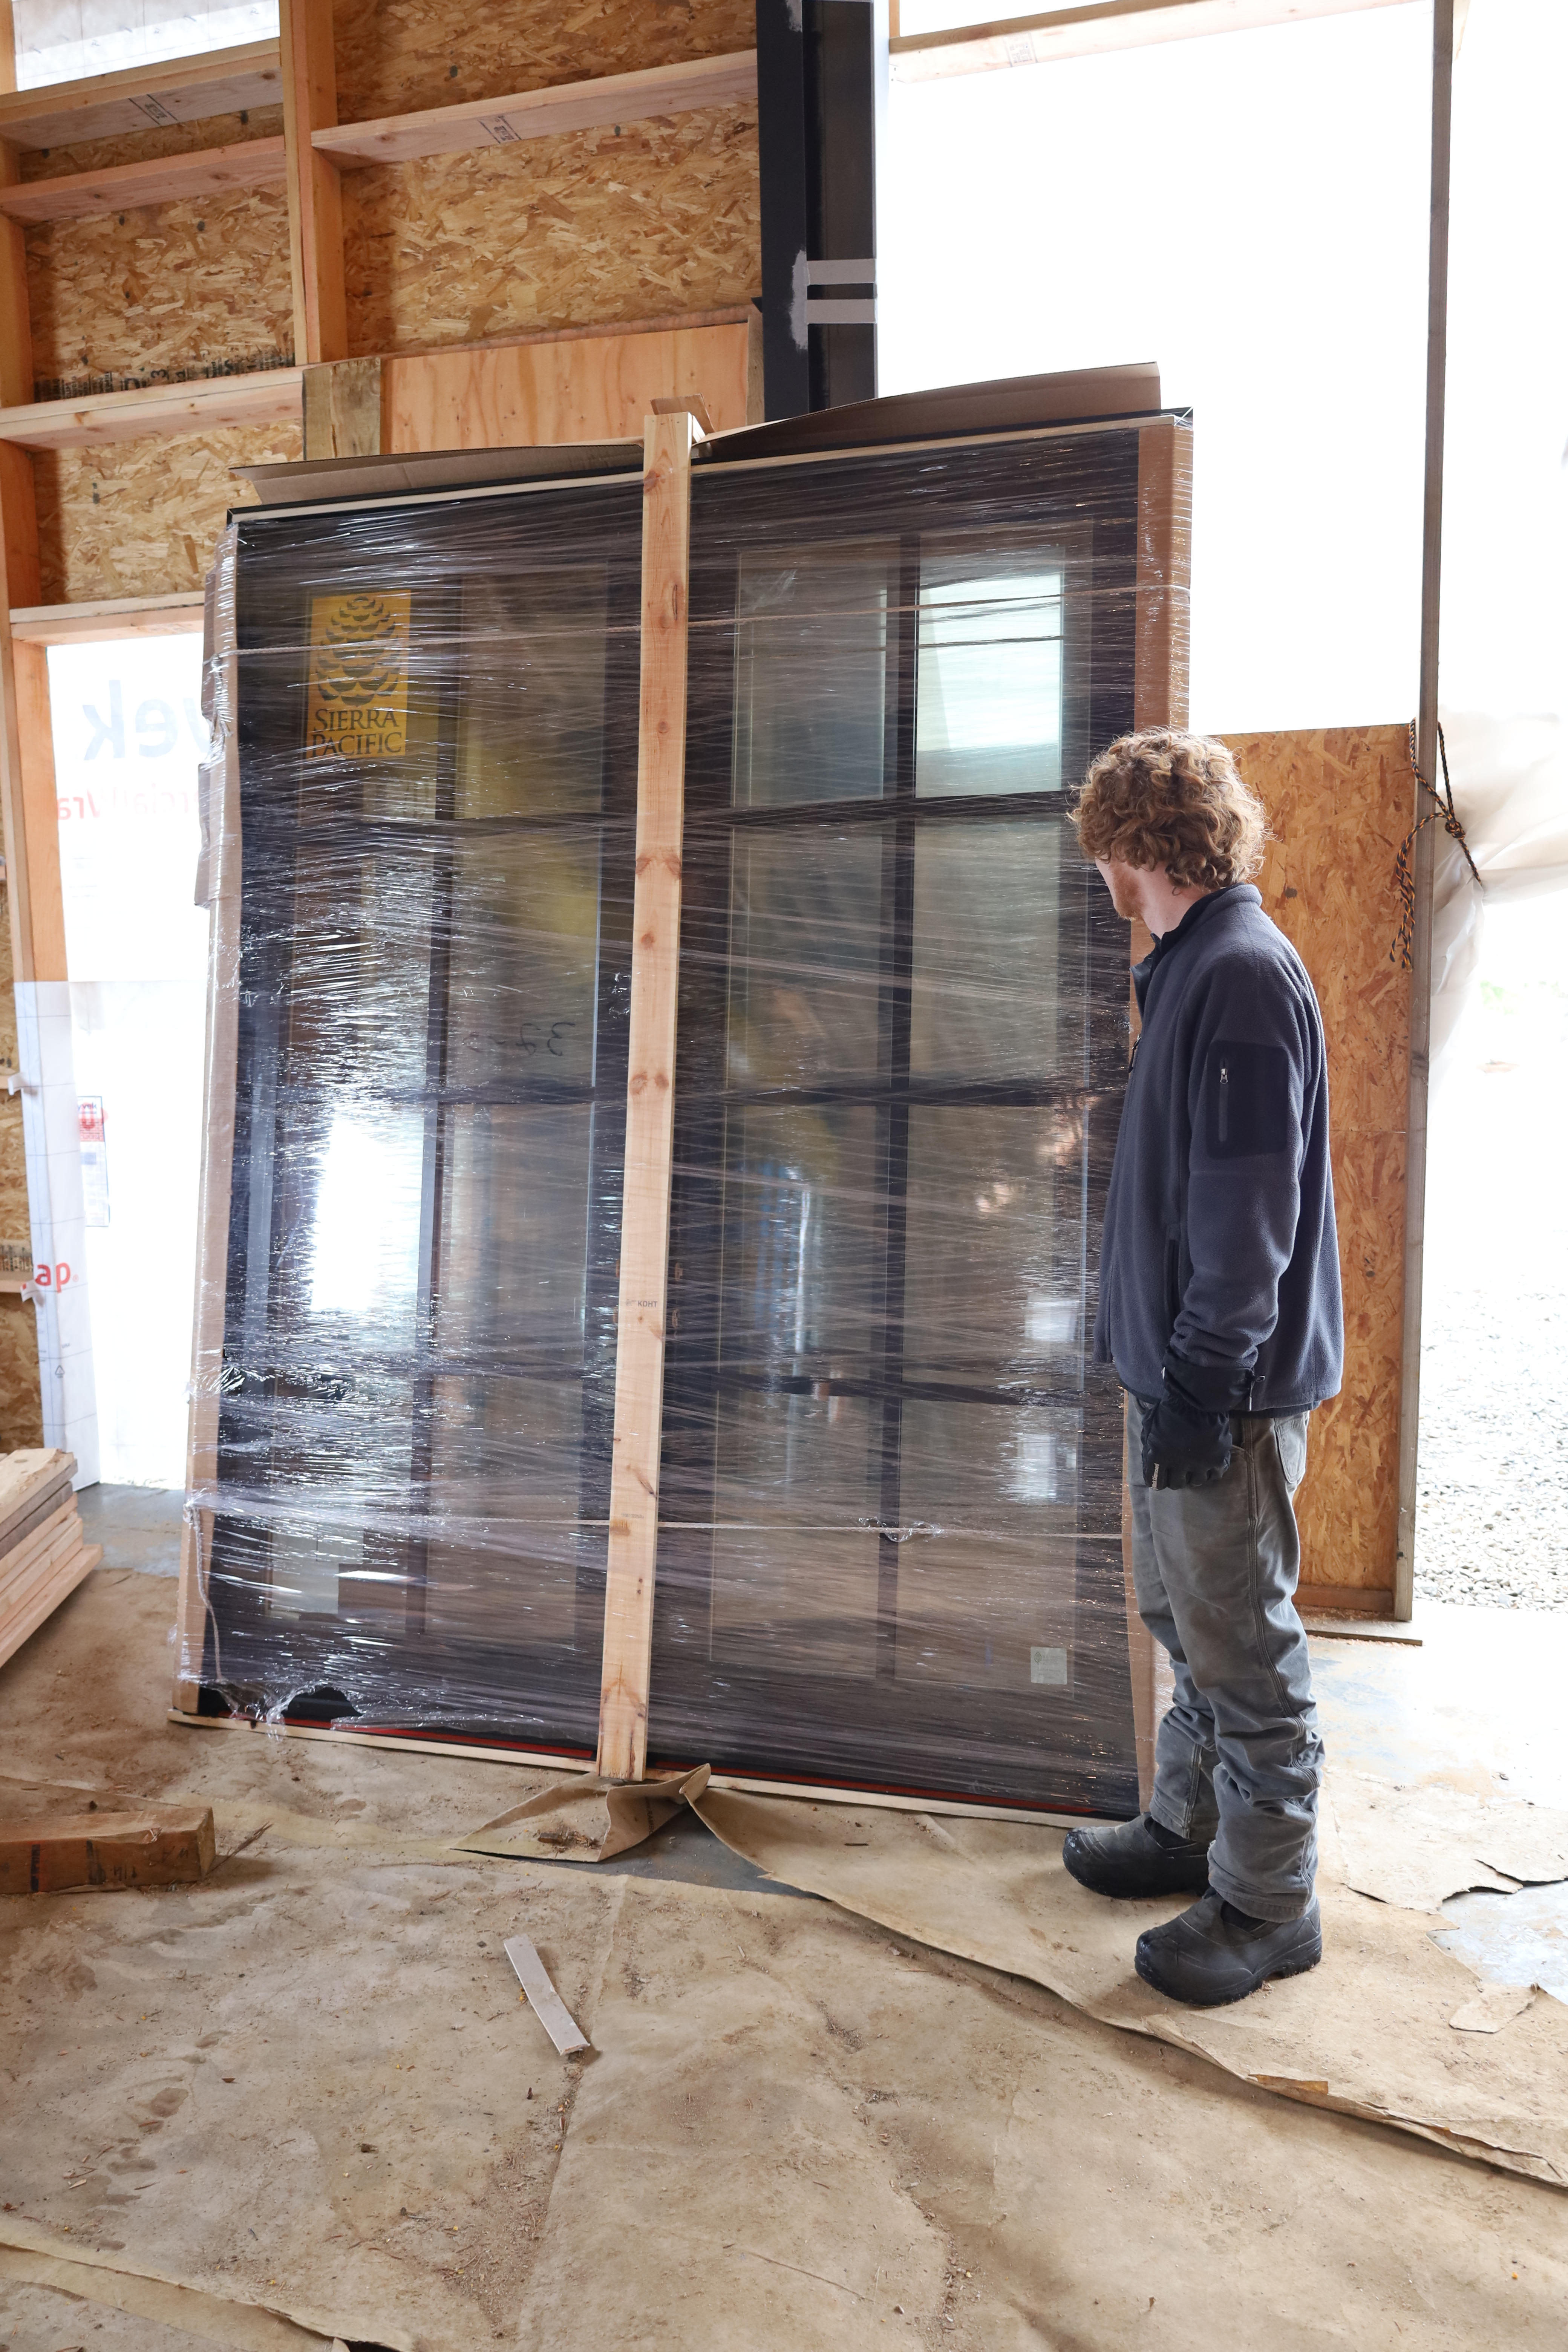

We ordered some cheap dollies from Harbor Freight to help move the heavier windows.

The crew began installing the windows while Sam and John were unloading them. First they had to drill holes through the aluminum window flanges (to screw them into the framing). Why they don’t come pre-drilled remains a mystery.

After drilling tiny holes around the perimeter, caulk was applied to the seams and flange. We went through about 10 tubes of caulk. It’s a good thing Home Depot offers case discounts.
Then, the windows were inserted. They all fit nicely due to our precision framing.

Lanny checked that the windows were level and square before screwing them into place. Oddly enough, some of the windows weren’t made very square… Some tweaking and additional shimming was required for a few.
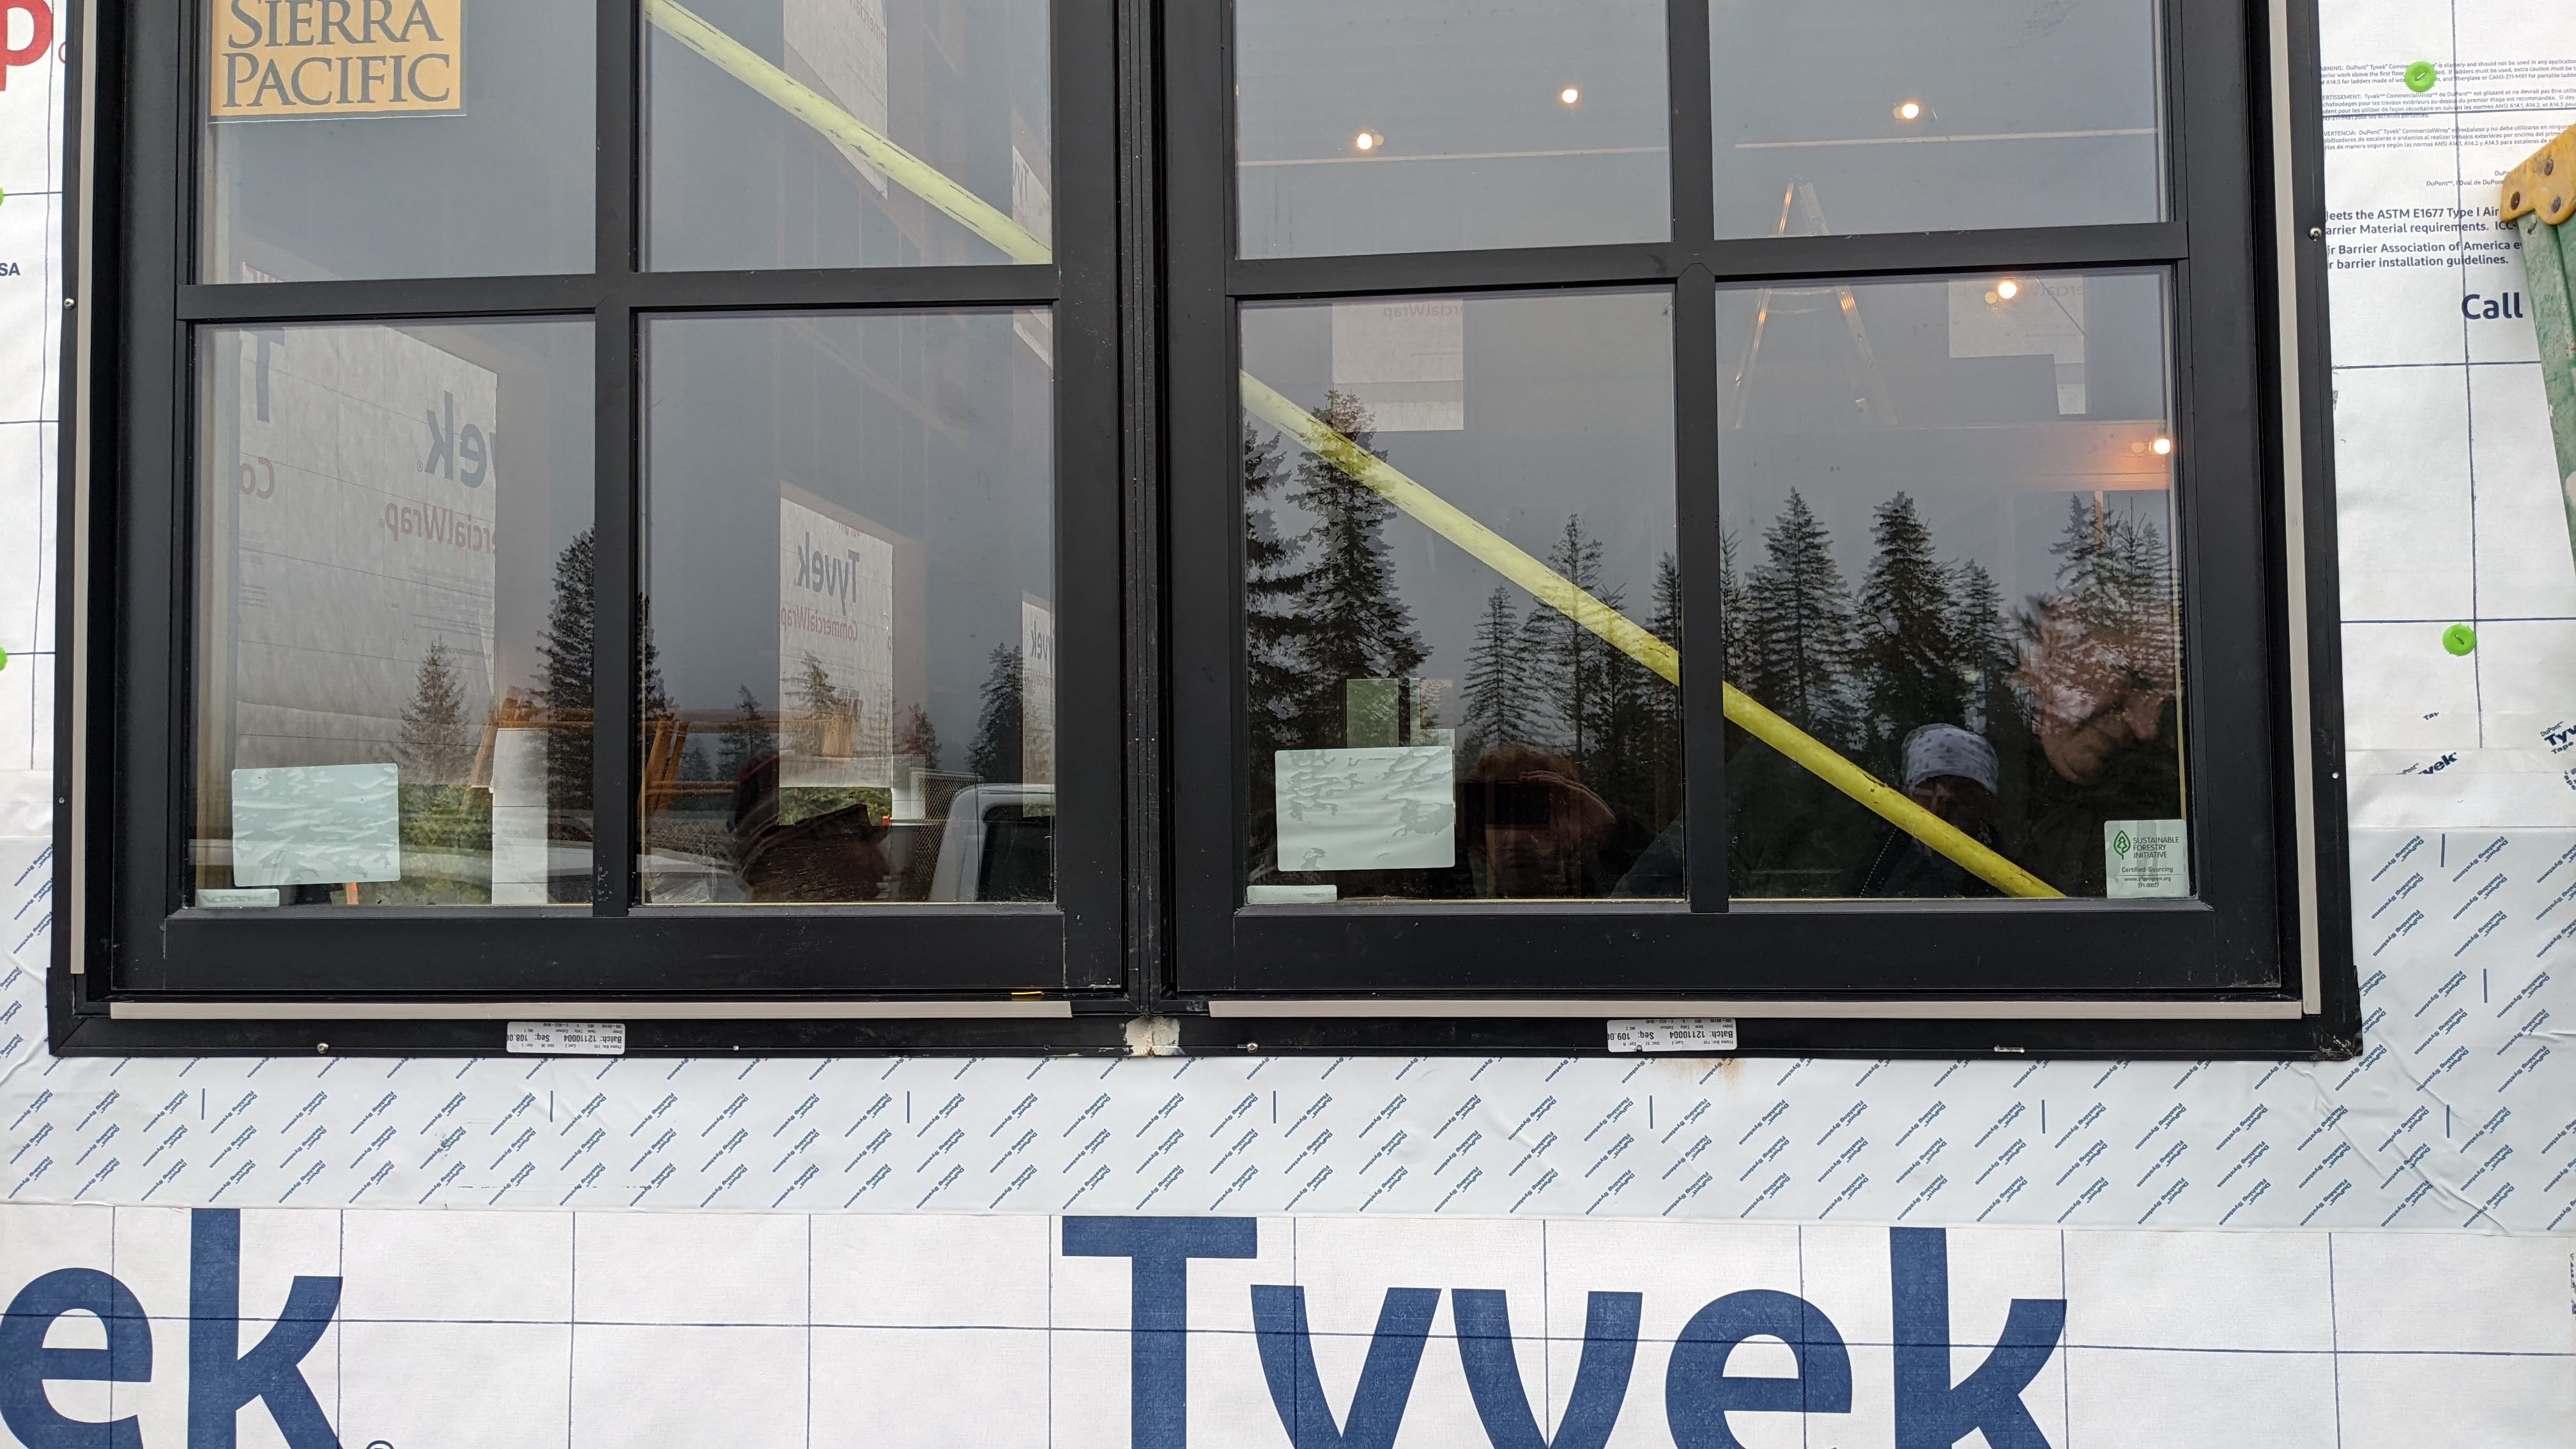

Finally, the rest of the flashing was applied. 9″ wide pieces of Vycor tape cover the sides, and then another 9″ piece goes across the top. The tape is always done from bottom to top, so water can flow down over each layer. Lastly, the Tyvek is flopped back down over the header tape. The tape is very sticky, and this process looked tedious, not to mention cold, since you can’t wear gloves when handling tape.
The windows on the first level went very quickly. The triplet windows on the third level were more of a production. We used the chain hoist to load the windows into the scissor lift. One guy got on the ground to screw a temporary base to the window. The crew was very excited by all of this (even the guy on the ground), as they often have to build scaffolding and carry the windows by hand.
Then out the building and up they went…
Until the scissor lift got stuck. It’s wheels were spinning on the uneven gravel and it had to be rescued with the loader.
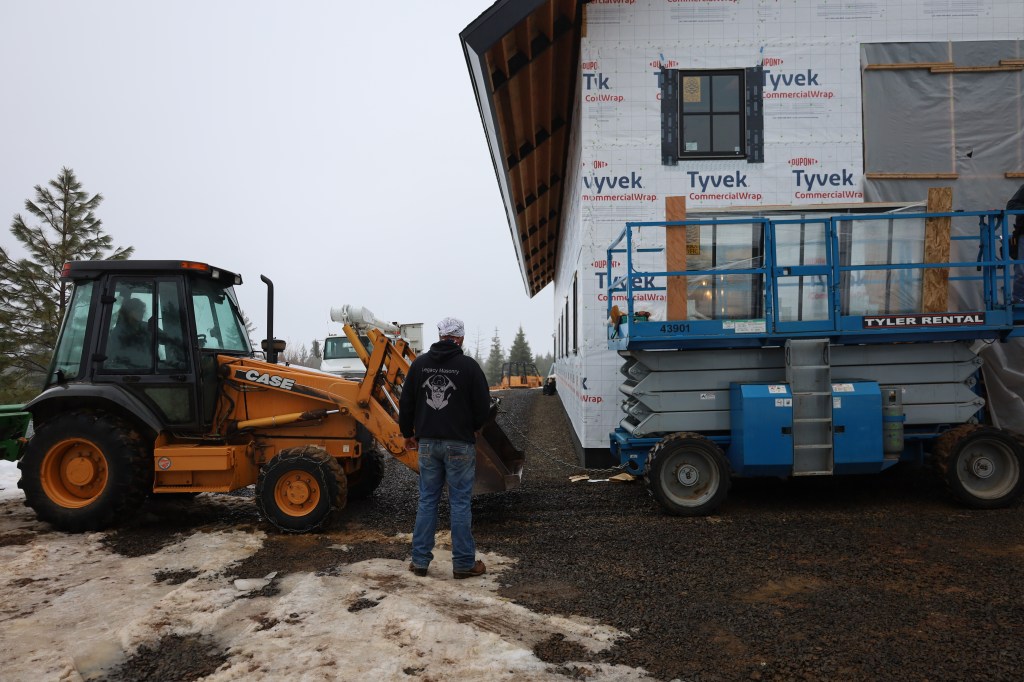
This was the same pesky spot that always causes problems for the scissor lift. Sam got a bucket of gravel for the guys to make a level spot. I felt somewhat guilty standing there photographing the scene while these men shoveled gravel for a good ten minutes.
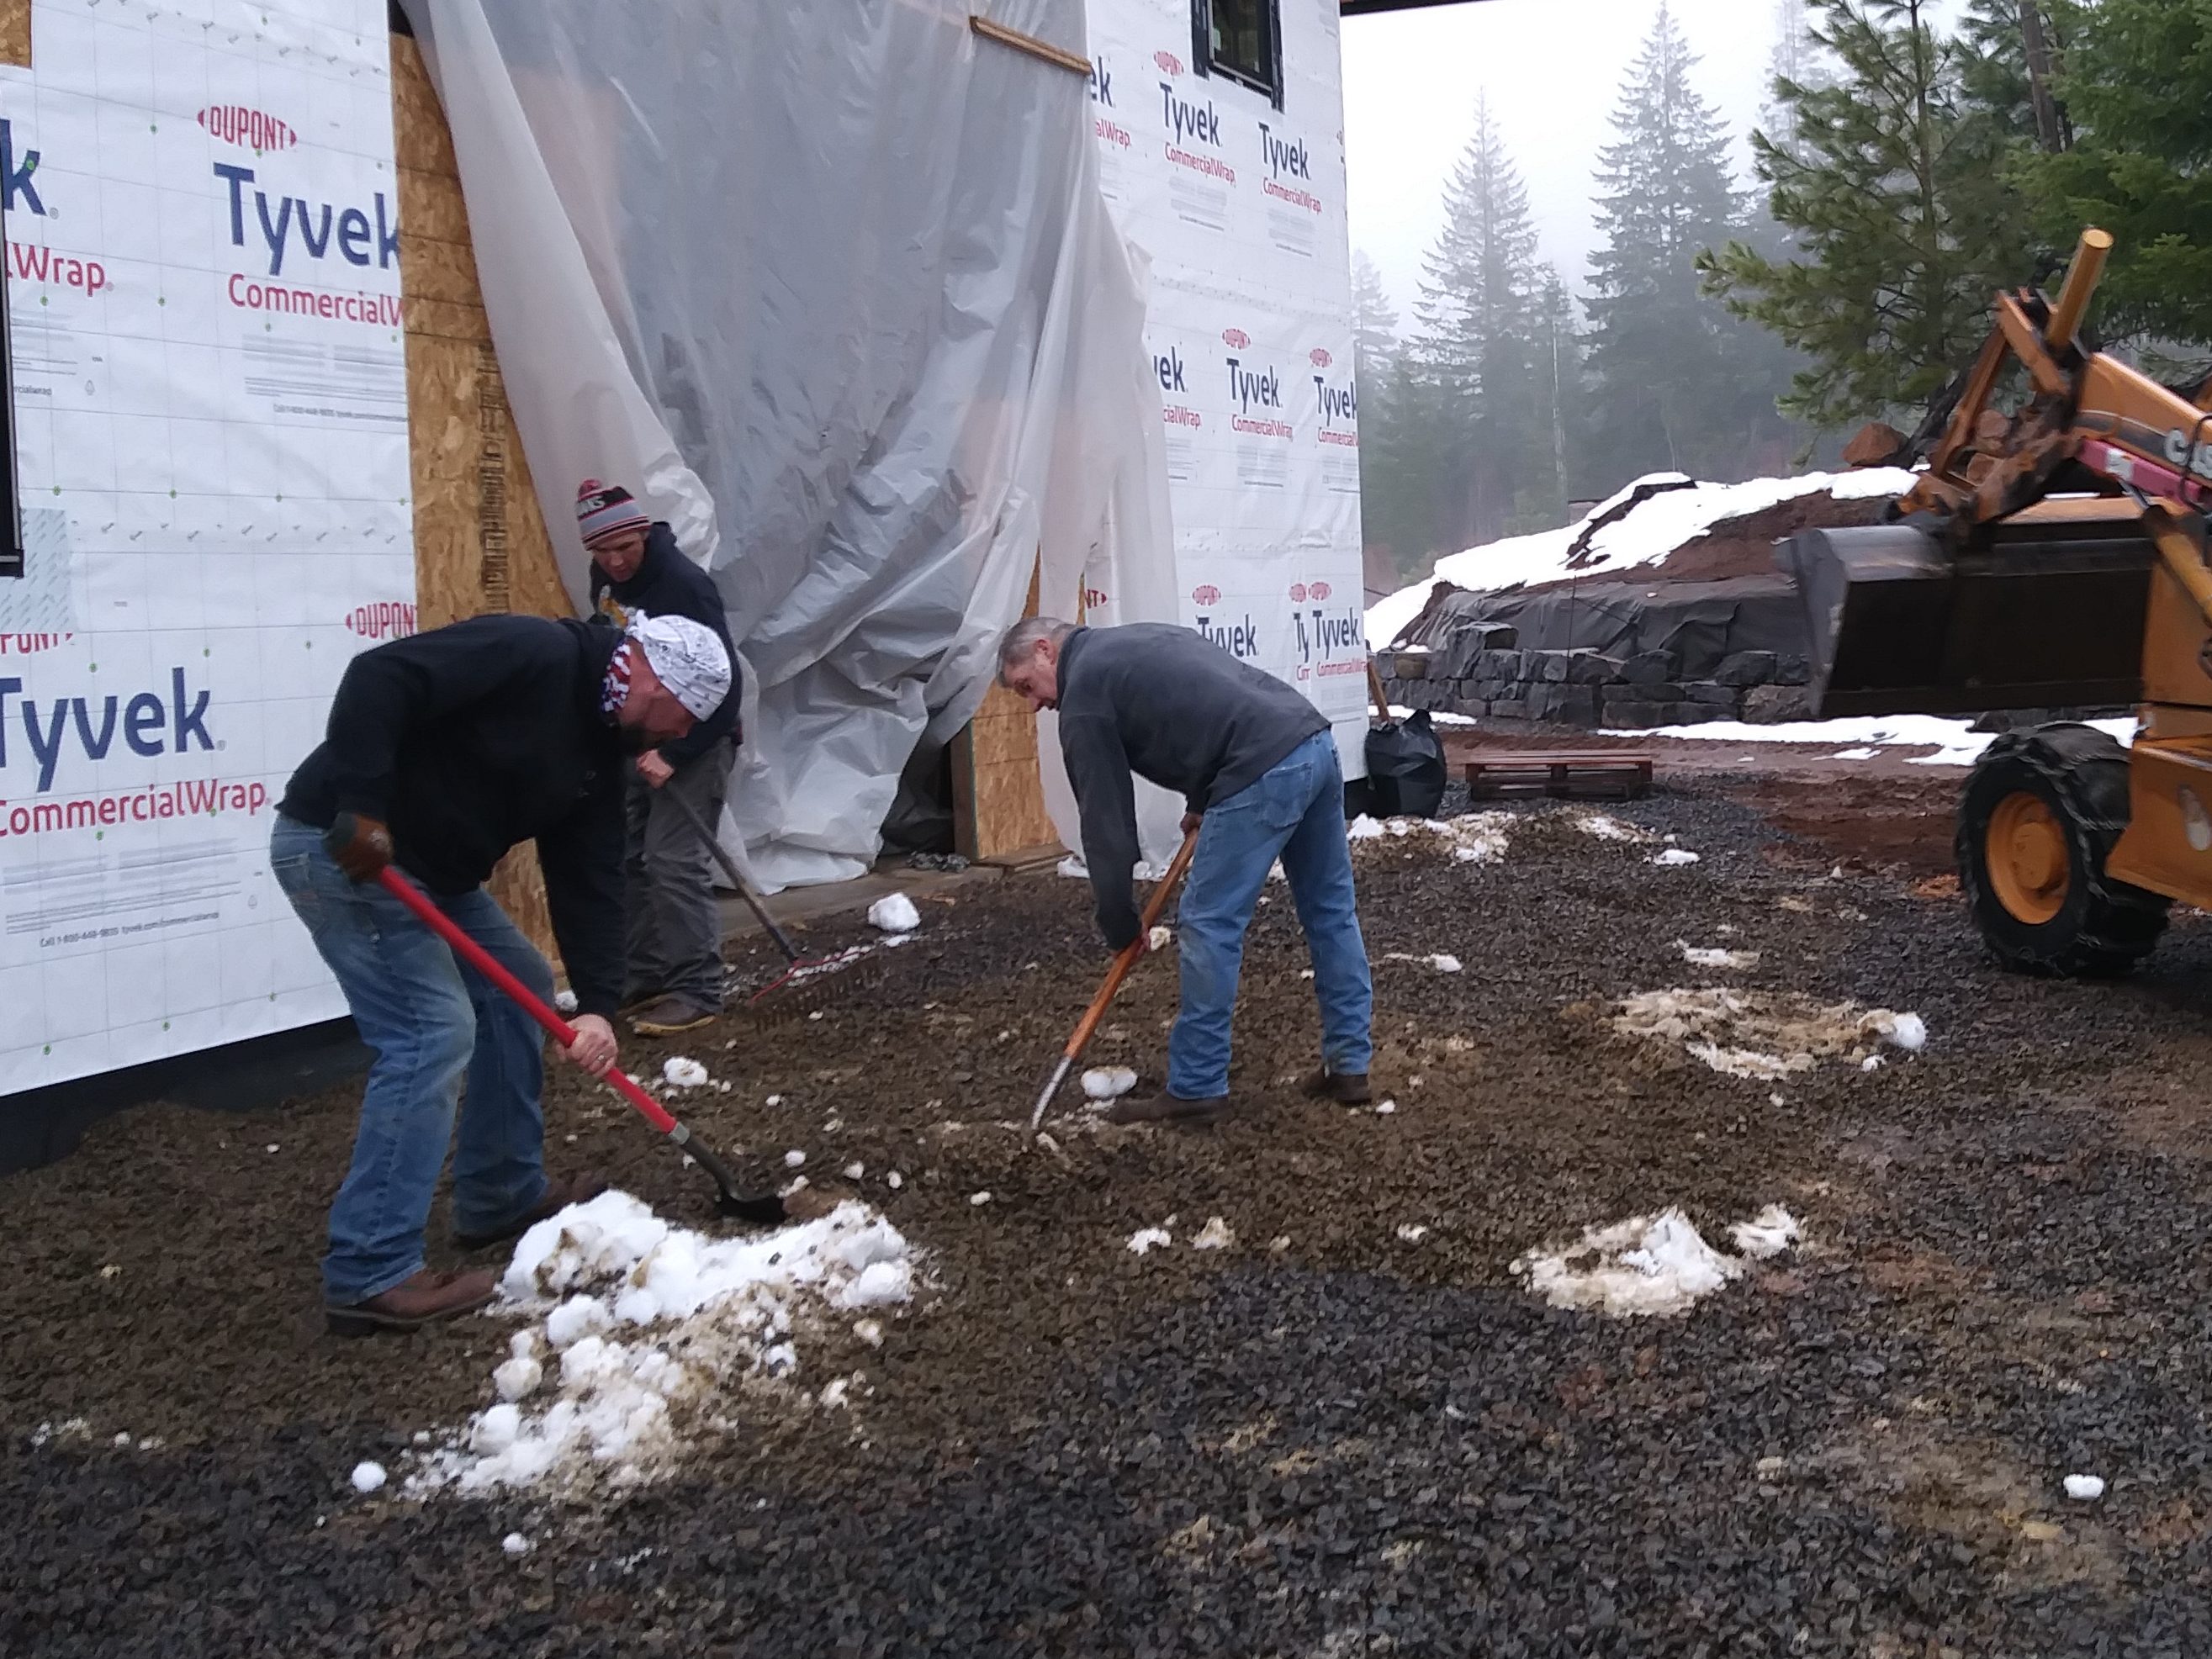
Alas, they fixed the pesky spot and up they went!

Now how to get the window in? The lift leans away from the building as it goes up. Up high, you can barely reach the building with your fingertips. Sam and I weren’t sure how the guys were going to get the heavy window in it’s opening. It was too scary for us to watch, but we were confident they would sort it out. After what seemed like two hours, they got the window in.

The rest were easy. Lanny and his crew returned the next day and finished the job!
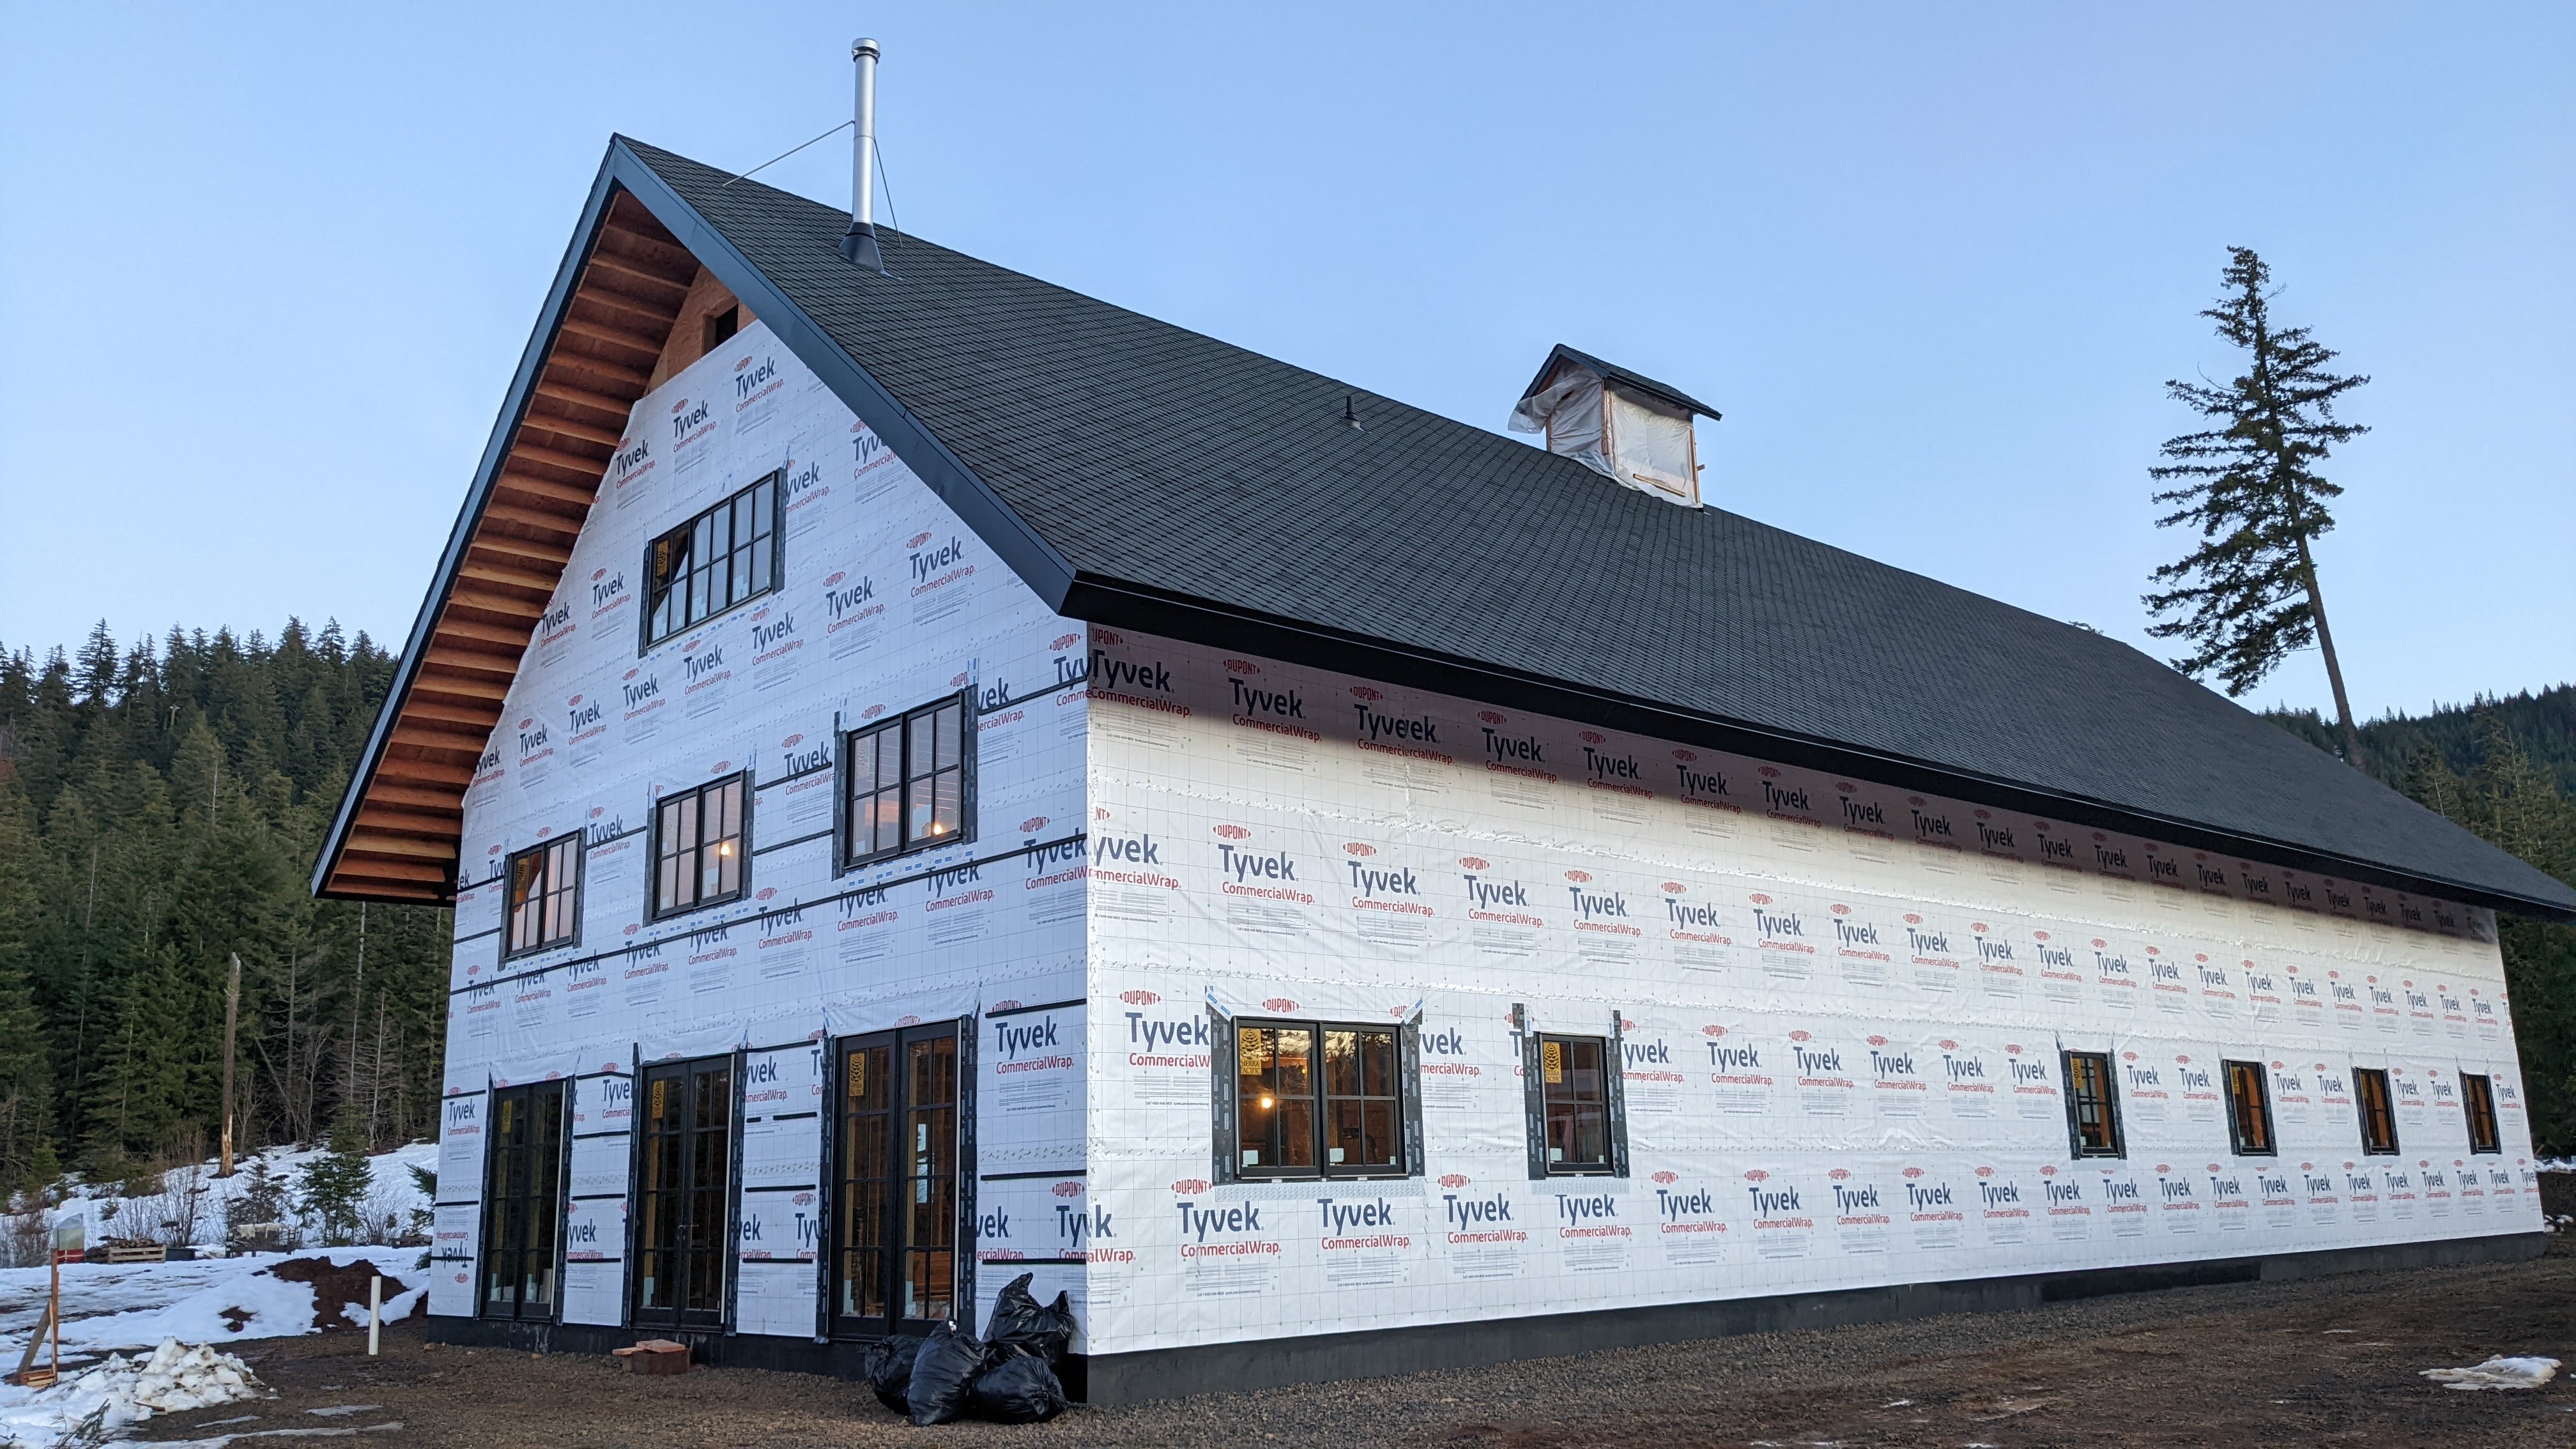

We are leaving the natural pine look on the interior, but we still have to paint all of the pine surfaces with multiple coats of a clear sealer. That will be an ongoing project for the next few months.
We also need to install the screens and the crank hardware. We’re just missing a few doors now.

