Electrical work was next on our to-do list once we completed the plumbing. Time to dust off the boxes of MC cable we’ve been hoarding since last May!
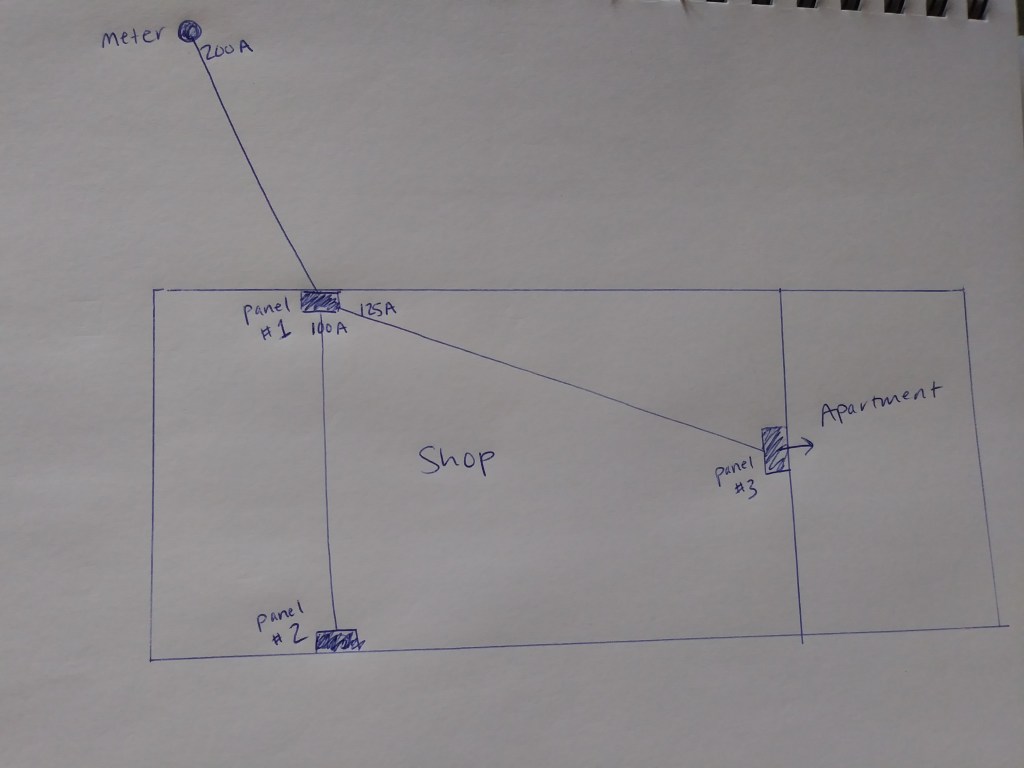
First, we needed to bring power into the building. A few years ago, before we began construction, we had a transformer and a temporary electric panel installed. They are currently about 50 ft away from the building. A conduit runs underground from the outdoor panel and up to a circuit breaker panel in the building (panel #1 below). From here, more conduit is buried under the slab, leading to two additional breaker panels on opposite sides of the shop. One of these will power the apartment (panel #3 below).
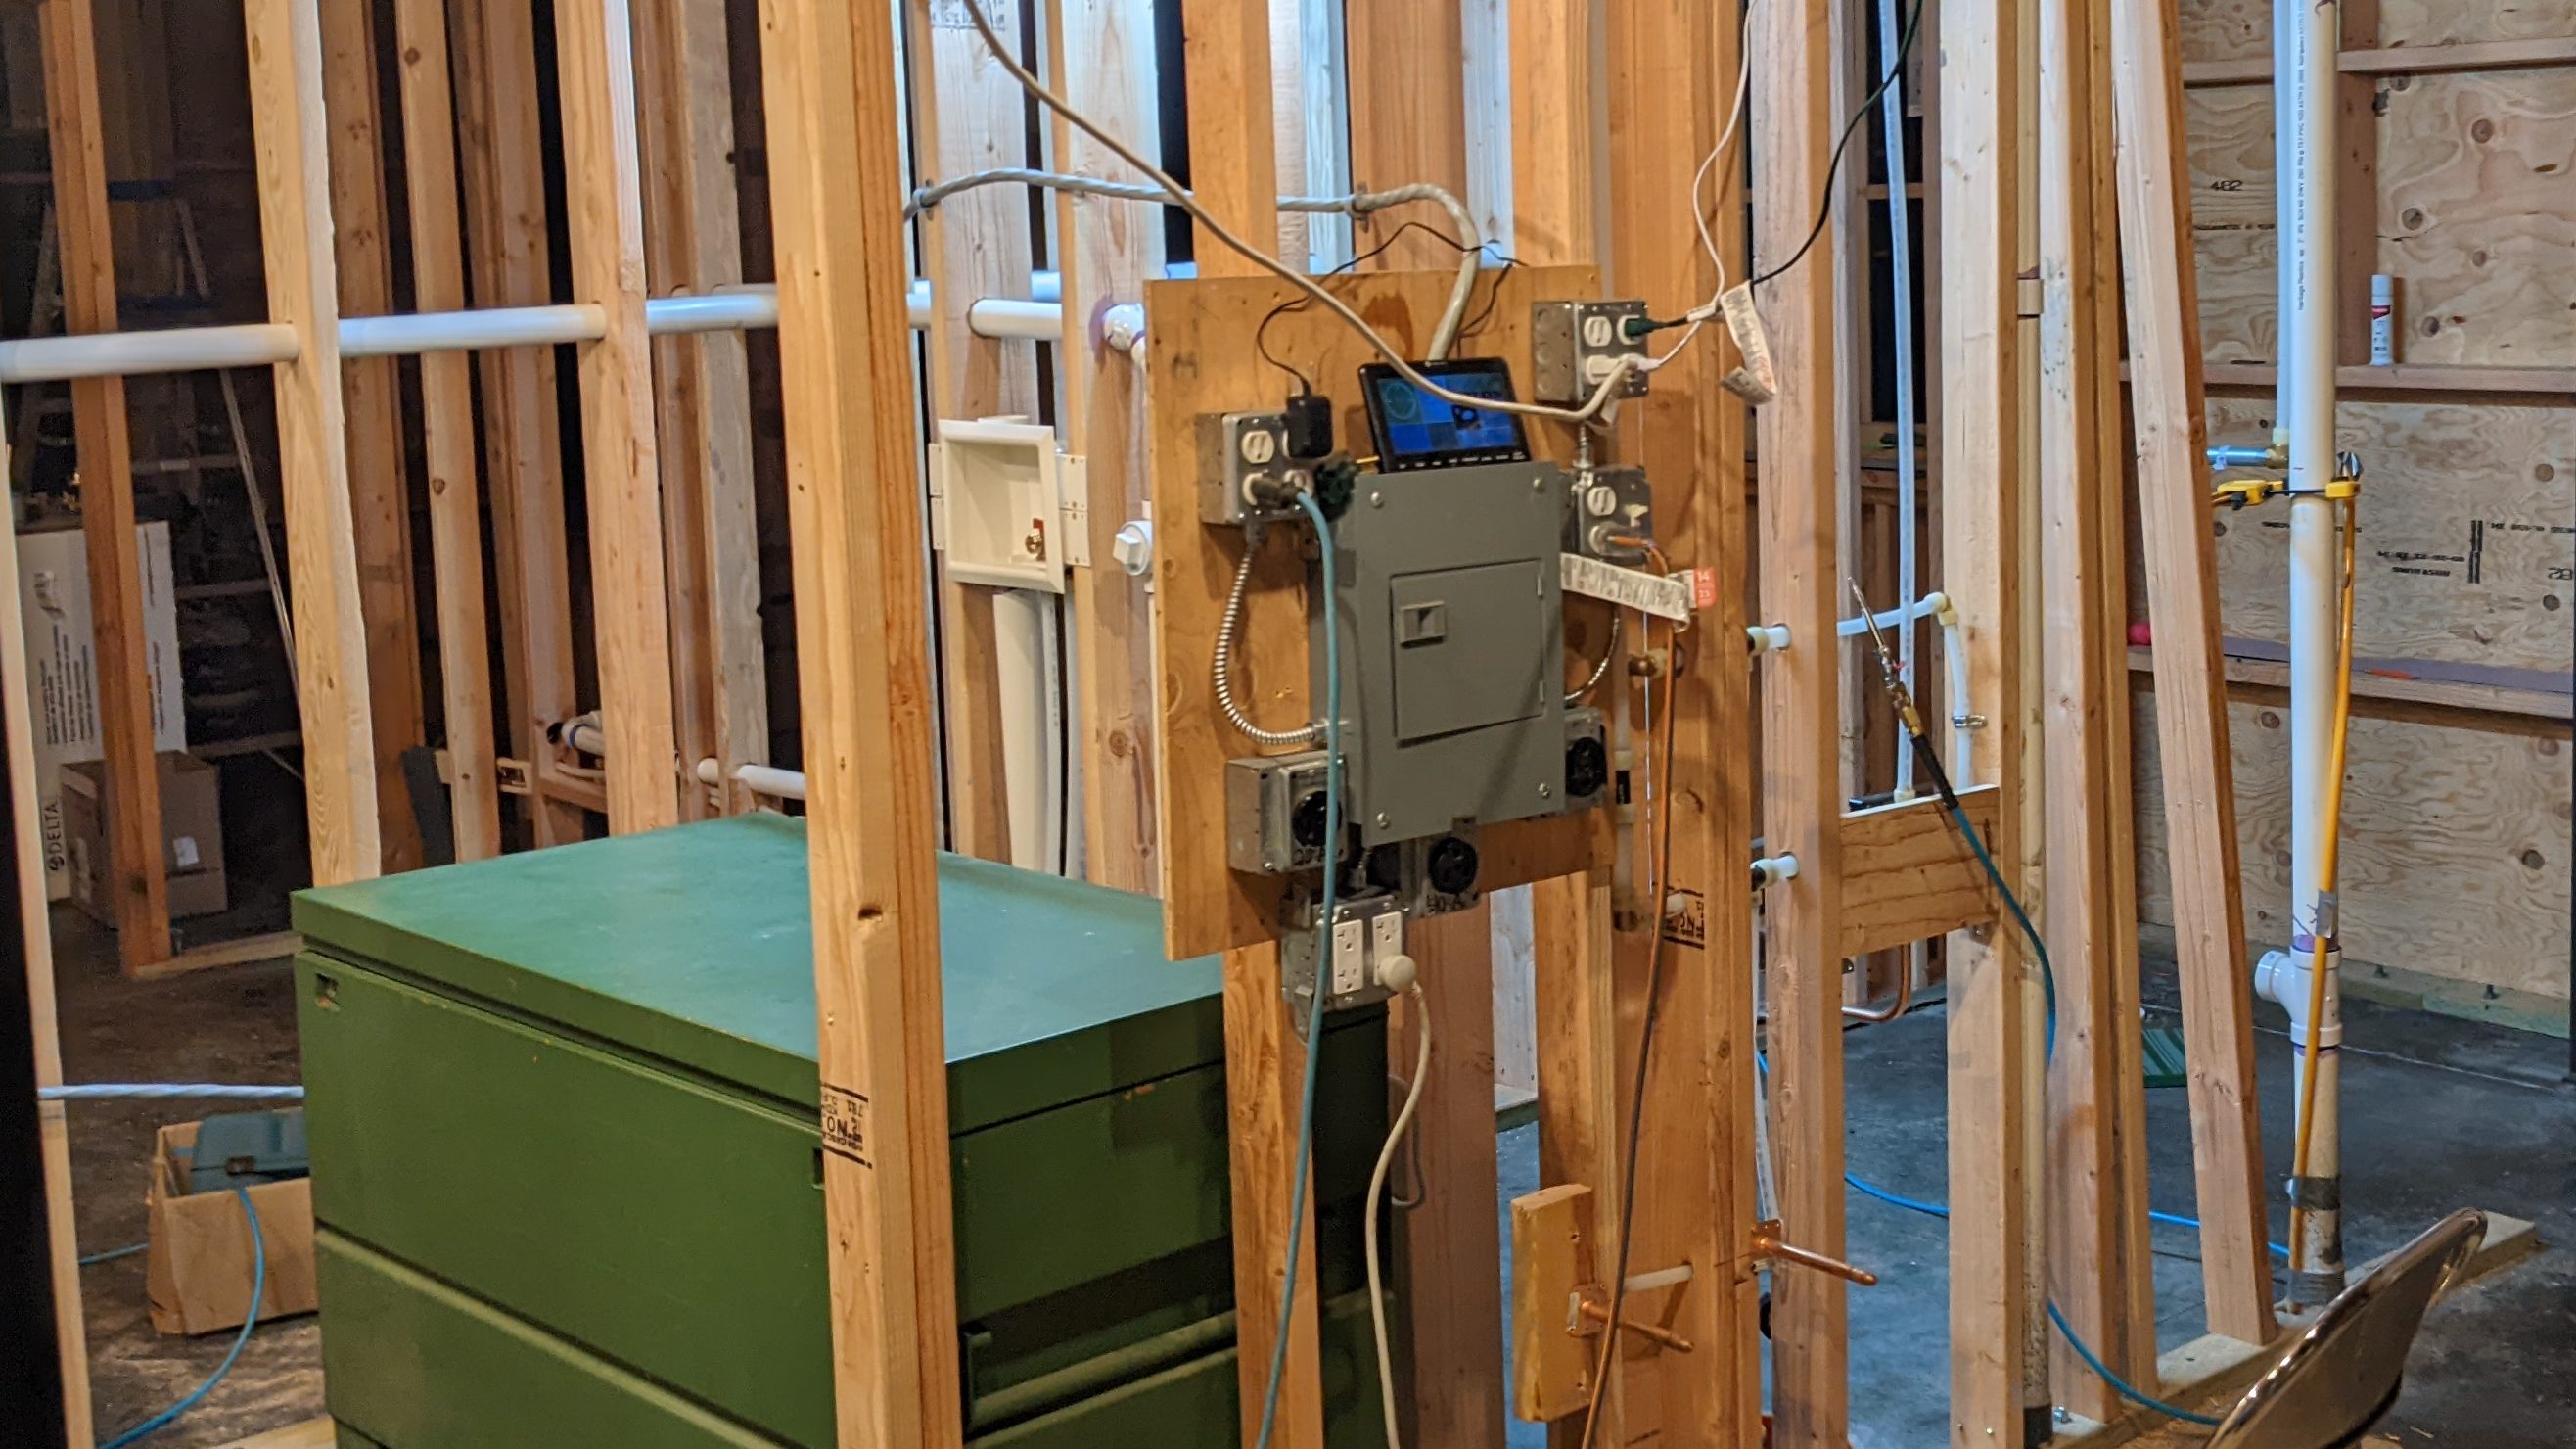
Of all the building material shortages over the last year, electrical supplies have been the most scarce. Everything from meter bases to small wiring parts have been impossible to find. After much grief, Sam settled on a Siemens circuit breaker panel or “load center”. We started with panel #3, which powers the apartment. Sam built this temporary setup since we don’t have walls yet…
Similar to plumbing, Sam and I were interested in different aspects of electrical work. I tackled the design and layouts while Sam worked on the logistics and ordered the supplies (boxes, receptacles, mud rings, wire nuts, and many other electrical parts that were foreign to me).
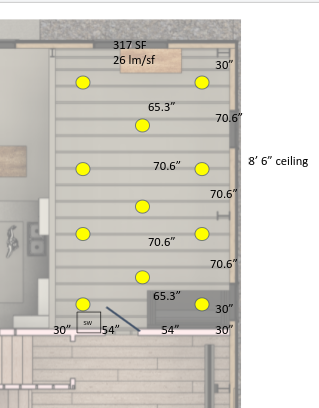
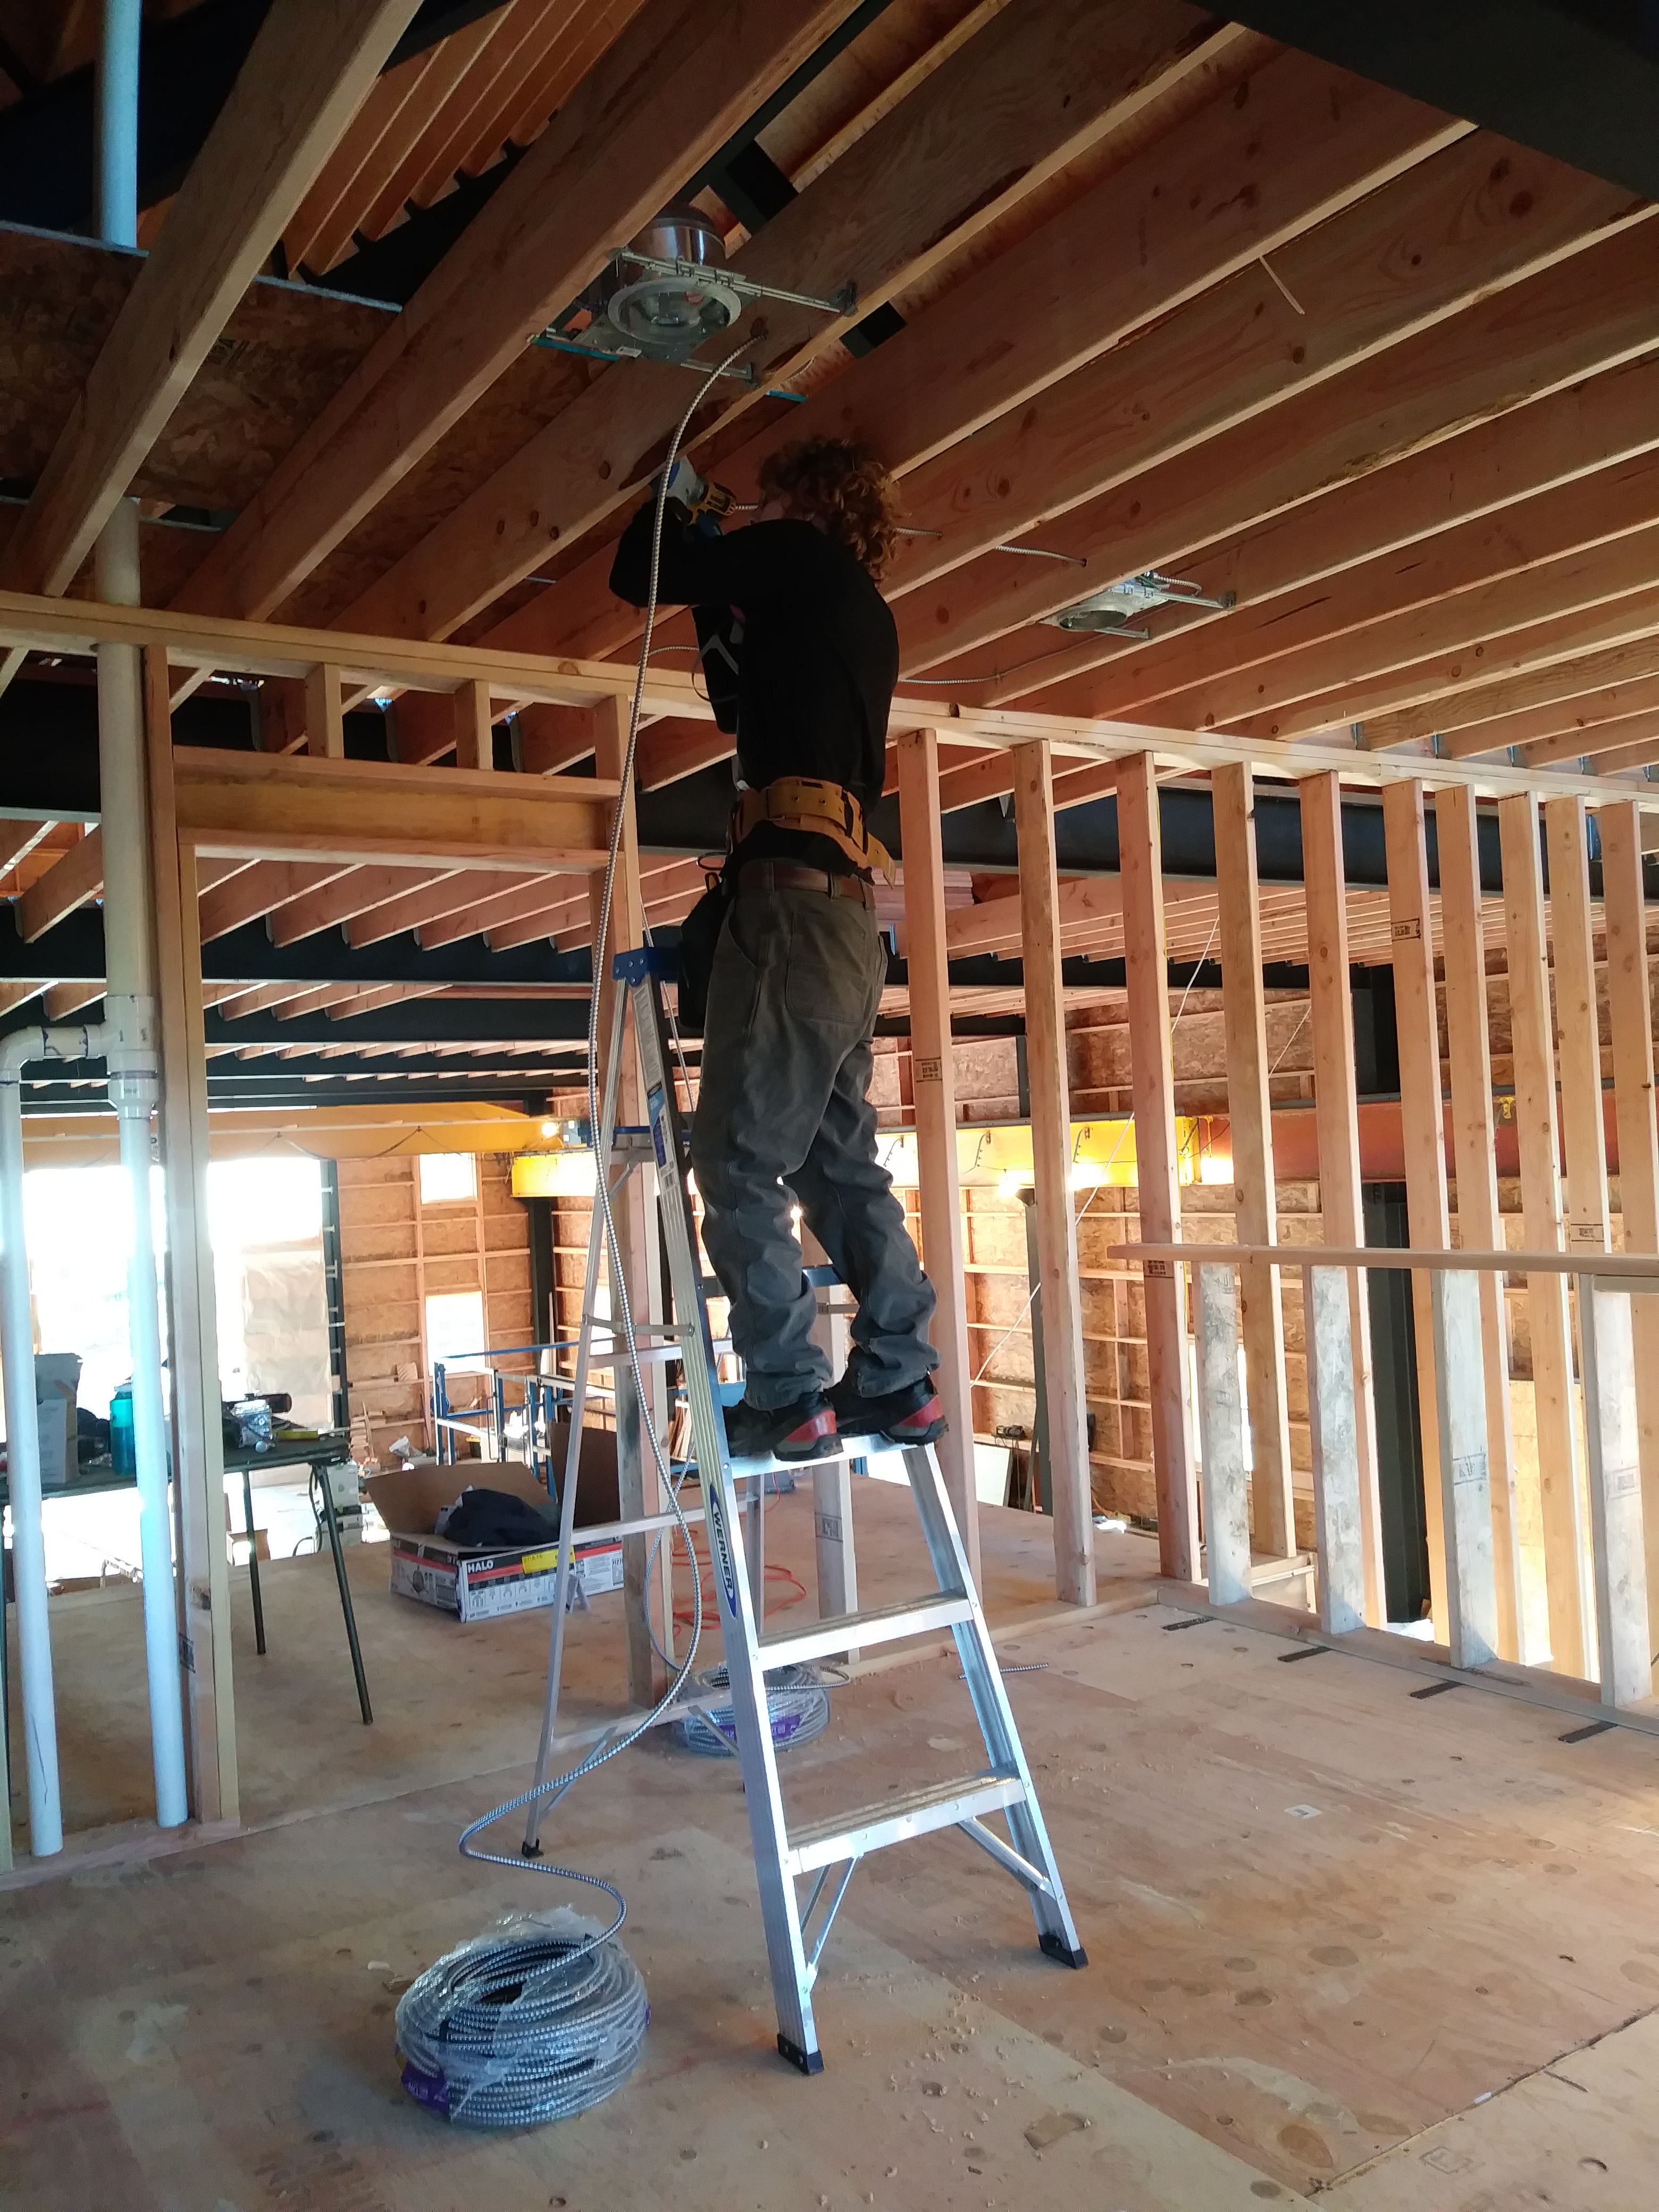
Lighting design for the rooms with standard 9 ft ceilings was fairly simple. However, our open living room/kitchen space with 19 ft ceilings presented a big challenge. After a lot of research and testing an assortment of lights, I came up with a plan. It involves recessed LED lights with a narrow beam angle, plus some pendants and wall sconces. Factoring in lamps and furniture we don’t have yet also presented a challenge.
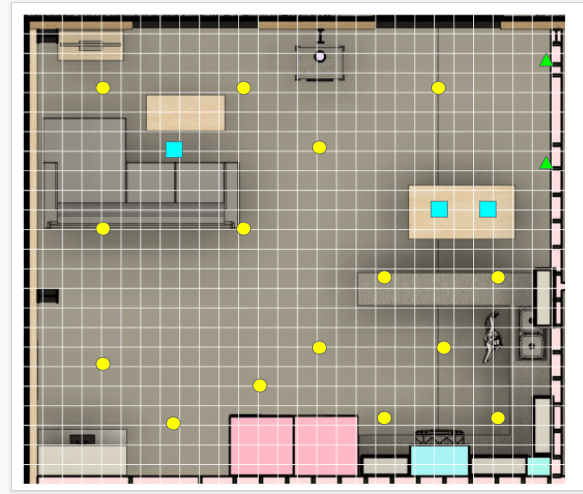
I spent some extra time grouping the lights and placing switches. Neither Sam nor I have ever been completely satisfied with the light switch placement in our homes, so we wanted to get it right.
Finally happy with the layout, we ordered cases of recessed light housings or “cans” and went to Home Depot to pick them up.

The boxes of cans were fairly heavy, so we didn’t bother securing them in the truck bed. We noticed some movement when we entered the highway, so Sam pulled over to rearrange the boxes better. We made it home thirty minutes later and unloaded everything. Sam closed the door behind me, and I said “wait, there’s one more.” Sam said the truck was empty! We then counted the boxes several times, reviewed the photo (above) that Sam happen to take upon pickup, and finally convinced ourselves that one box must have blown out. Sam hastily left with his truck keys…
An hour later, Sam triumphantly returned holding a box with only slightly dented corners. Sam drove all the way back to the Home Depot parking lot, turned around, and found the box in tact near the side of the on ramp! I couldn’t believe it. The cans weren’t even damaged, plus Sam didn’t have to play a dangerous game of “Frogger” to retrieve them.
We started installing them the next day. We began in the office since it has a simple layout and only one switch.

We did the smaller rooms next. Things got a little tight in the bathroom. Sam battled with the plumbing to wire the vanity sconces.

Even the ceiling was getting crowded after we installed the bathroom fan. I had to redo the layout a few times because there was always a joist where I wanted to place a can. (The cans get mounted between joists.)
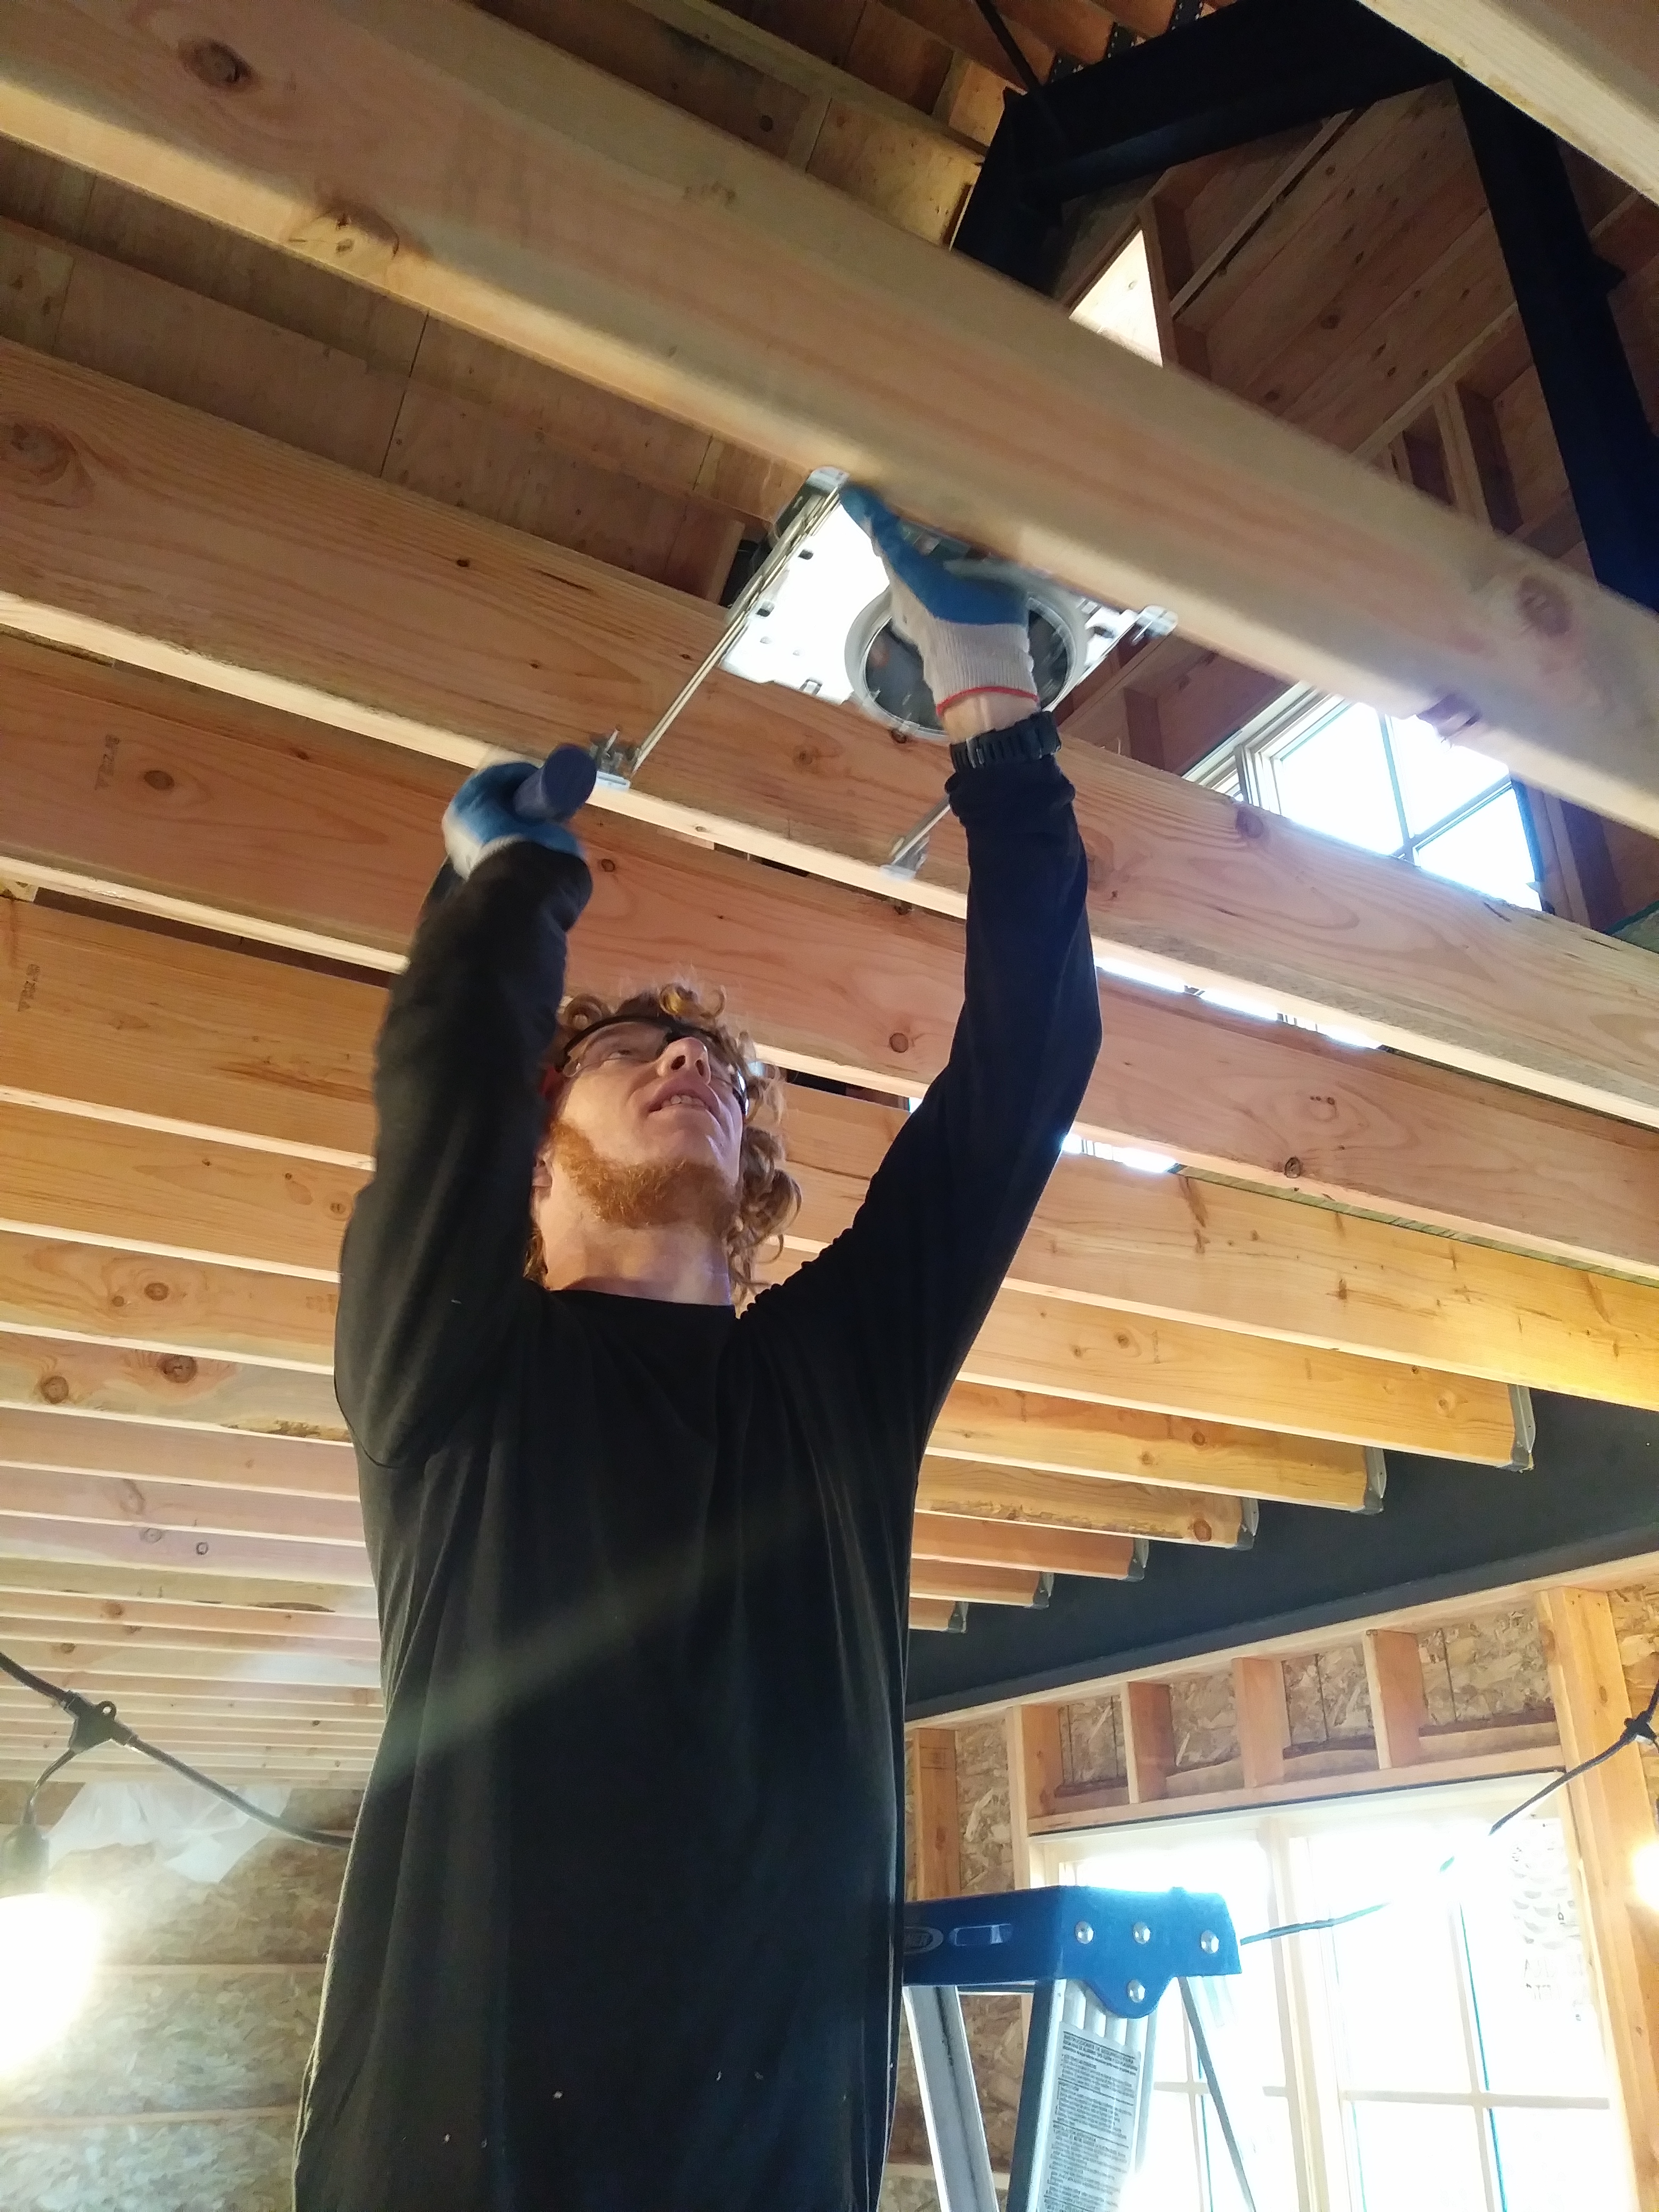

The MC cable is stiff and sometimes requires two sets of hands to get it to cooperate. Sam and John spent the next two days in the scissor lift, wiring the living room lights, while I moved on to the outlet layout.


Choosing outlet locations seems simple, but there are a lot of rules to follow to meet code… Luckily we have this nifty reference book that both Sam and I have nearly memorized.

The kitchen was the most tedious as there are so many rules. Who knew the dishwasher outlet can’t go behind the dishwasher? (It goes through an adjacent cabinet.)
I marked the outlet locations on the studs and went over my plan with Sam, pointing out the large kitchen appliance receptacles that need to be on their own circuit. Sam studied the locations, mentally mapping out the wire routes before getting to work.
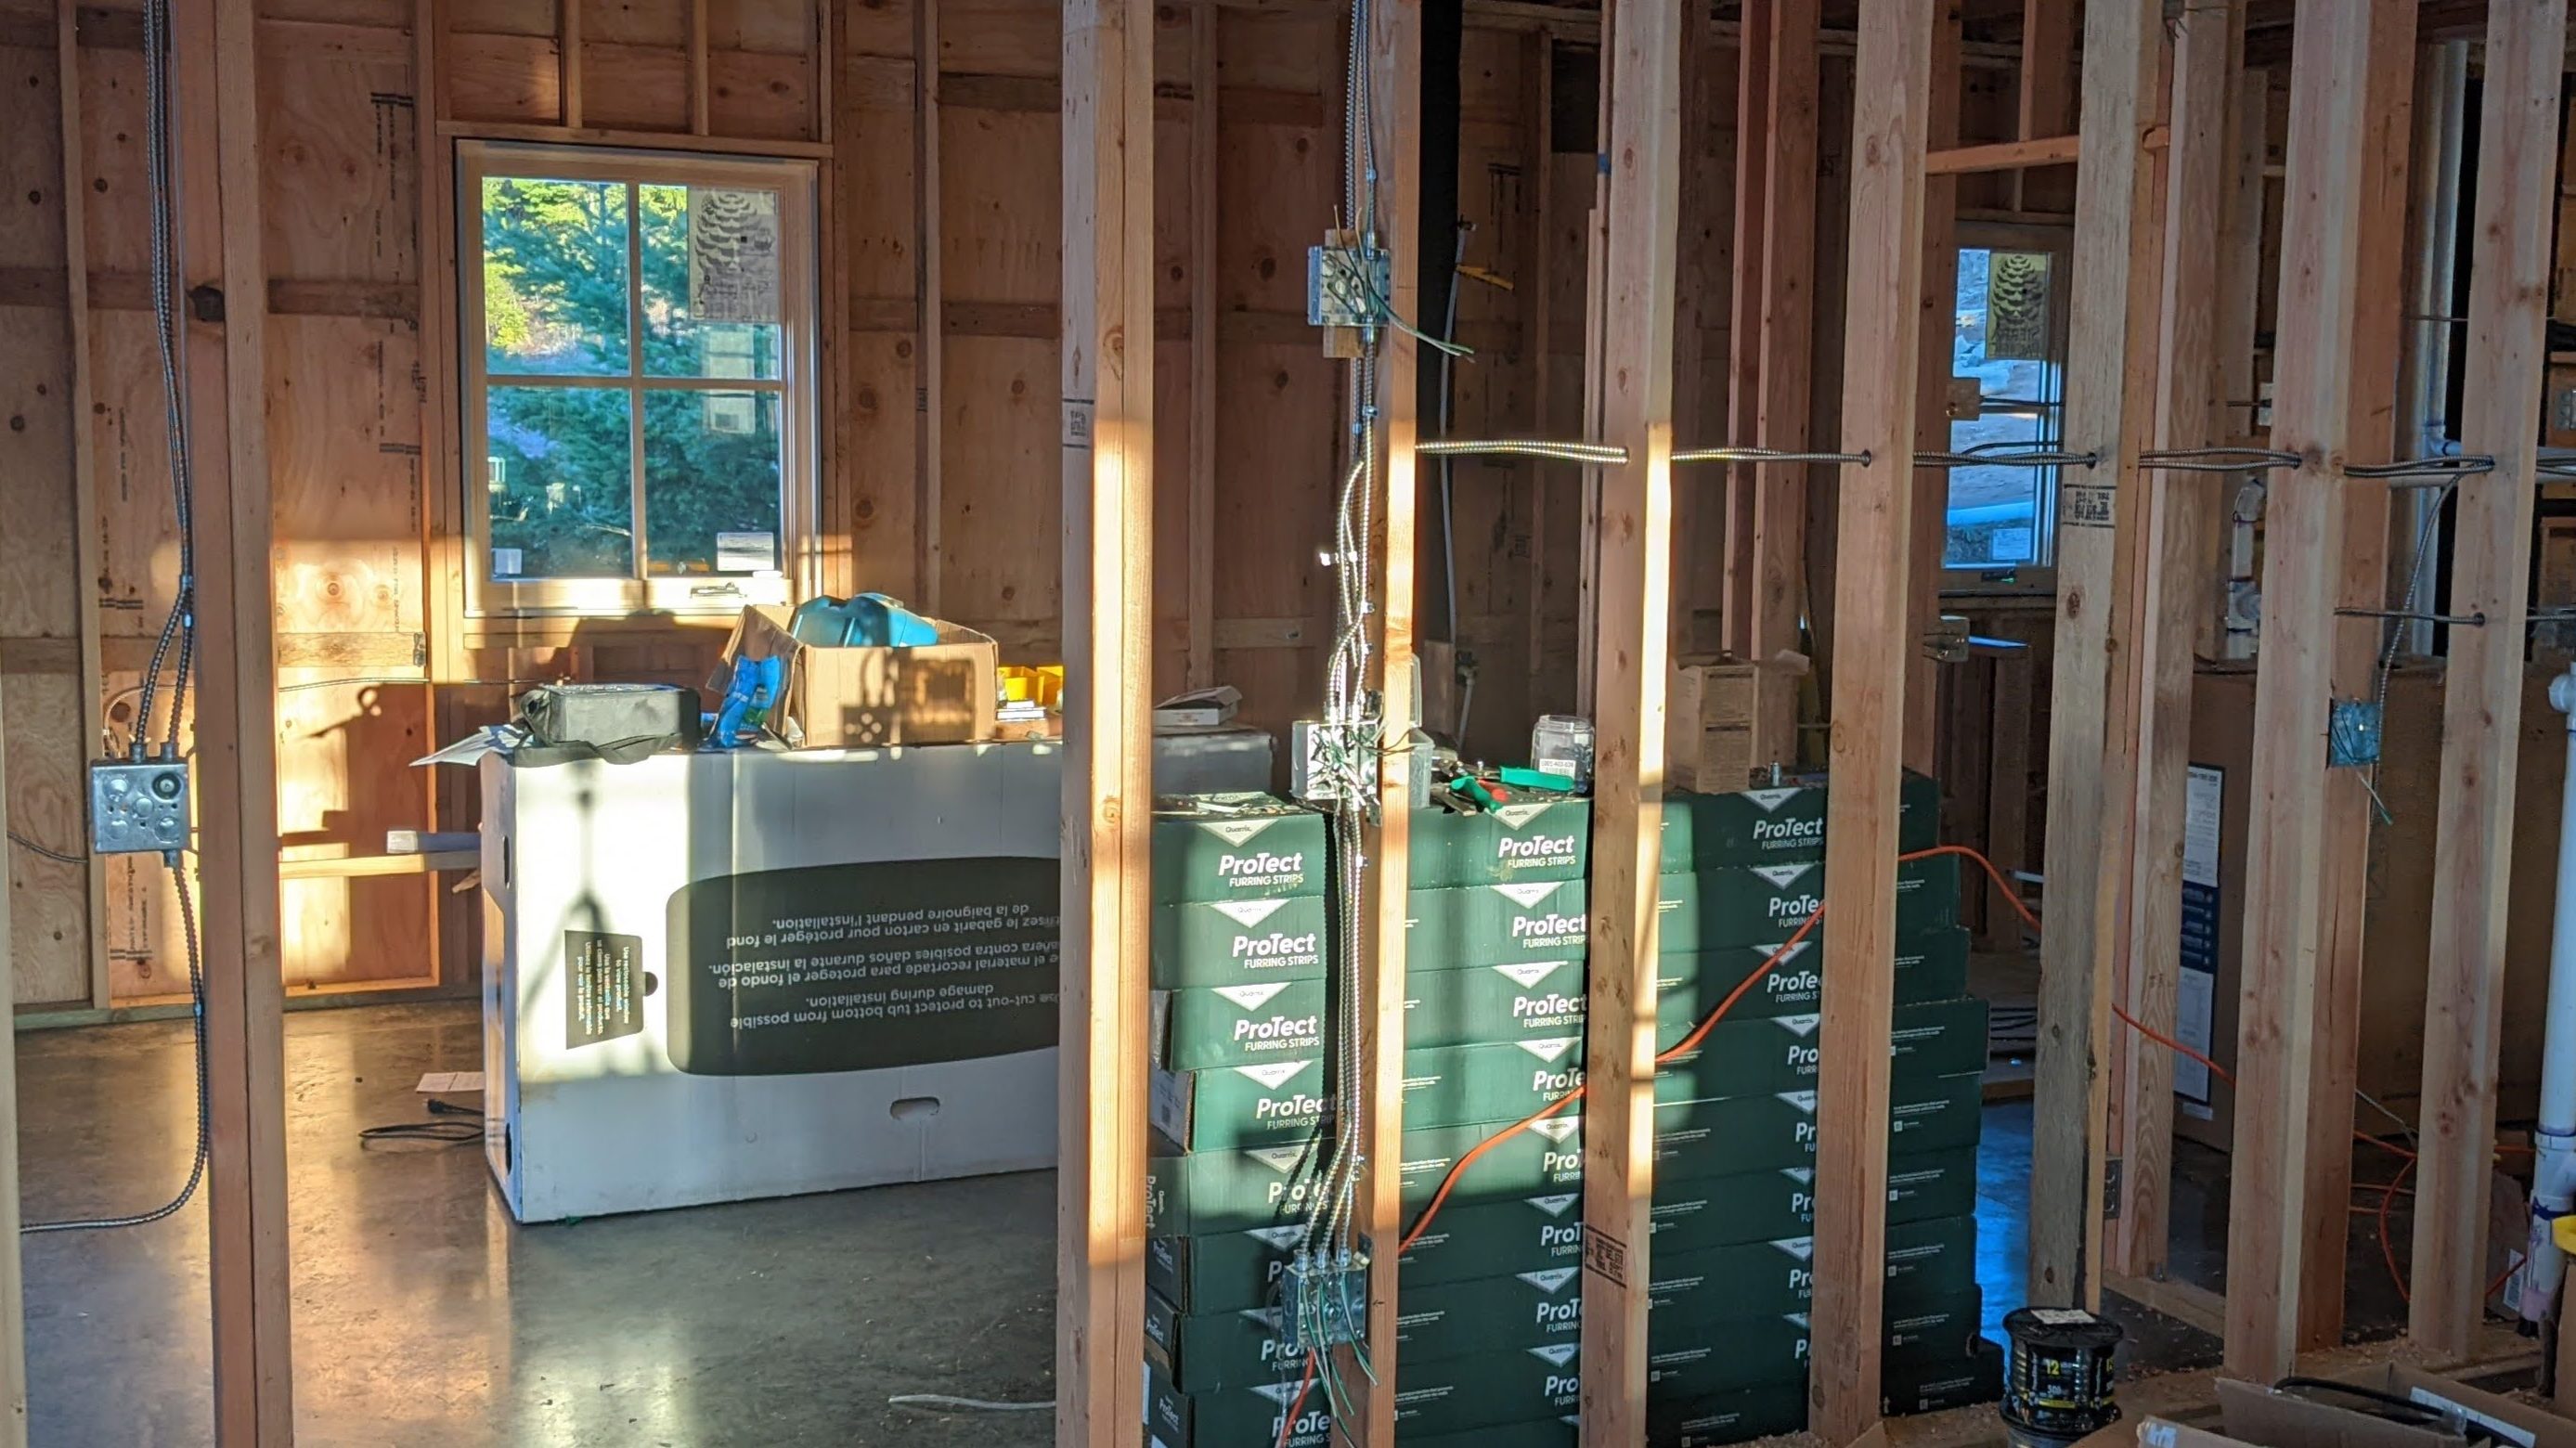
Every cable for the apartment passes through the diving wall into the mechanical room. Sam had to be strategic with the wire routing, accounting for obstacles like the steel frames, the half wall (not connected to the ceiling), etc.

The wiring is pretty standard for any house and can get a little mundane. We thought we’d take a break to wire the crane….
