Our friend Mikko drove down from Seattle to visit us. We were at a turning point when he arrived- transitioning from the north side to the east and west sides. But first, we had to get around the tricky corners. Luckily Mikko likes projects and was happy to help!
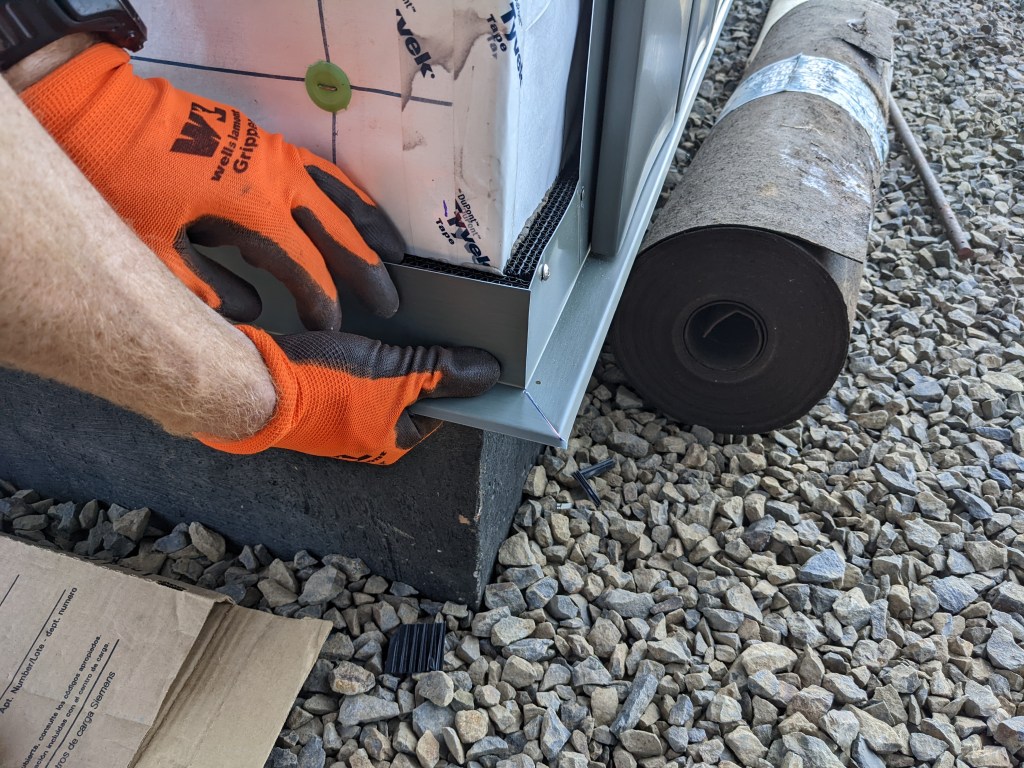
We started with the base flashing, always working from the bottom to top.

Sam mitered the corner pieces to come to a point.
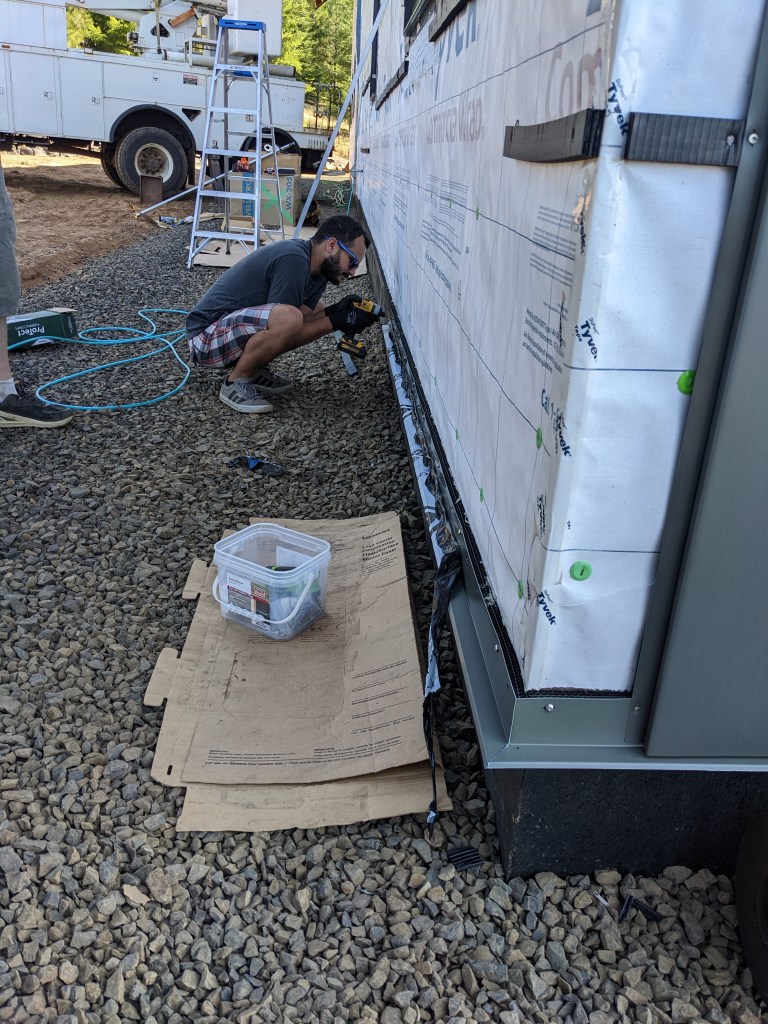
Mikko was able to get real low to help install the flashing. Sam and I aspire to squat like that again.
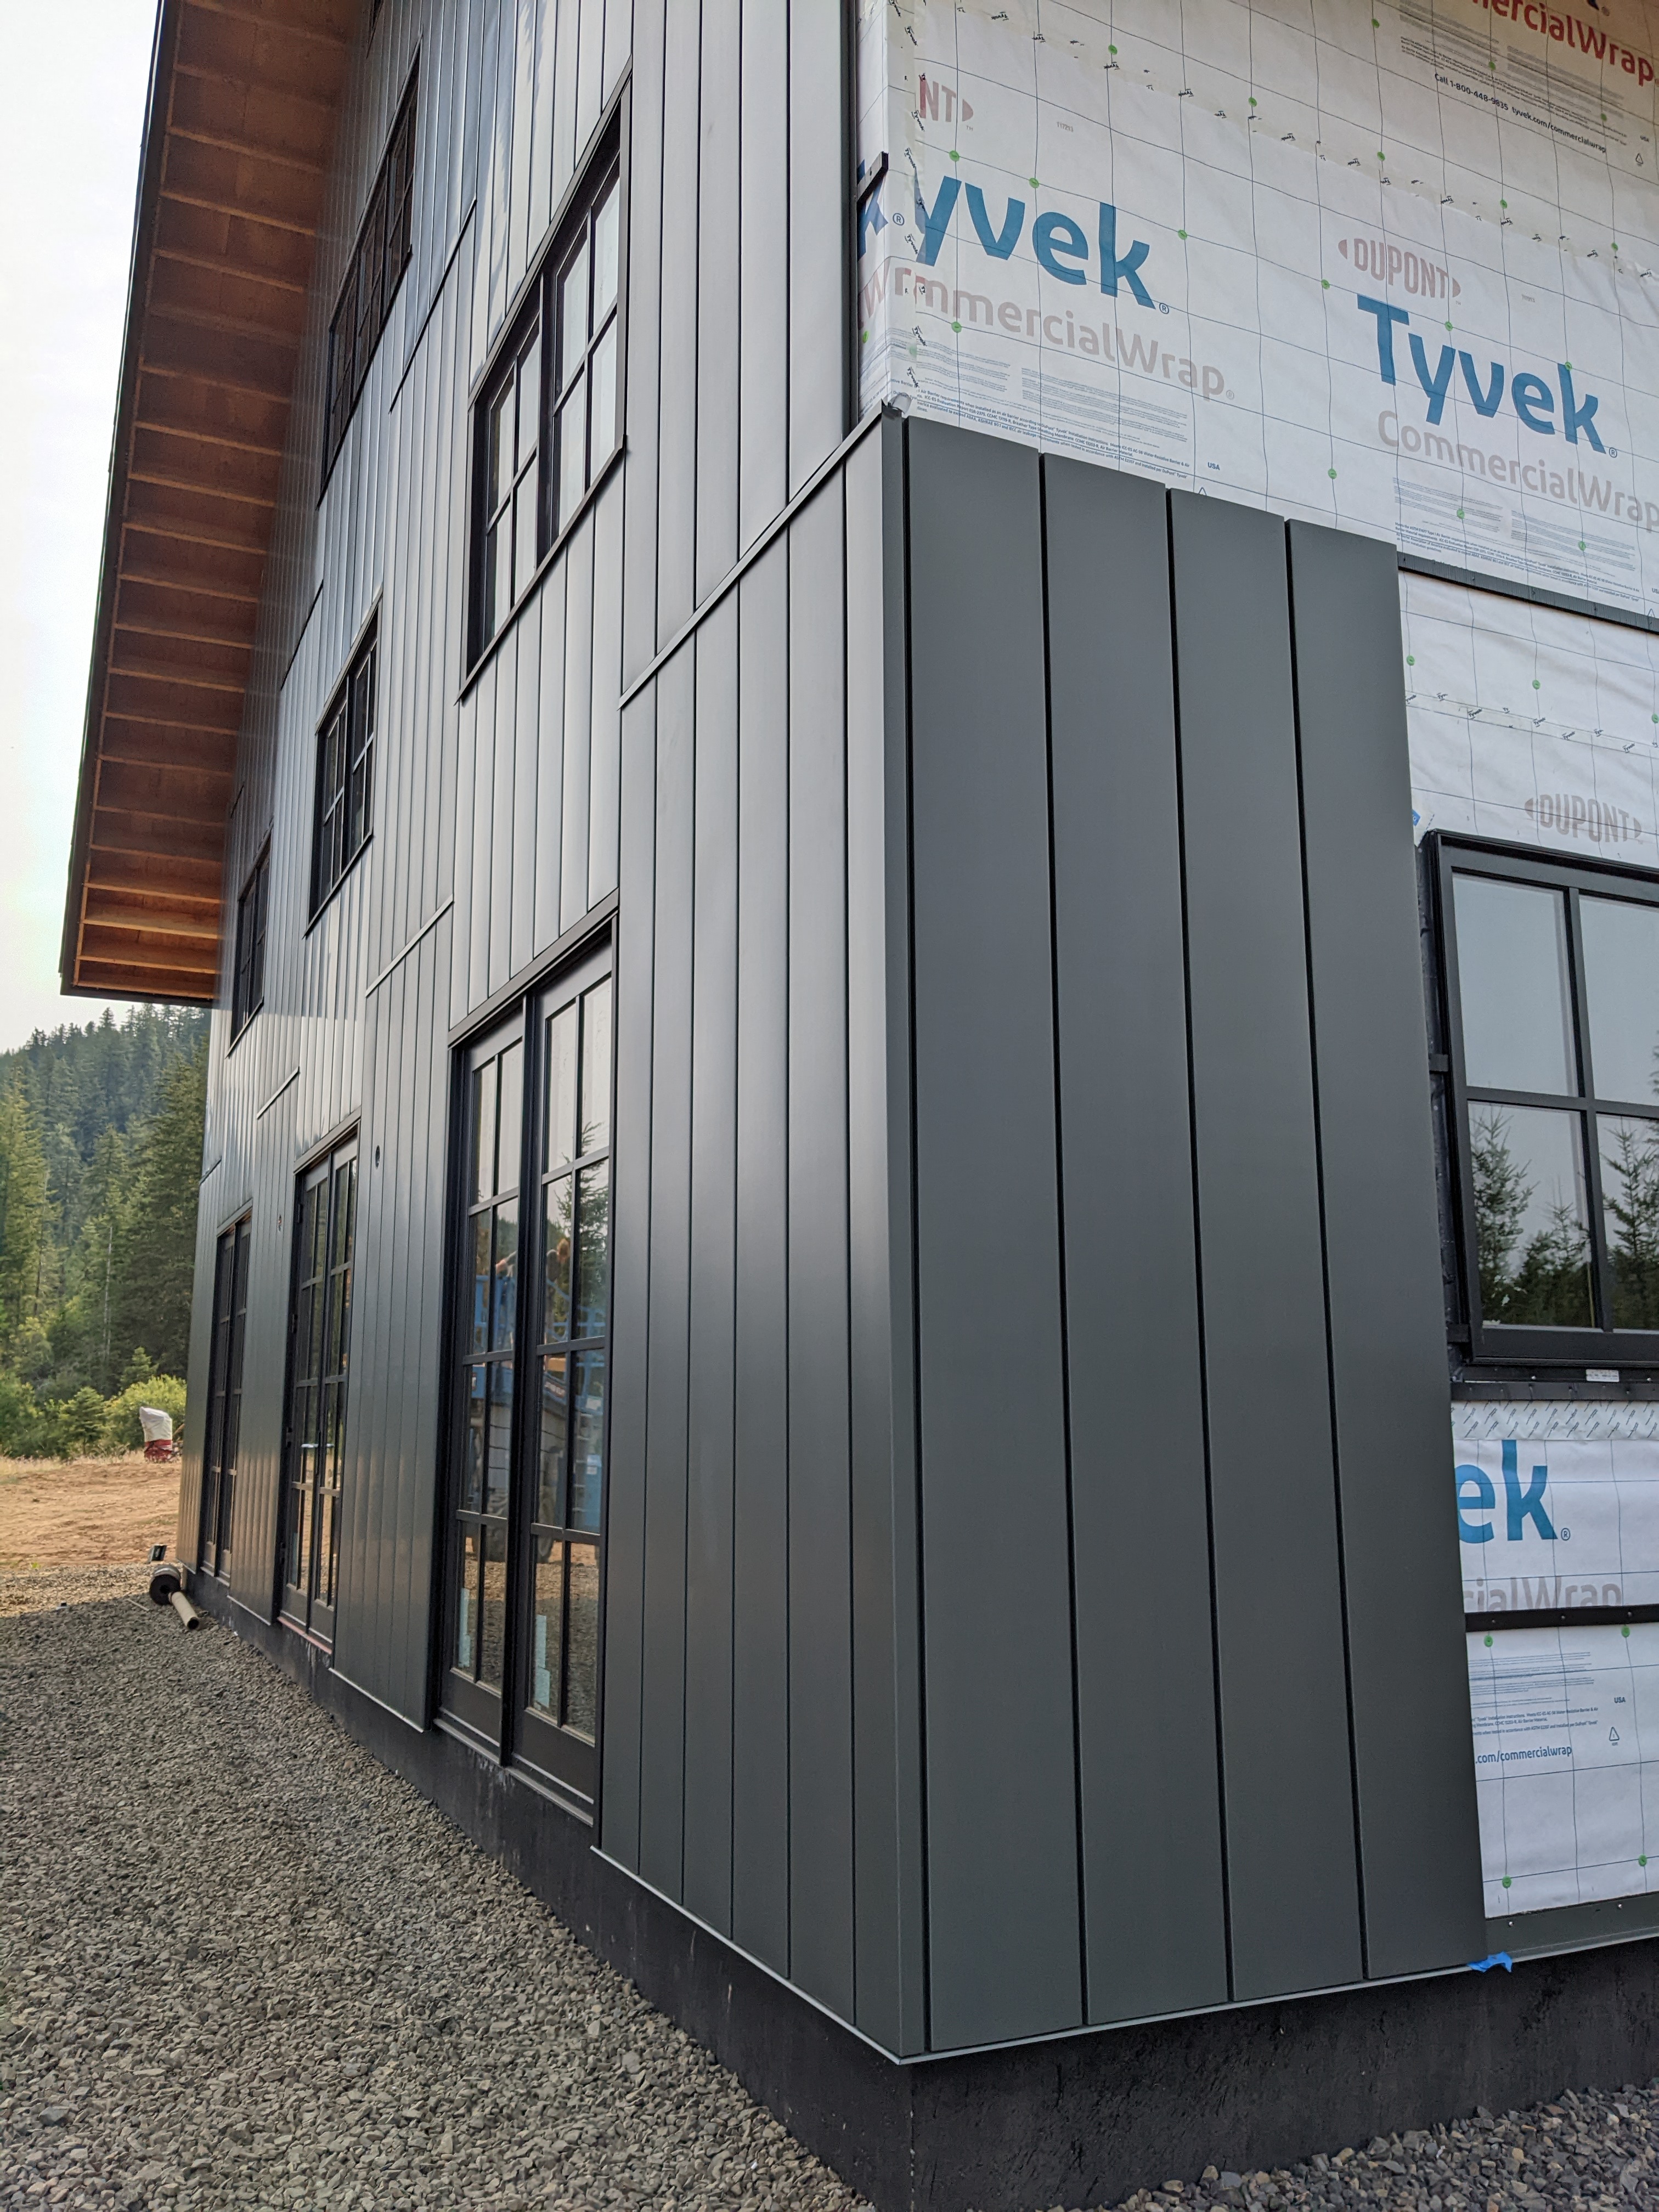
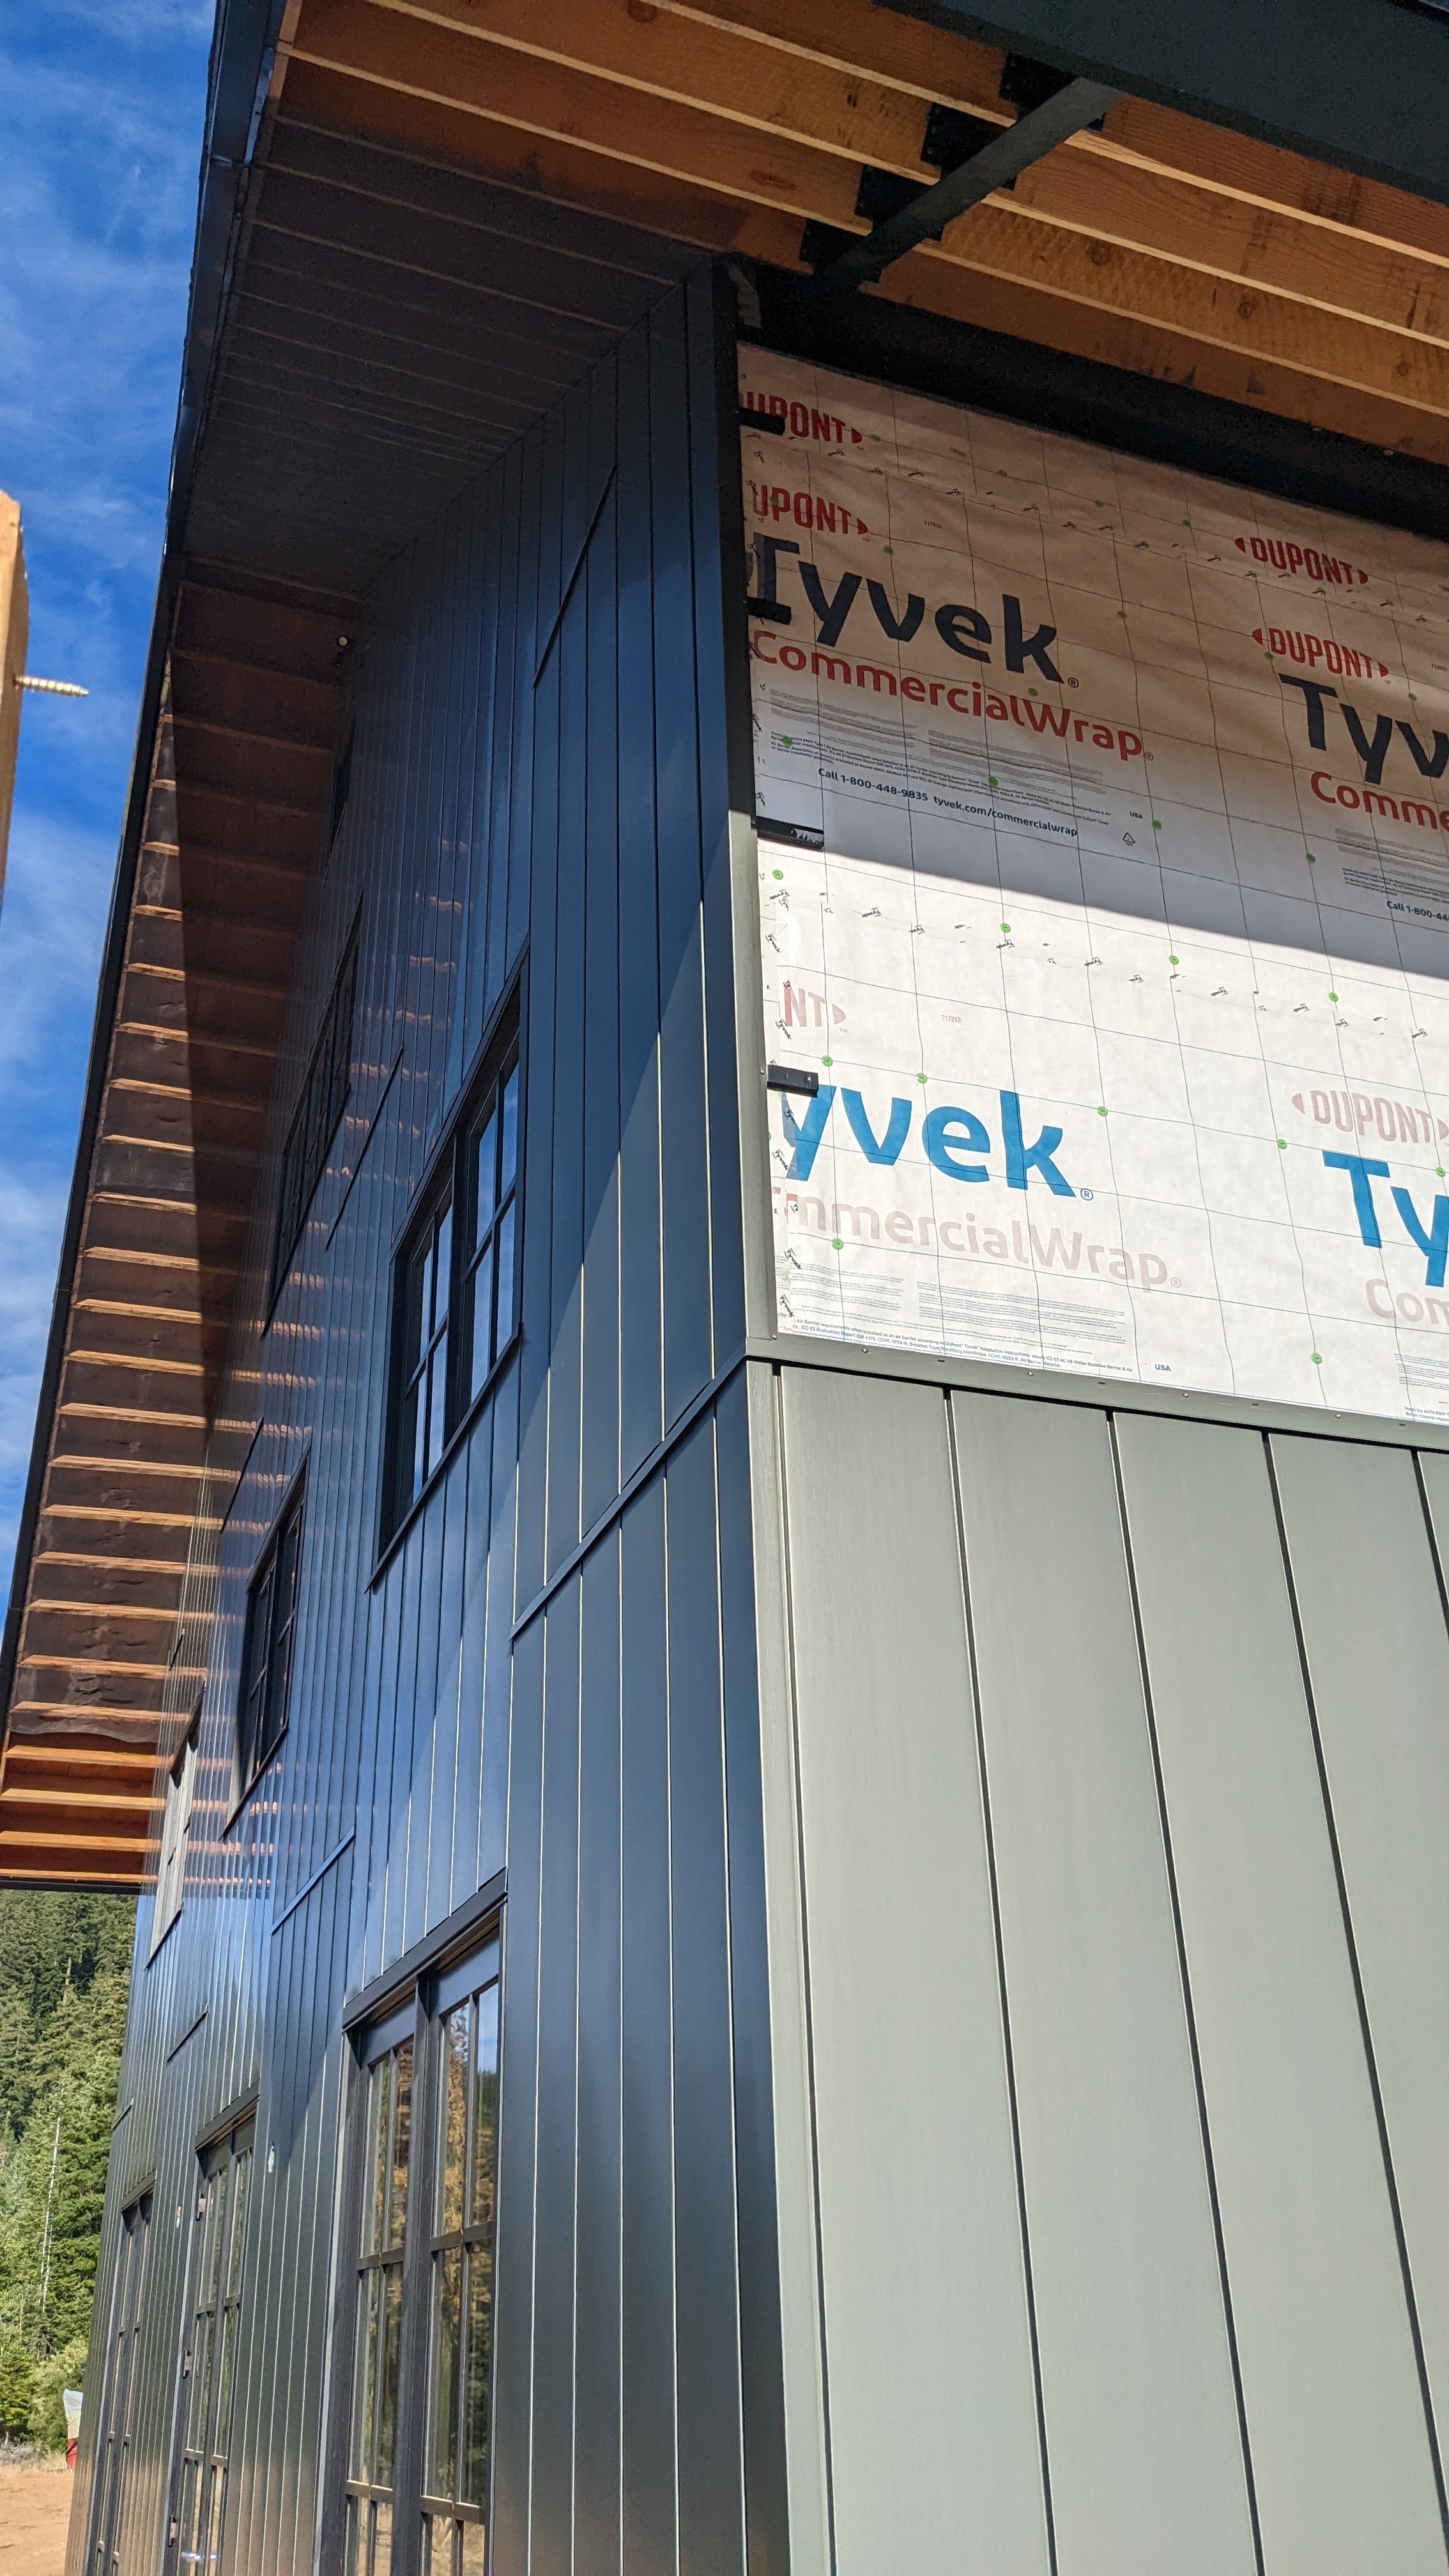
Next, was the first corner piece. Rather than starting and stopping our pattern at each corner, we designed a single panel that bends around the corner, allowing us to continue the overlapping pattern on the adjacent side.
After some careful measuring, we got the first corner piece in! This allowed us to continue a run of panels along the side of the building.

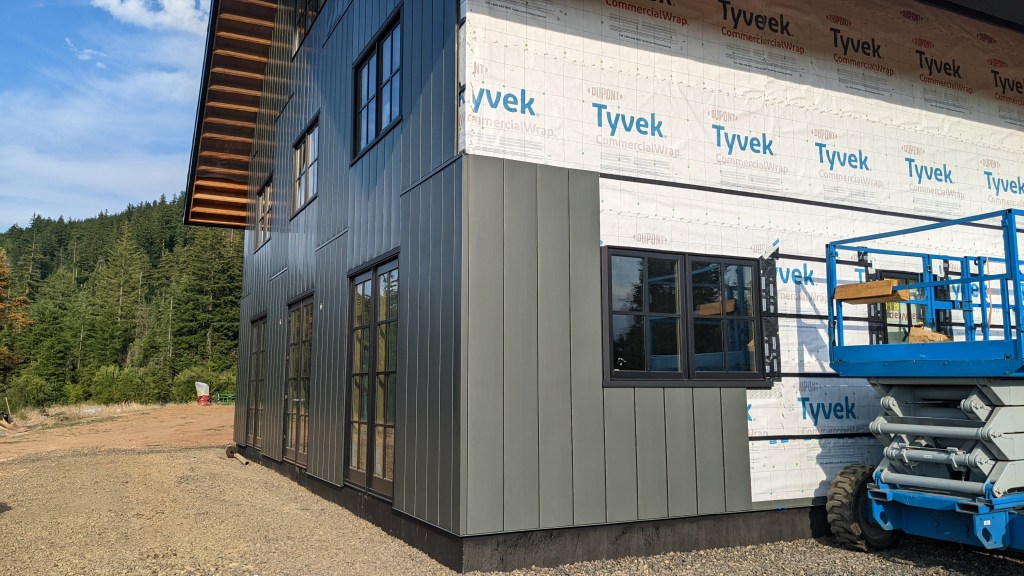
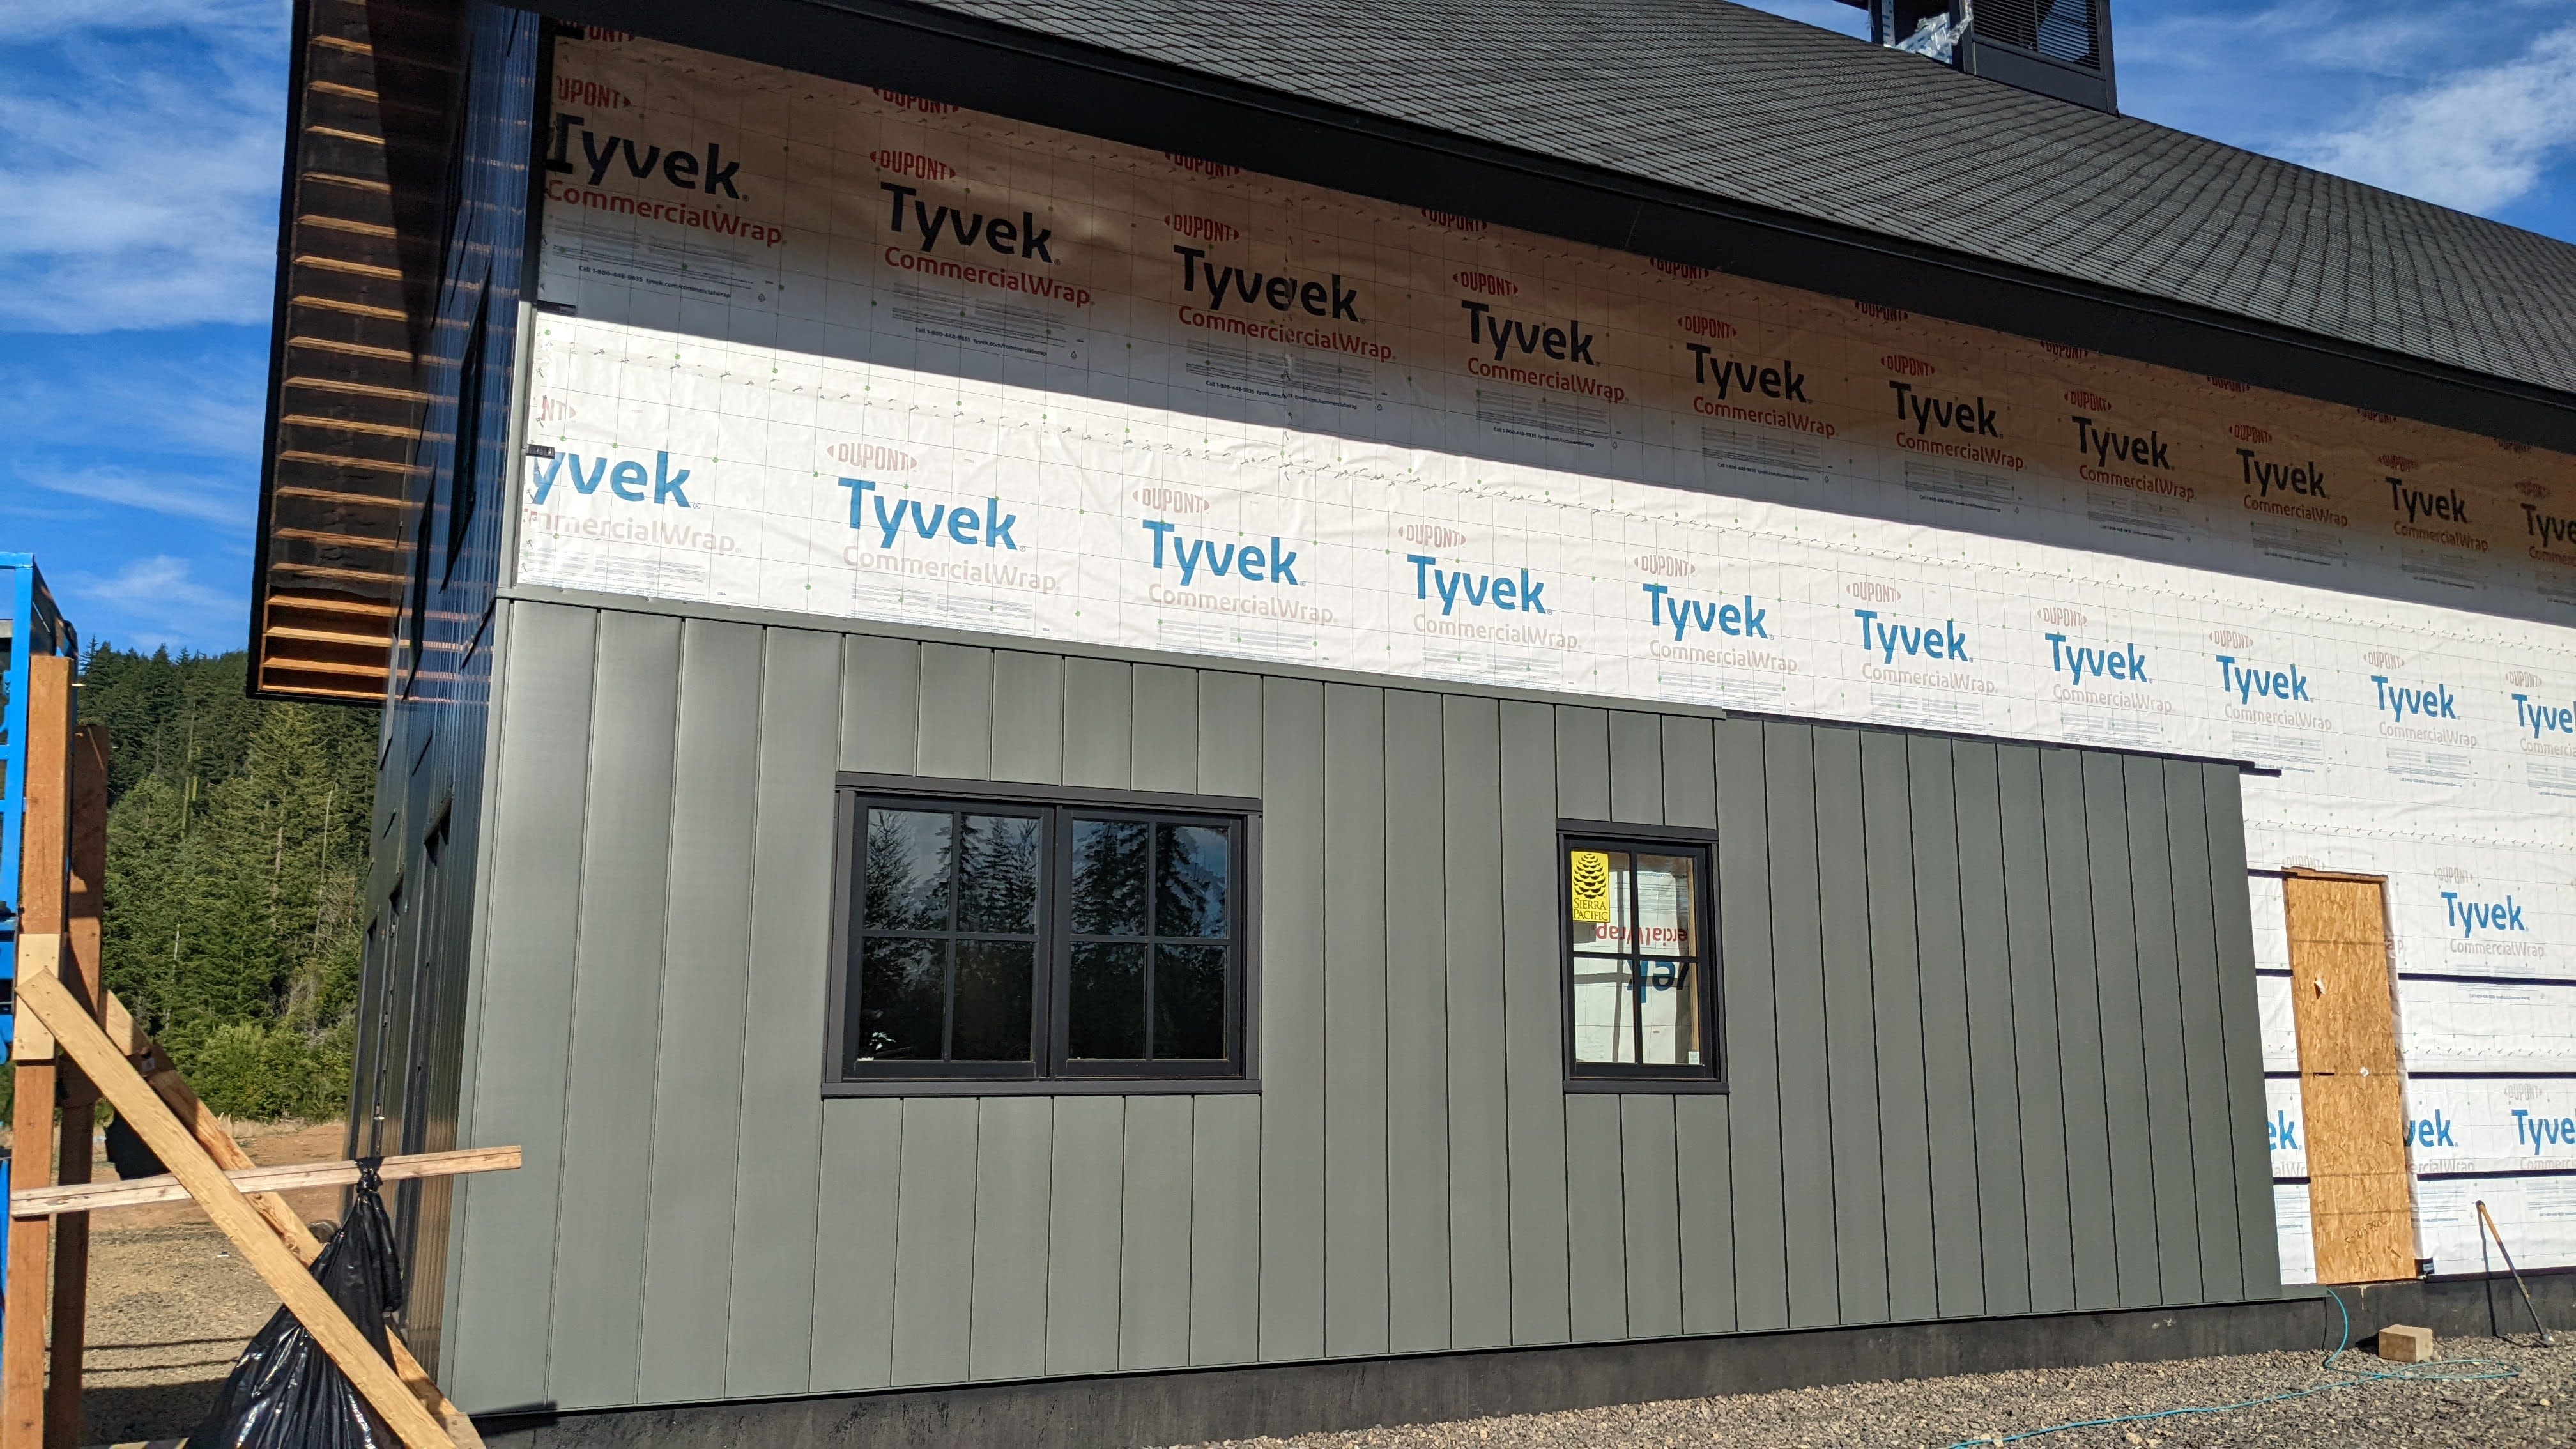
We decided to work on the east and west sides simultaneously. This gives us the flexibility to work on the west side in the morning and the east side in the afternoon, always avoiding the sun.
The long sides of the building are easier because the seam is at a consistent height and most of the panel sizes are repeated. Of course some new problems arose…
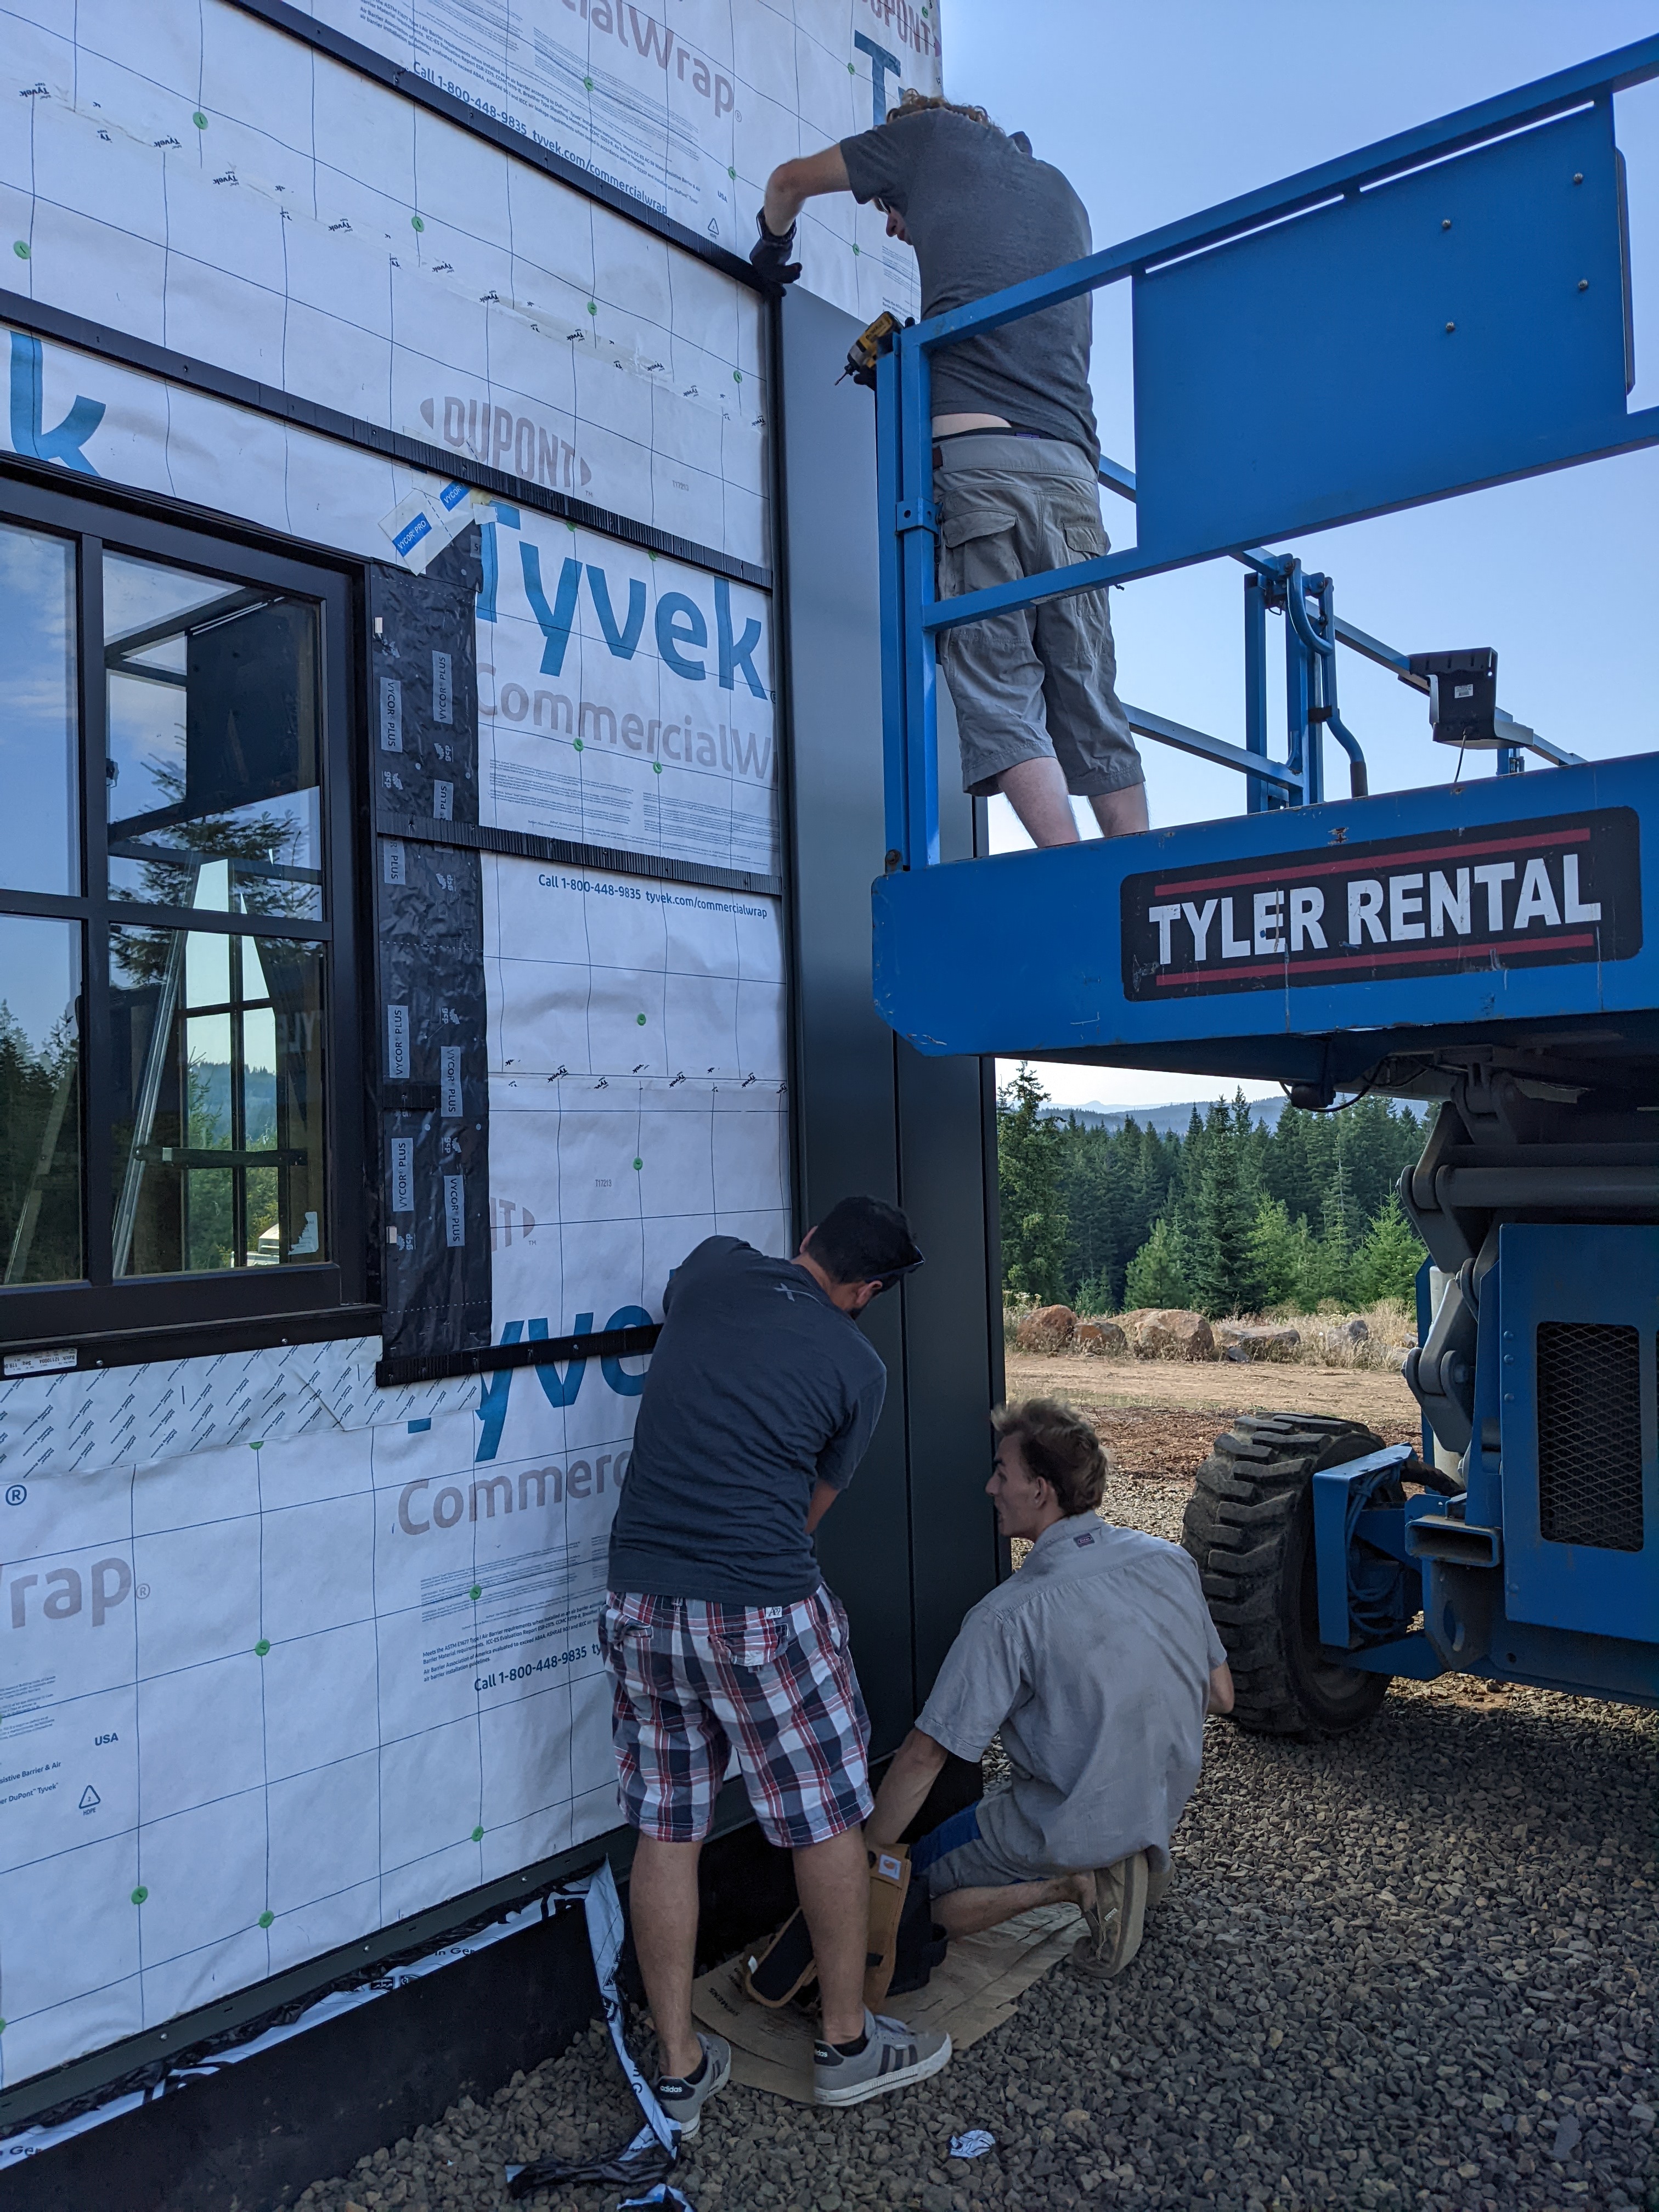
The first problem was figuring out how to affix the bottom row of panels efficiently. The scissor lift was too tall. The other option was using a ladder and moving it for each panel. That wouldn’t do. Luckily Mikko helped us come up with a more viable solution.
After a few hours, Sam and Mikko concocted this…

The work platform moves with the lift, allowing us to reach every screw along the low level panels. Sam and Mikko looked a little hesitant to try it out…
but they looked pleased once they went up!


Sadly, Mikko couldn’t stay long. I took his place on the new work platform, and Sam and I installed about 10 panels in just a few hours!

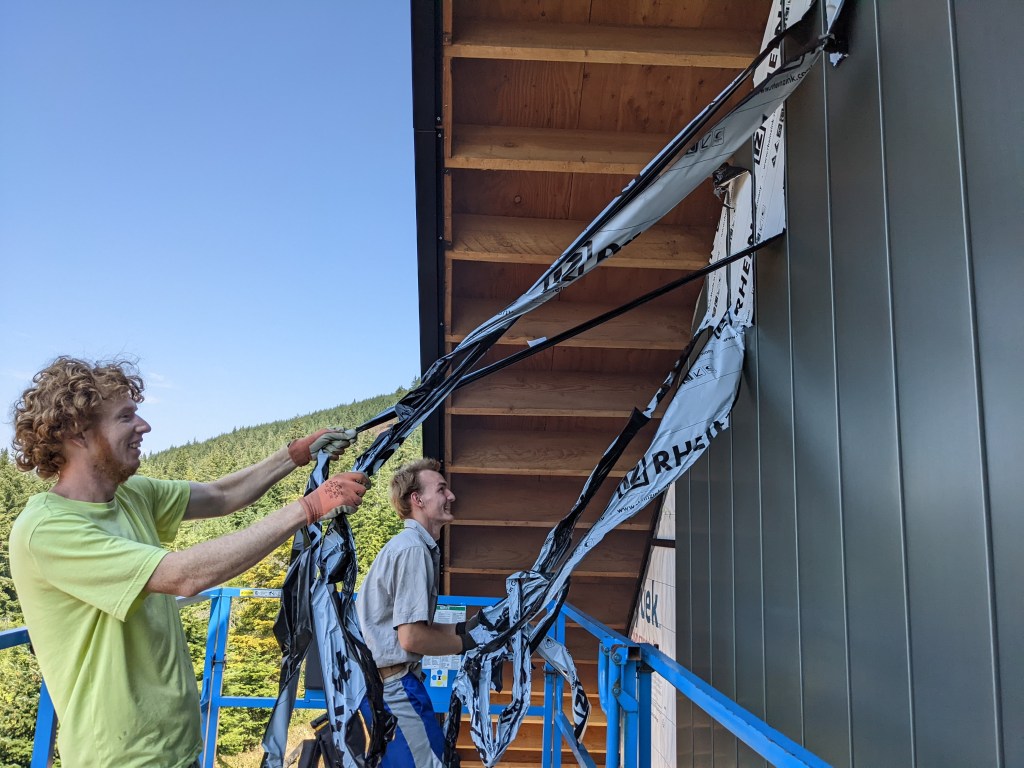
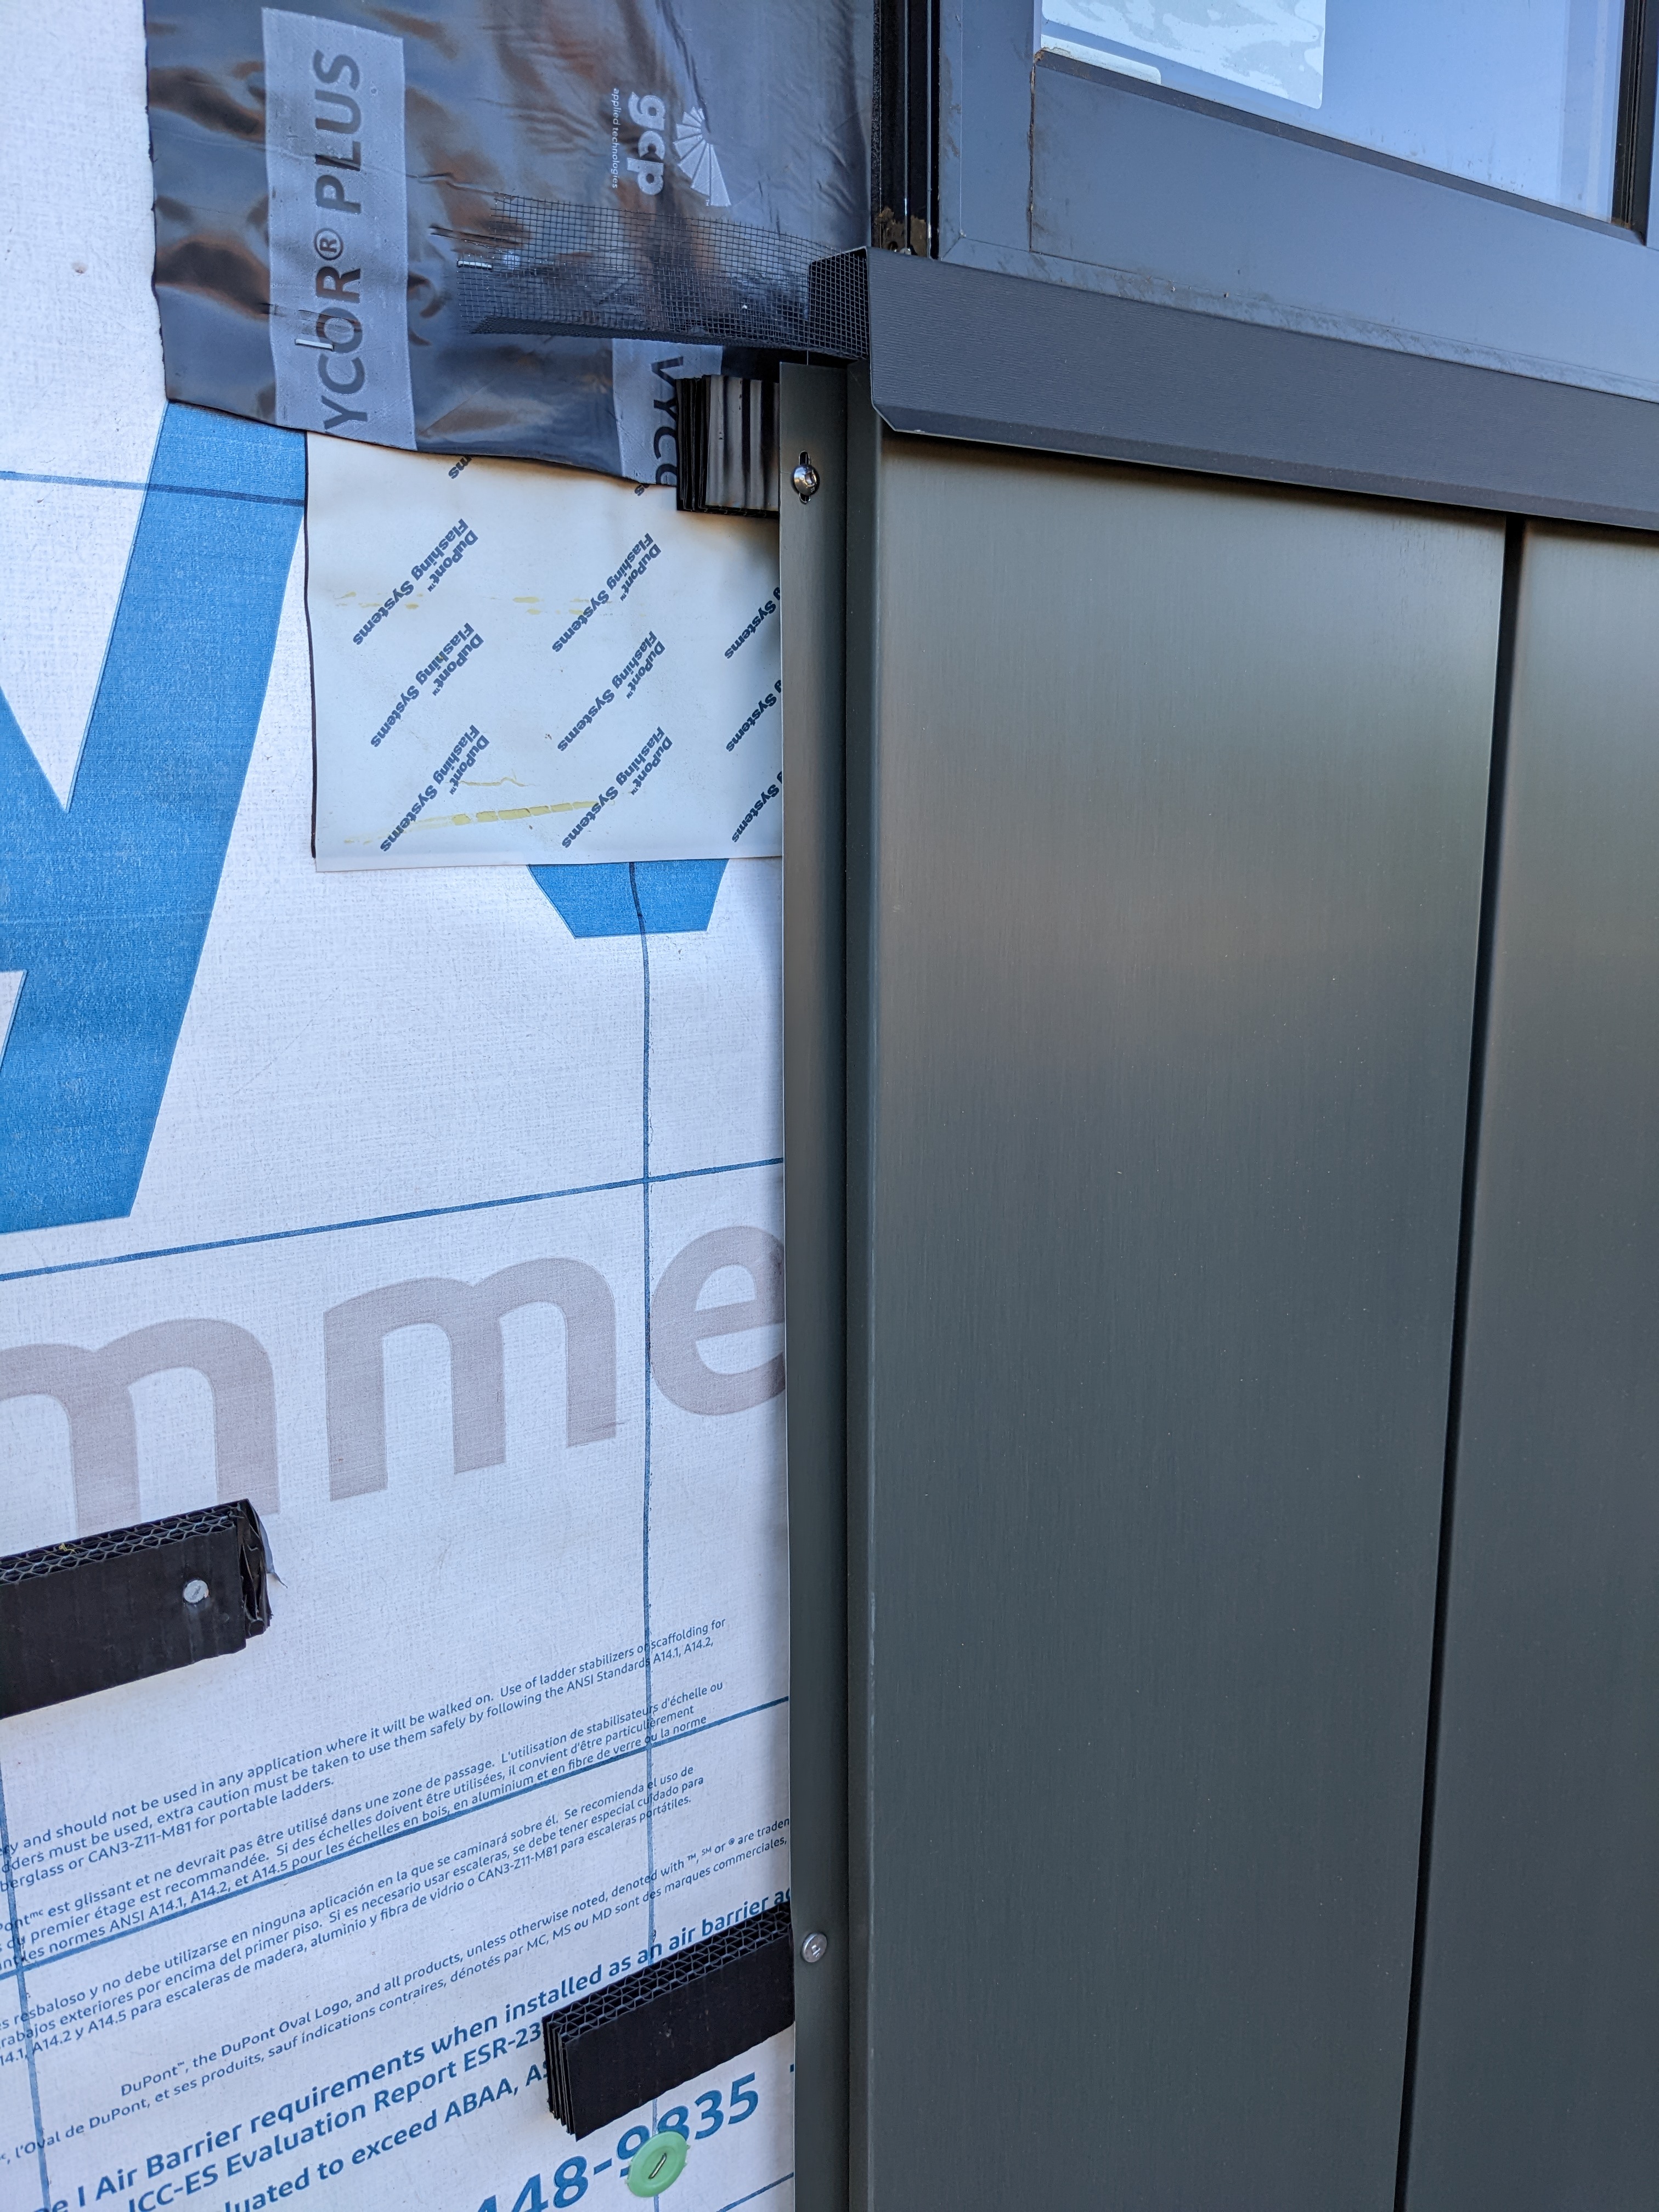
Another big setback was removing the plastic from the panels. All of the panels are covered in a plastic film. The plastic is applied back at the Reinzink factory in Germany and stays on during the roll forming and bending processes. It protects the panels from scratches and fingerprints but sure is a pain to remove. The plastic is very strong. You can stretch it a mile without ripping it.
We peel only the edges prior to installation. Getting the film out of the nooks and crannies is very tedious.


This is probably the most time consuming task in the whole process of panel layout and installation. My fingers were sore, my gloves were destroyed, and I even sweat indoors (something unheard of!).
Once the panels are up and we are done handling them, we strip the whole sheets. It may look like fun in this photo, but it is not for the weak. Sam has a sore shoulder.
With continued help from Aiden, we sped up the operation. We had some 10 panel days, and a record 23 panel day!
Buster couldn’t believe how fast we were working! Smokey was more interested in a bug.

Nothing could slow us down…
Until we had to install the upper corner pieces. First we capped the lower panels with a flashing for the the upper panels to sit on.

The corner panels required several complicated cuts to fit under the roof. But we got them in without too much struggle.
Then we moved our work station back into the upper deck of the scissor lift and installed a big run of upper panels! We worked so fast, I had to replace my gloves again.

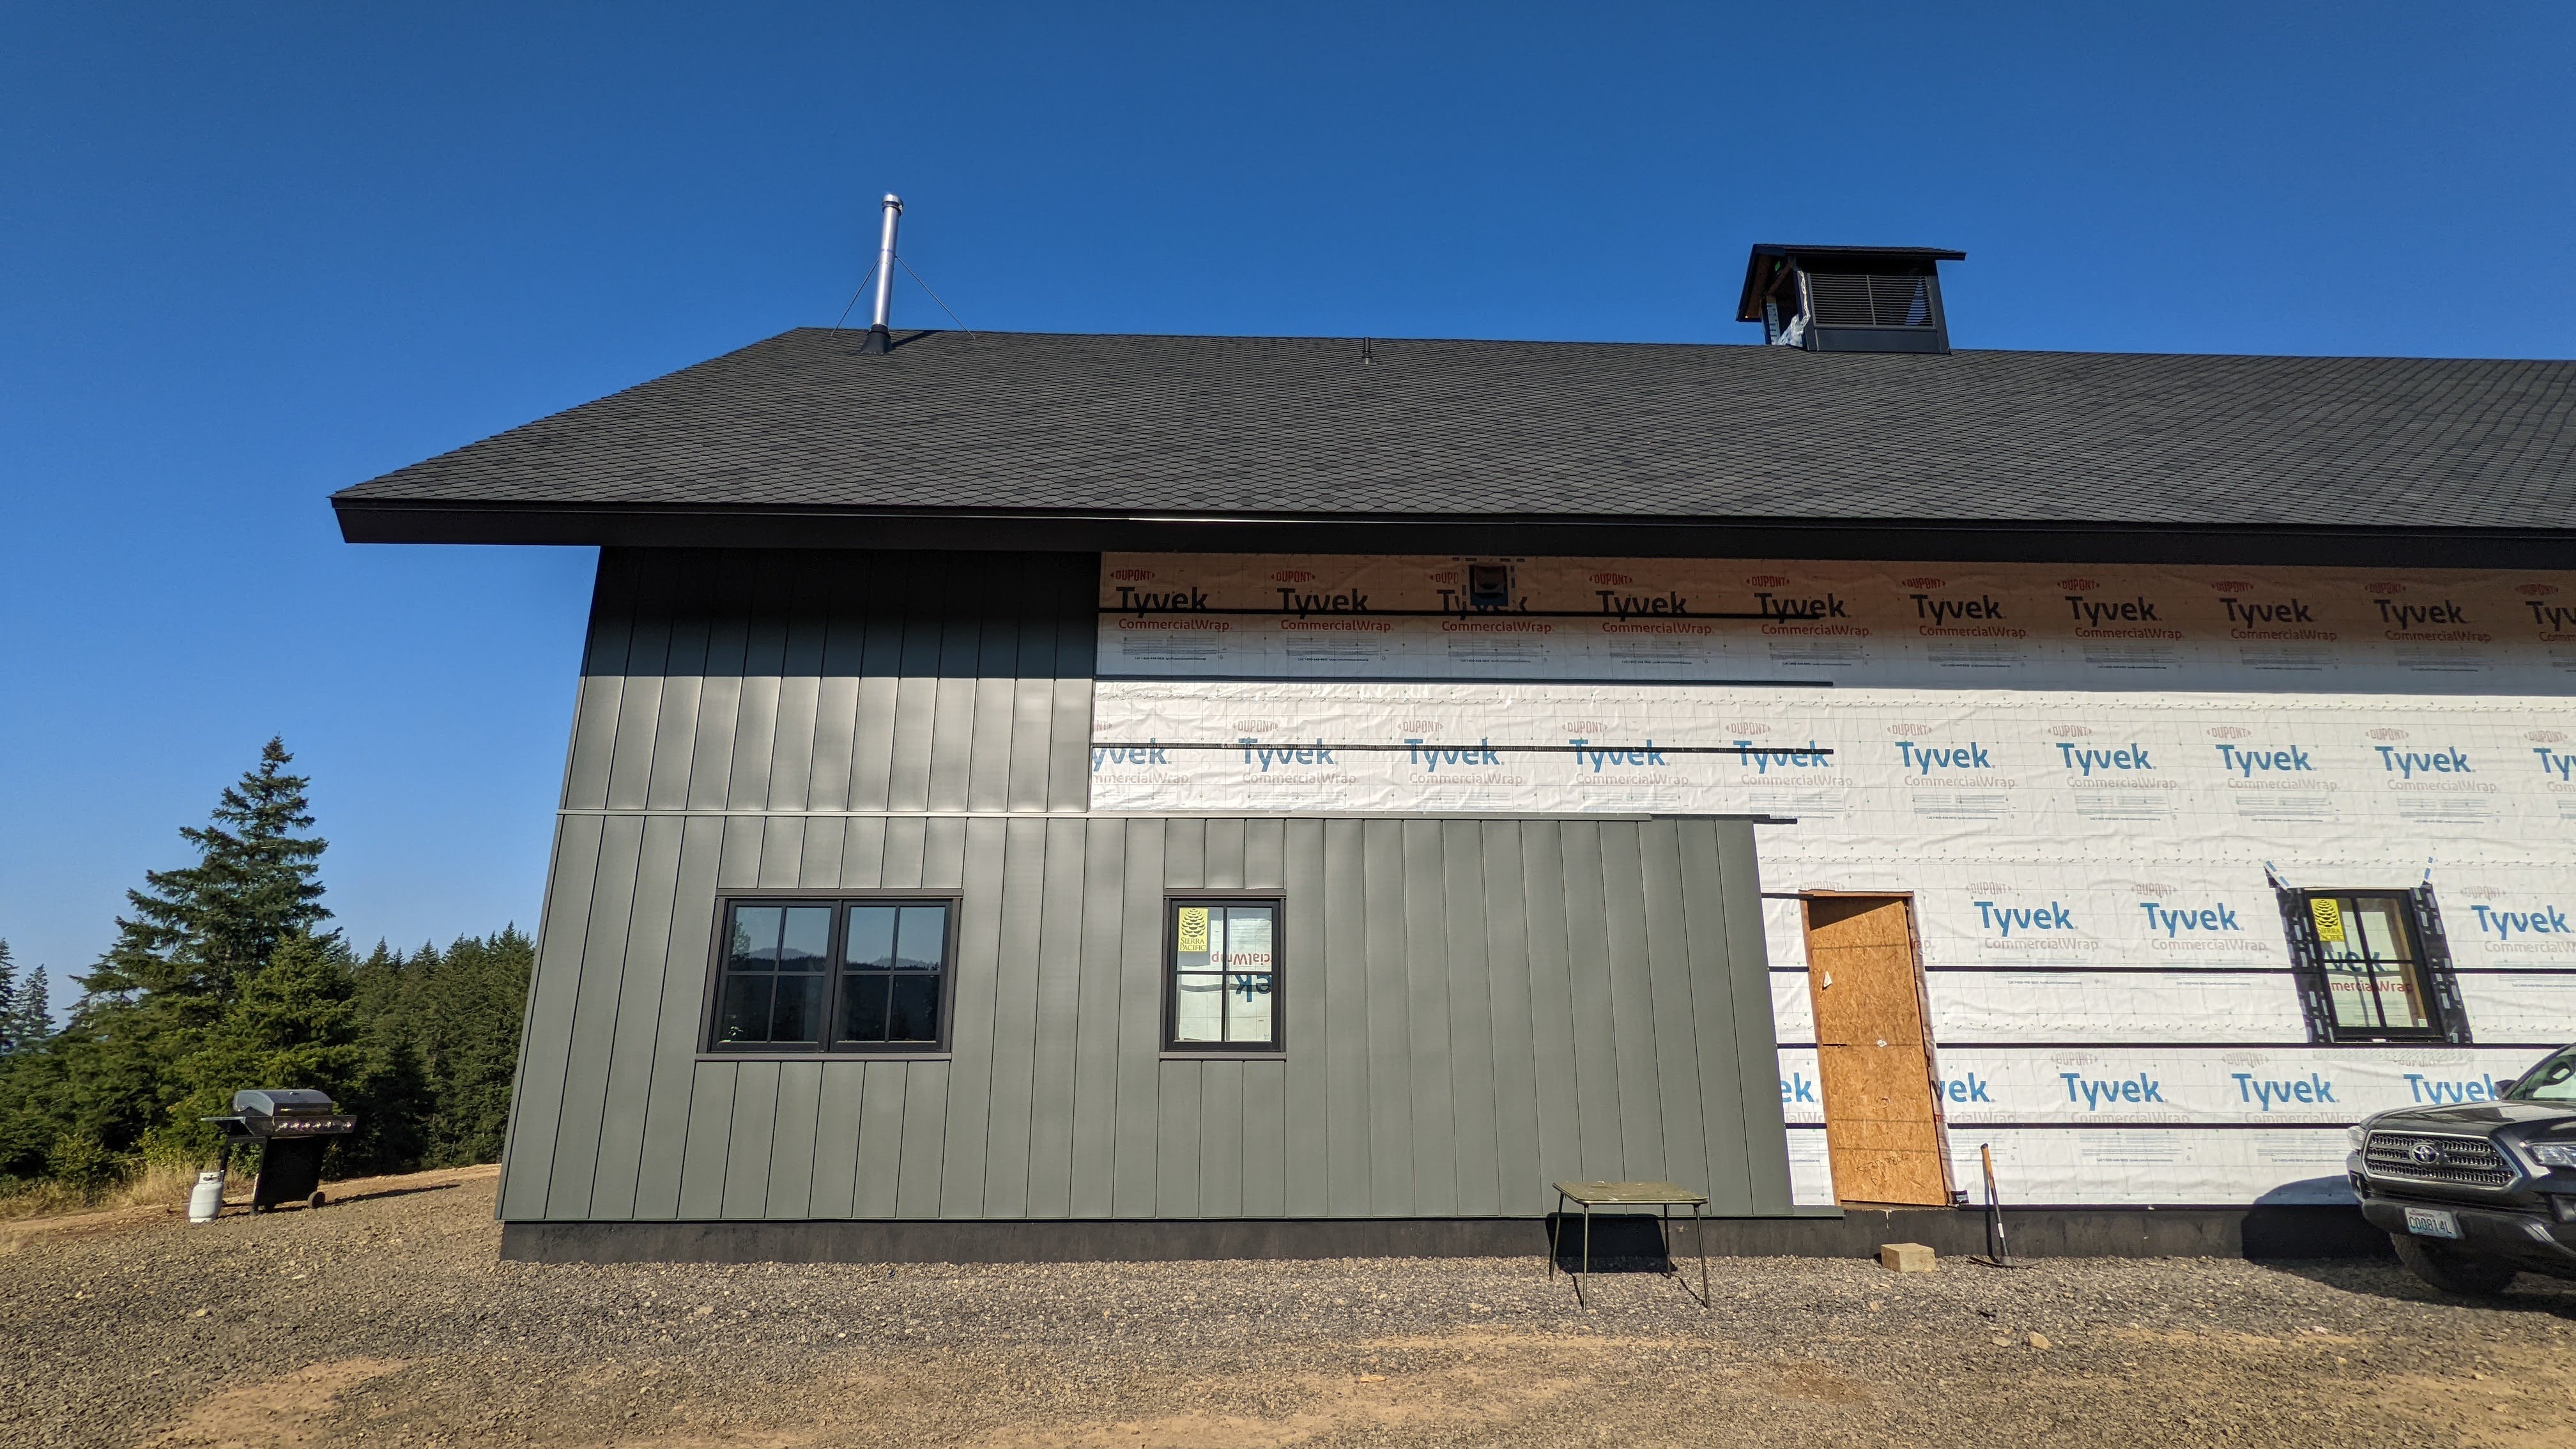
We made similar progress on the east side.

There were a few more windows on this side, which slowed us down.

We are making progress but still have a long way to go!


