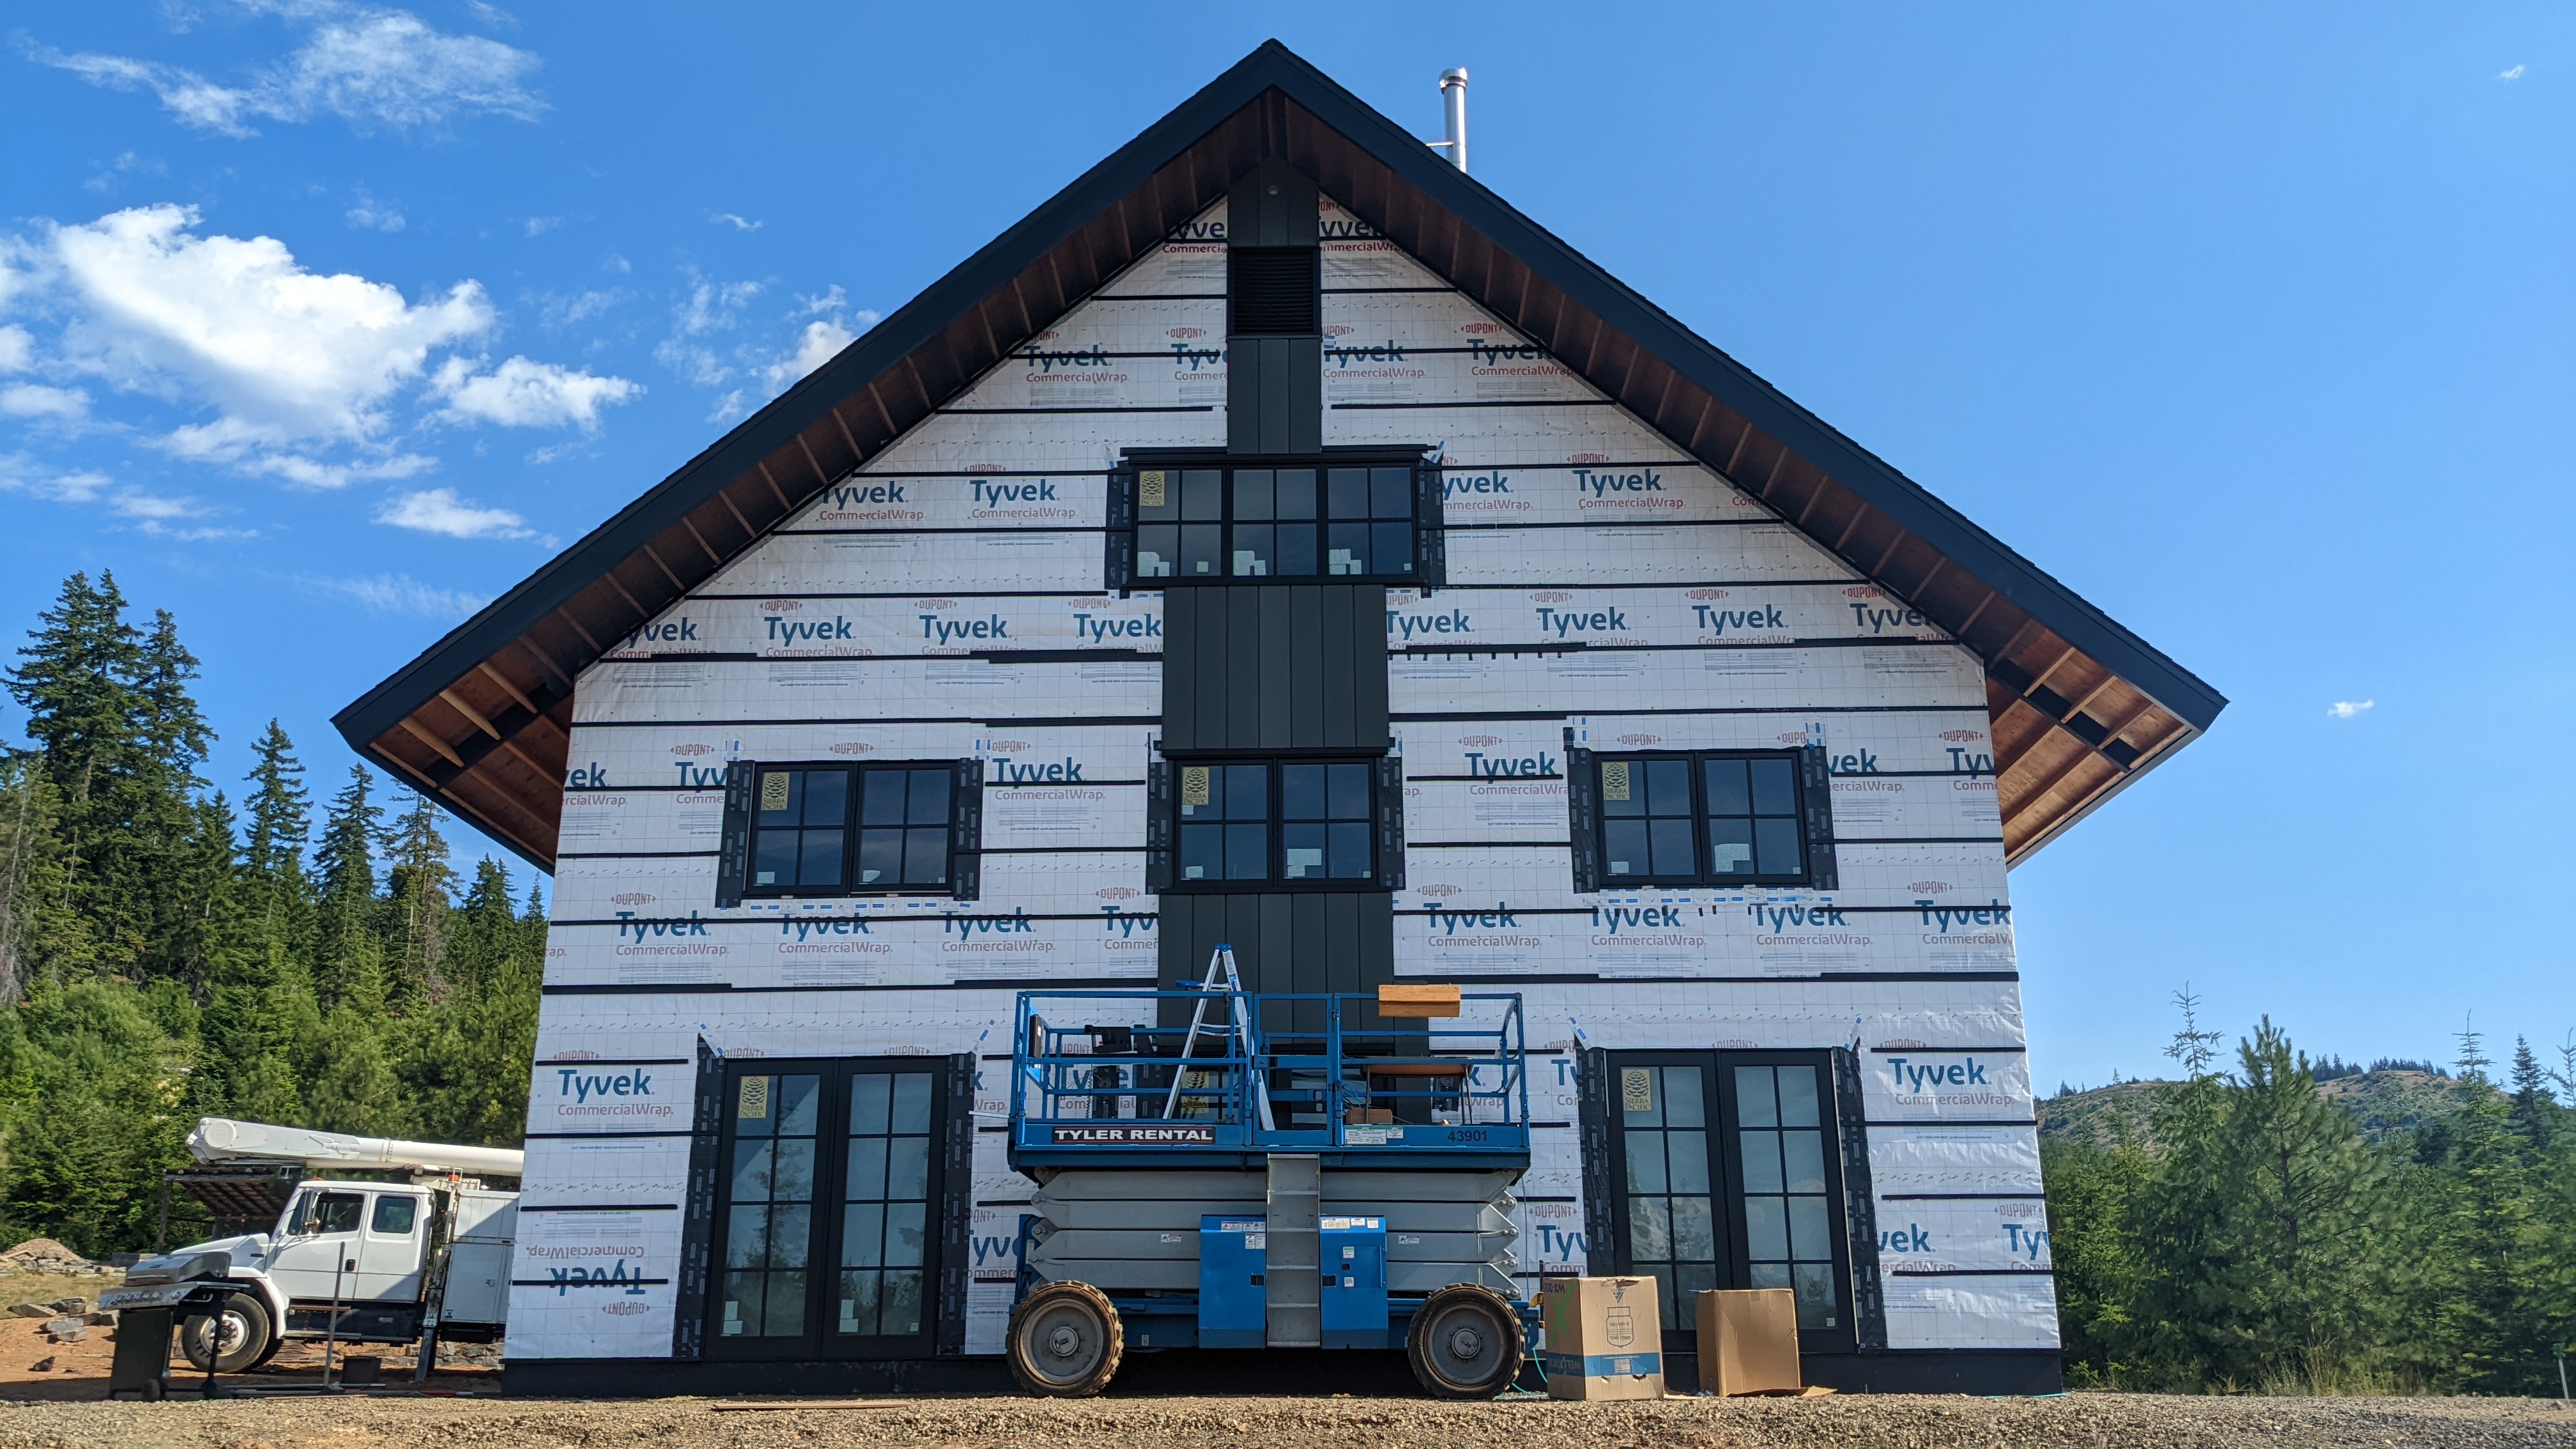
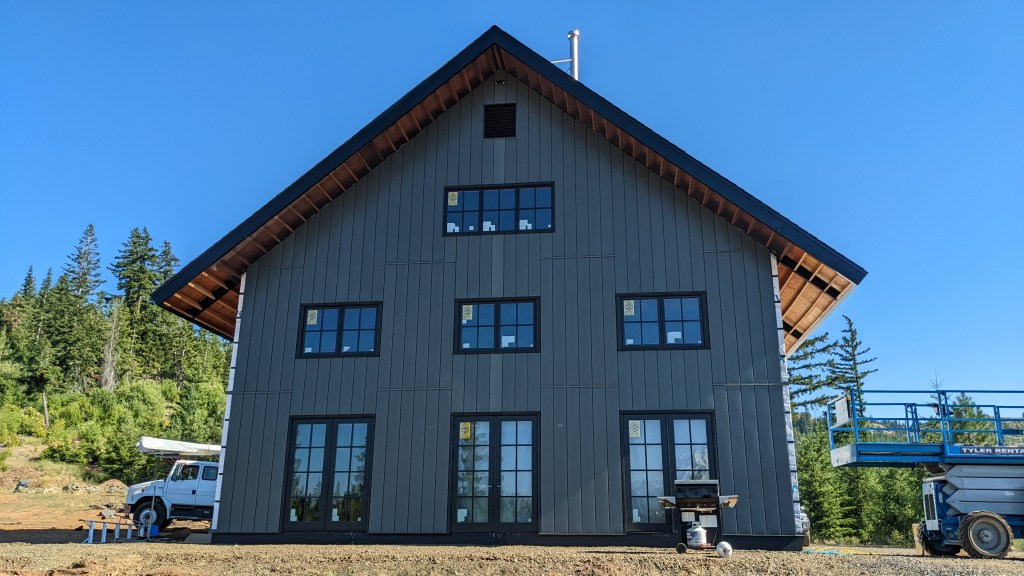
We began the great siding installation! In typical fashion, we started with the most difficult side of the building. The windows, doors, and numerous seams make it the most difficult. It is also the front of the building, so we wanted it to look the best.

Ideally we would start with an easier side to gain some practice, but that was not an option due to the overlapping panel system. To ensure that the center panels would in fact be centered, we started with them and worked our way out on both sides.
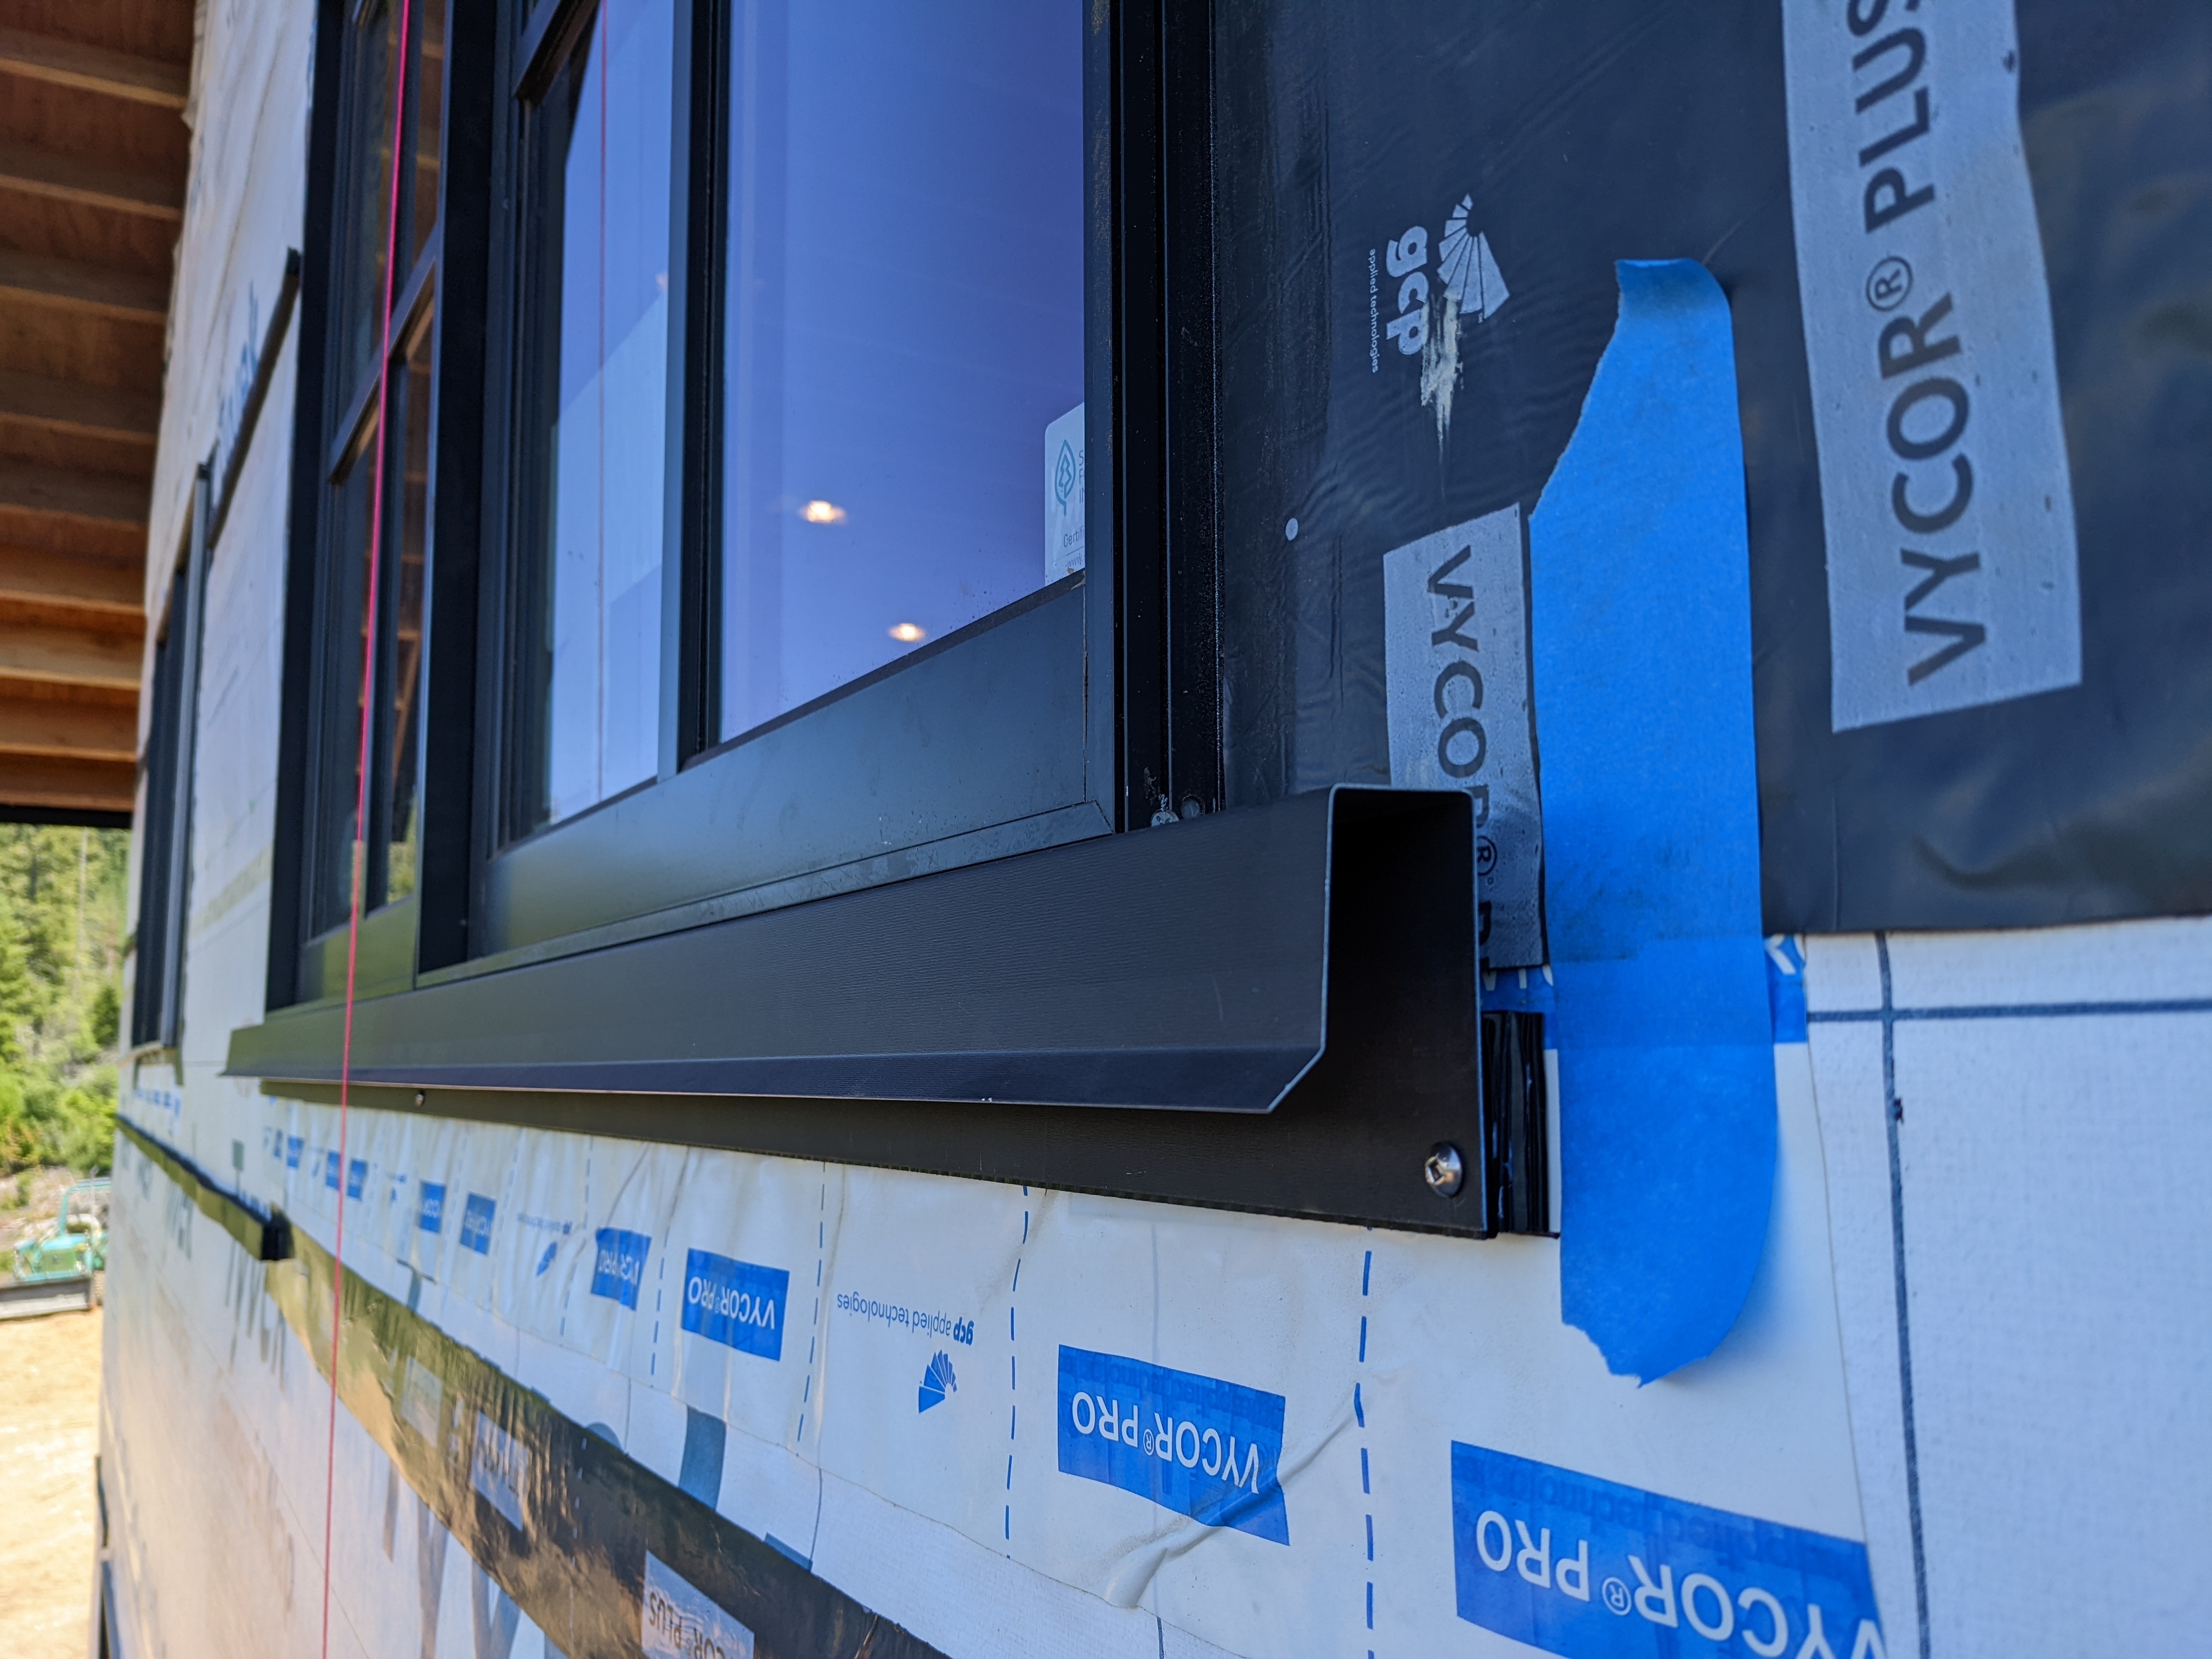
First we installed the center window sills and headers and set up a string line down the center of the building.
The center panels are unique because they are symmetric. Both the left and right sides get screwed down. We centered our first panel under the window sill and screwed it in place!
As excited as we were to put up more panels, we had to catch up on prep work.
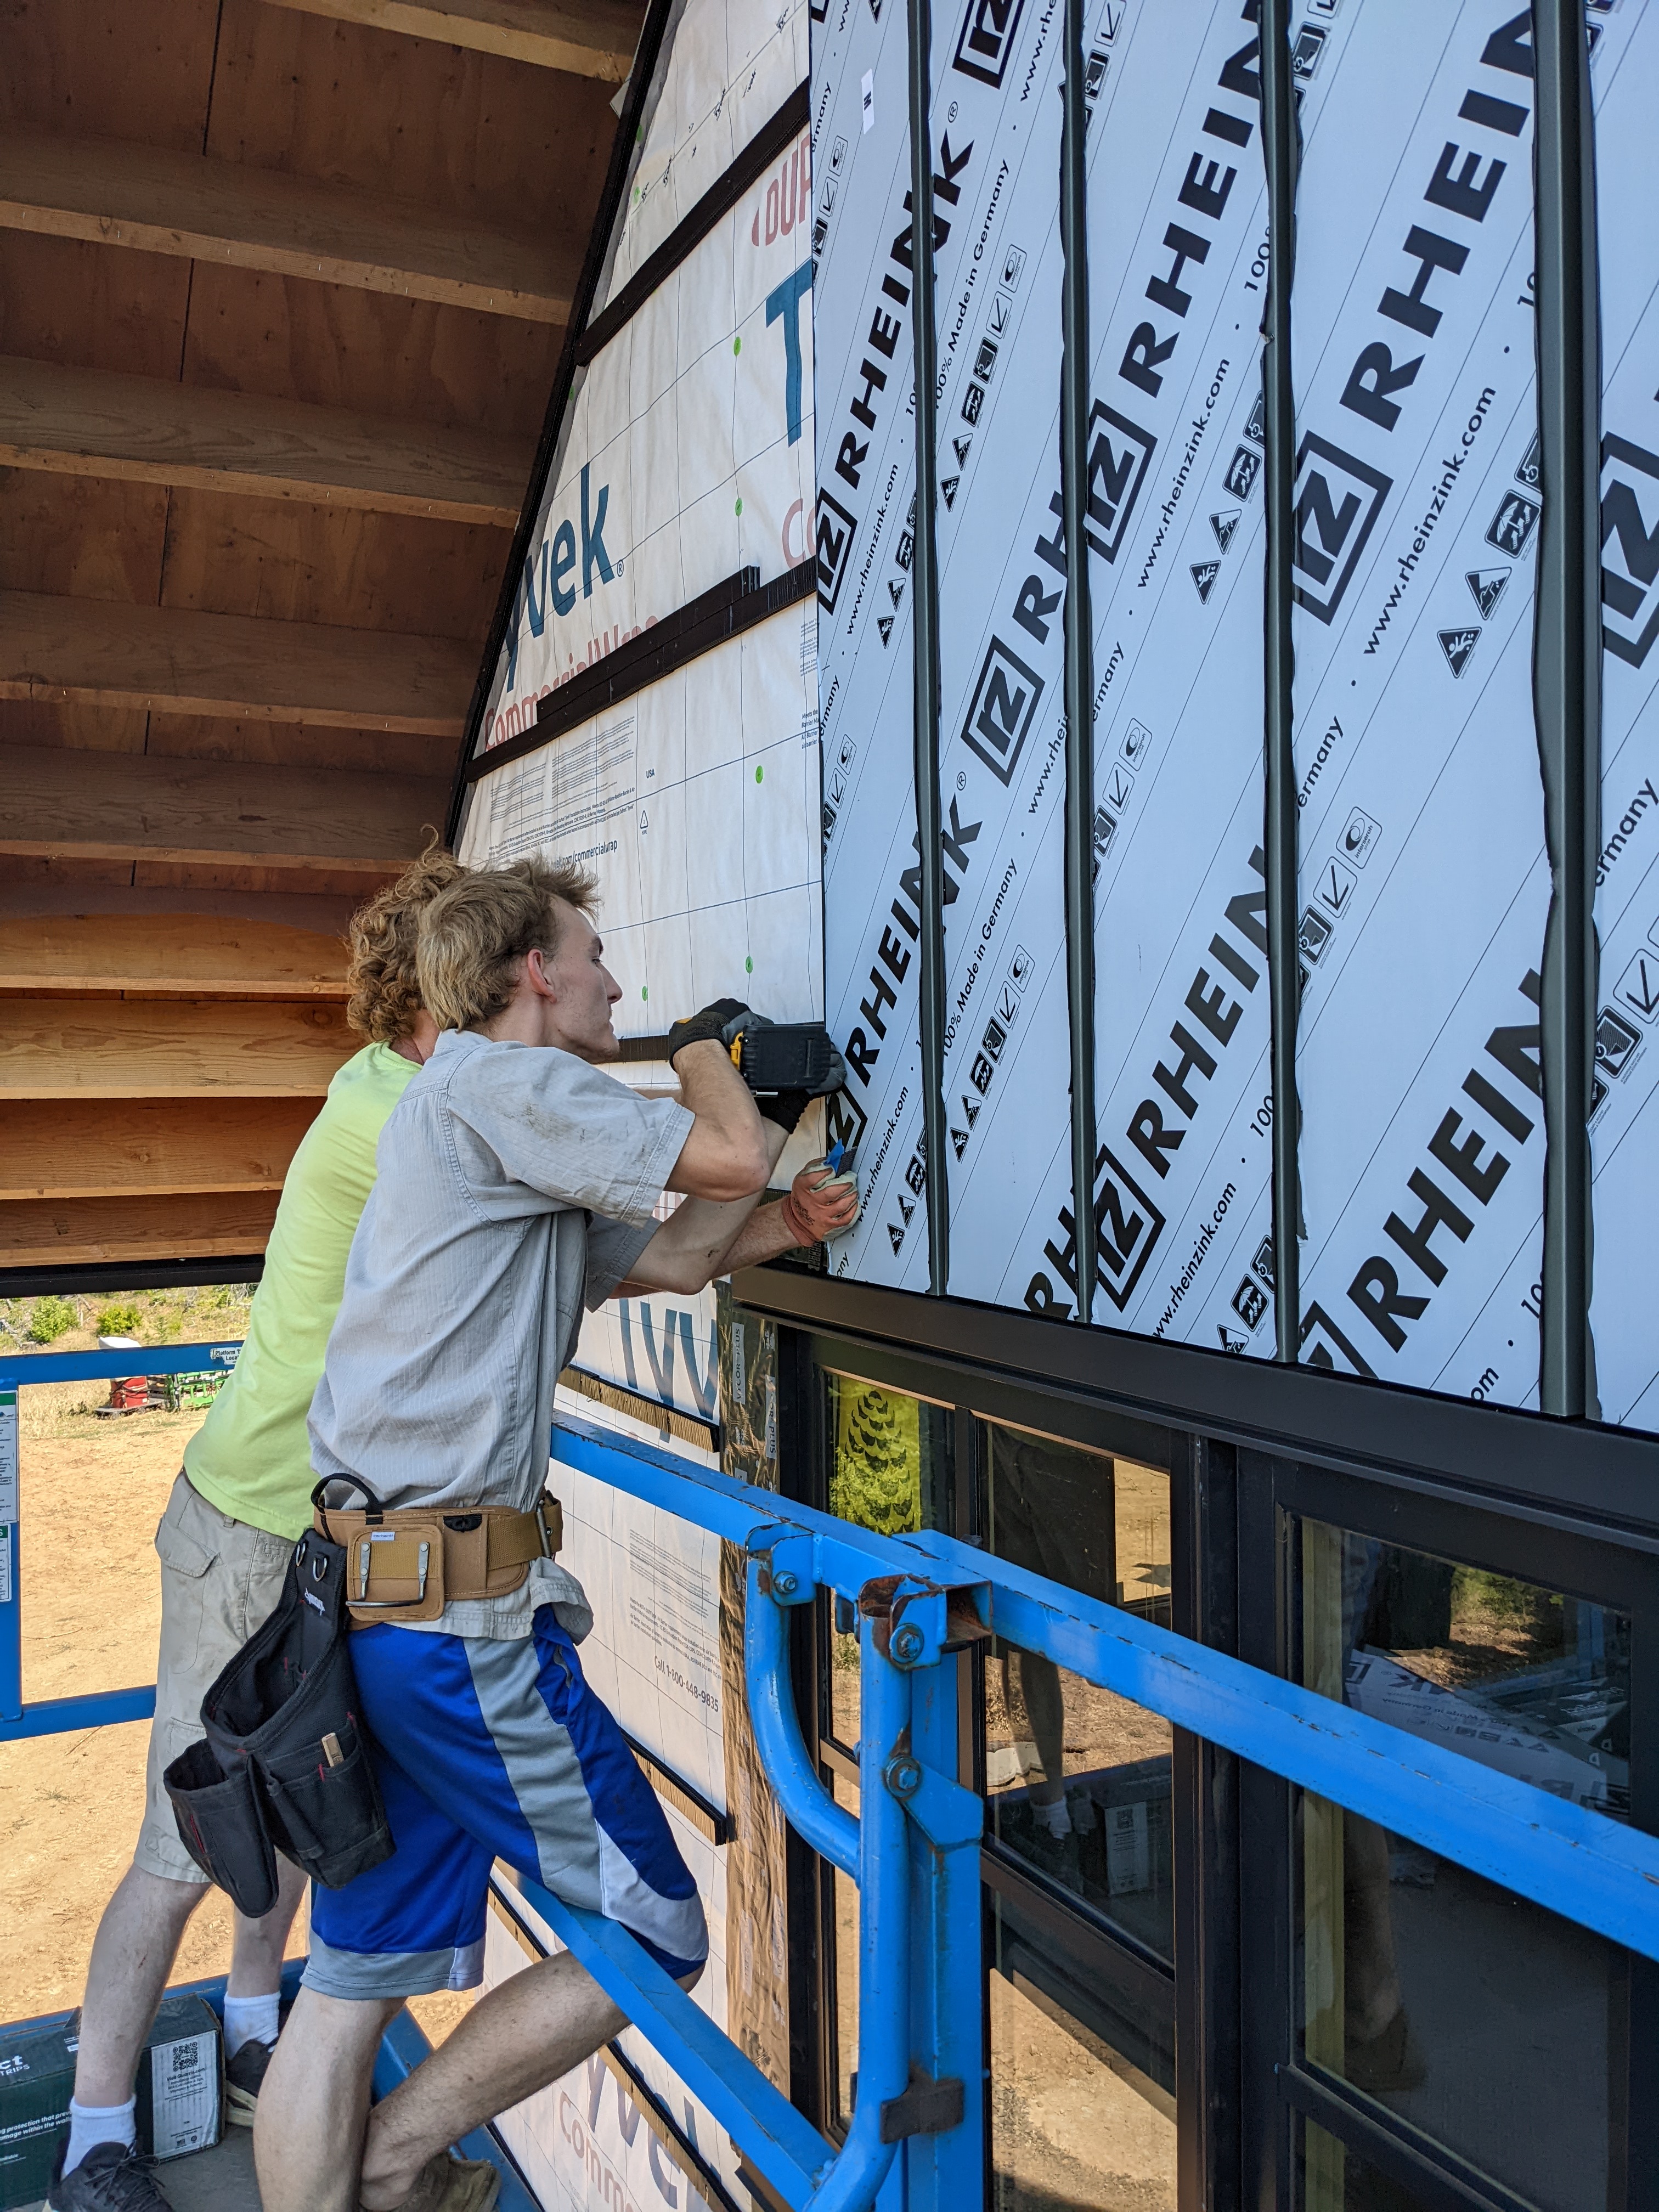
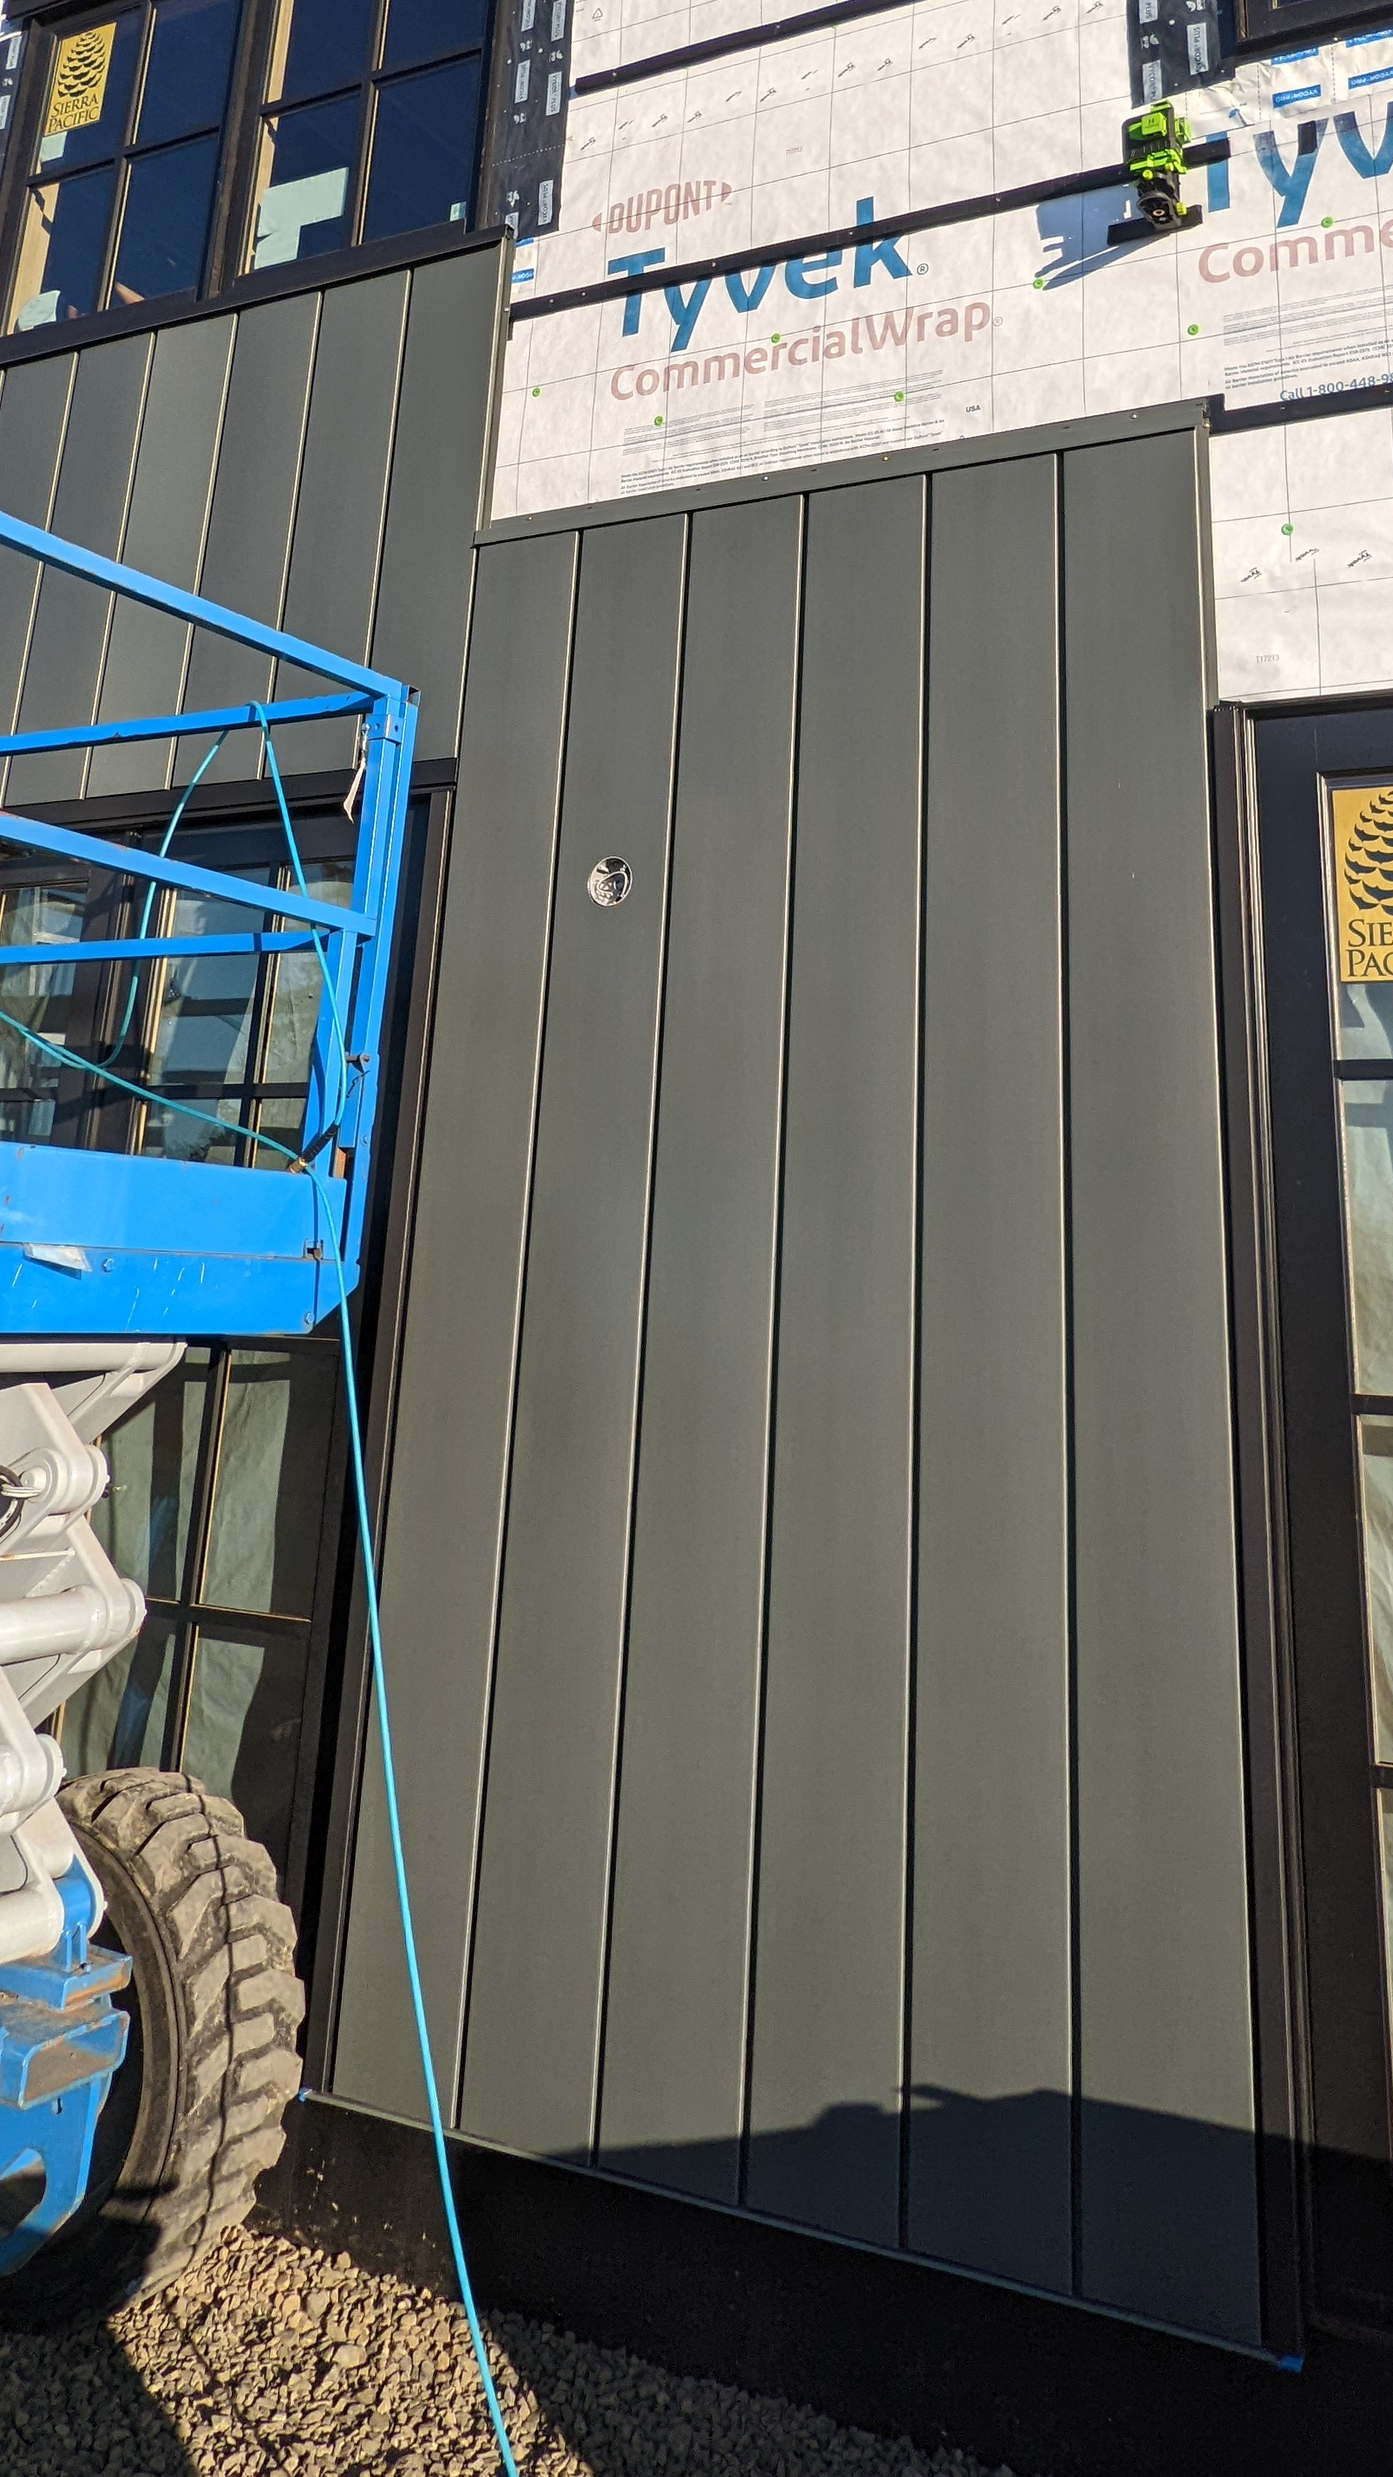
The panels get fastened to battens, which space the panels away from the sheathing. The battens are a plastic honeycomb, allowing for air flow and drainage behind them. (Hopefully most of the water flows over the panels and not behind them.)


The battens are spaced about every two feet. Behind each batten is a 2×6 framing member, so the panels will be well-secured to wood.
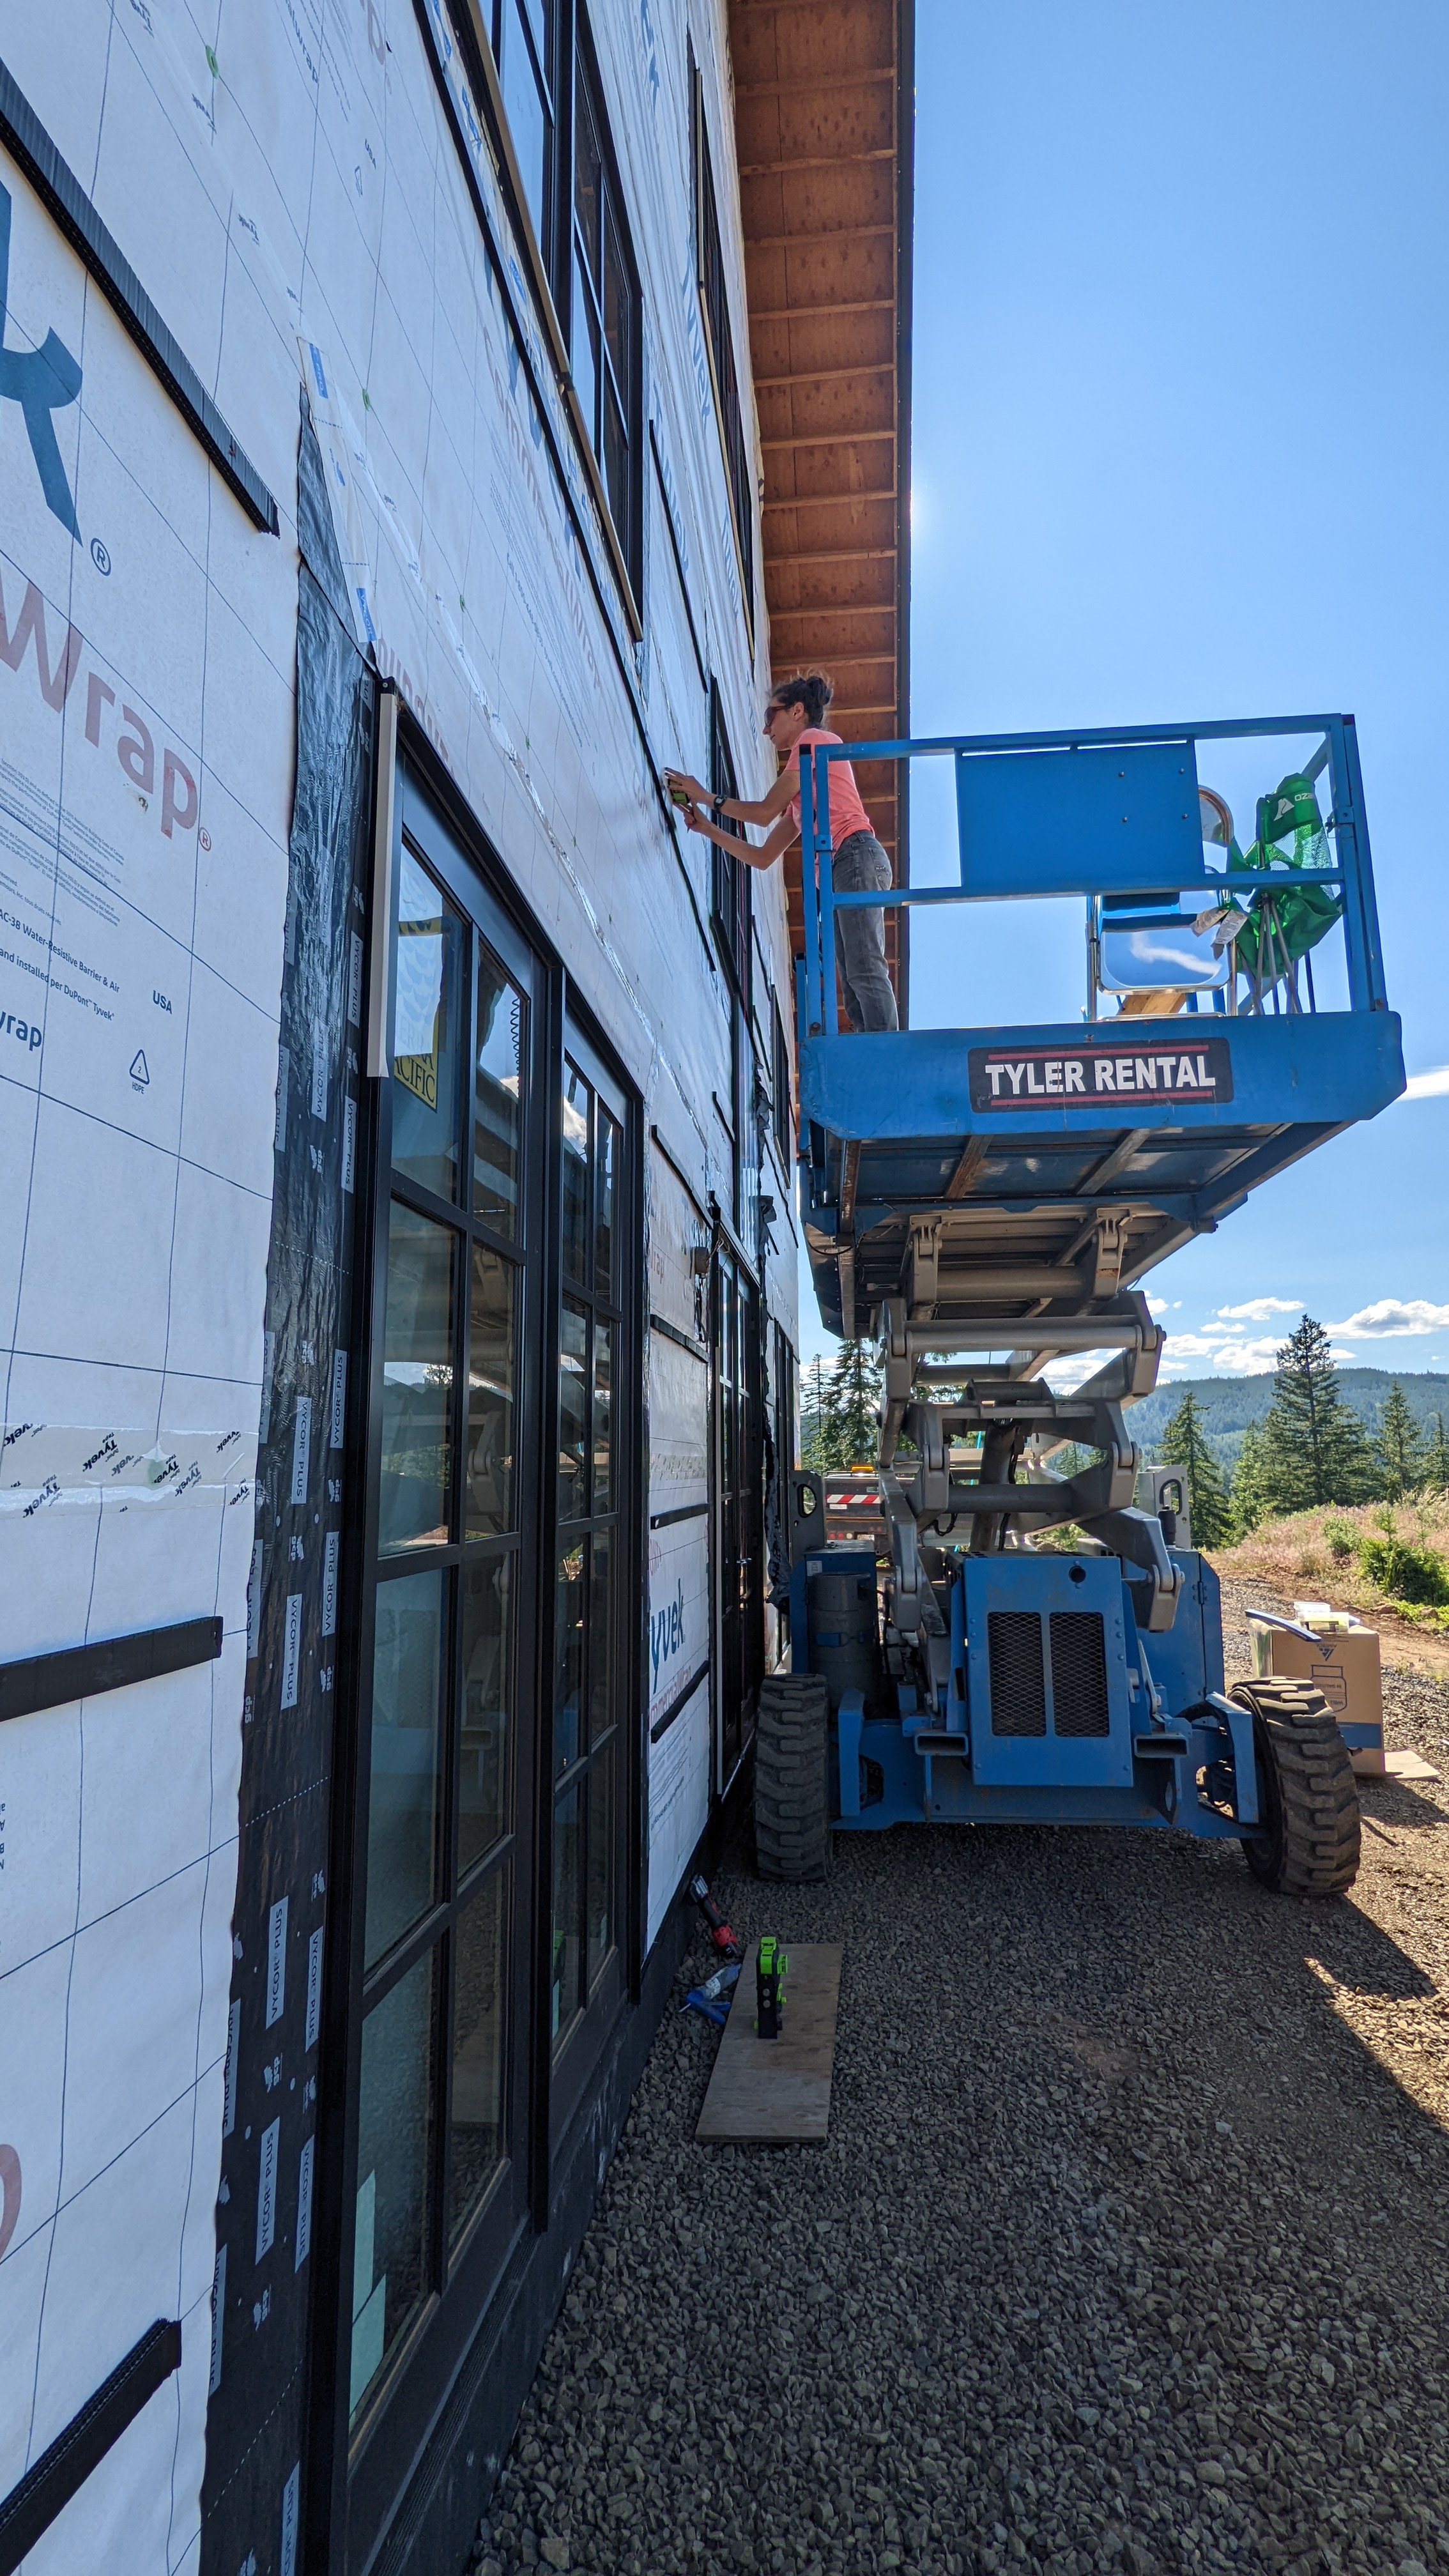
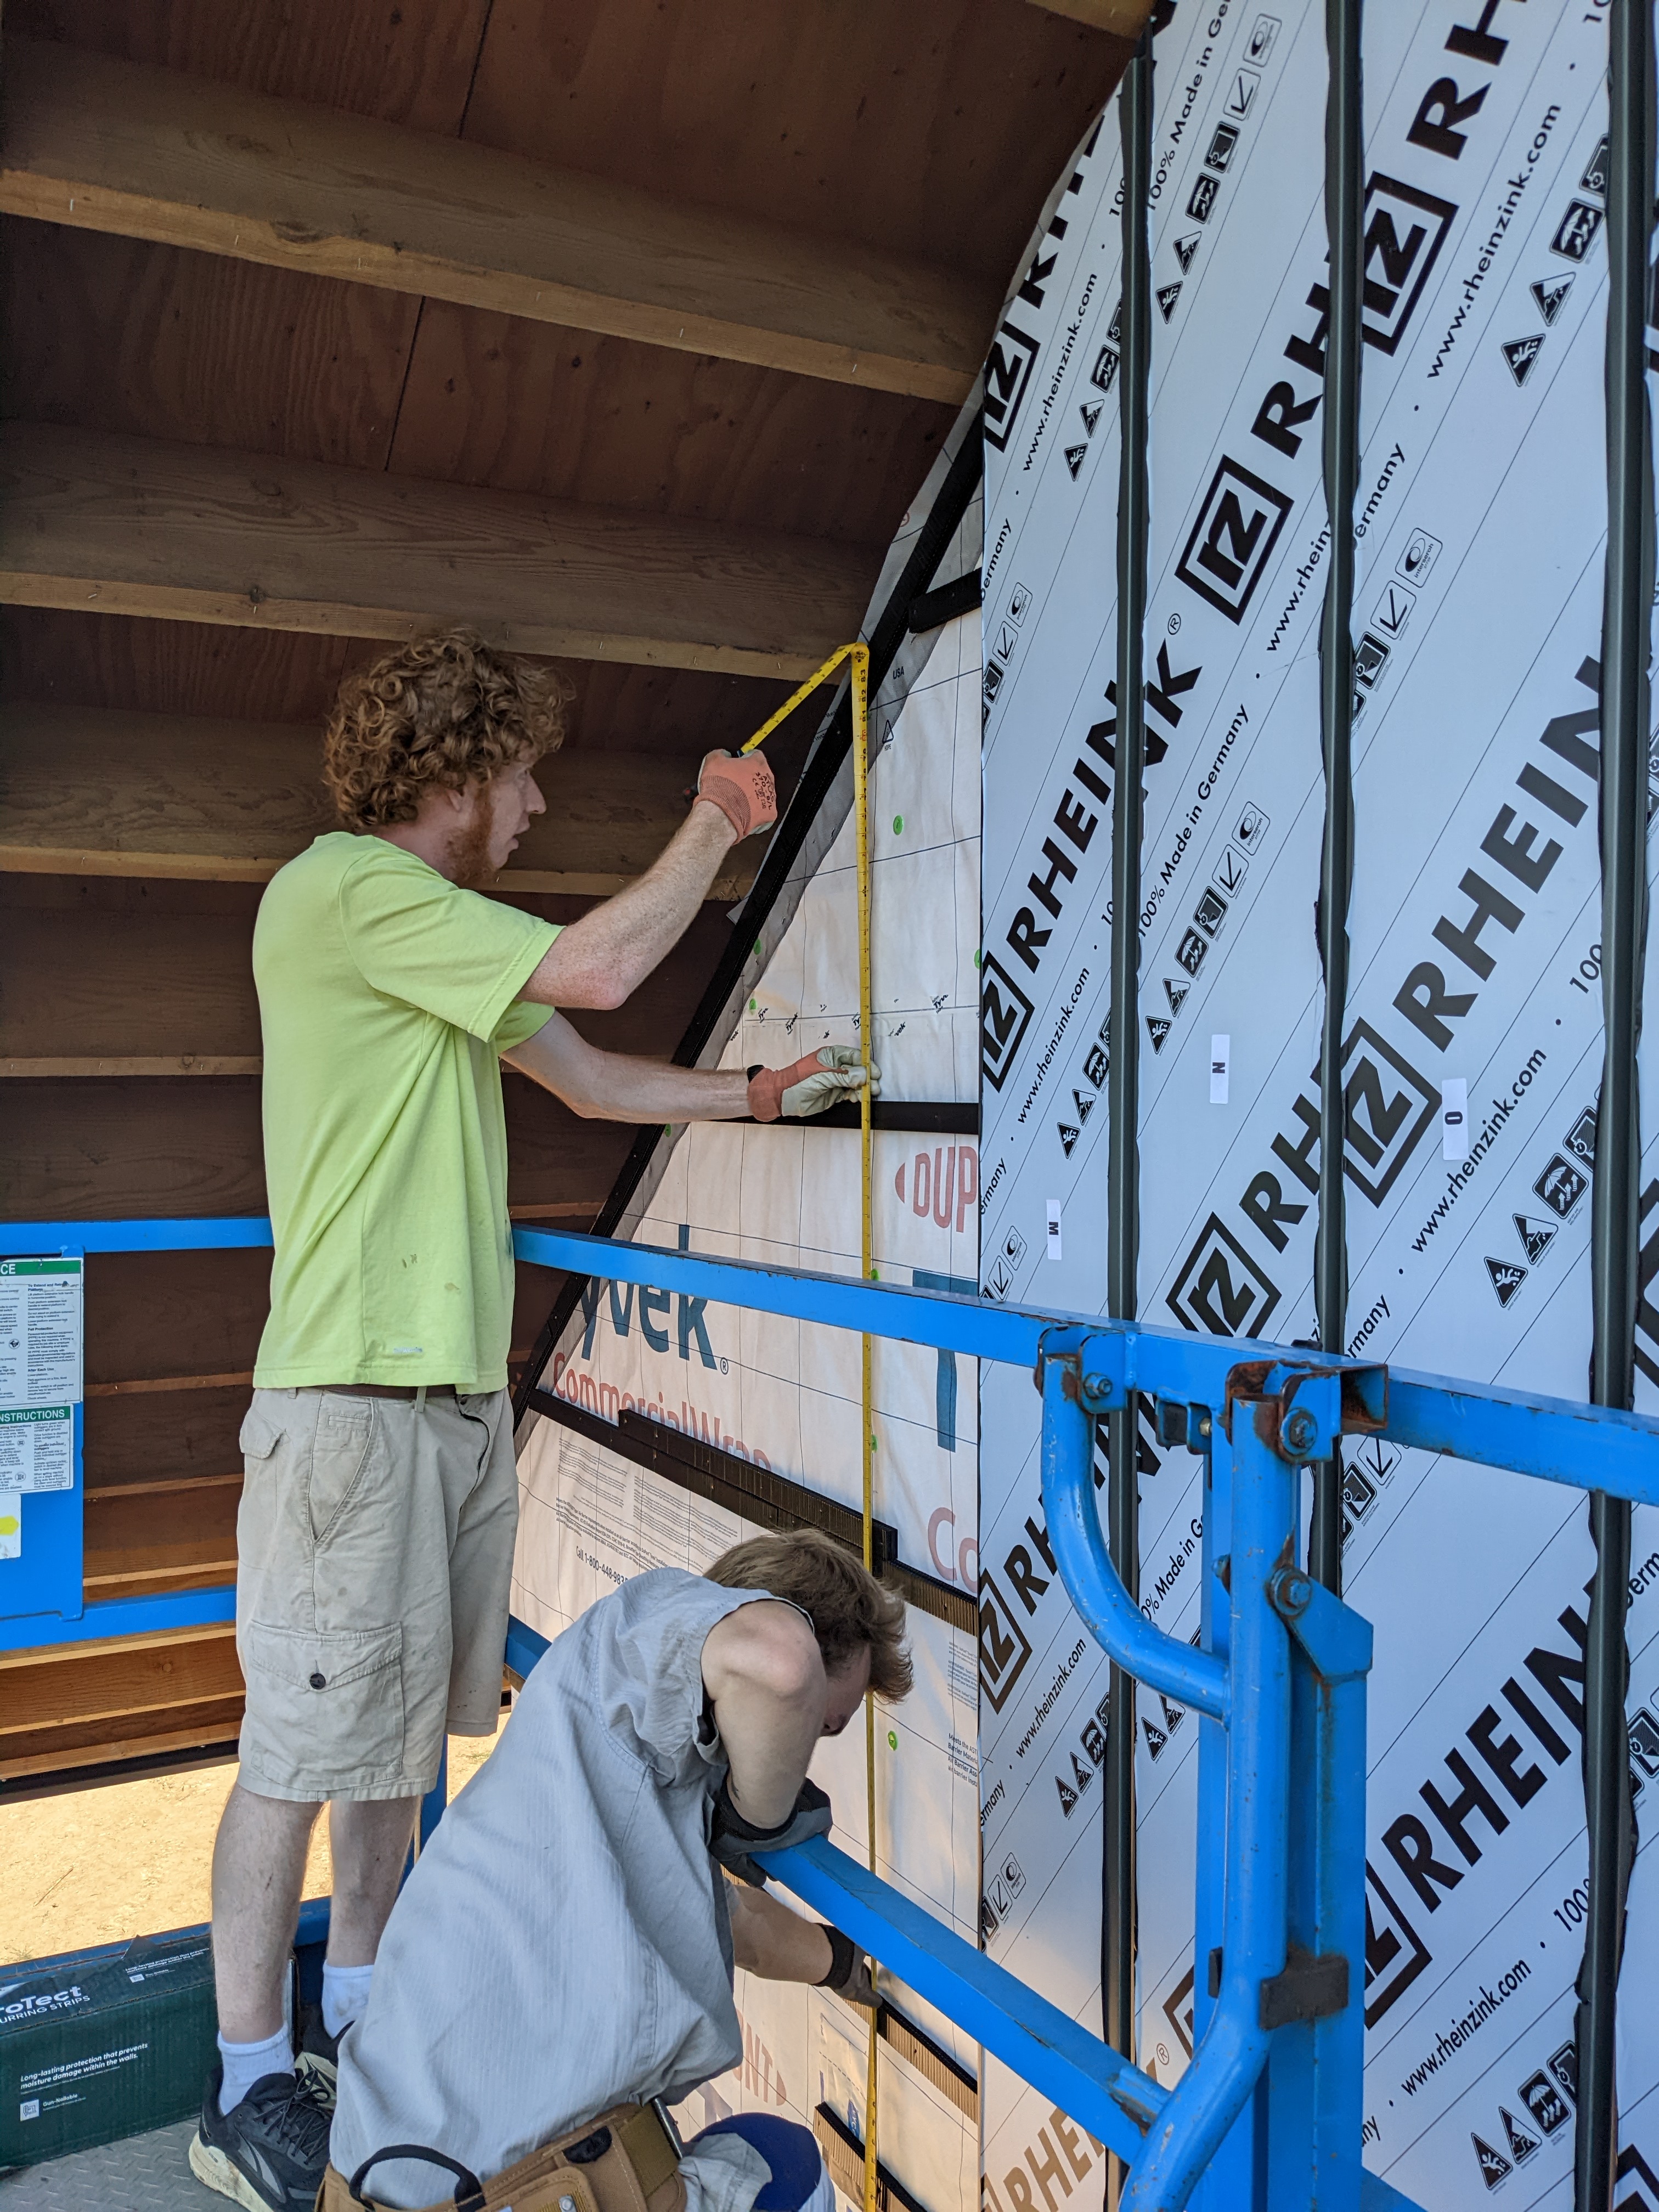
After almost a full day of securing battens, we noticed our string line was moving in the slightest breeze. This wouldn’t do! We set up the laser, shining a vertical line that we could similarly use as a reference. We also made some adjustments in our layout to account for the windows not being perfectly spaced. To ensure that our layout remained on track, we marked where the edges of the first five panels should be. Then we moved the laser and repeated the process around all the windows. We ended up marking the location of every single fastener (about 500 on the North end)!

After days of marking the layout, we were ready to put up a few more panels. But first, we had to find the right panels!
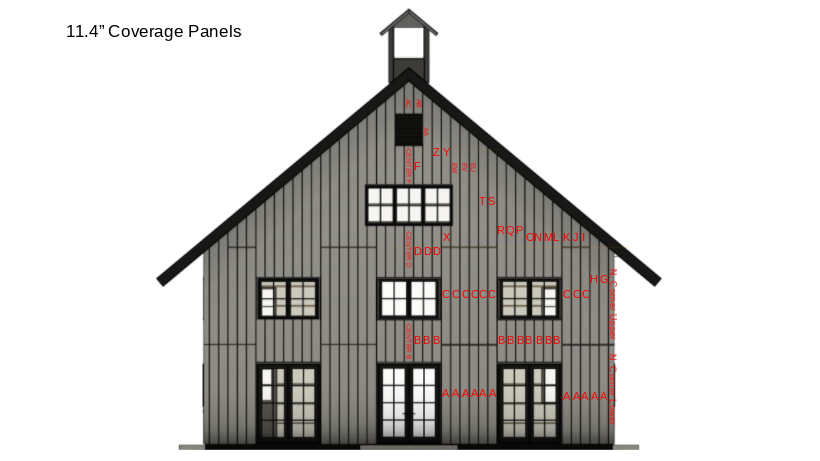
There are more than 30 unique panels on the North side. We created a map and key so we could find and assemble the panels much like a puzzle. There are panels labeled A-Z and beyond. Luckily the supplier attached stickers to each panel, corresponding to our decoding system.

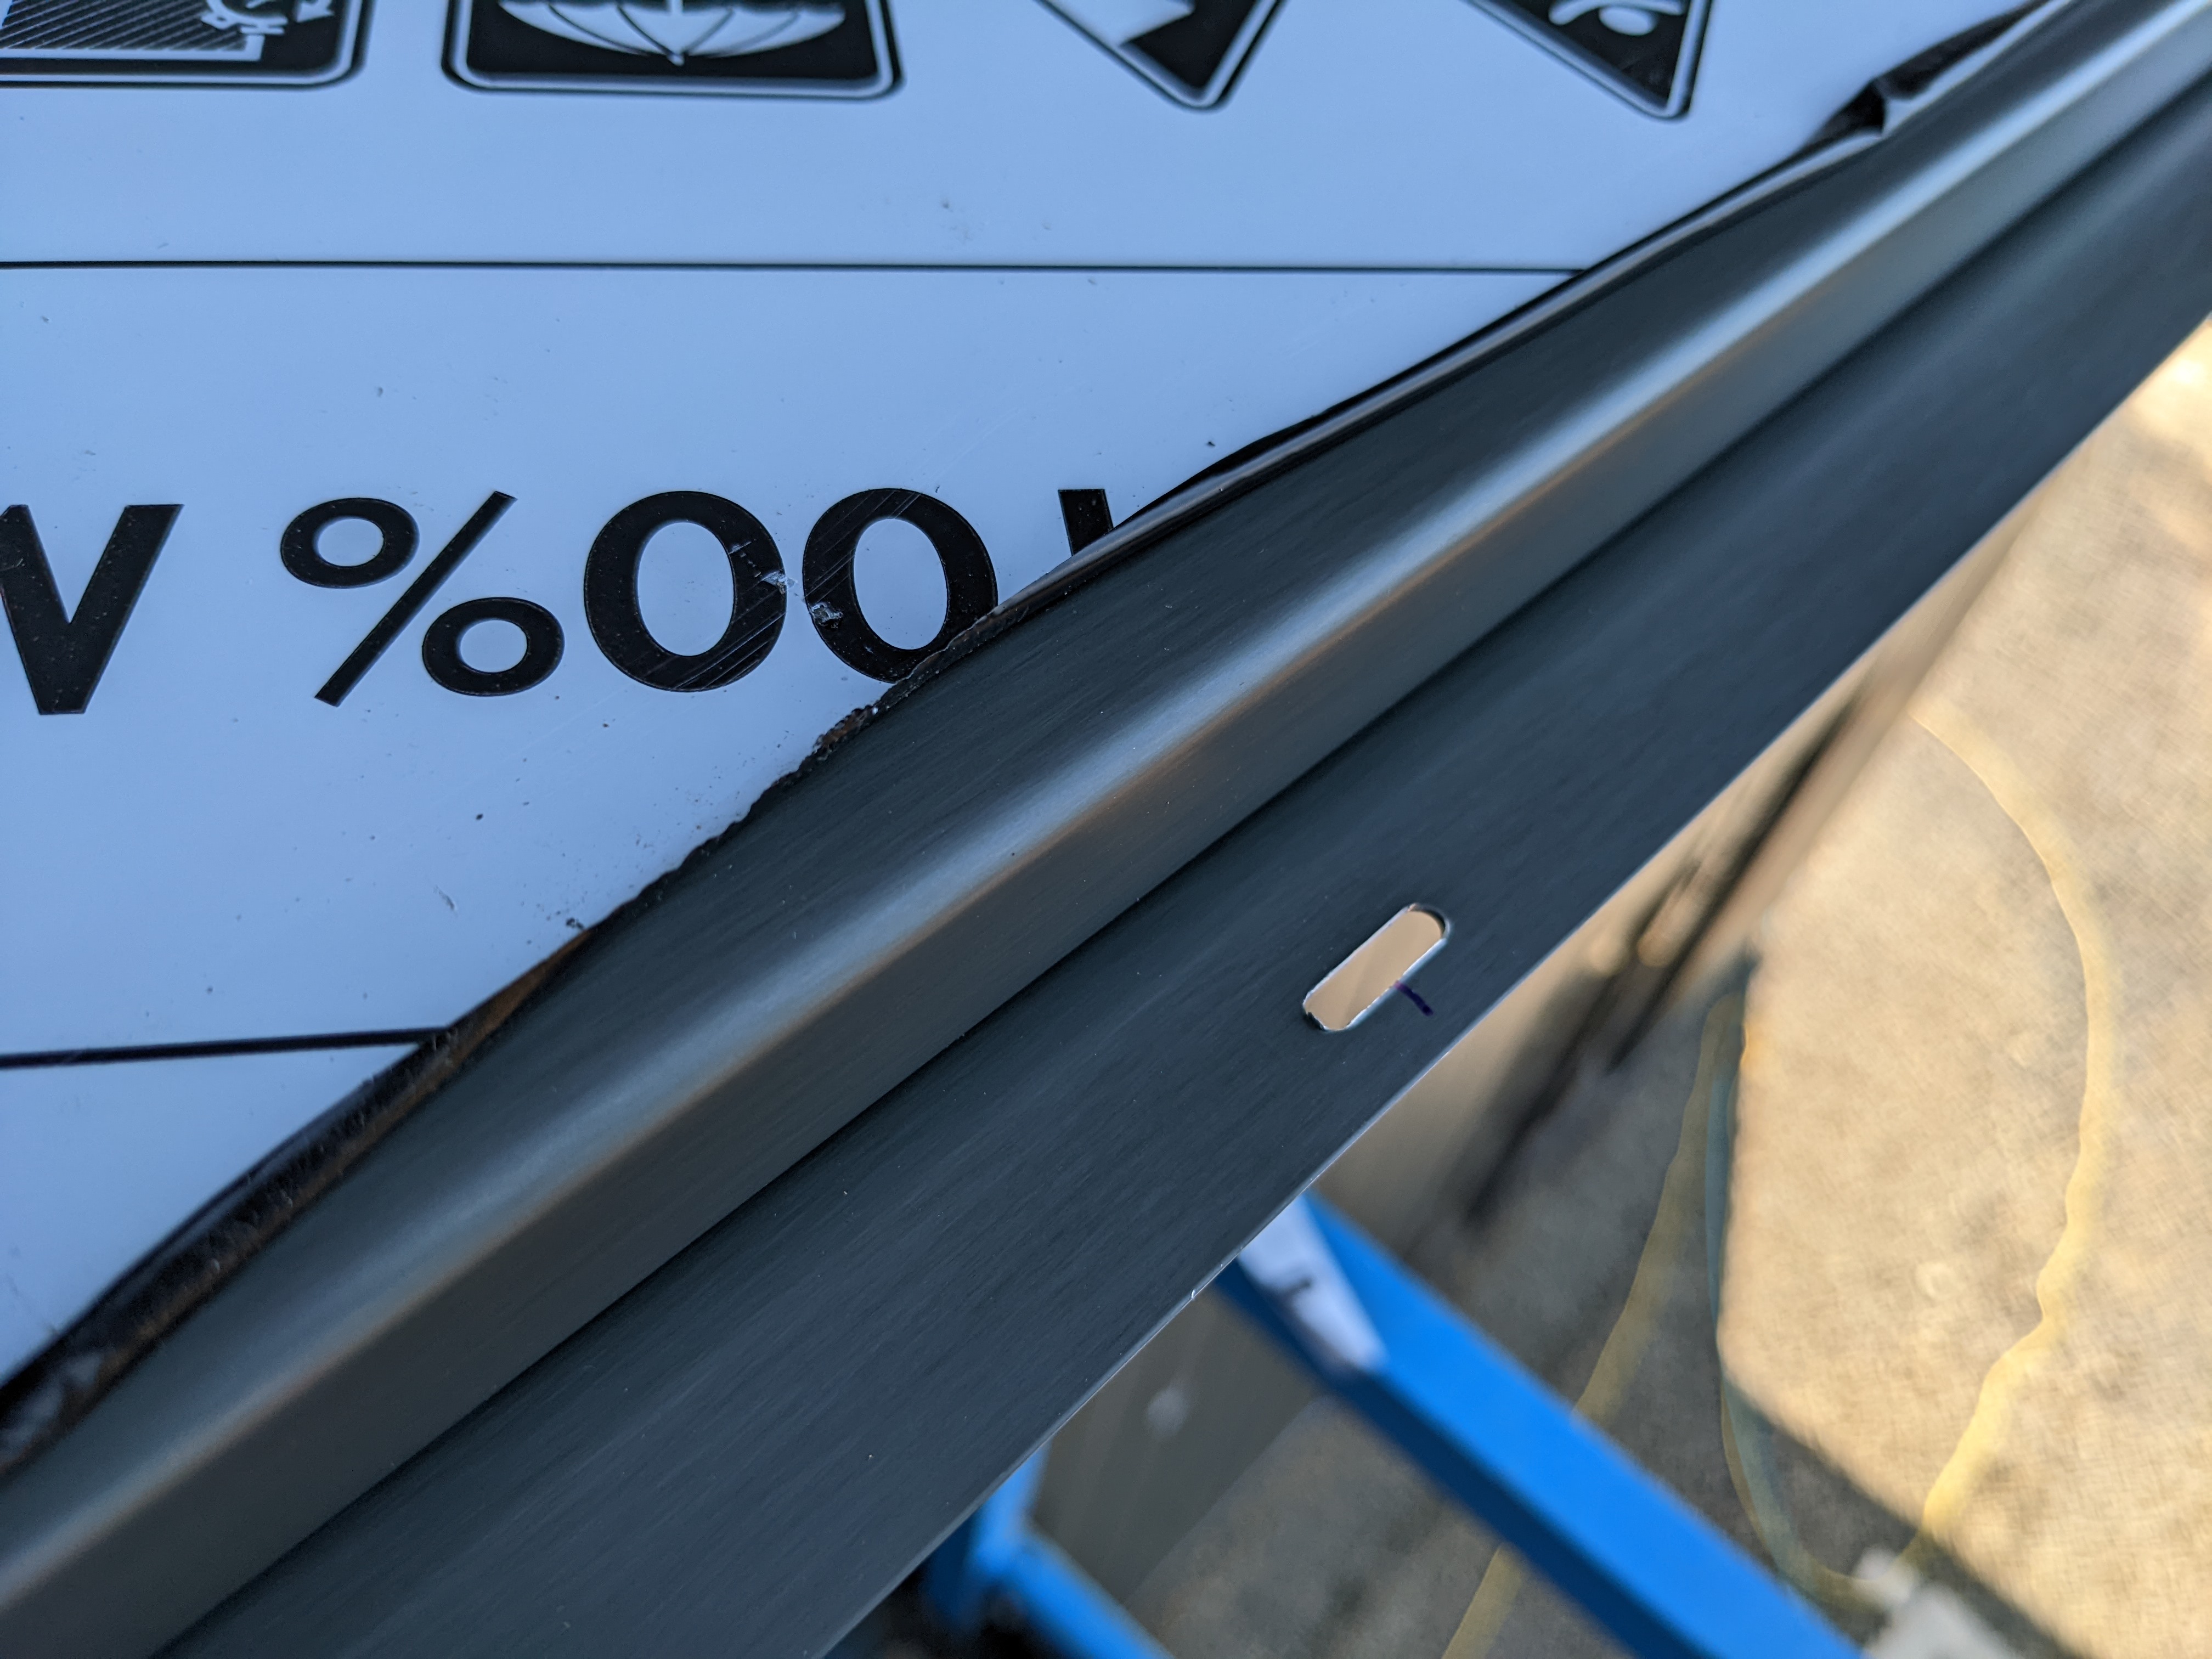
Once we found the correct panel, we punched holes along one edge for fasteners. We determined the locations of the holes by measuring the batten spacing on the building. Then we marked and punched each panel accordingly.
The centers of the panels get punched with holes to keep the panel from sliding around.
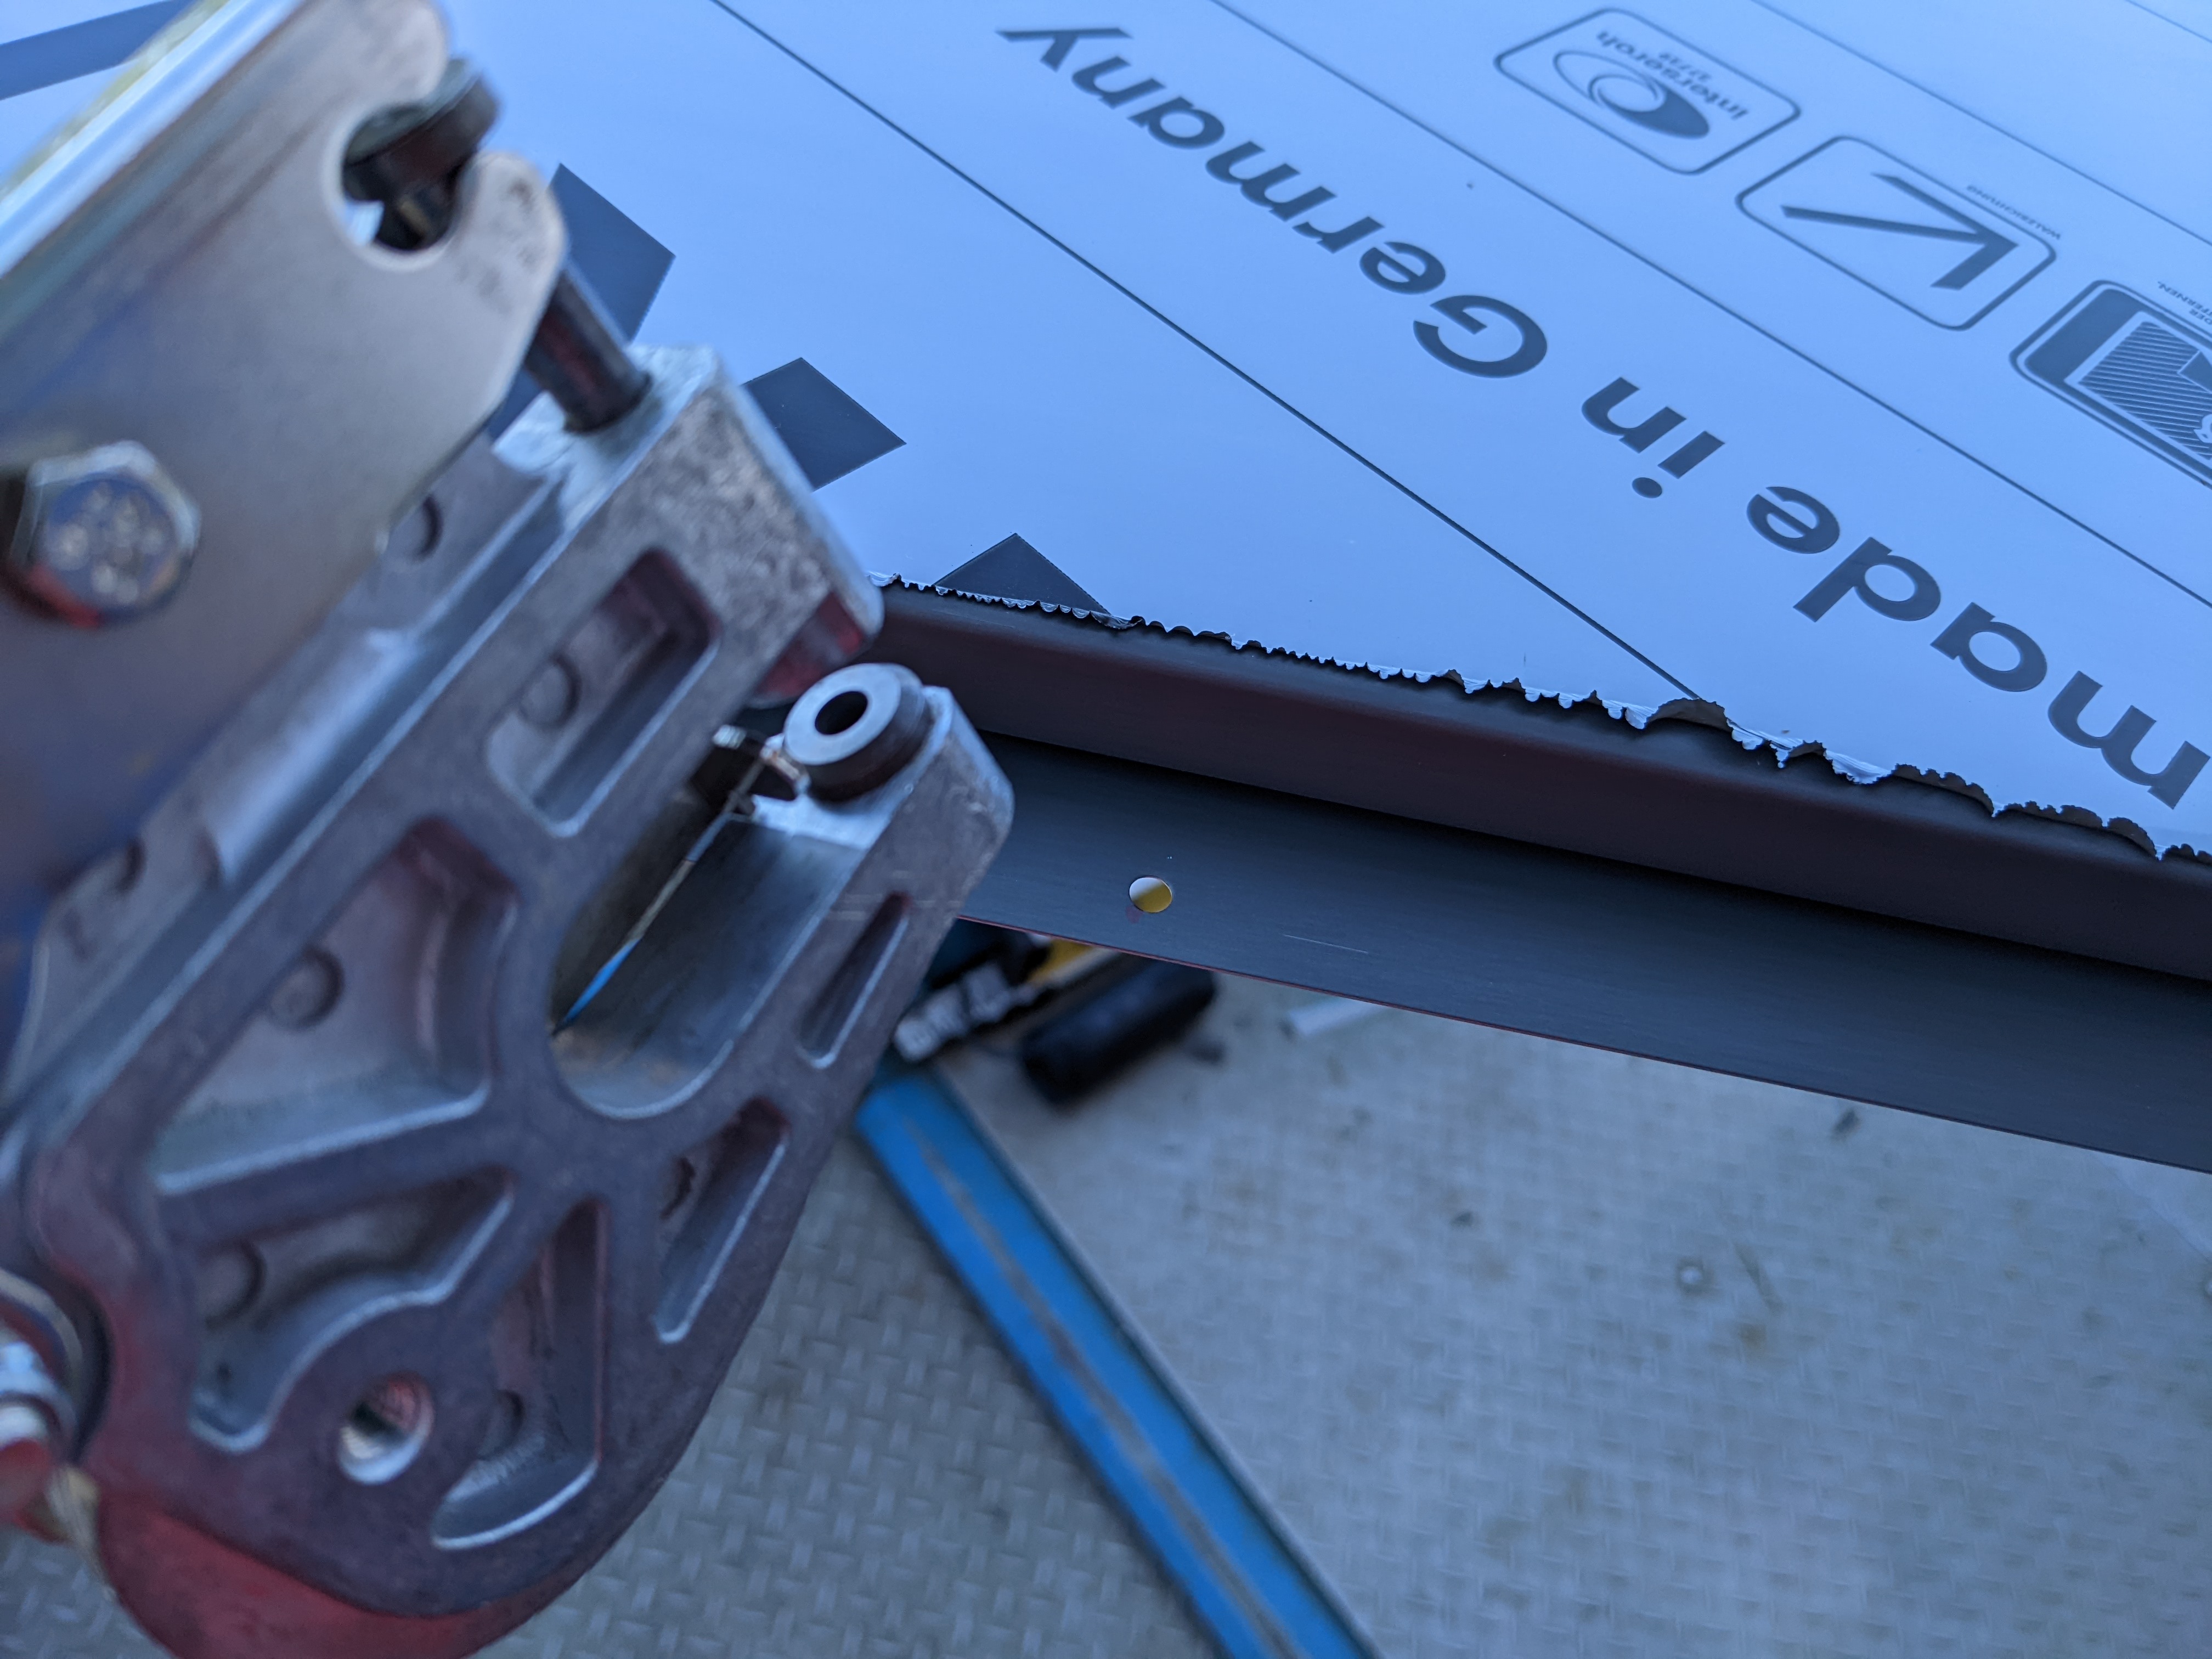

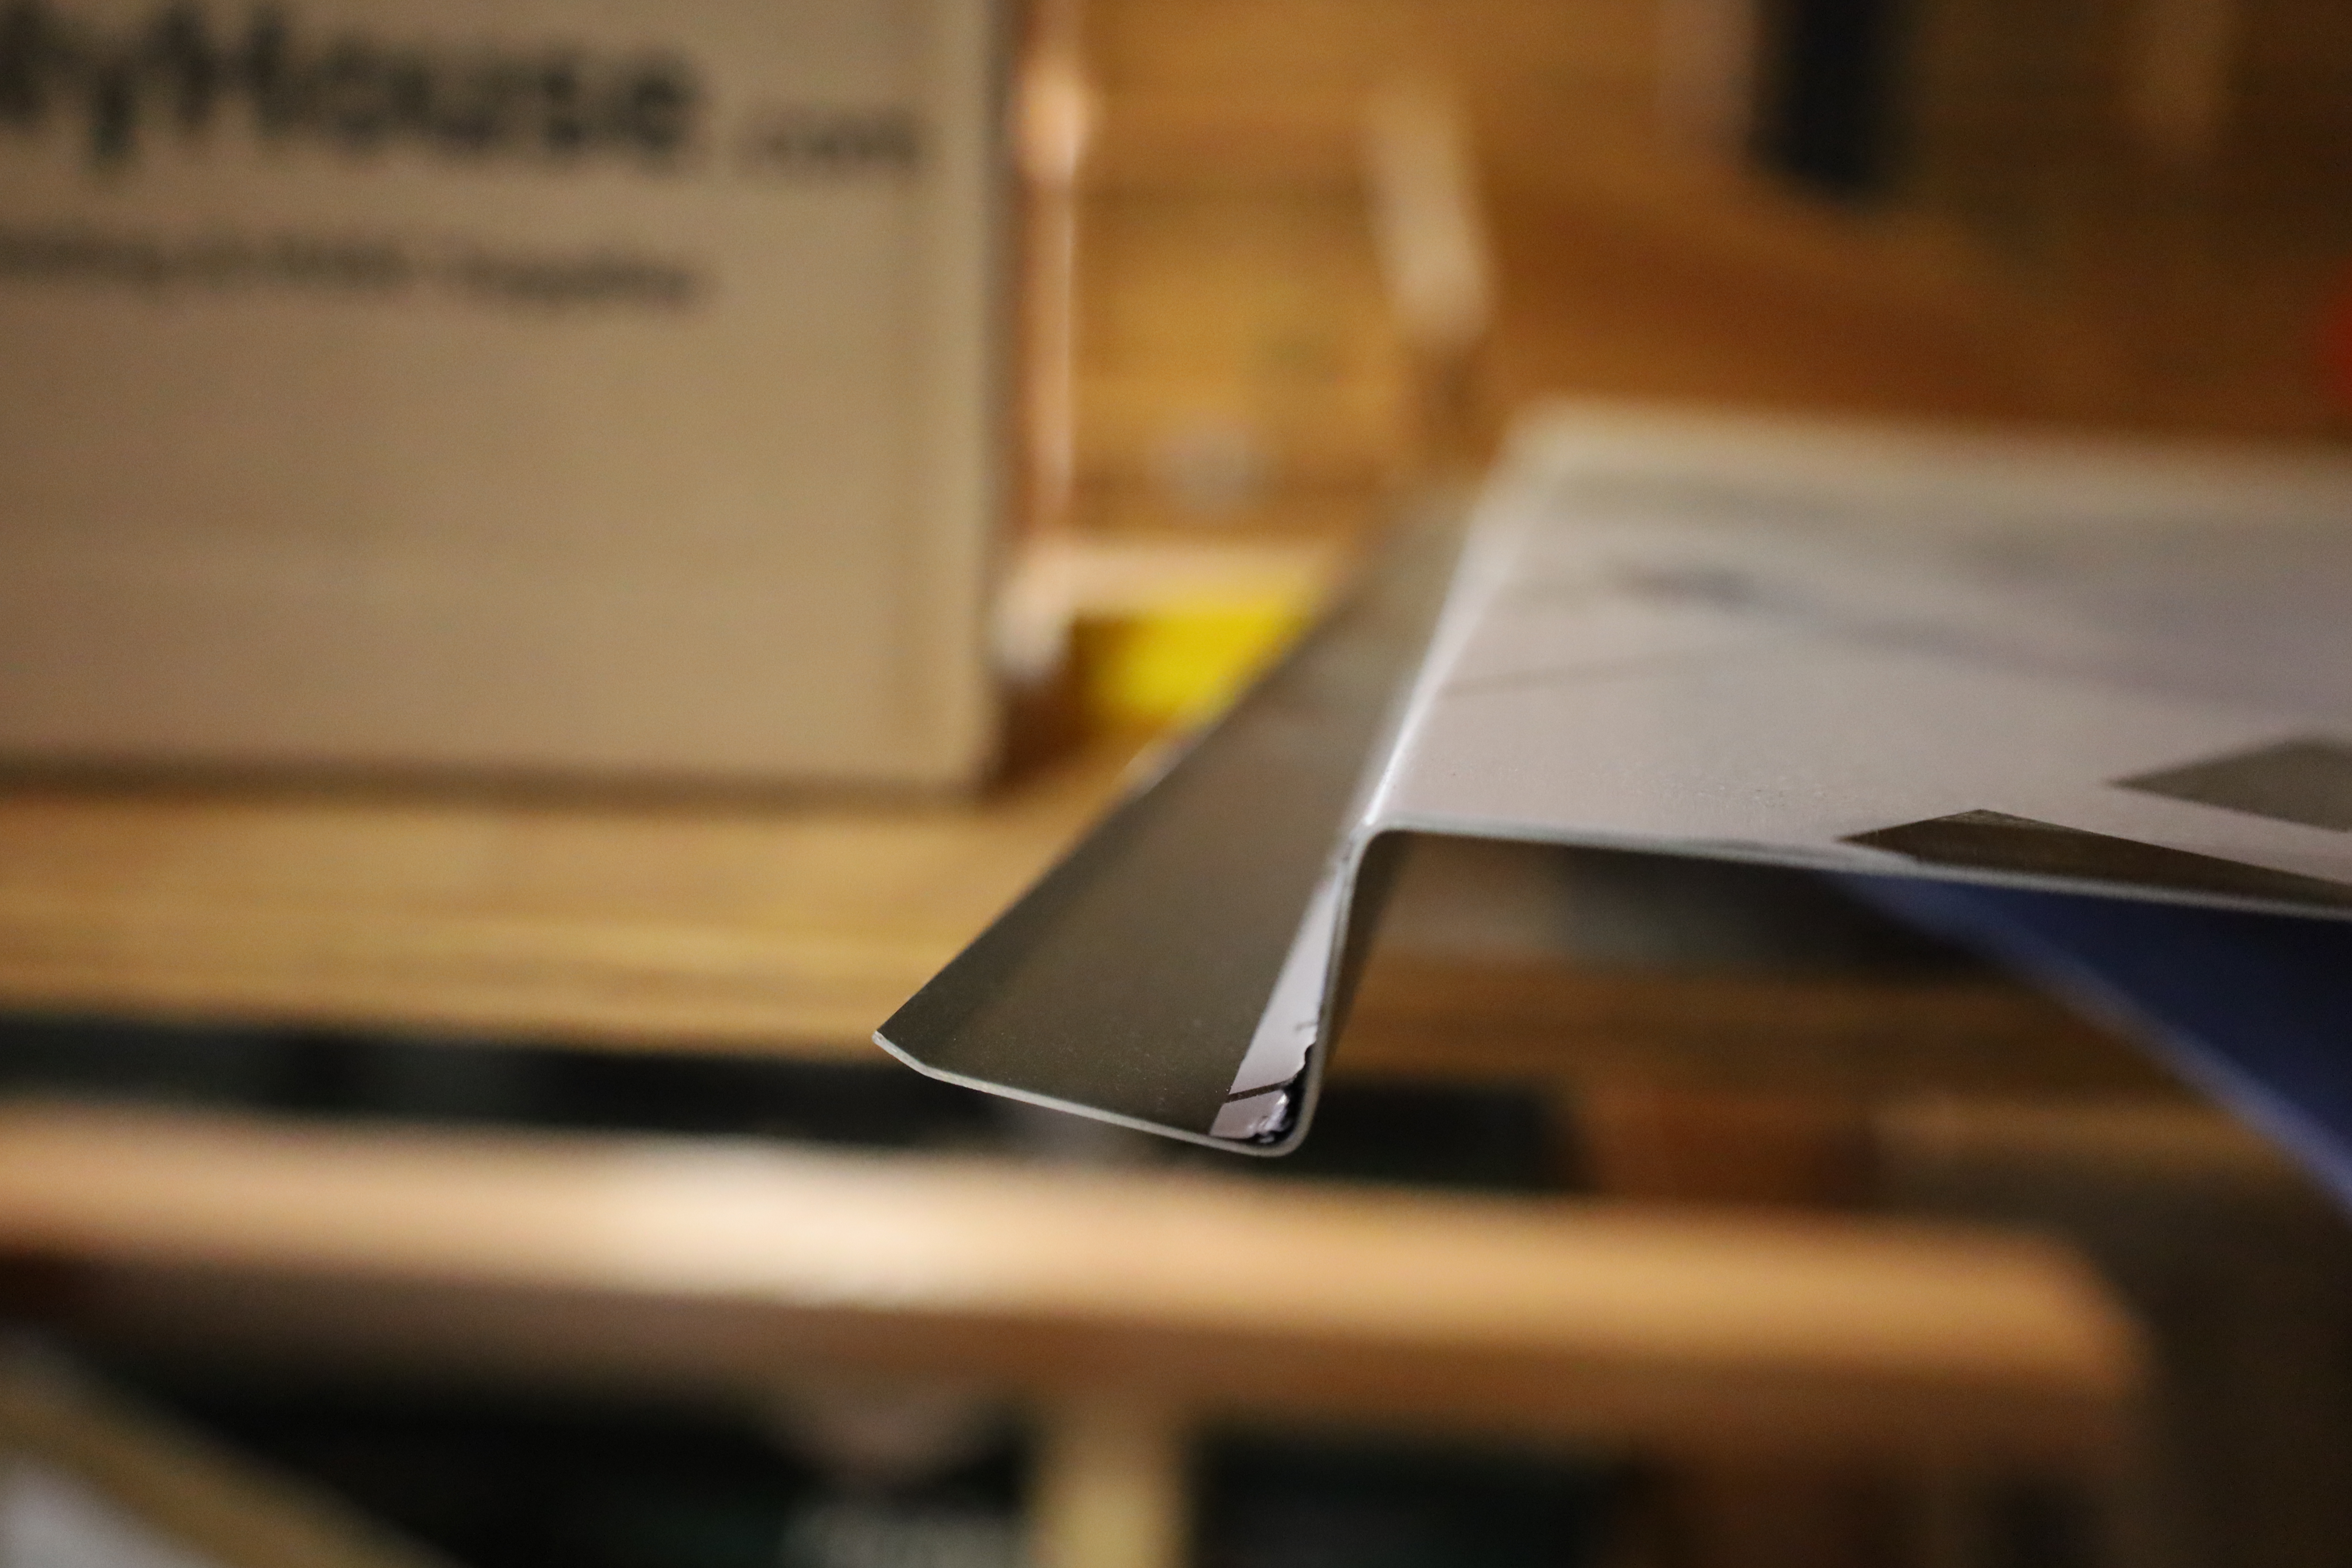
The ends of the panels get punched with slots to allow for thermal expansion of the panels. Like any metal, zinc grows and shrinks due to temperature. Most of the thermal expansion occurs in the long direction. The slots allow the panel to grow and shrink without putting force on the bolt.

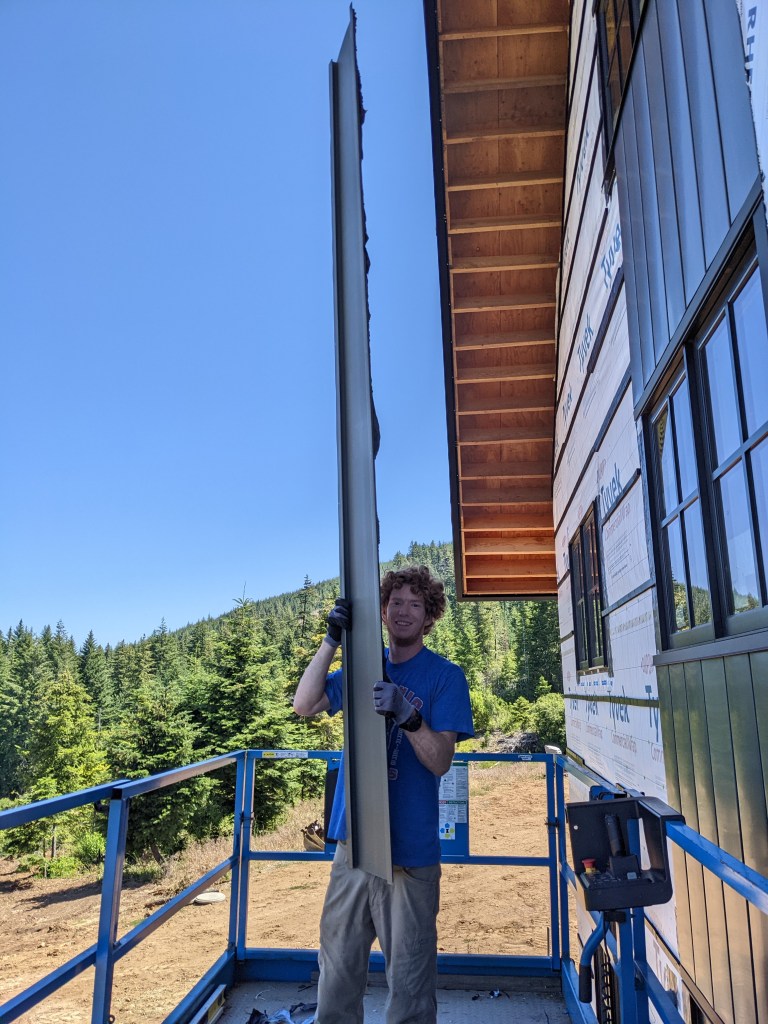
Finally, we installed some more panels.
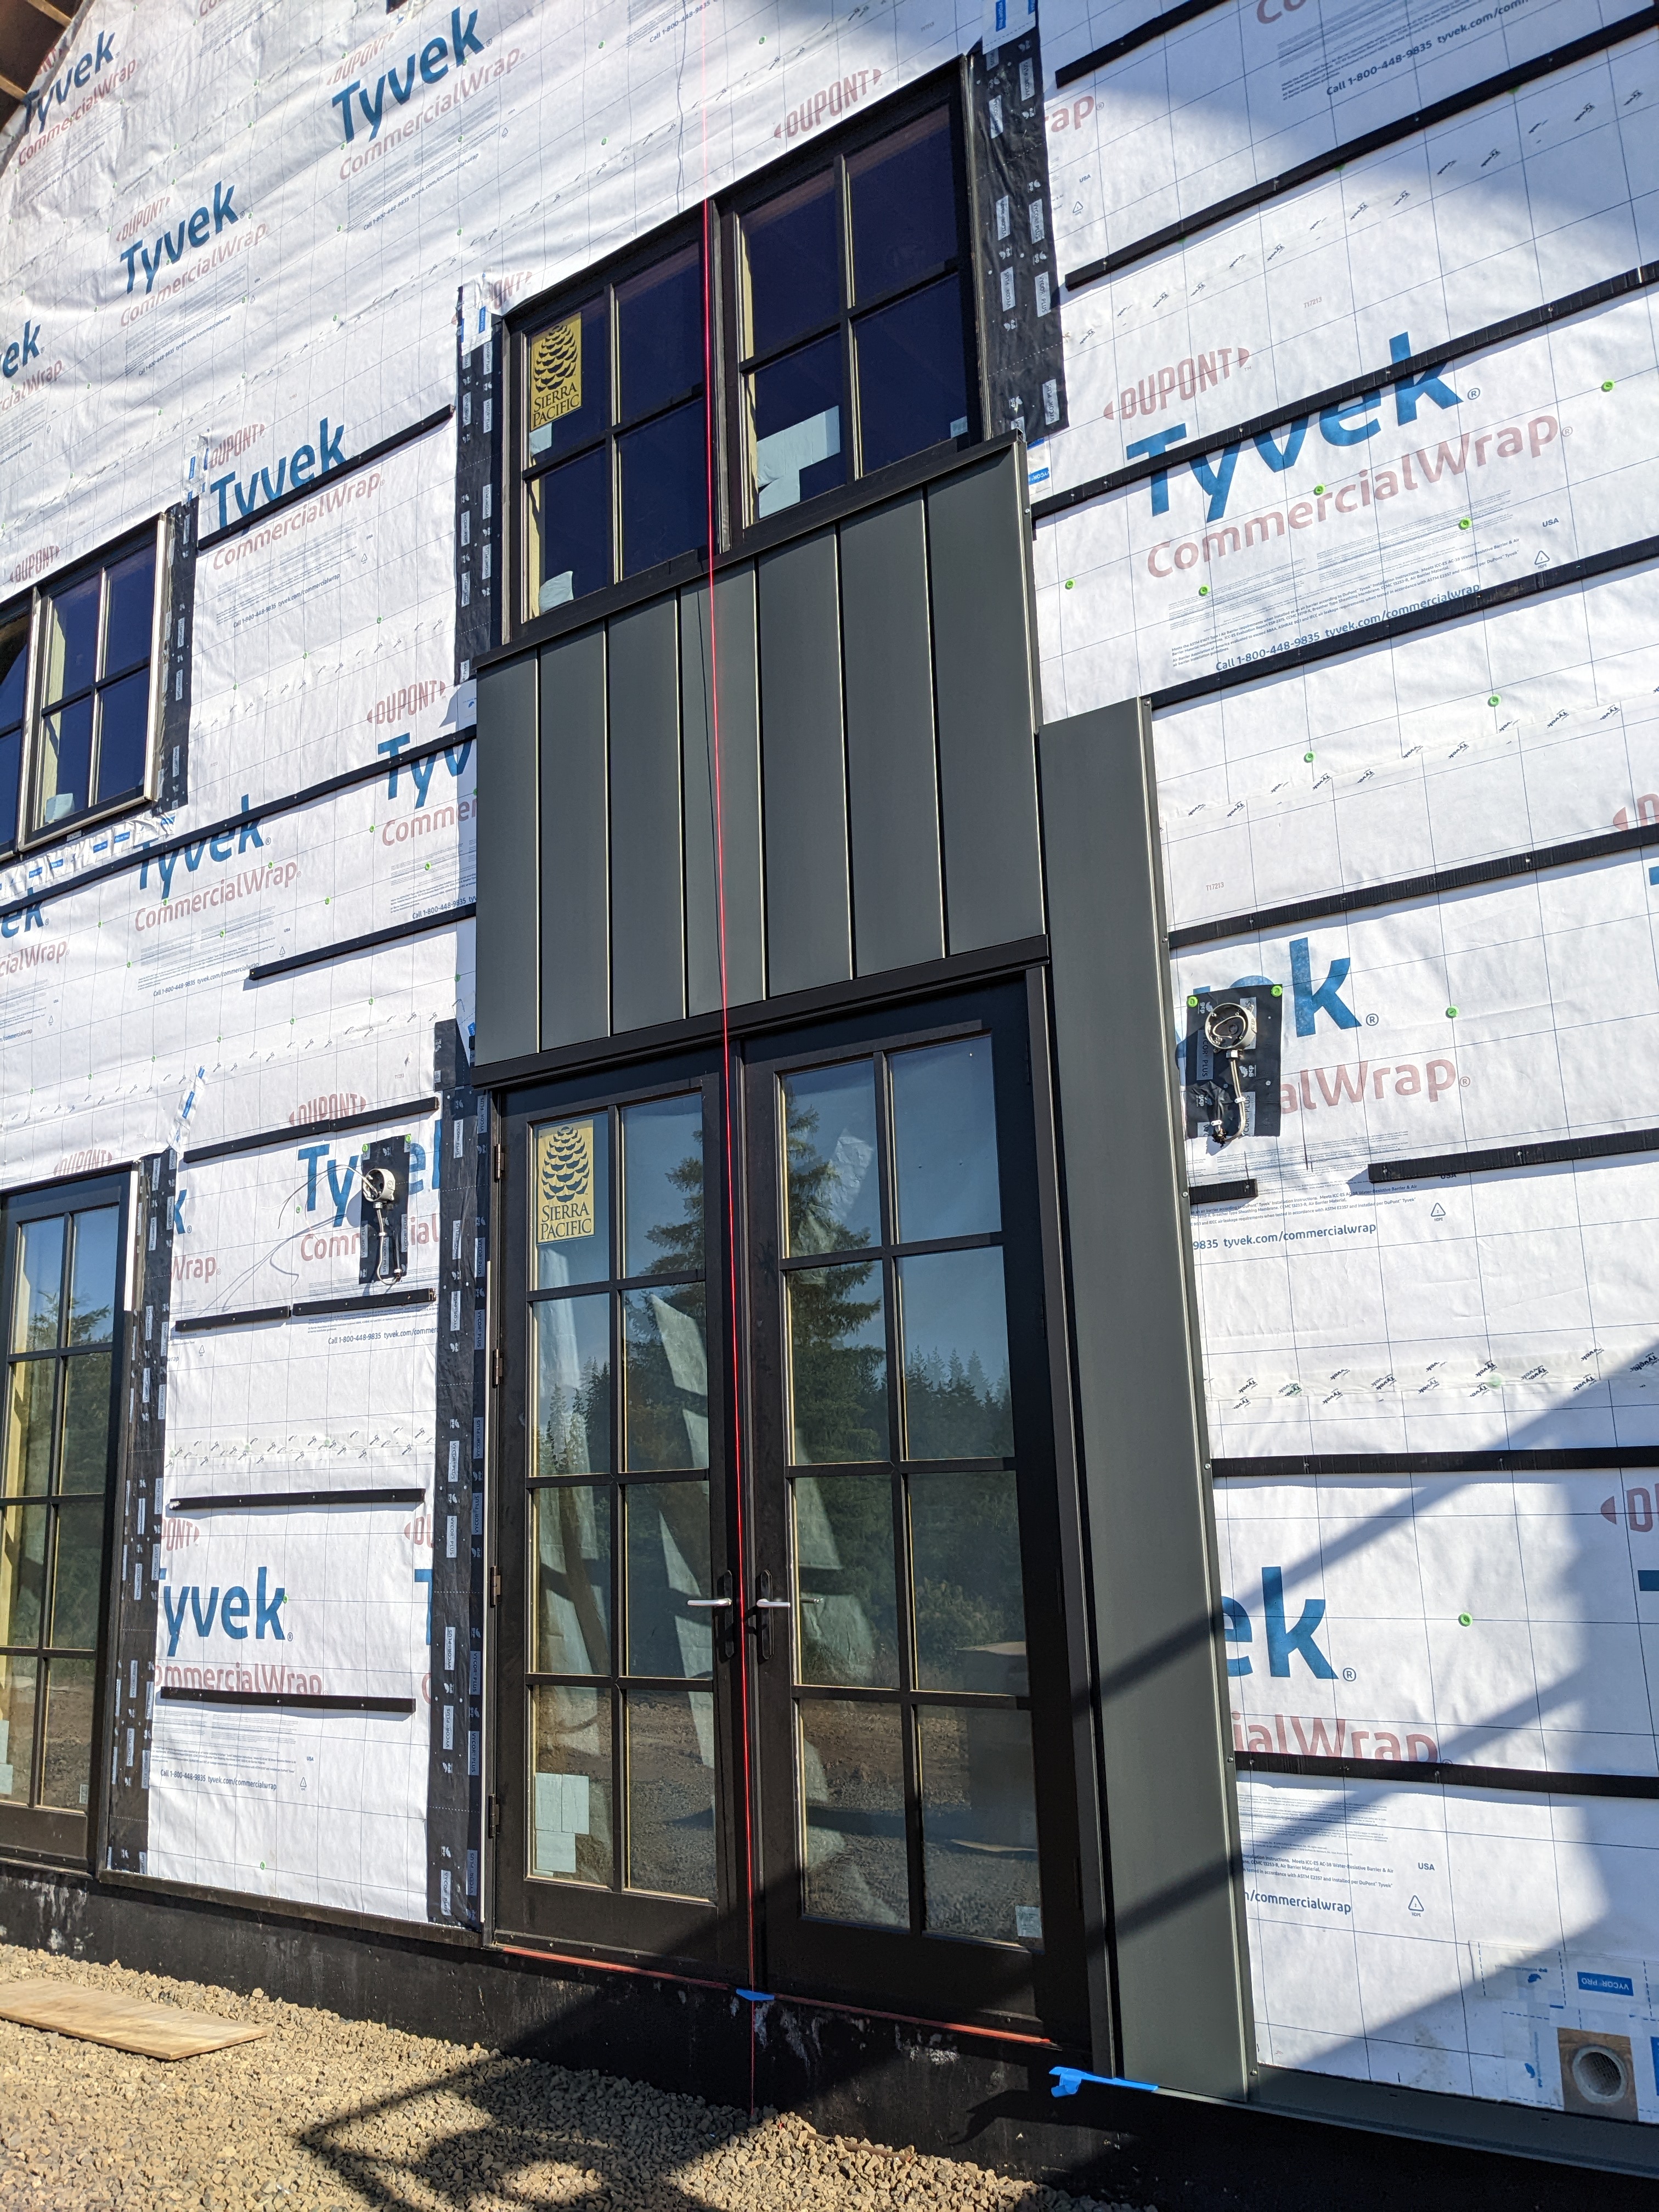
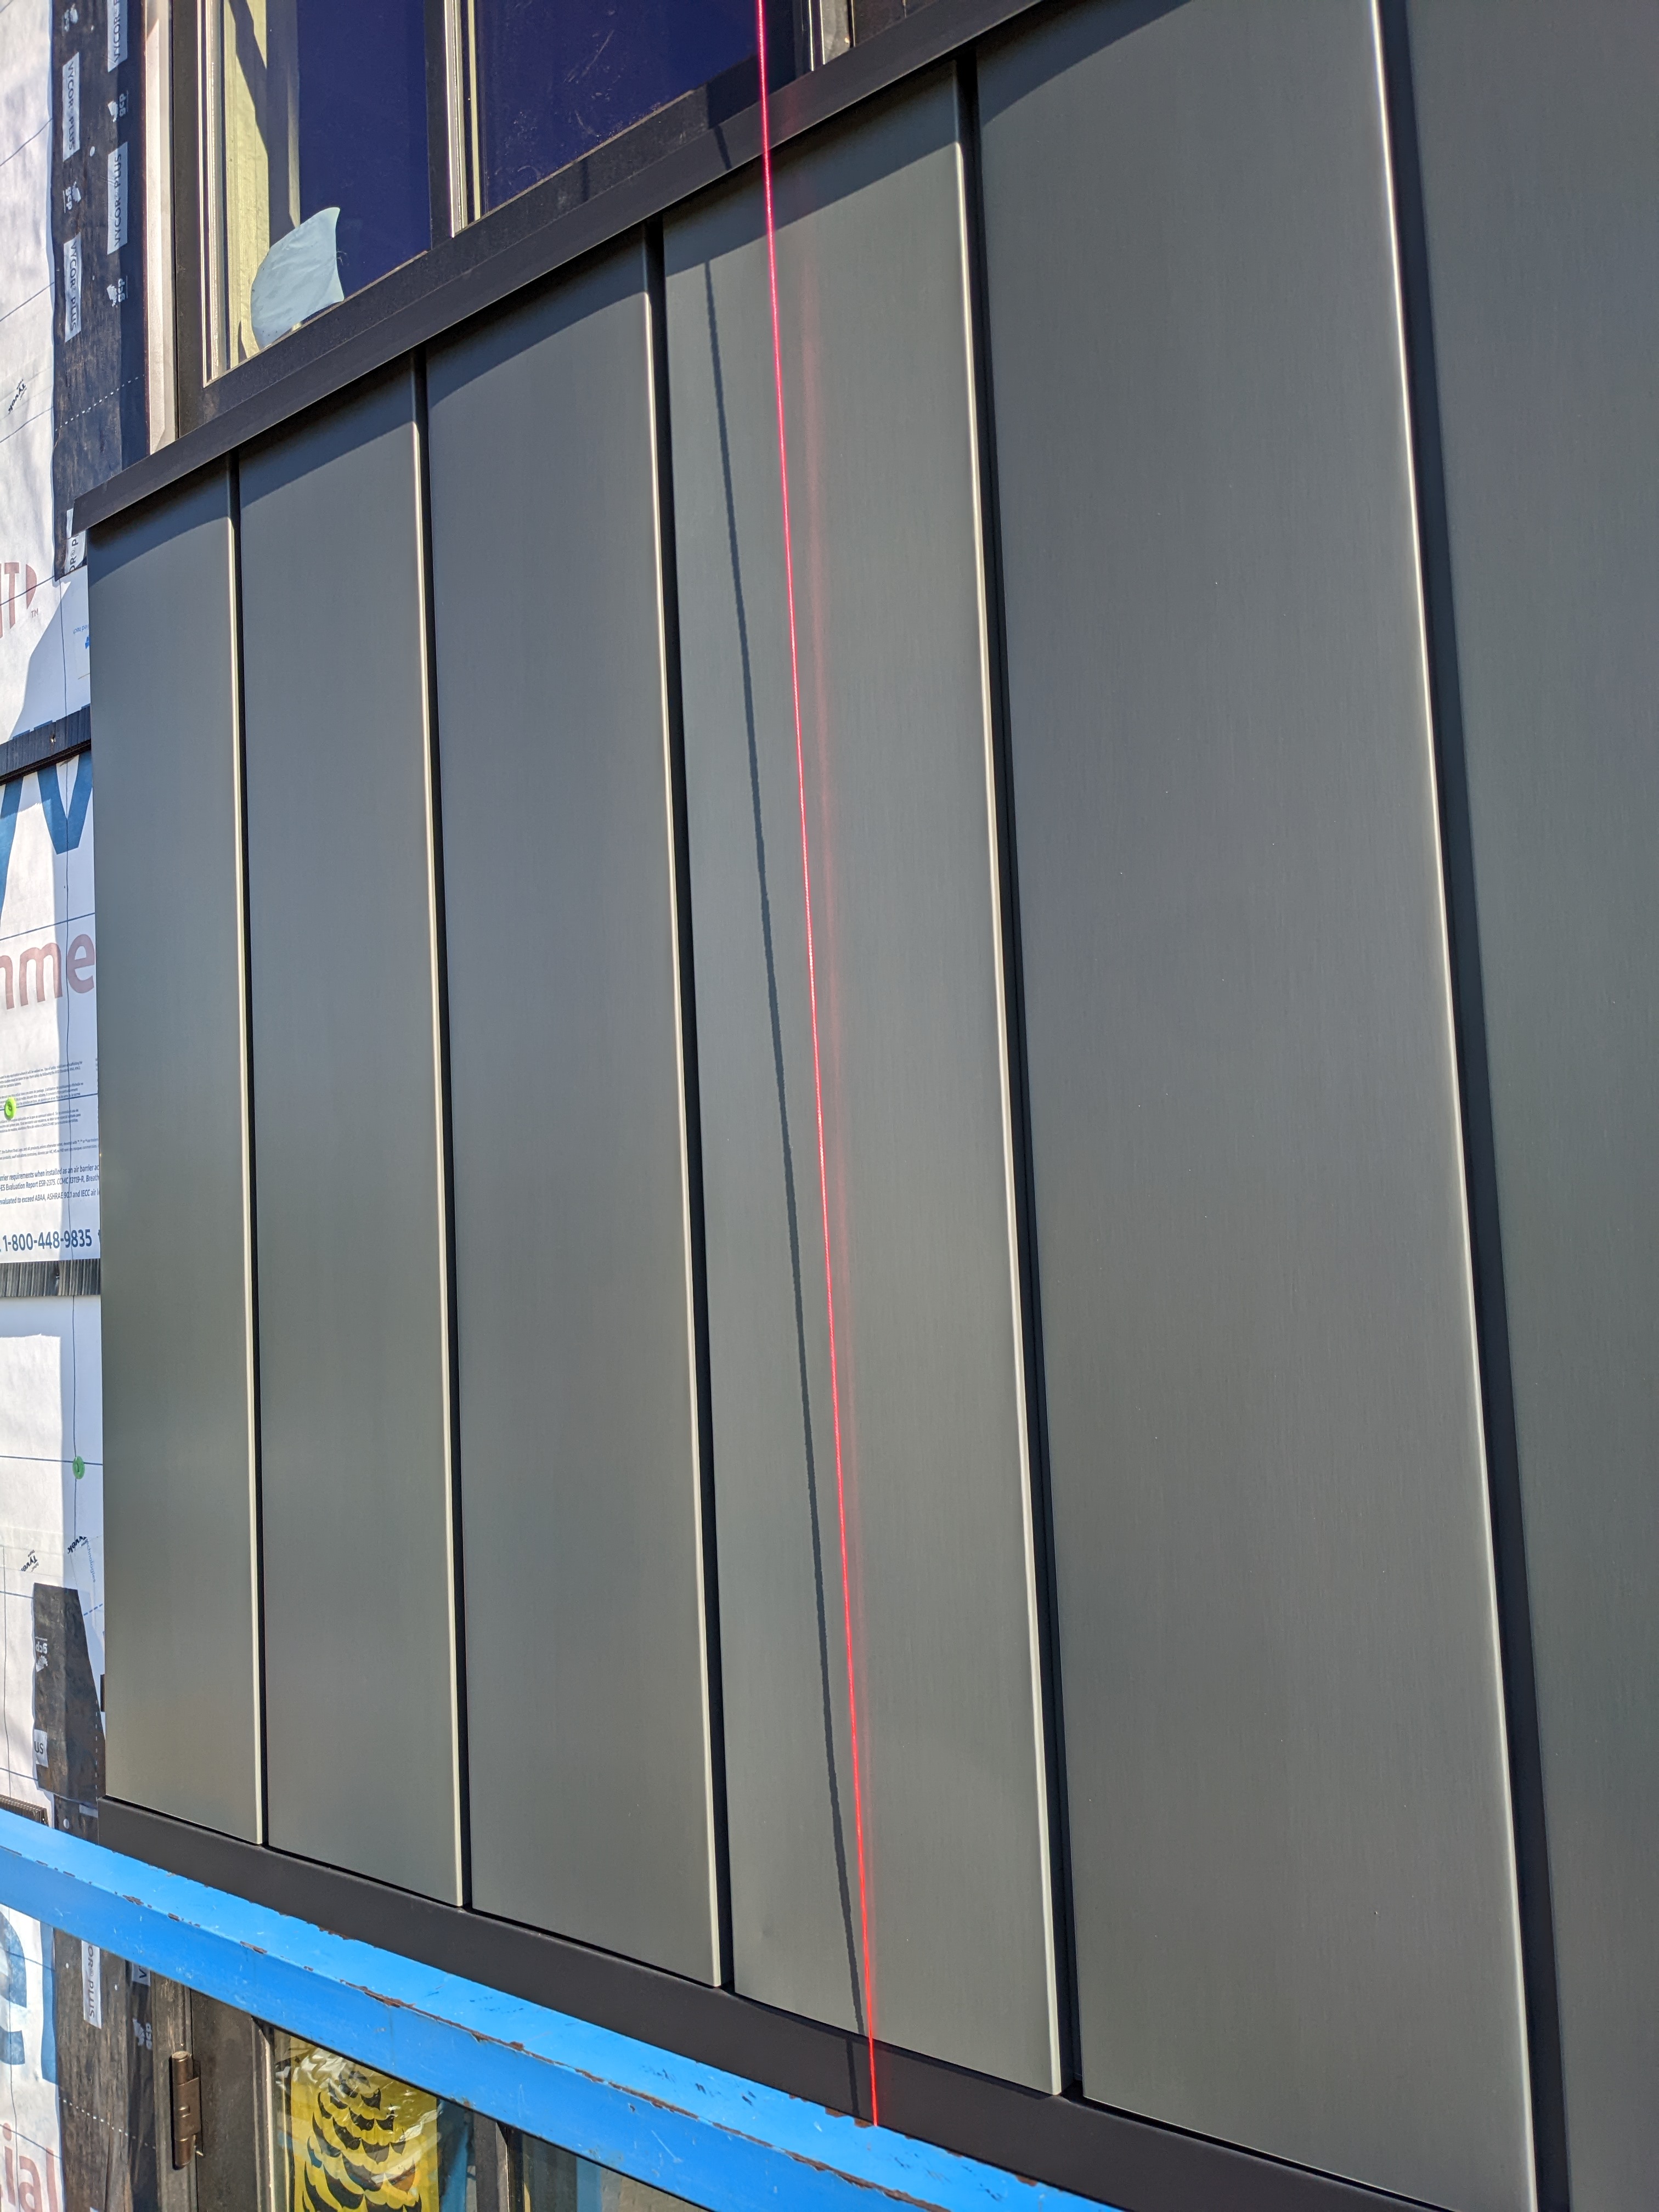
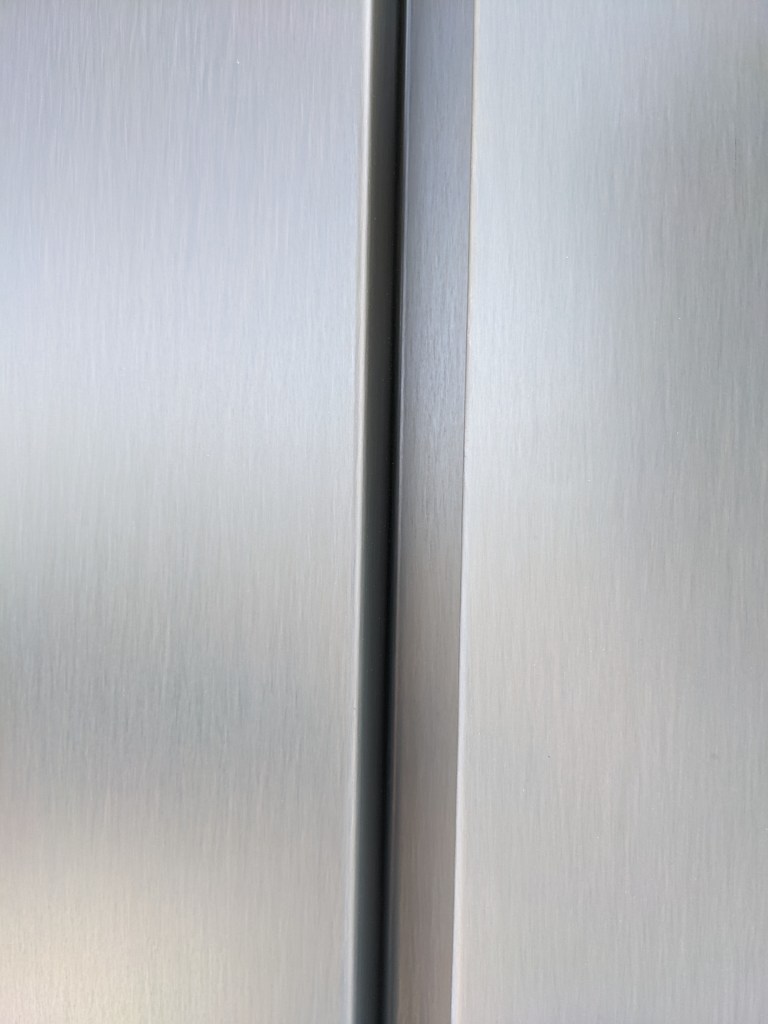
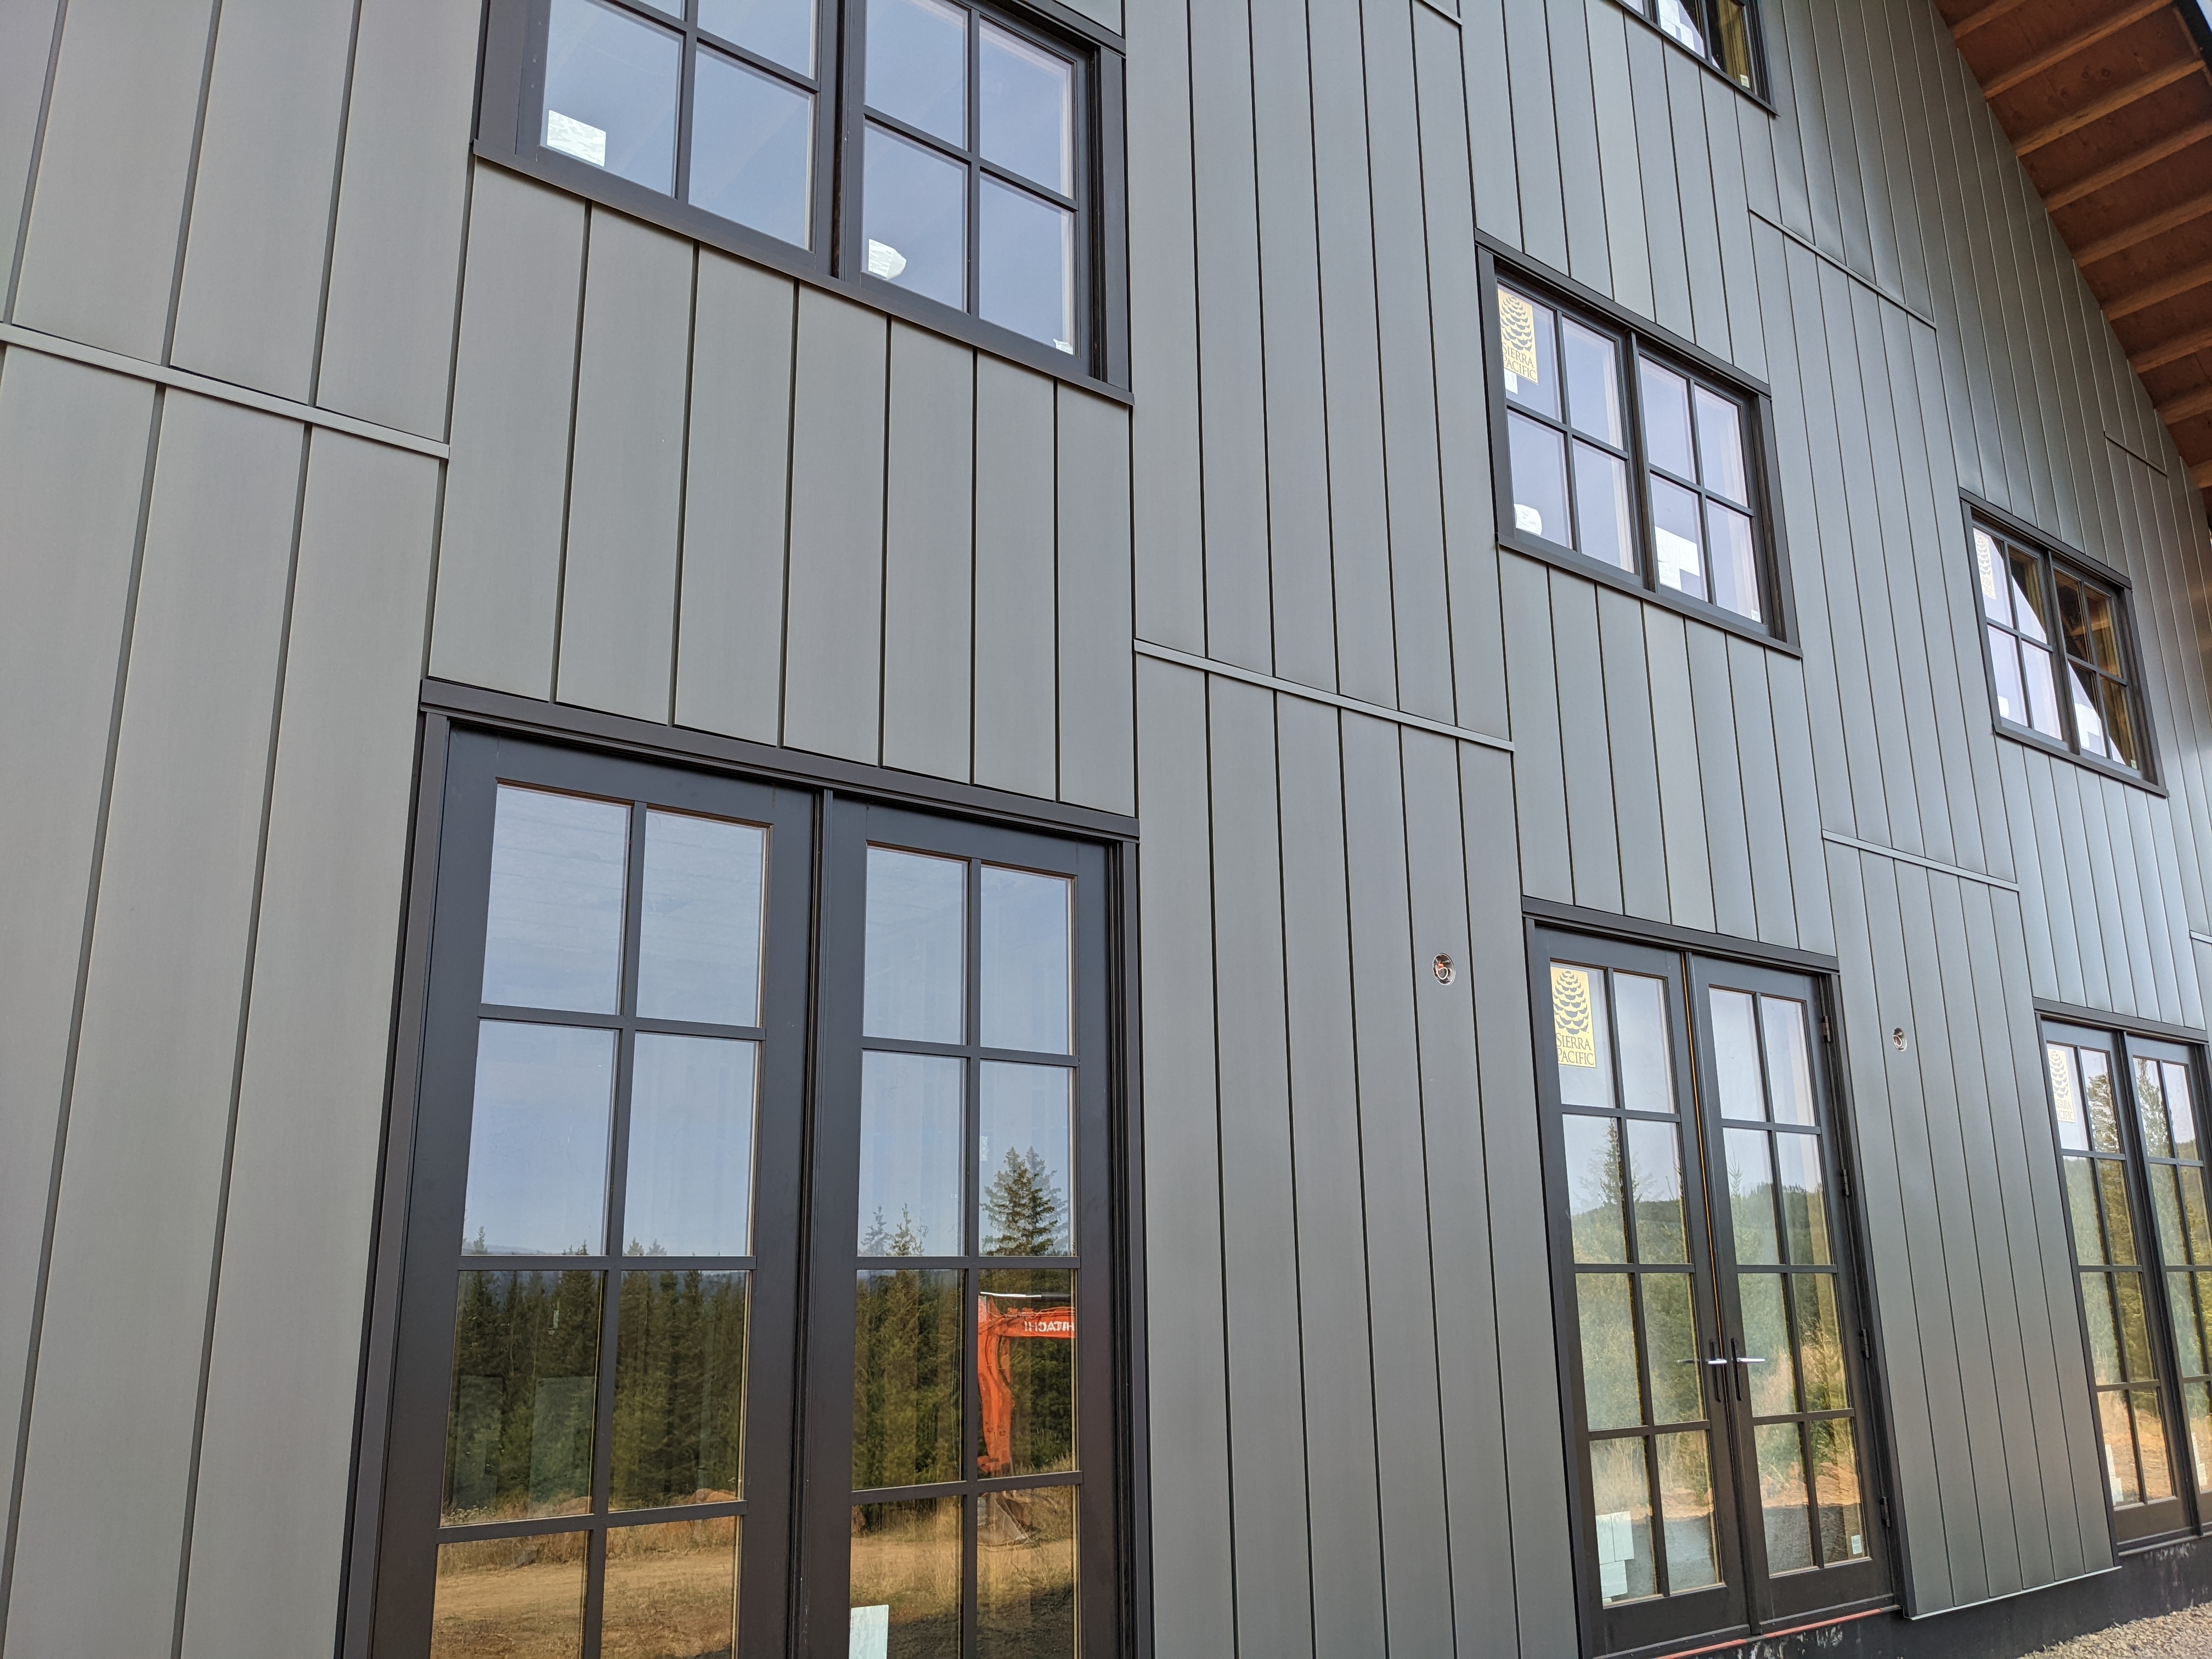
With the exception of the center panels, each panel has one edge that is mostly flat and one edge with a groove.


The edge with the groove gets screwed down. The next panel slides into the groove, covering the screwed edged of the previous panel. The “flat” edge has a little bump to help lock the panel in the groove. This process keeps repeating. This system is great because no screws will be showing; however, we won’t have the option to replace one panel without removing every panel on the whole building!
We had to push or pull the panels at every fastener location to keep the spacing on track. For example, if each panel was 1/8 inch off, the layout would be a whole inch off after just 8 panels. To prevent this, we made sure each panel lined up with our marks.


We worked our way up the center to the attic louvers, which we still needed to install.


Then we went back to the bottom and continued the pattern outwards.
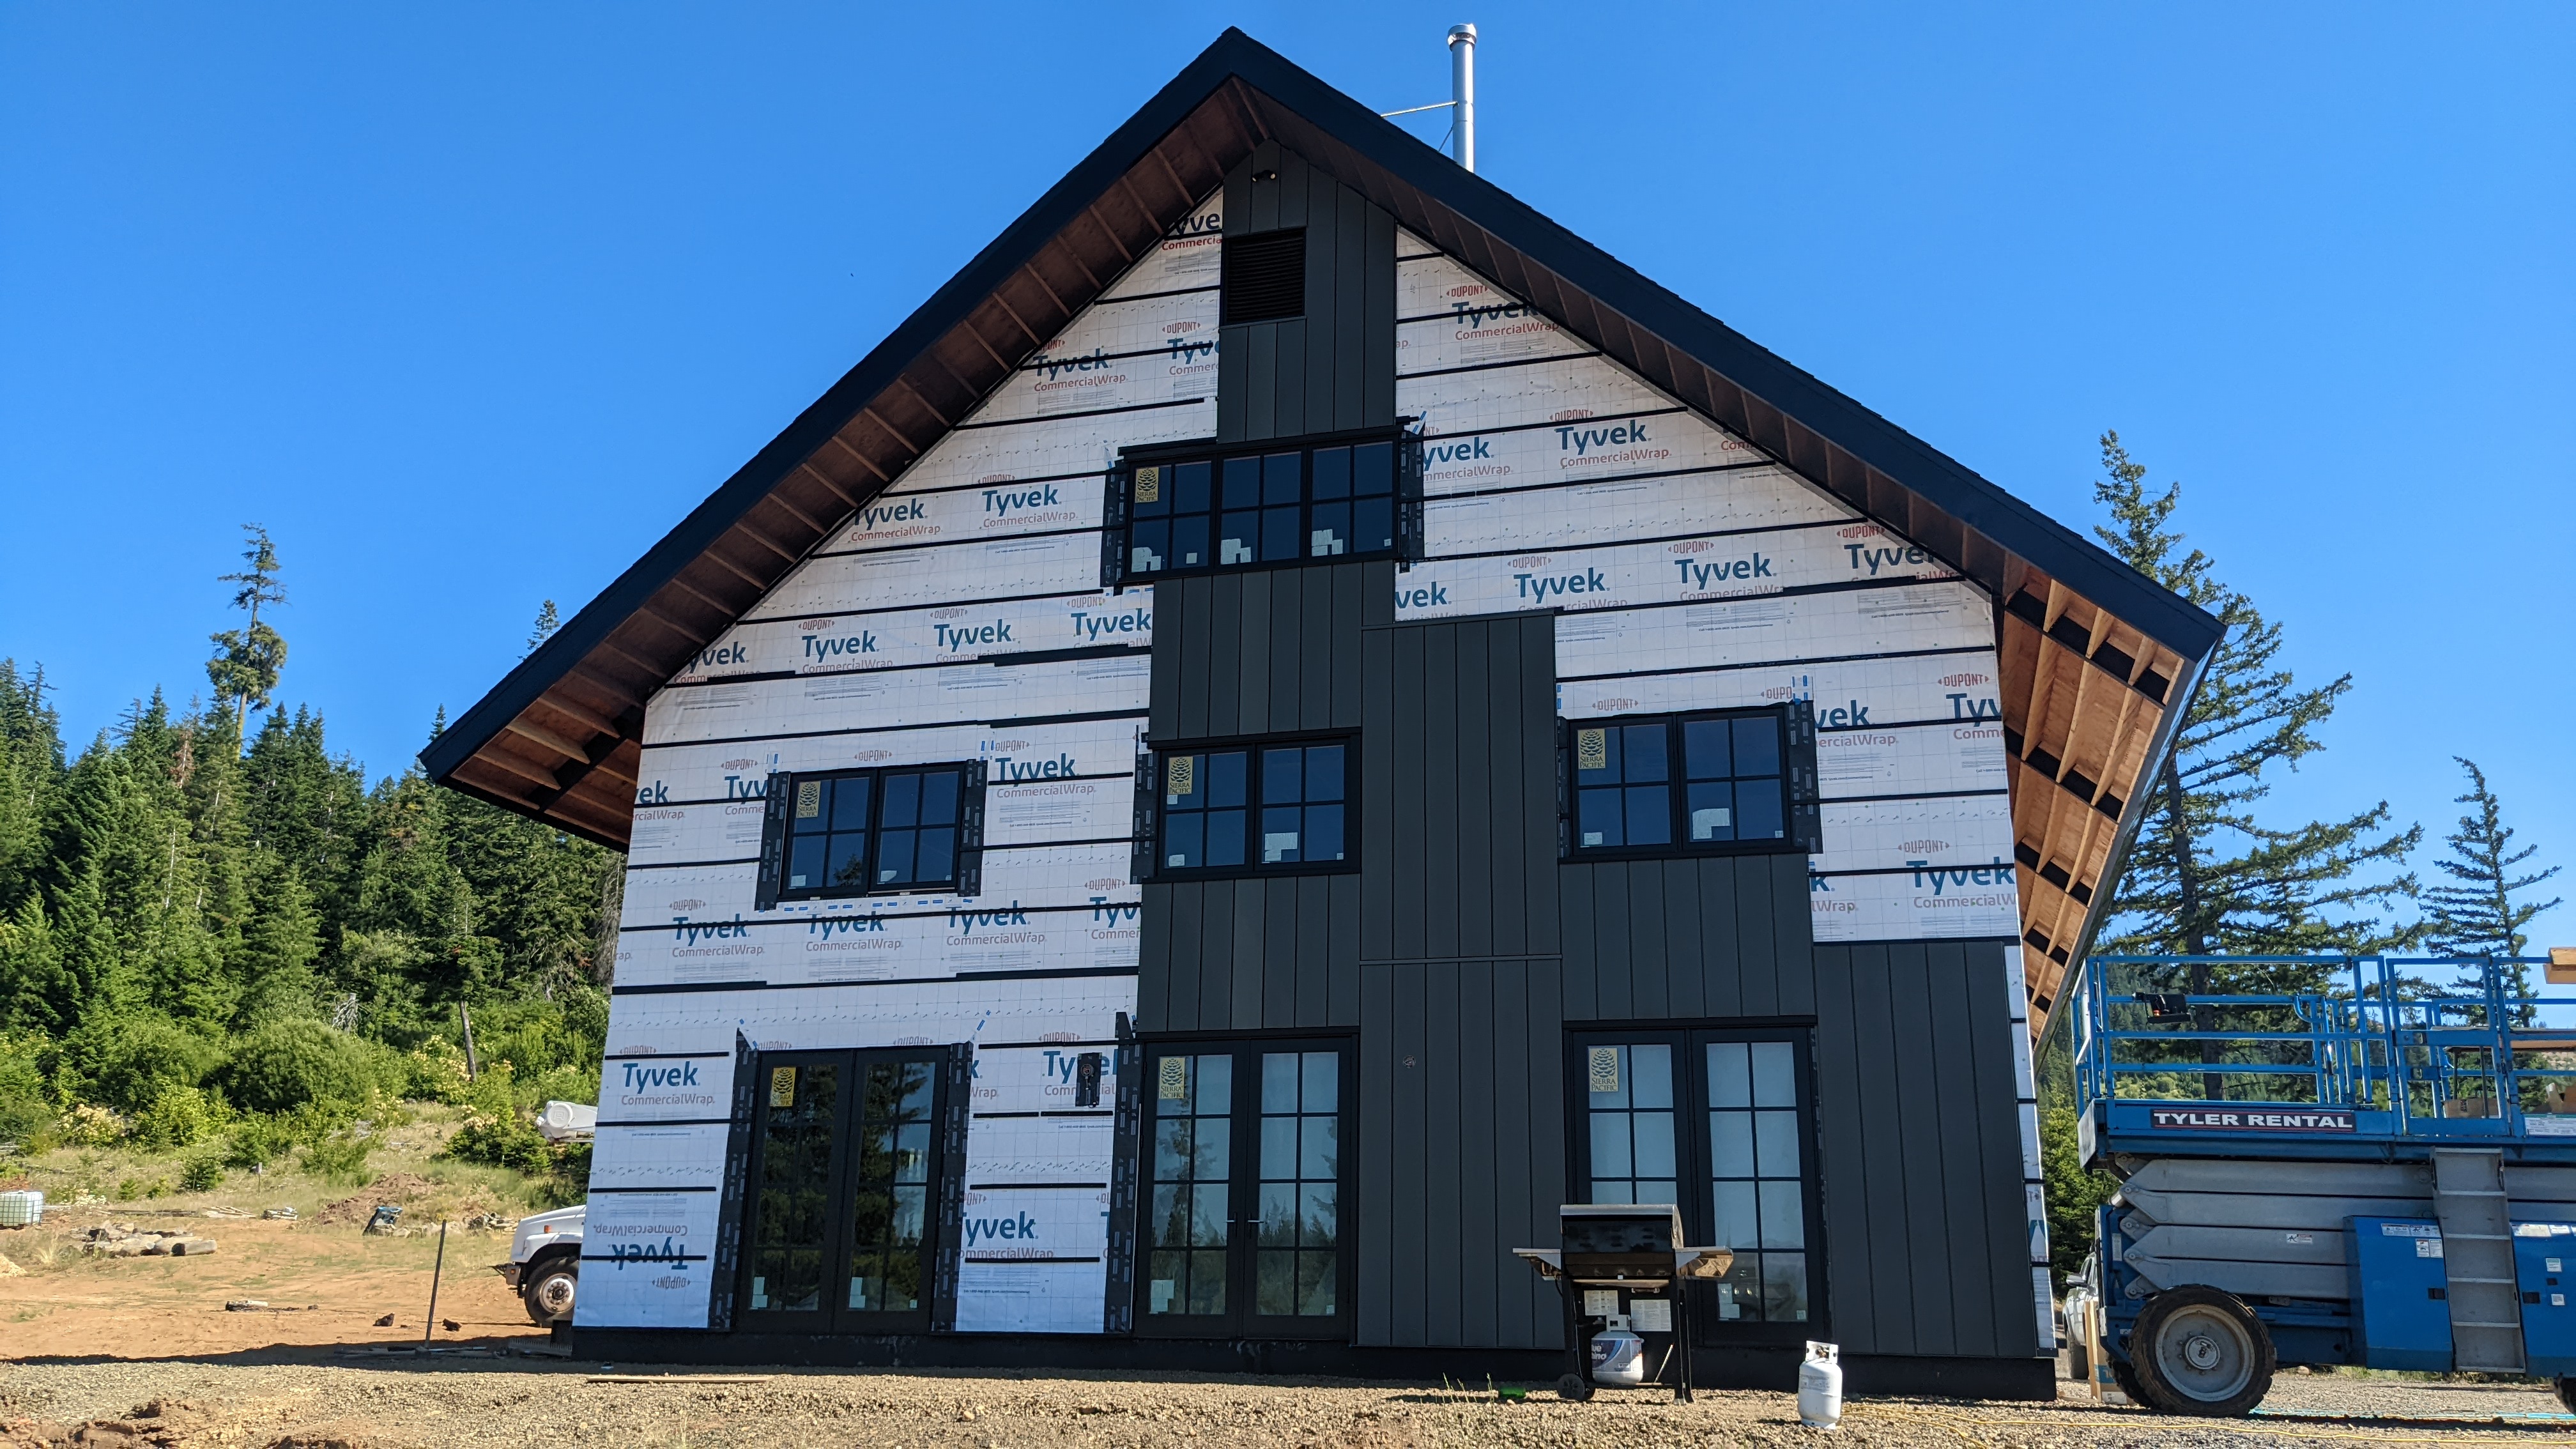
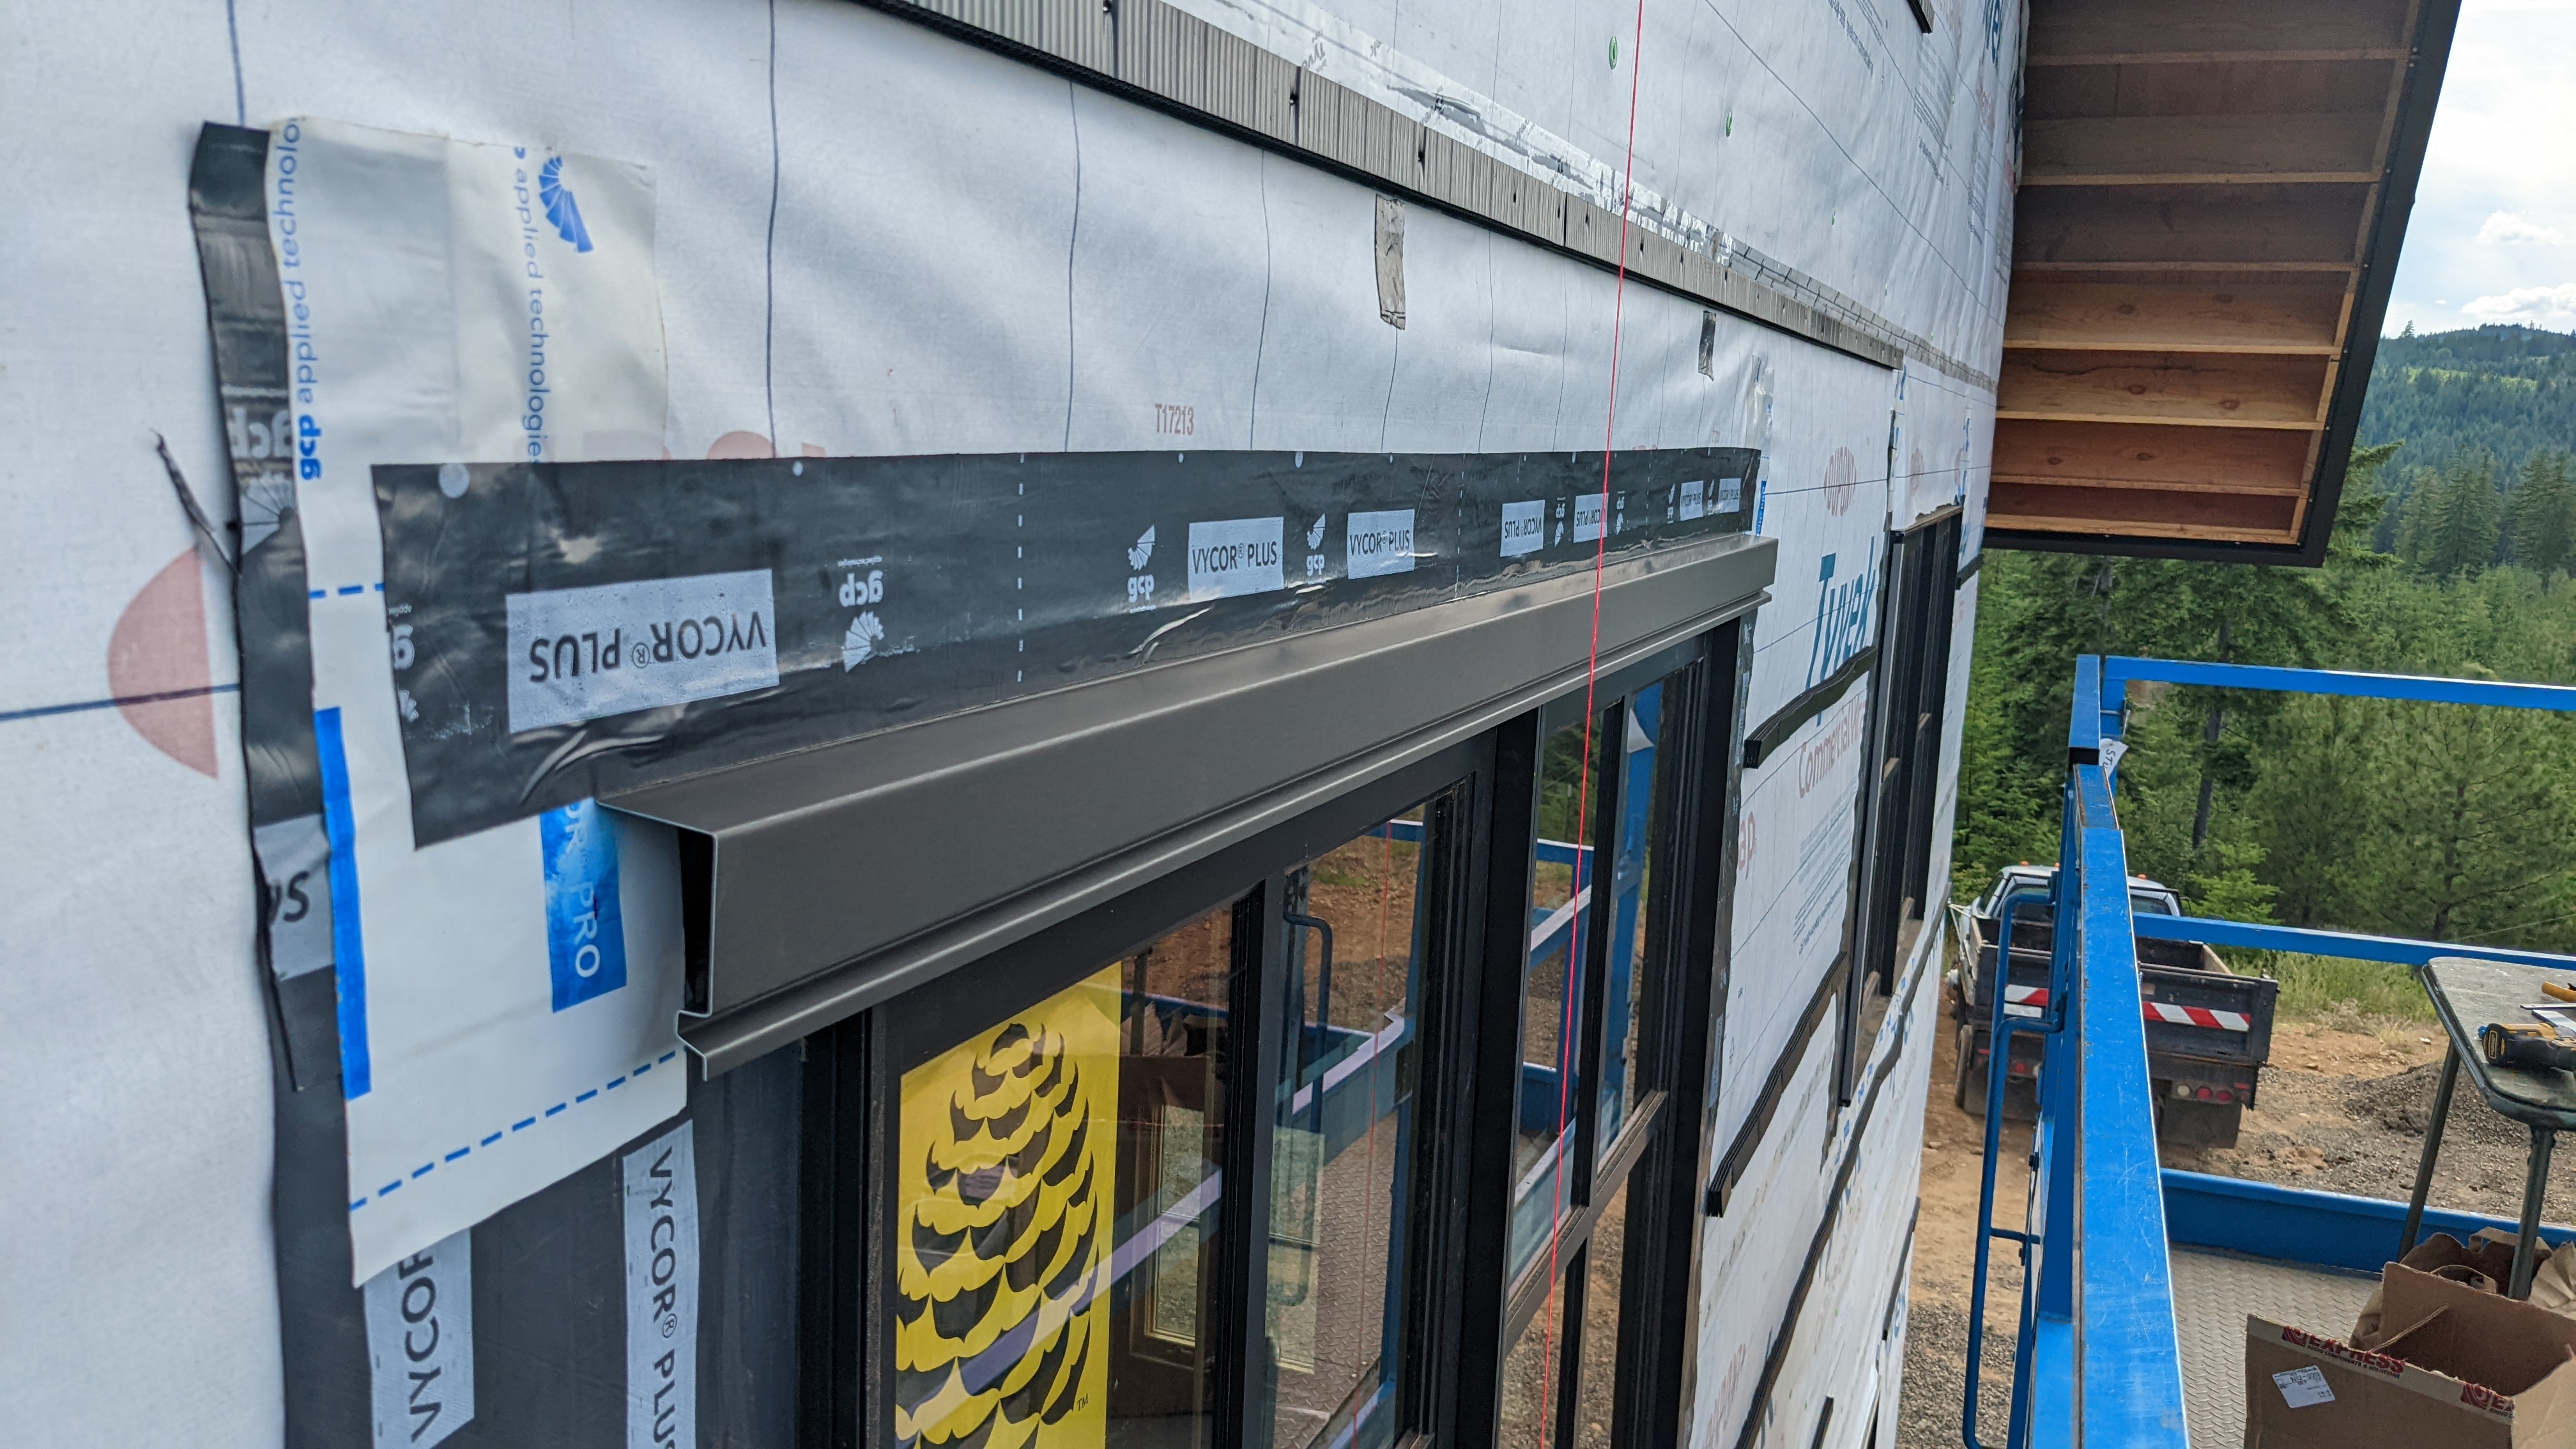
We installed the window trims as we progressed, since the trims act like caps, overlapping the panels. The black window trim pieces are black phosphate-coated zinc.

Because of thermal expansion, the maximum panel length is about 12-13 ft. (Our shortest panel is only two feet.) Longer panels will move too much, plus they lose stiffness. This is why most of the panels do not cover the entire height of the building. We created a few breaks to keep the panels a reasonable length. Although the seams were a bit nuanced, we’re glad we didn’t have any longer panels than we did.
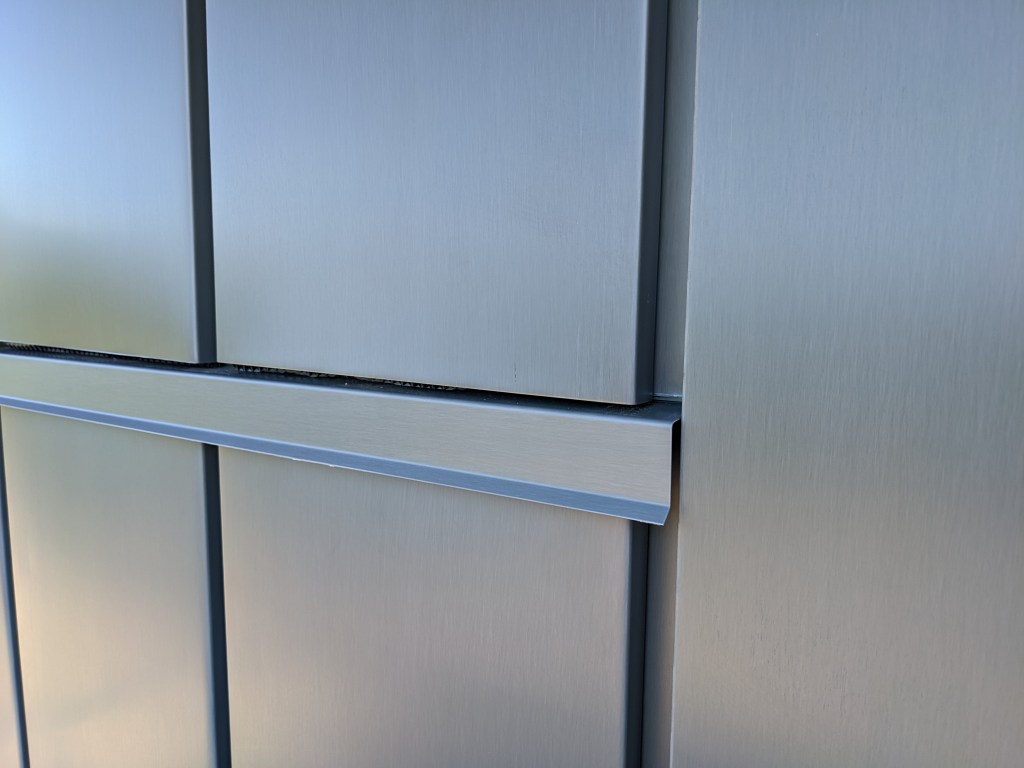
At the horizontal panels seams, we installed a Z-shaped flashing which is basically a cap so the water flows over the panel instead of down into it. The next row of panels then sits on top of this flashing.
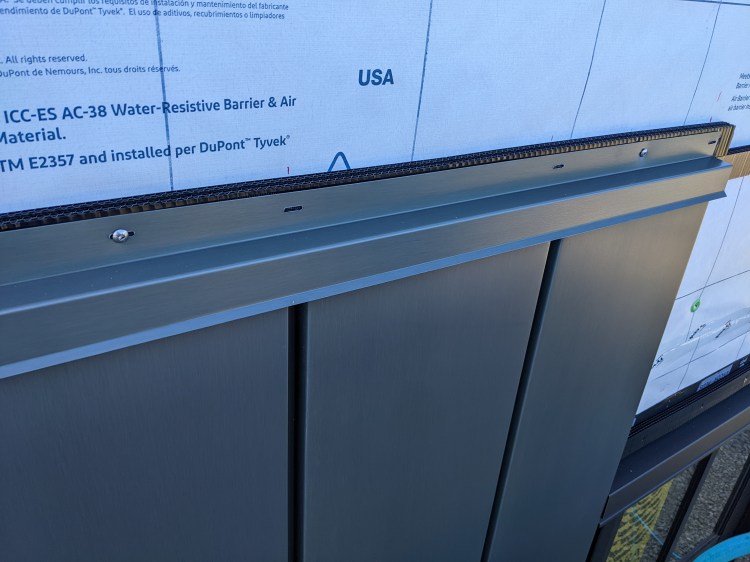
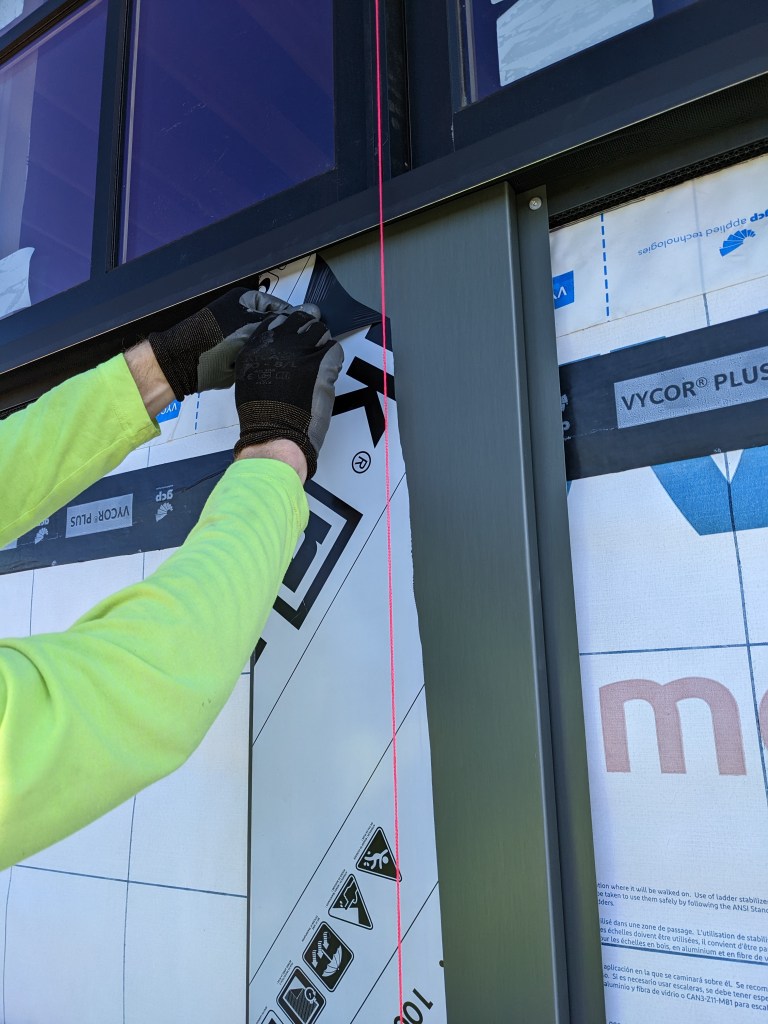
Installing the flashings turned into a project as well. We added a mesh screen (folded into a detailed geometry) behind every flashing to keep bugs out.


There is also a bug protector inside the bottom of every single panel made out of a plastic batten. We don’t want bees nesting in all of the panel cavities.
Because Sam put so much work into the design up front, we didn’t need to cut any of the panels like most metal siding installers would. They were all pre-cut and fit perfectly.

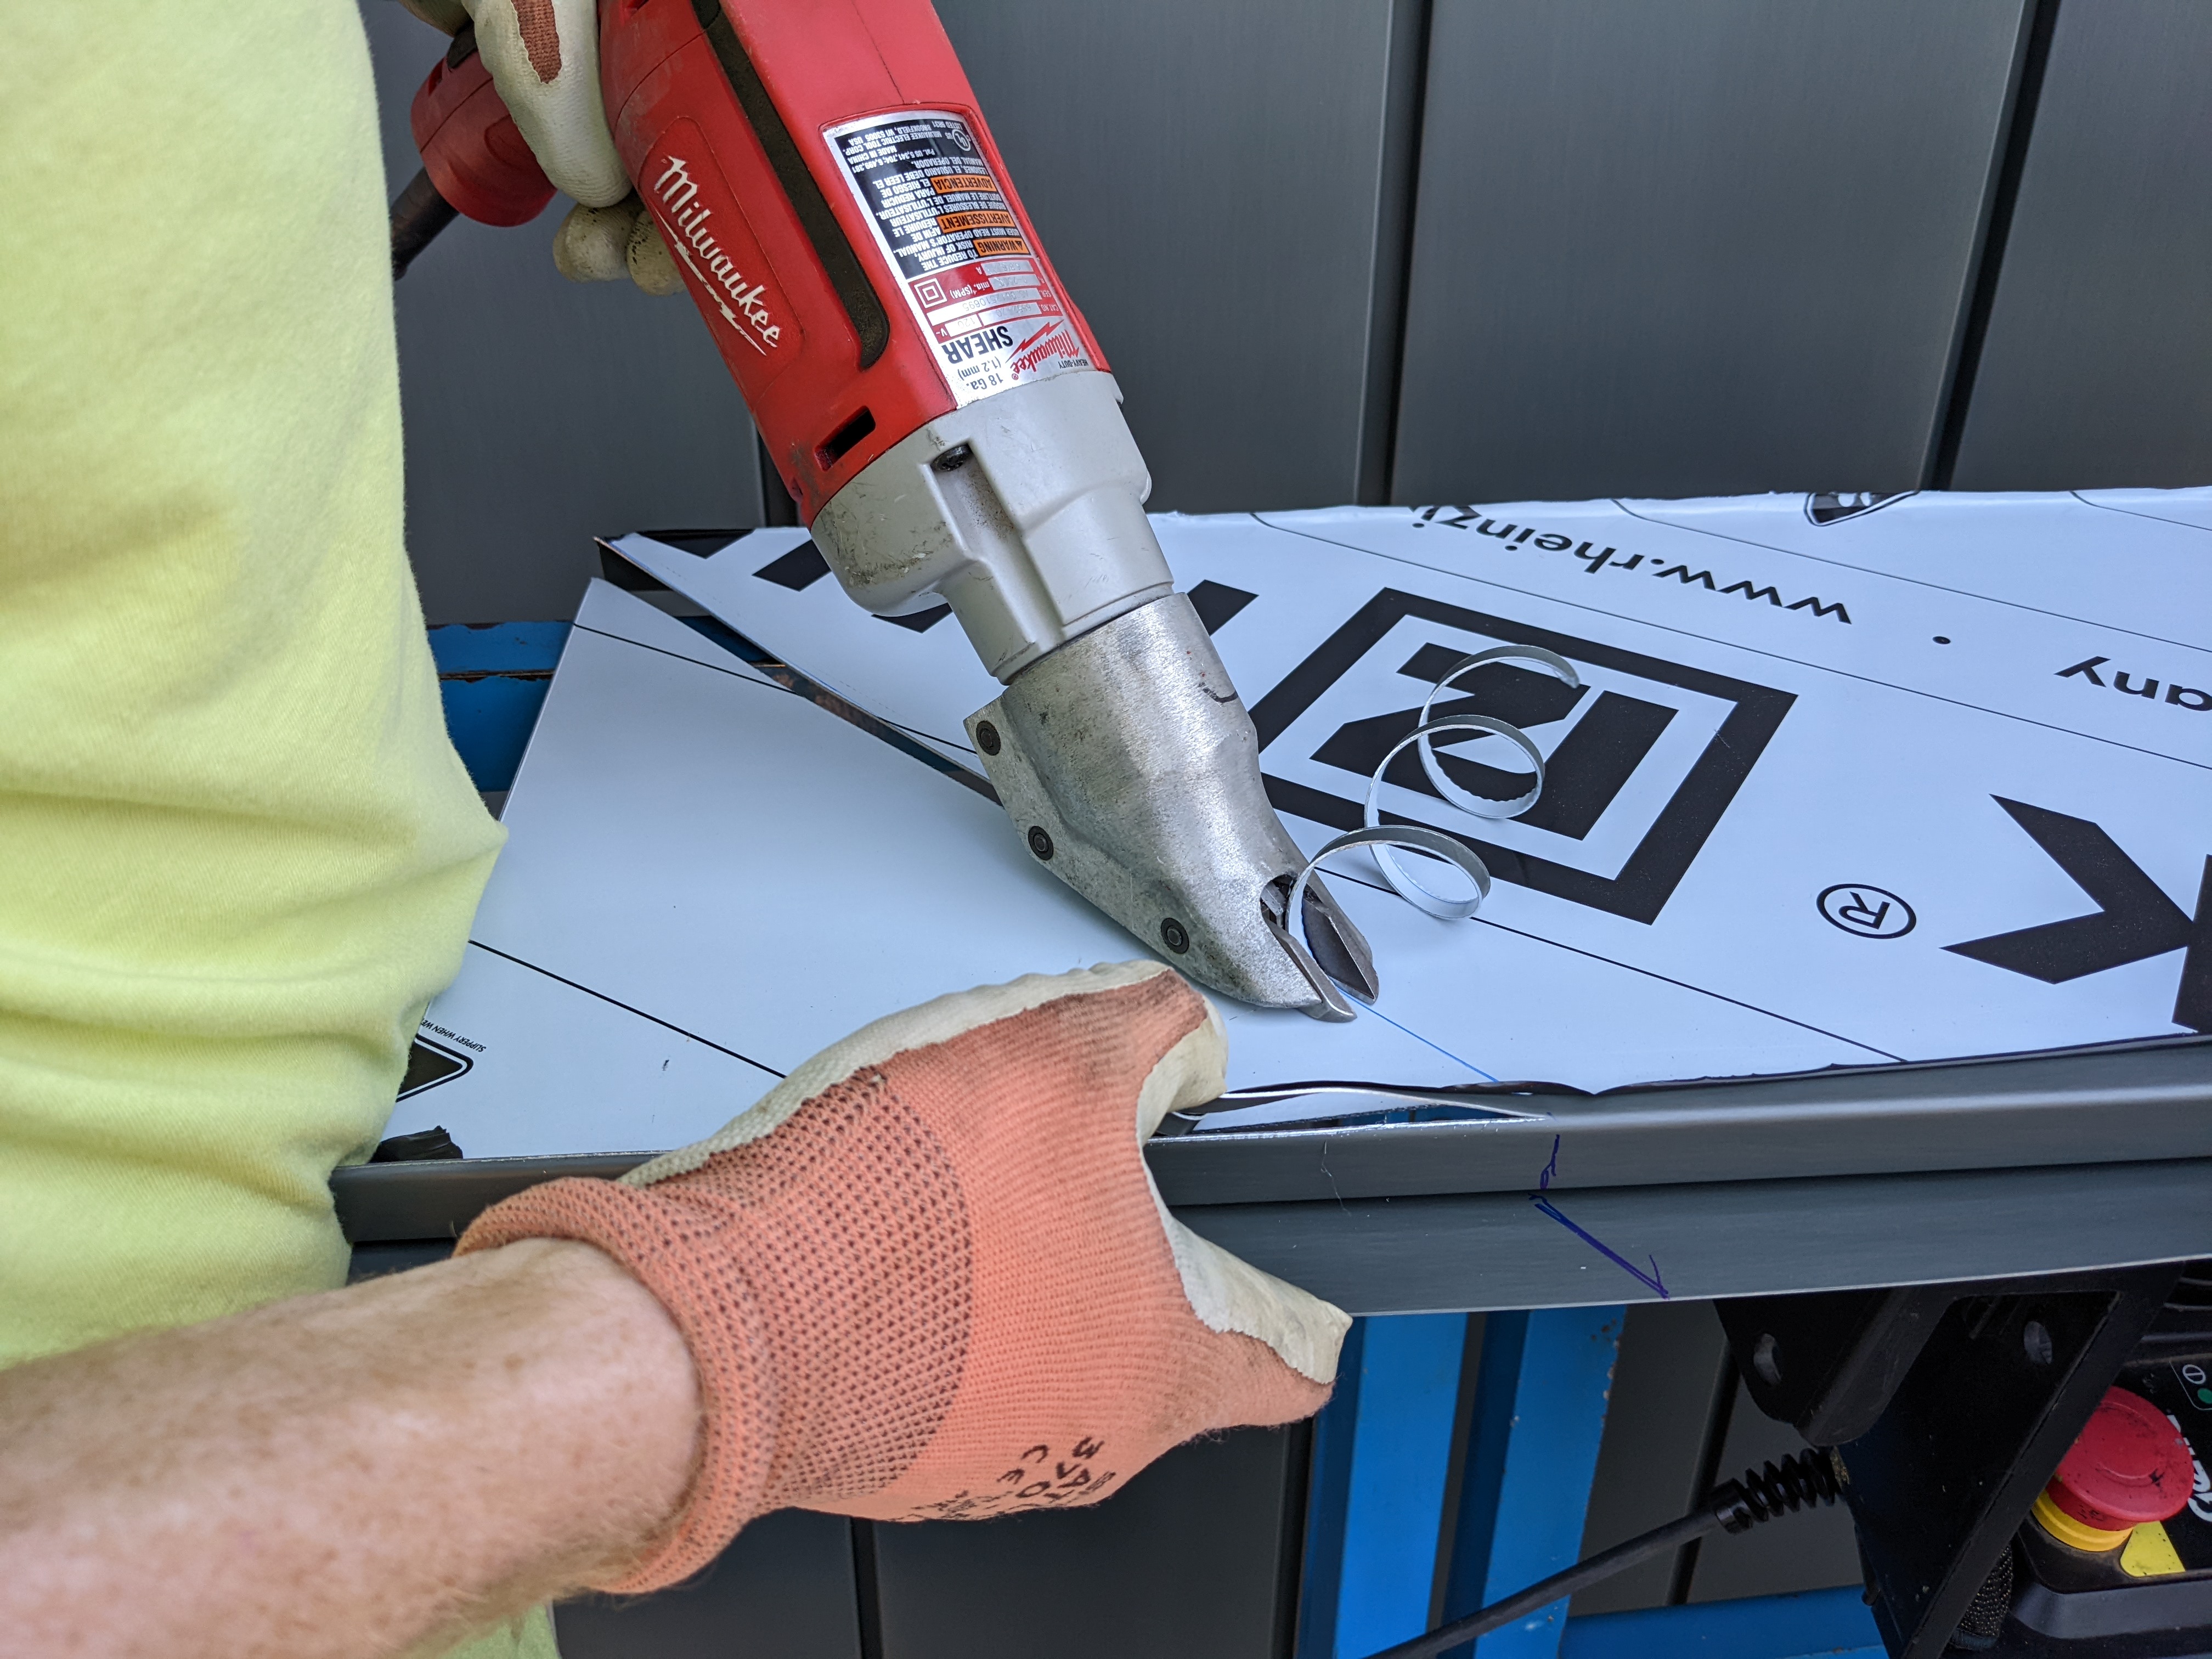
However, there were a few details where cutting was required. Sam cut holes for sconces.

He also notched the locations where a panel met a flashing.
Lastly, we had to measure and cut the diagonals for every panel under the roof. Luckily Sam has a large collection of cutting tools.
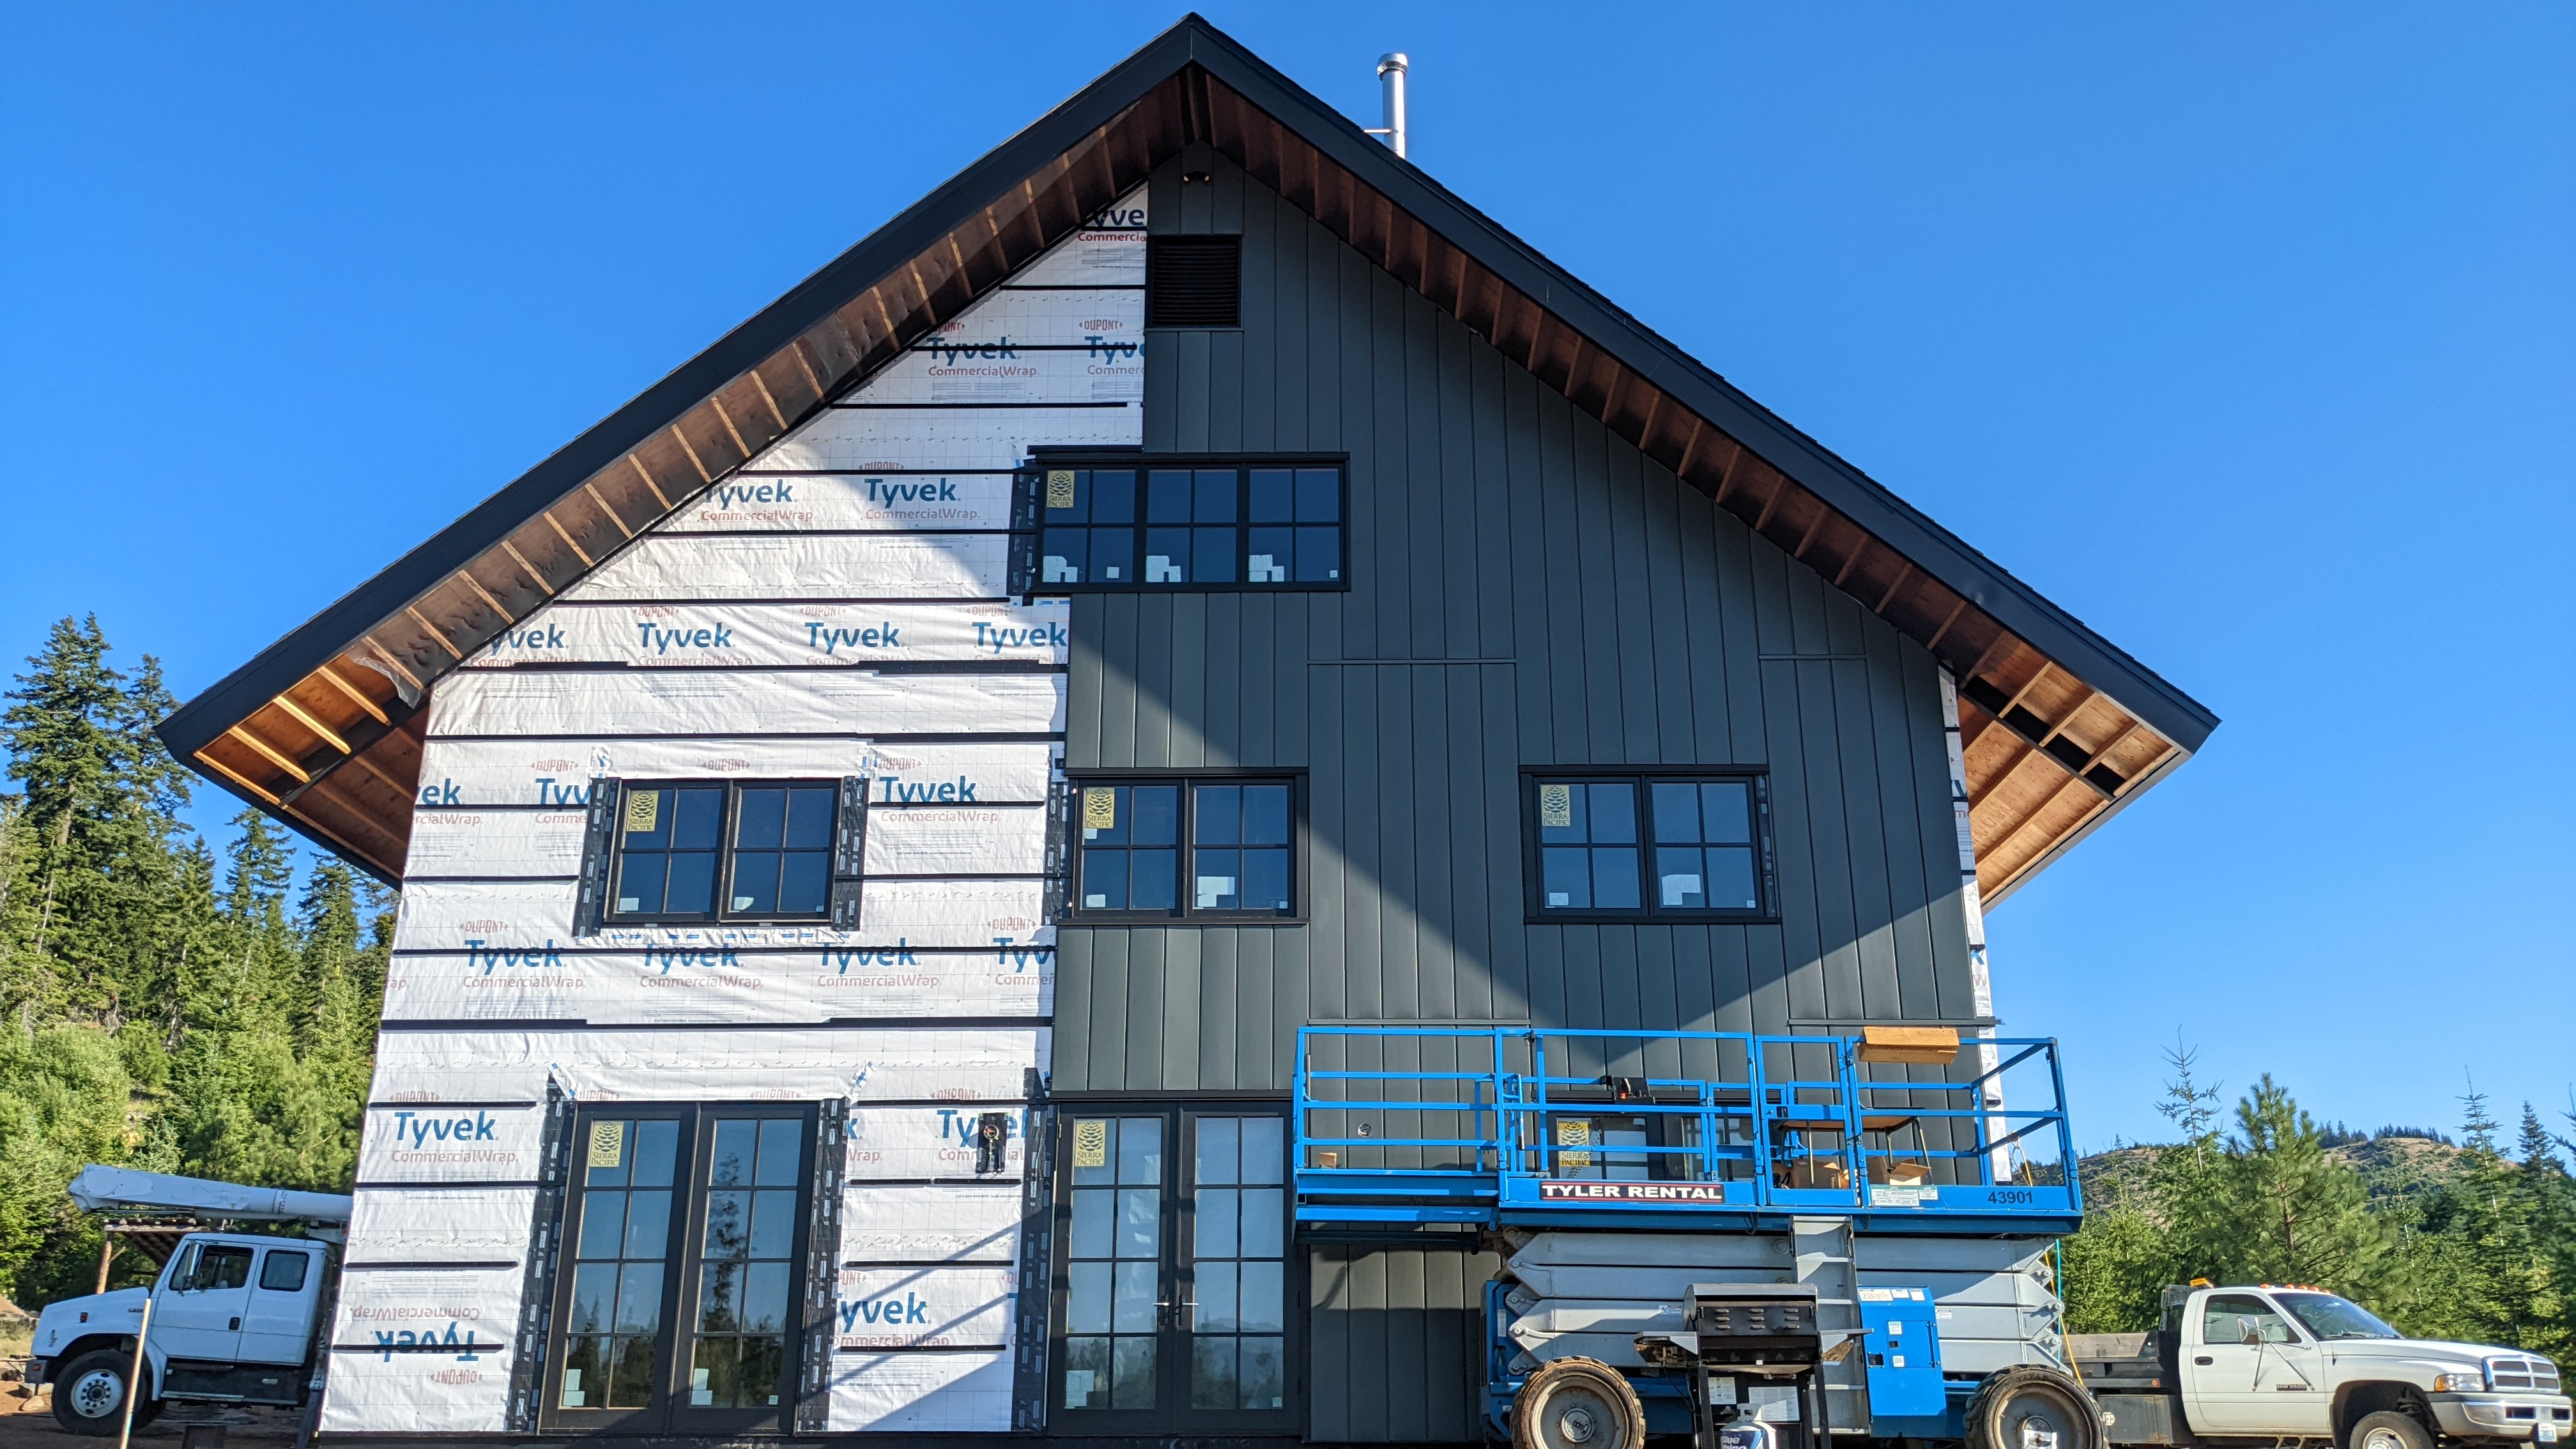
We completed the North End! More details about the panel system will be “revealed” in the next few posts.
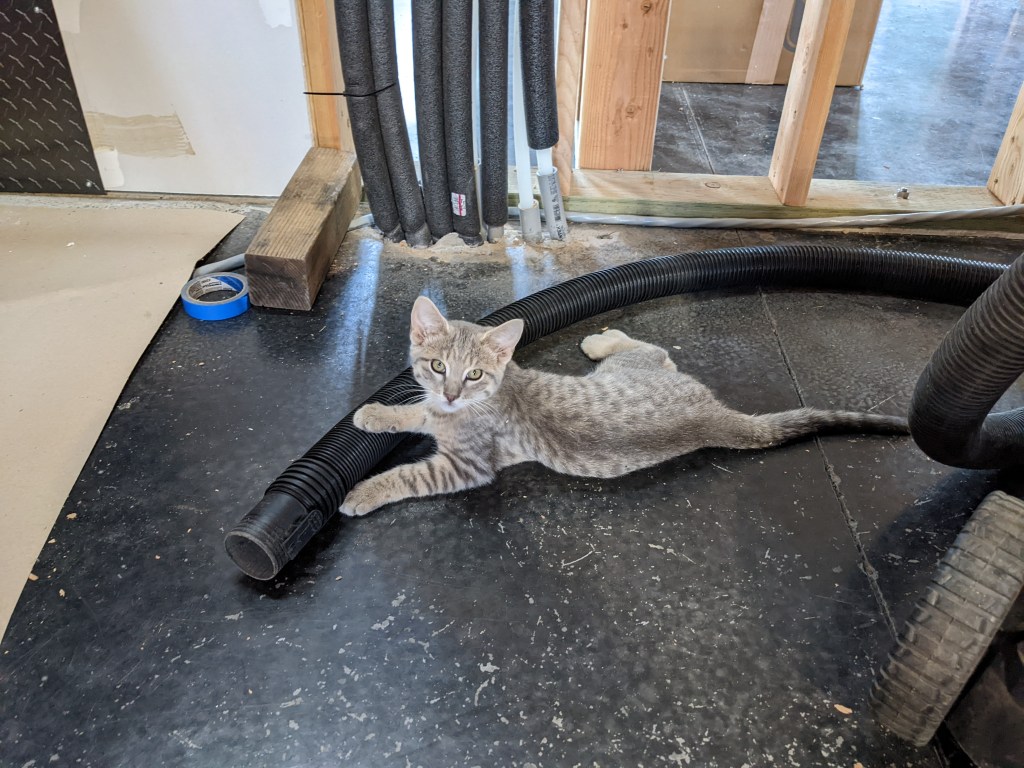
A quick cat update – Buster learned how to vacuum.
Smokey learned how to use the tape measure, but he is still working on reading fractions.
Stay tuned…


Sent from my iPad
>
LikeLike